<xslt> TypoTag
Important
TYPO3 versions lower than 7.6.20 and 8.7.3 contain a bug that prevents the functionality described in this tutorial from working. Please make sure that you use the correct versions if you want to implement the TypoTag functionality.
From a developers point of view using the XSLT content object in a TypoScript template or in a FLUIDTEMPLATE is perfectly fine. But imagine you have some power users that work with XML/XSLT and want to upload and transform stuff themselves. In this tutorial, we will look how to do this with an <xslt> TypoTag. The obvious advantage of a TypoTag in comparison to the other approaches is that it can be used everywhere in the system. You can also use it in a news record or an address element for example.
Attention
TYPO3 7.6 and 8.7-10.4 use different rich text editors (rtehtmlarea and ckeditor). The configuration therefore depends on your TYPO3 version and the RTE you use. The tutorial will first discuss the general setup of the TypoTag and then show the respective configurations for the two RTEs.
Configuration for a simple input field (TYPO3 7.6 and 8.7-10.4)
The configuration for a simple input field without RTE works the same for both TYPO3 versions and is also the basis for the integration of the TypoTag into the respective RTE.
The XSLT TypoTag works similar to a <link> TypoTag and will look like this:
<xslt stylesheet="collection.xsl">fileadmin/xslt/collection.xml</xslt>
To make it work, the content of the field should be treated by a parseFunc. If you output the field with Fluid you simply send the content through <f:format.html>.
<f:format.html>
   {data.myField}
</f:format.html>
If you treat the field output with TypoScript, you have to send the content through lib.parseFunc
my.field.stdWrap.parseFunc < lib.parseFunc
The approaches shown here use the standard lib.parseFunc that has to be modified like this with TypoScript:
# allow the new TypoTag in both versions of the standard parseFunc
lib.parseFunc {
  allowTags := addToList(xslt)
}

lib.parseFunc_RTE {
  allowTags := addToList(xslt)
}

# define the TypoTag
lib.parseFunc.tags.xslt = XSLT
lib.parseFunc.tags.xslt {

  breakoutTypoTagContent = 1
  stripNL = 1

  source.data = current : 1

  transformations.1 {
    stylesheet.dataWrap = fileadmin/xslt/|{parameters : stylesheet}
    setProfiling = 1
  }
}

# add it to the RTE version of parseFunc
lib.parseFunc_RTE.tags.xslt < lib.parseFunc.tags.xslt
First we add the <xslt> tag to the allowTags lists of both parsing libraries. Then we configure the tag. Notice that its important to set the breakoutTypoTagContent property, otherwise you will have <p>s wrapped around your result. Another thing to remember is that it is possible to get the attribute values of custom tags with getText from the $cobj->parameters array. Because the stylesheet property has stdWrap capabilites we can use a dataWrap to set a basic path to the XSL stylesheets and just let the users enter the needed stylesheet. And that’s it. Now you have a fully fledged XSLT object at your editor’s fingertips.
Note: Of course you can define your own parseFunc. Simply don’t forget to send your field content through it.
Configuration for rtehtmlarea (TYPO3 7.6)
In rtehtmlarea the custom tag will look like this:
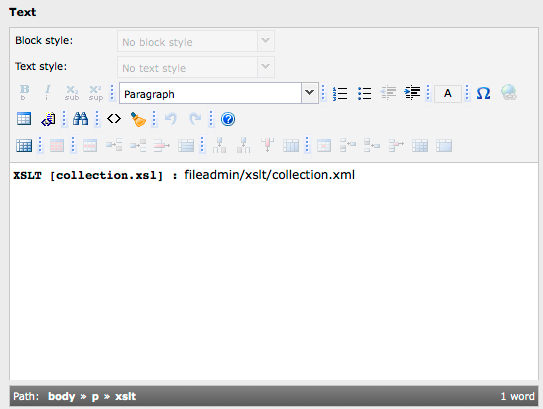
A user simply writes the path to the XML file that should be processed by a stylesheet into the RTE field. The <xslt> tag is then wrapped around it with a user element:

This is the PageTSconfig for achieving the user element:
RTE.default {

        showButtons := addToList(user)
        hideButtons := removeFromList(user)

        userElements {
                747 = XML Transformations
                747 {
                        10 = XSLT
                        10.description = Executes a XSL transformation
                        10.mode = wrap
                        10.content = <xslt stylesheet="collection.xsl">|</xslt>
                }
        }

        proc {
                allowTagsOutside := addToList(xslt)
                allowTags := addToList(xslt)
                entryHTMLparser_db {
                        htmlSpecialChars = -1
                        allowTags := addToList(xslt)
                }
        }
}
Notice: Its not possible to set attributes with a user element. Therefore you will have to set a fixed XSL stylesheet for each <xslt> user element you define.
Configuration for ckeditor (TYPO3 8.7-10.4)
From this version onwards CKEditor is the new default RTE. Note that you can still use rtehtmlarea in TYPO3 8.7 but it is now a separate extension in TER. The integration of the <xslt> TypoTag into CKEditor is fully backwards compatible to the rtehtmlarea integration. It looks like this:
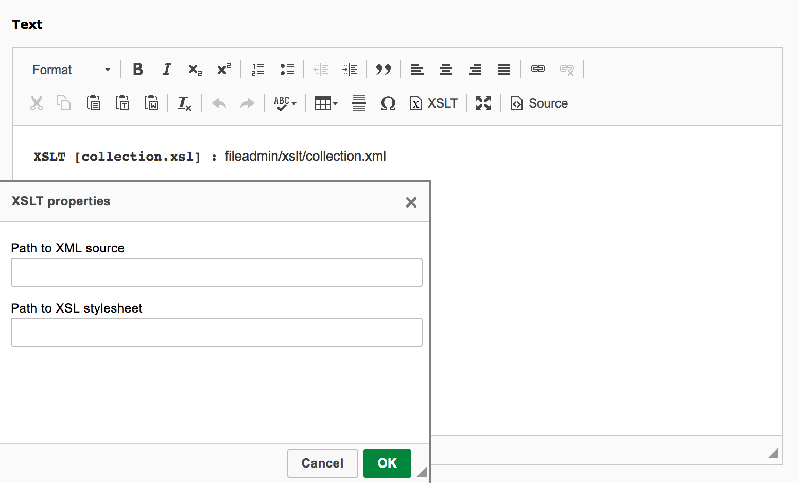
Additionally, CKEditor has some neat features: A dialog in which the user can directly insert the path to the XML source and the stylesheet that should process the source. The configuration works with YAML files and presets that can be specified for fields or branches of the page tree with PageTSConfig. By default the RTE gives you the “minimal”, “default” and “full” presets.
If you want to integrate the <xslt> TypoTag into your CKEditor you have to build a new YAML preset in an extension and activate it with PageTSConfig. cobj_xslt provides an example configuration. It is based on the “default” preset of CKEditor and you can include it with one line of TypoScript:
RTE.default.preset = cobj_xslt
If you have defined your own preset you need to add the following to your YAML configuration:
# register the <xslt> plugin with CKEditor
editor:
  externalPlugins:
    xslt: { resource: "EXT:cobj_xslt/Resources/Public/JavaScript/Plugins/xslt/plugin.js" }

# register <xslt> tag with RTE processing
processing:
  allowTags:
    - list of your other allowed tags
    - xslt

  allowTagsOutside: [list of your tags, xslt]

  HTMLparser_db:
    allowTags: [xslt]
And a bit of CSS
To get a nicer display of the new tag in the RTE you can include the following CSS rule in the contentCSS file that you load with either rtehtmlarea or CKEditor:
xslt:before {
        content: "XSLT ["attr(stylesheet)"] :";
        display: inline-block;
        padding: 0 0.5em 0 0;
        font-family: monospace;
        font-weight: bold;
}
We are using the :before pseudo-selector and the content property in combination with CSS’s attr() function to display the stylesheet that is set with each <xslt> TypoTag.