Usage
This section describes how you can use the Google Ads for TYPO3 integration to create meaningful ads for your customers. We will touch on all the necessary steps to create an ad, explain the available settings while creating an ad, go into detail about additional options, and give you insights on how to manage your ads.
Let’s get started.
Creating a new ad
To make ad creation as intuitive and easy to access as possible, the Google Ads for TYPO3 integration provides four entry points. To create a new ad you can use the Create ad option in the context menu, the Create ad button on a page in the Page module, the Create ad button on a page in the List module, and by using the Edit option in a page record’s context menu.
Each of these different methods to access ad creation is described in more detail below.
Context Menu
To access the context menu, right click on the icon of the page you want to create an ad for. At the bottom of the context menu you will find the Create ad option. Click on Create ad and the Create ad for page window will appear.
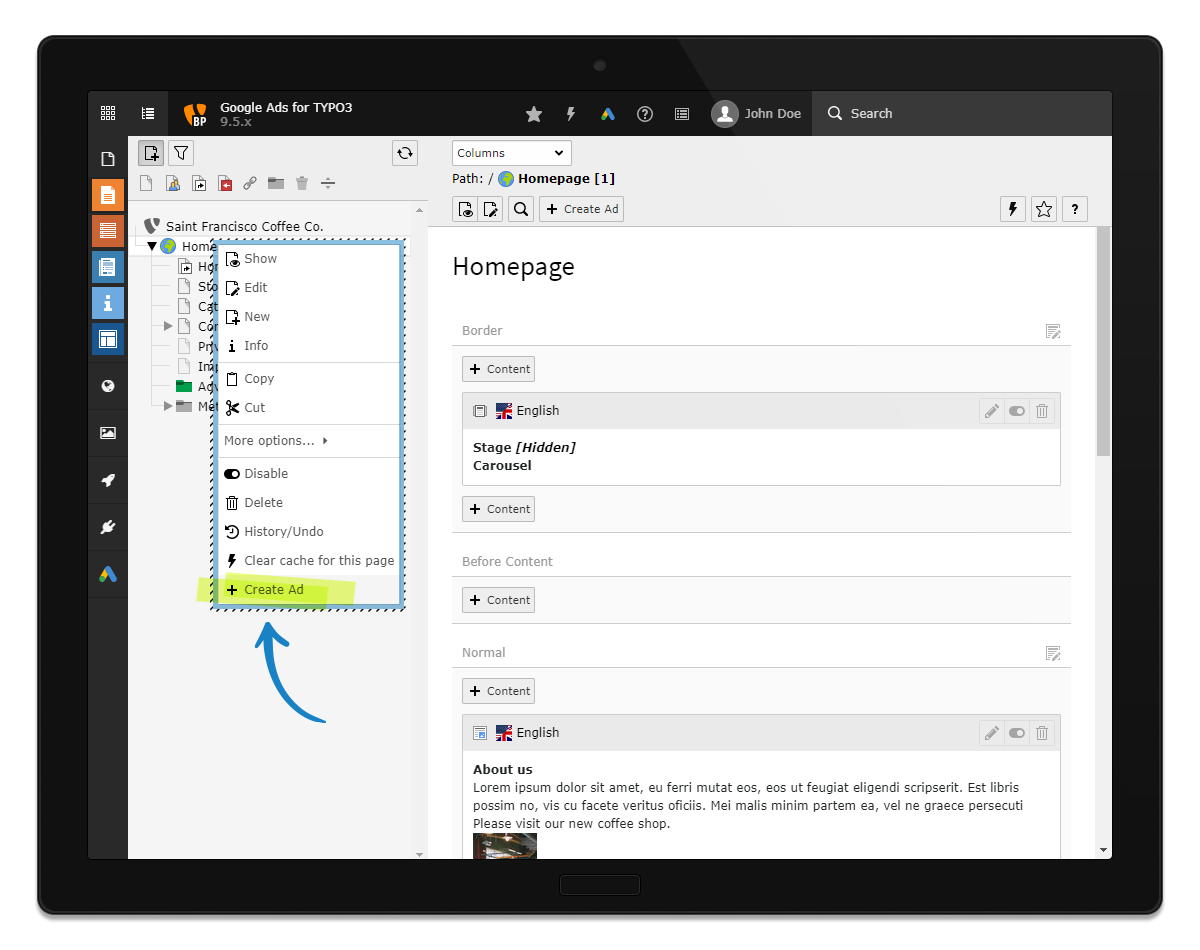
In the context menu you find the entry Create ad.
Page module
Click on the Page module on the left hand side of the TYPO3 backend. In the Page tree, navigate to a page you want to create an ad for. You will see the Create ad button at the top, right next to the search toolbar toggle switch. Click on Create ad and the Create ad for page window will appear.
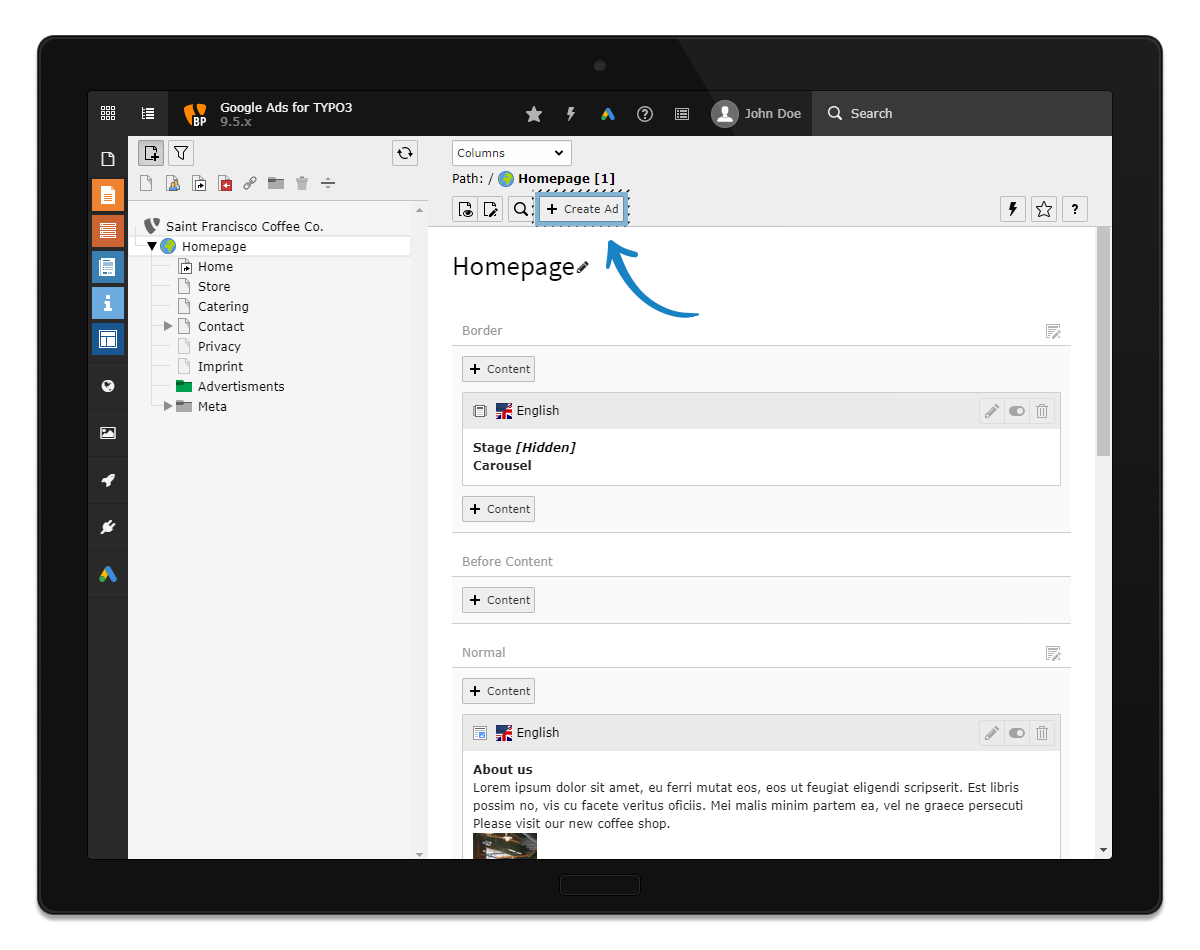
In the page module you find the button Create ad.
List module
Click on the List module on the left hand side of the TYPO3 backend. In the Page tree, navigate to a page you want to create an ad for. You will see the Create ad button at the top, right next to the search toolbar toggle switch. Click on Create ad and the Create ad for page window will appear.

In the list module you find the button Create ad.
Edit page record
To access the Edit page record option, right click on the icon of the page you want to create an ad for. A context menu will appear where you can select Edit. You will see the Create ad button at the top, right next to the delete button. Click on Create ad and the Create ad for page window will appear.
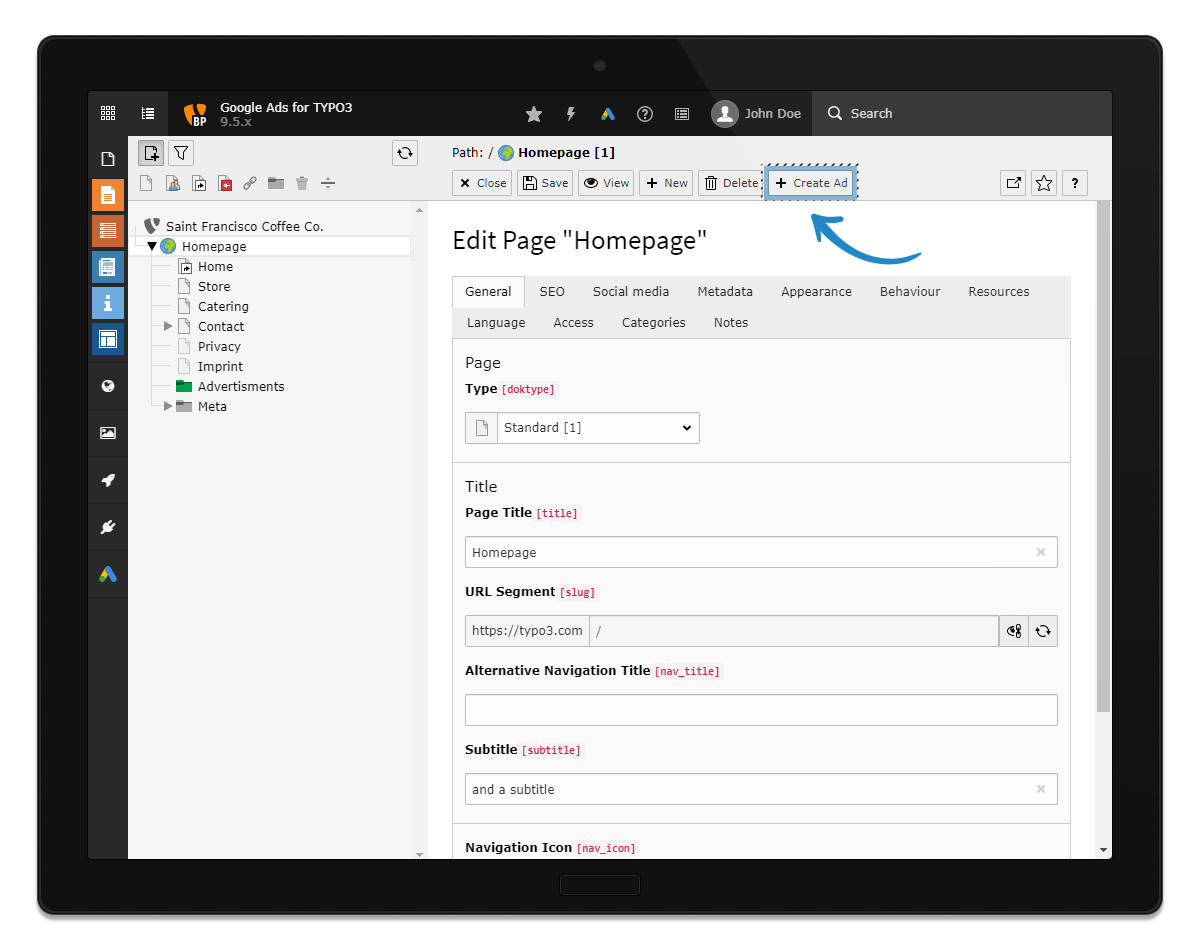
In the page edit view you find the button Create ad.
The create form
This is the Create new ad for page form. Here you can fill in headlines and descriptions, define keywords, set locations (by country or range), extend your ad, schedule it, and set a daily budget for your ad.
Each of these options is described in more detail below.
Content and Preview
Here you can add headlines and descriptions for your ad. Fill in at least one headline and one description field. The form will then show you a preview of how your ad would look like on Google on both mobile and desktop devices.
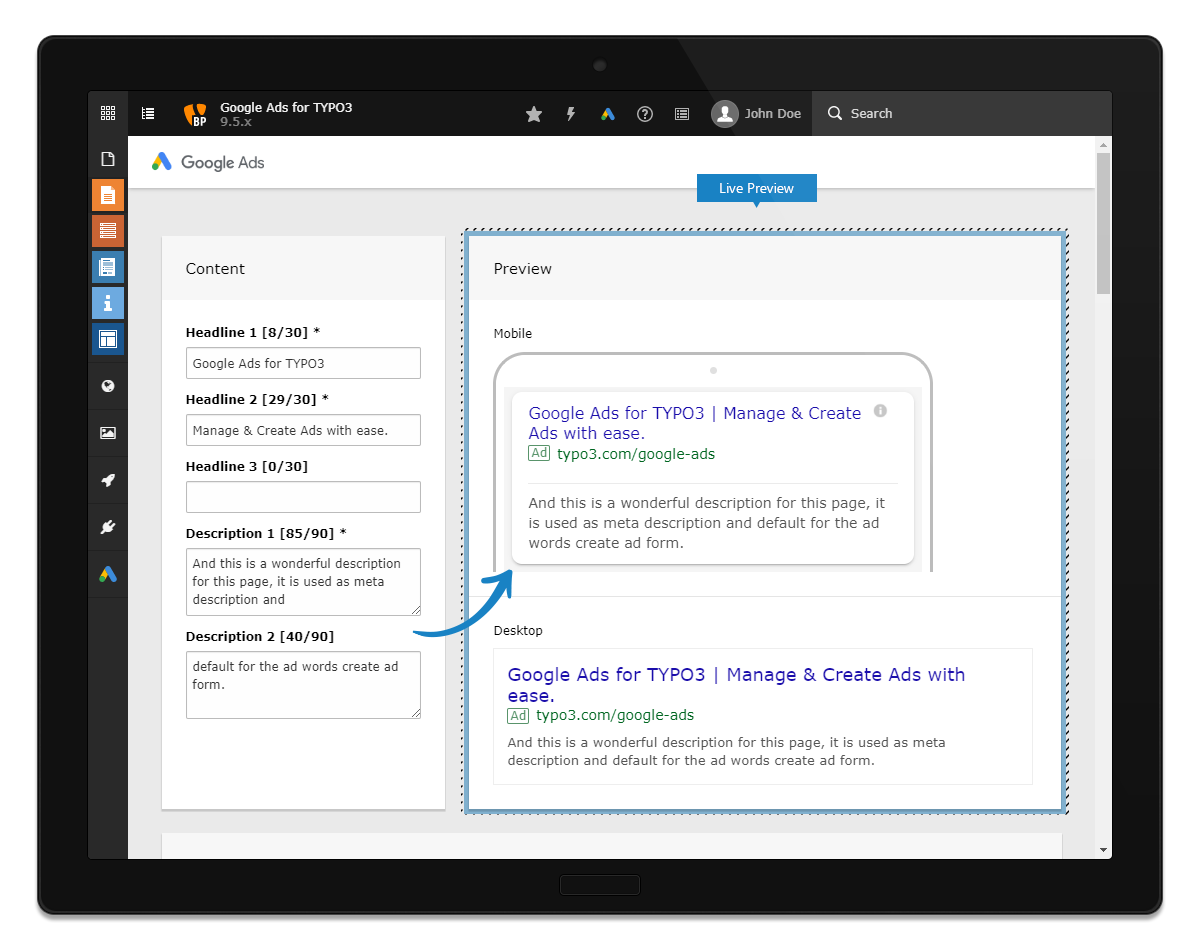
Create new ad form - headlines and descriptions, and a preview for mobile and desktop devices.
Note
Please note that some of the fields in the form may be pre-filled with data from the page you selected, but you can change any data to your liking.
Keywords
Based on your current page and page properties you may receive keyword recommendations by Google. It is important to note that these recommended keywords will show a so-called Search Volume, which is the average monthly quantity of searches for that specific keyword.
Below the recommended keywords you find a list of currently used keywords for your ad. You can add additional keywords by typing them into the Keyword combinations field.
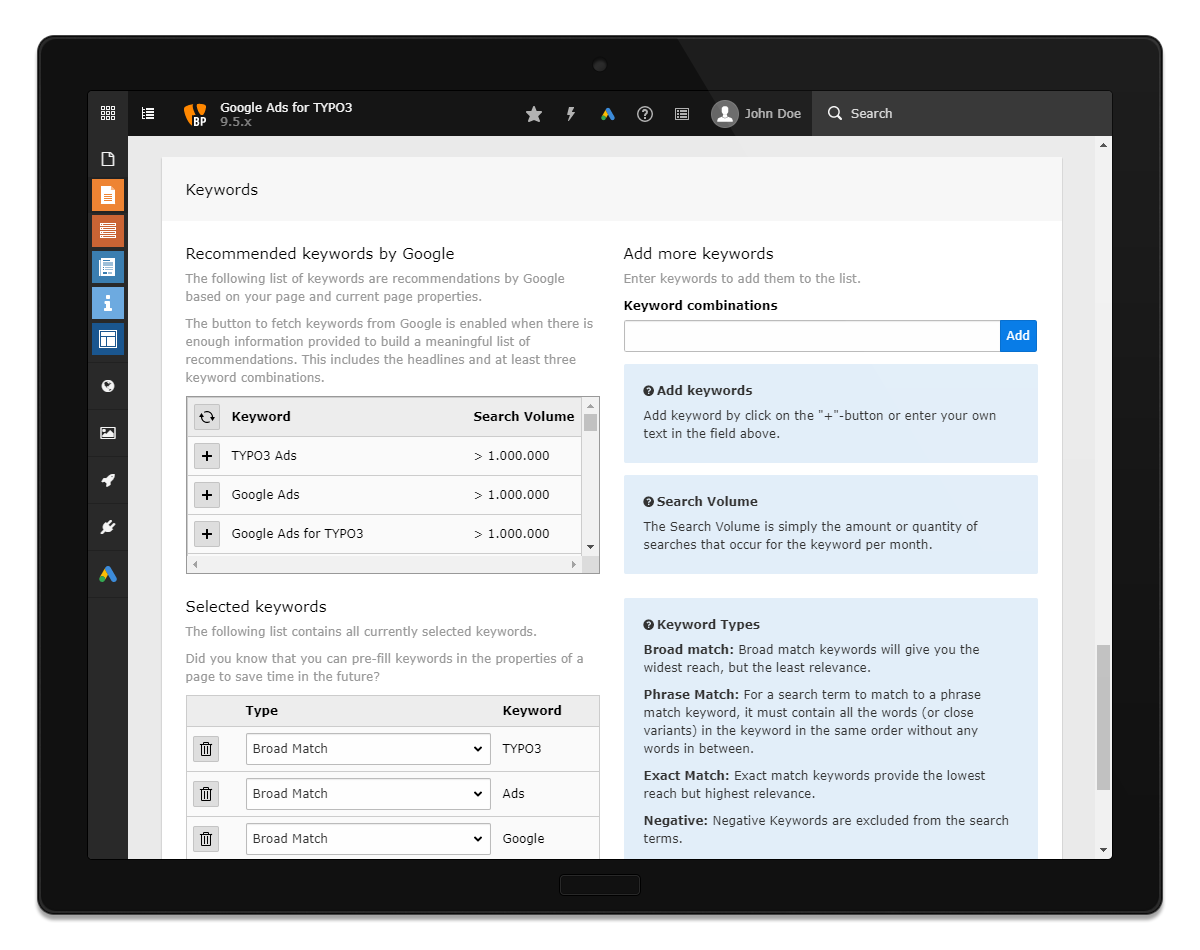
Create new ad form - keyword suggestion wizard and input fields for keywords.
Keyword Types
- Broad match: These keywords provide you the maximum reach, with the disadvantage of the least relevance.
- Phrase Match: A phrase match allows your ad to show only when someone’s search includes the exact phrase of your keyword, or close variations of the exact phrase of your keyword.
- Exact Match: The opposite of borad match keywords, exact match keywords provide the lowest reach with the advantage of the highest relevance.
- Negative: These keywords let you exclude specific, unwanted search terms.
Locations
In the locations settings you can define where your ad will be shown. By clicking the Add location button you can decide whether you want to set your ad for an entire country or a radius in kilometres around a location. You can create multiple locations for your ad, e.g. combining multiple countries plus a radius around your companies’ location.
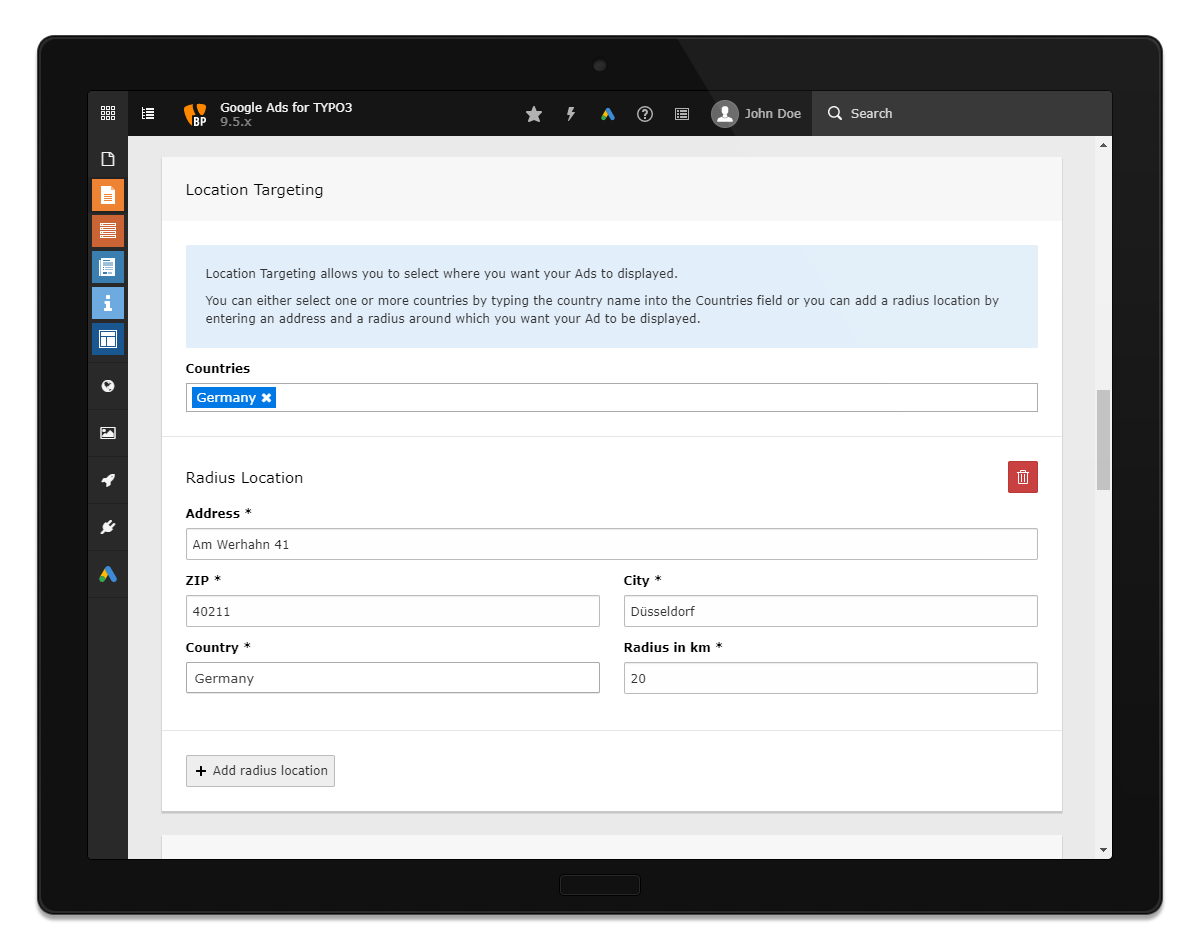
Create new ad form - location targeting for countries and/or radii around locations.
Ad Extensions
You can extend your ad by adding so-called Ad extensions to them. Two different extensions are available; the Call Extension and the Site Link Extension.
The Call Extension lets you add a phone number to the ad so potential customers can directly get in touch with you to talk about your service offerings. You can add it by clicking the Add call extension button, selecting a country for the prefix number, and filling in the desired phone number.
The Site Link Extension lets you add up to six links to pages that are interesting for your customers. Each Site link consists of a title, link to a page, and an optional description. You can add it by clicking the Add Site Link extension button, adding a title, typing in or selecting a link to a page, and filling in the optional description field.
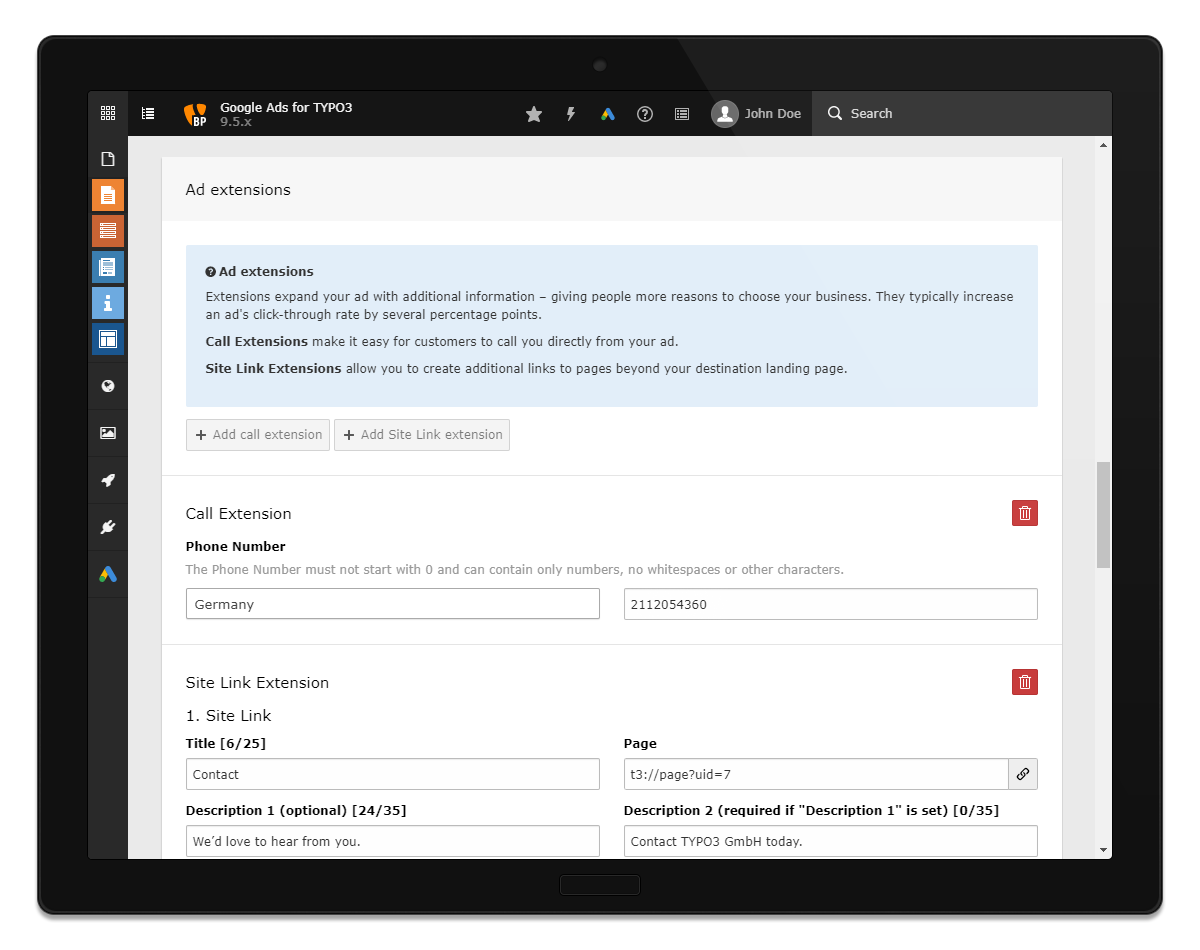
Create new ad form - enriching an ad with additional information.
Tip
You can save Site Links to use them in another ad by marking the checkbox Store Site Link for next as creation.
Note
Please note that only four Site Links will show up in an ad at any given time.
Schedule
The Schedule settings give you full control over scheduling your ad. Here you can define the start and end date of an ad, and choose between one of the Ad delivery schedule presets: 24/7, Weekdays, and Opening hours. The grid below shows the time ranges when the ad will be delivered, where blue cells represent an “active” state. The ranges can be modified in various ways:
- Click a cell
- Click a cell and move the cursor
- Click a weekday on the left to toggle the whole row
- Click an hour on the top to toggle the whole column
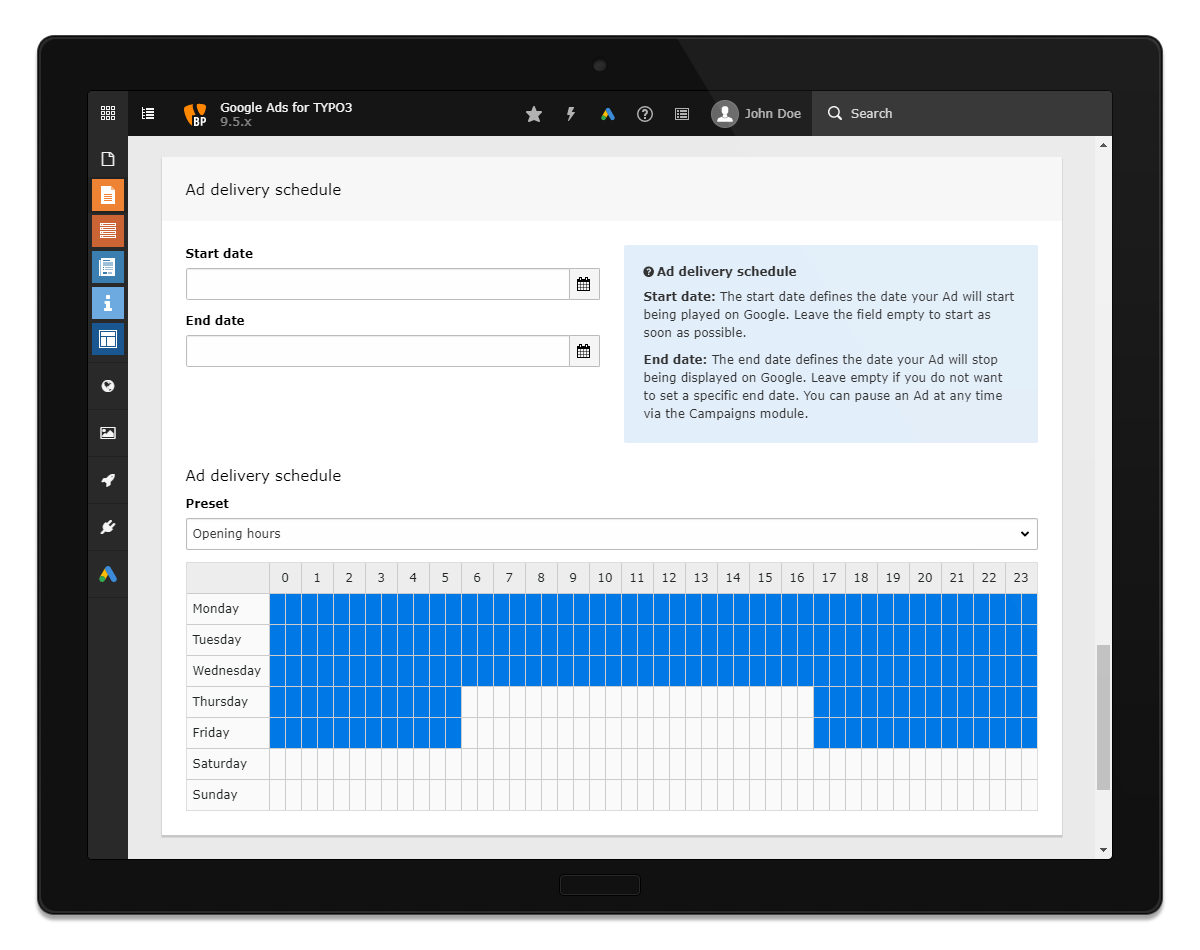
Create new ad form - scheduling your ad for your target customers.
Setting a budget and submitting your ad
The budget field lets you set a maximum amount per day. While the budget set here might not be fully utilized, it will never be exceeded.
Now that we filled in all the necessary fields and went through all the available options for creating an ad, we are now able to submit the ad by clicking on the green Create ad button in the Submit Ad to Google Ads section on the right.
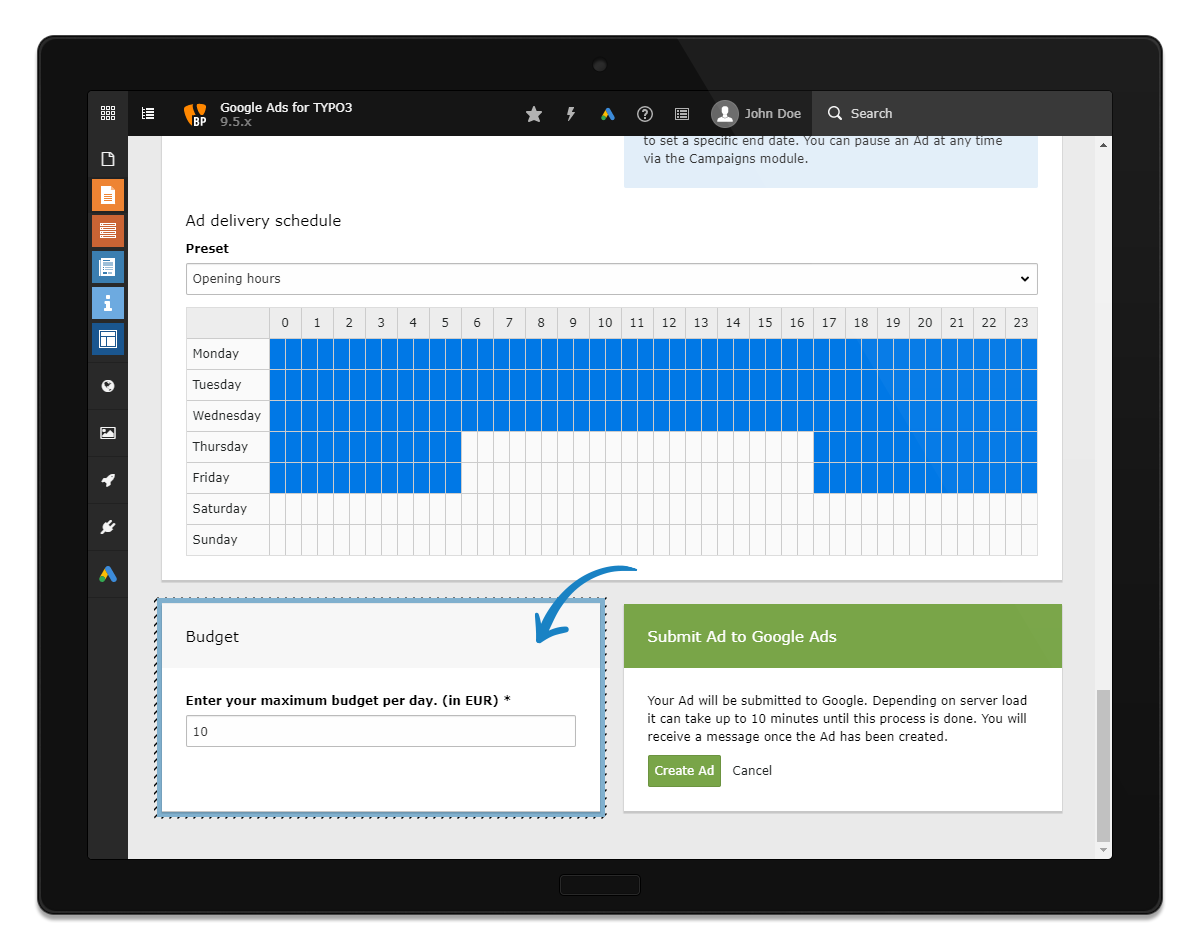
Create new ad form - setting a budget and submitting our ad.
Note
Please note that it may take a few minutes until the ad is created. You can find your brand new ad in the Management module overview.
The Campaigns module
In the Campaigns module you see an overview of all your Google Ads Campaigns arranged in a list. From here you can access the detail view of a campaign, pause and resume campaigns, and edit campaigns.
Pausing and resuming a campaign
In the Campaigns module you can temporarily pause Google Ads Campaigns and resume them at a later point in time.
To pause a campaign click on the pause button shown in the screenshot below.
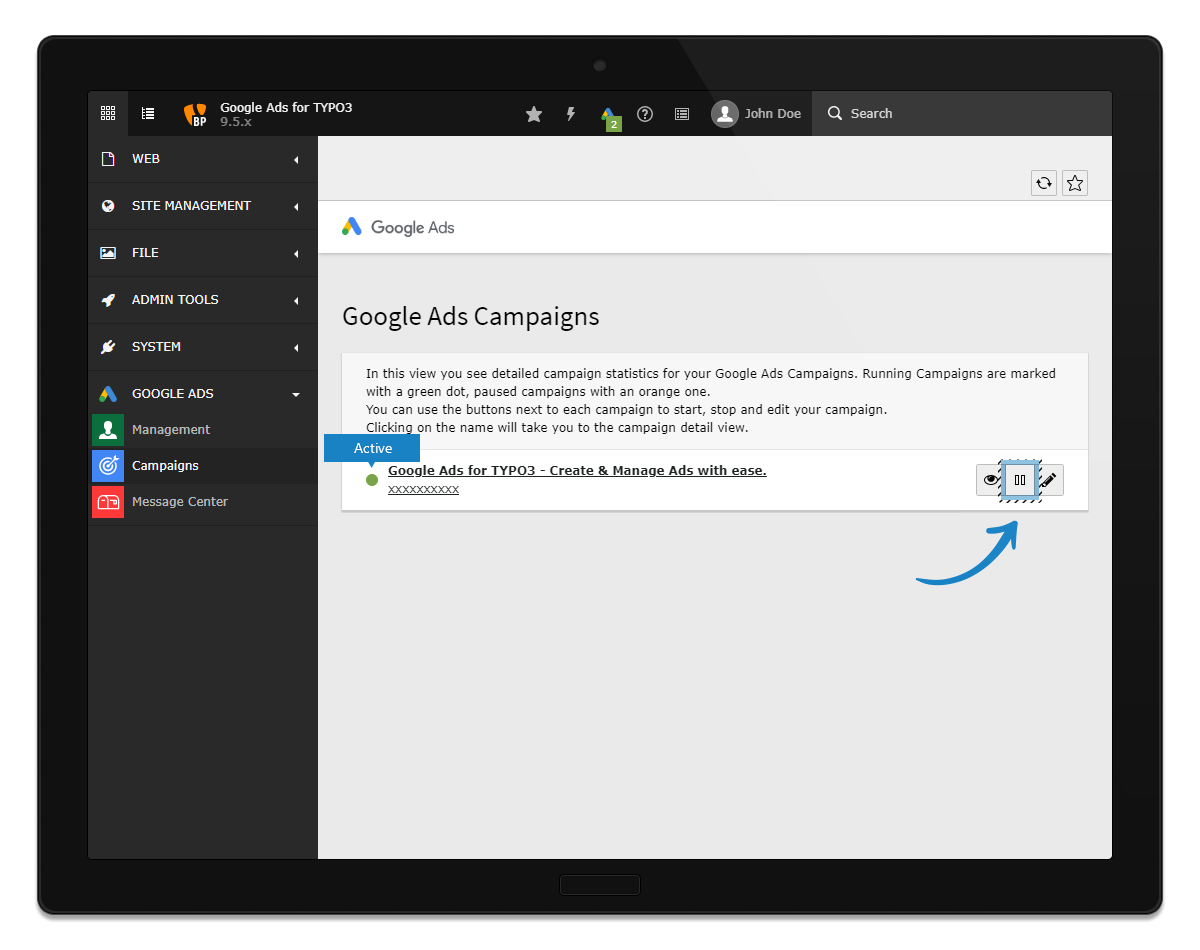
Campaigns module - pausing an ad.
To resume a paused campaign click on the play button shown in the screenshot below.
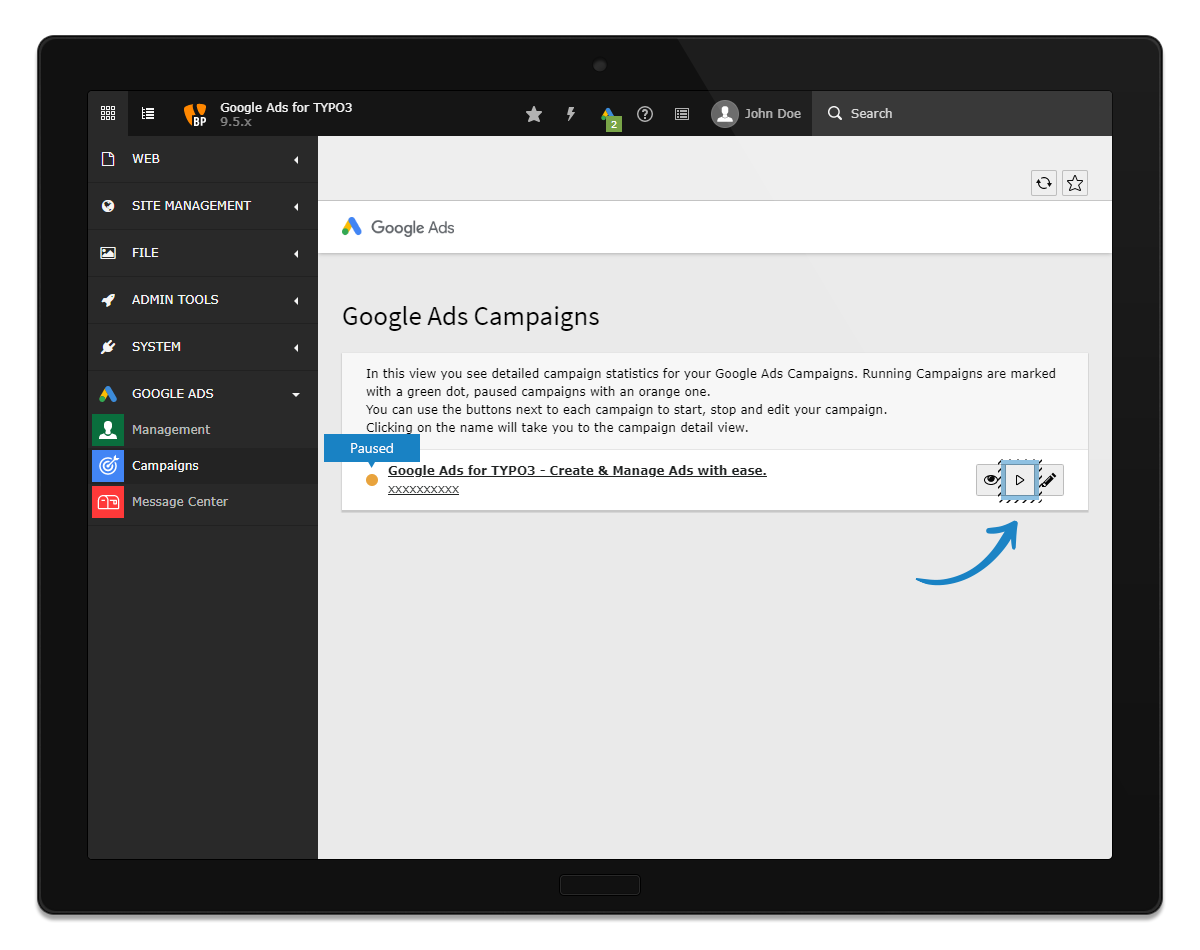
Campaigns module - resuming an ad.
Campaign detail view
Note
NEEDS SCREENSHOT
To access the detail view of a campaign either click on the campaign name or the Details button (eye icon).
In the detail view you get an overview of the Status, Budget, Start-Date and End-Date, Ad delivery schedule, and Locations. Furthermore it shows you the selected Keywords, attached Ads, the overall statistics per campaign, and the statistics per attached ad.
The Statistics show you the Impressions, Clicks, Average CPC (cost per click), and the total cost.
Deleting an ad
To delete an ad attached to a campaign, scroll down to the Ads section and click on the trash can icon on the right.
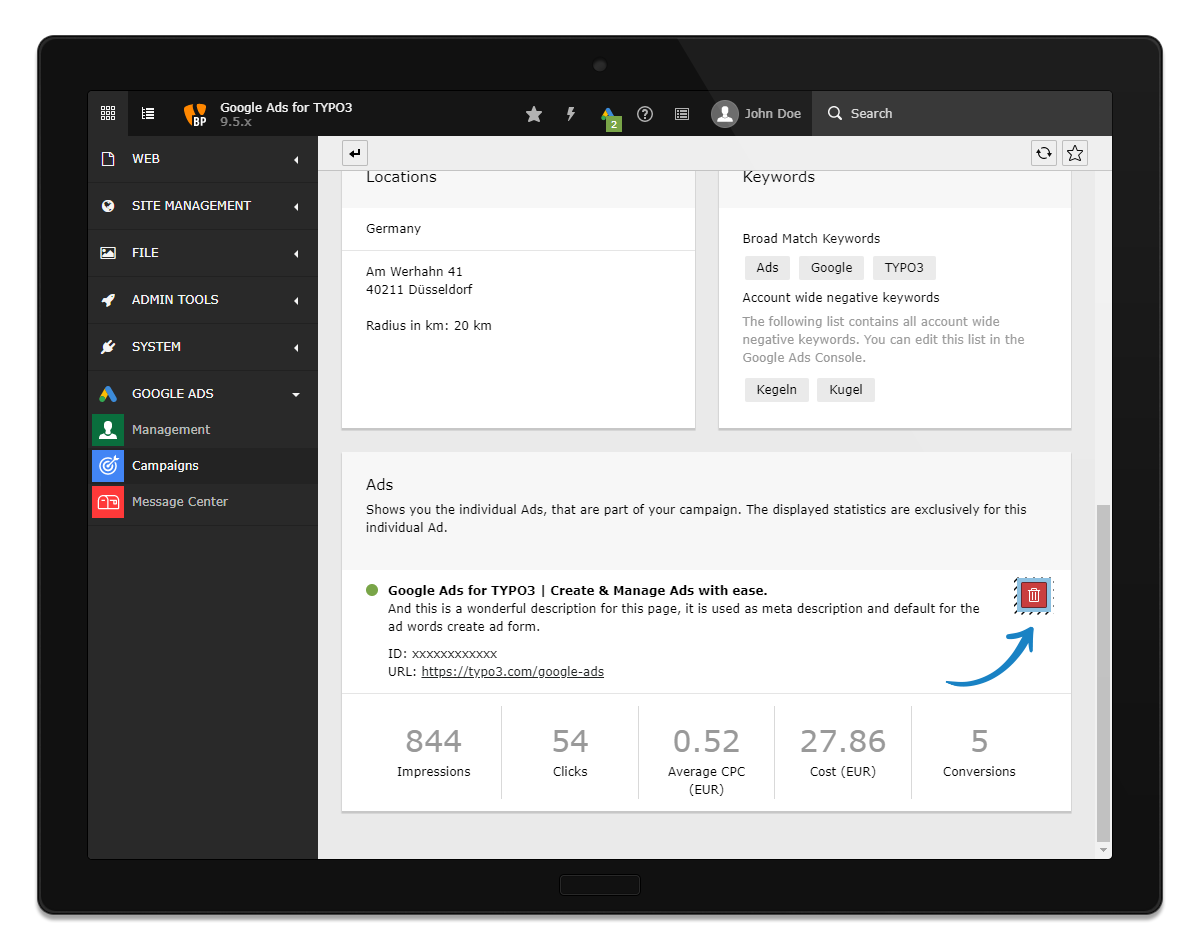
Campaigns module - deleting an ad.
The Message Center
The Message Center provides a list overview of all messages created by the Google Ads for TYPO3 integration and will keep you informed about the status of created ads. Messages can be read, marked as read, marked as unread, and deleted. You can access the detail view of every message by clicking on them.
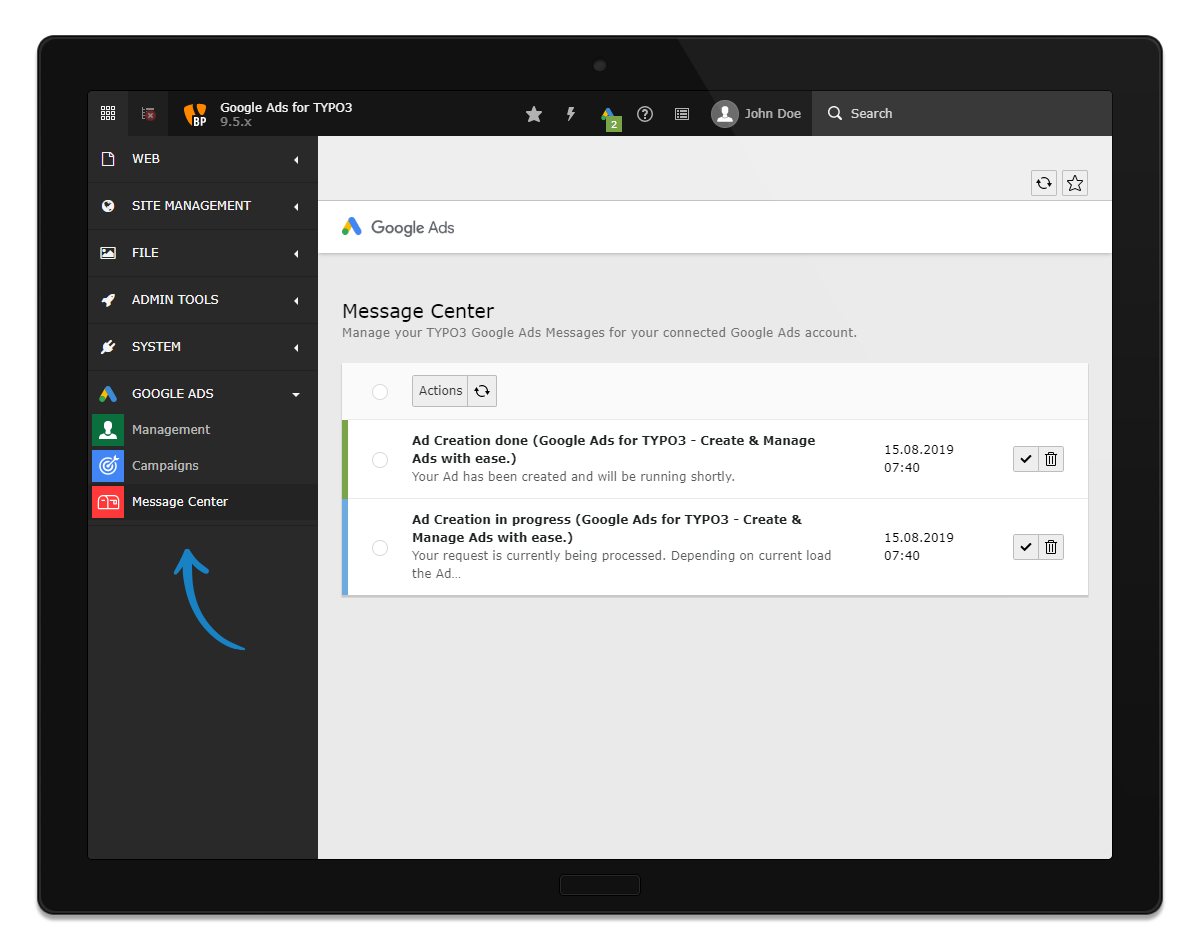
Message Center - overview of all messages.
Tip
You can also check the small Google icon in the top bar of the TYPO3 backend to quickly check unread messages.
Note
Currently, messages can be delayed by up to 10 minutes.
Google icon in the top bar
To check unread messages you can also use the small Google icon in the top bar of the TYPO3 backend. Clicking on a message in the menu will open the detail view of the message.
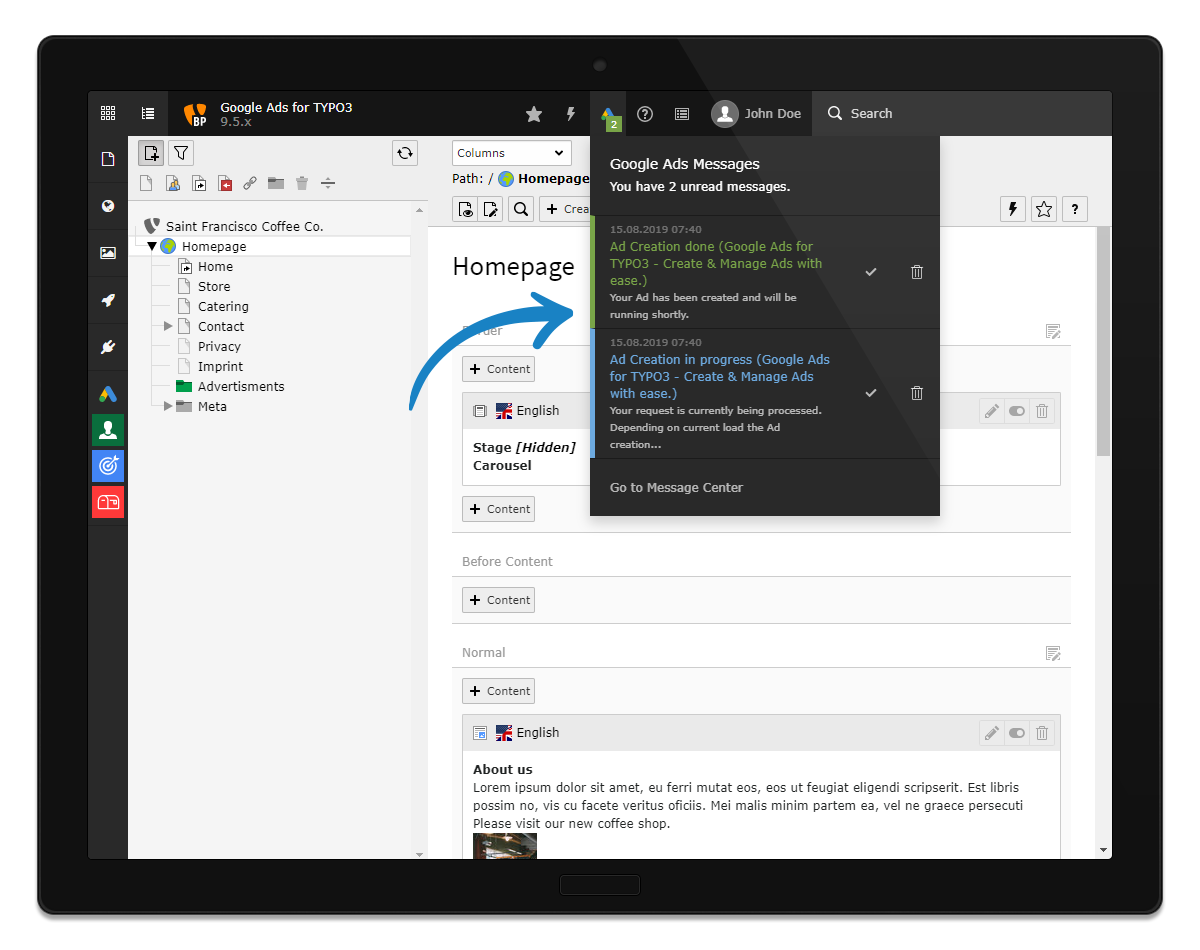
Message Center - Google icon in the top bar of the TYPO3 backend.