DEPRECATION WARNING
This documentation is not using the current rendering mechanism and is probably outdated. The extension maintainer should switch to the new system. Details on how to use the rendering mechanism can be found here.
Browser Tutorial Social Media (en)
| Author: | Kasper Skårhøj |
|---|---|
| Created: | 2002-11-01T00:32:00 |
| Changed: | 2010-08-25T23:14:34 |
| Classification: | browser_tut_socialmedia_en |
| Description: | Tutorial Social Media for the Browser - the TYPO3-frontend-engine. Use social bookmarks. Integrate your TYPO3 application to facebook.com. |
| Keywords: | forAdmins, forDevelopers, forBeginners, forAdvanced, browser, tutorial, frontend-engine, frontend, engine, socialmedia, socialweb, social, media, web |
| Author: | Dirk Wildt, Die Netzmacher |
| Email: | http://wildt.at.die-netzmacher.de |
| Website: | http://die-netzmacher.de |
| Language: | en |

 Browser Tutorial Social Media (en)|img-3|
Browser Tutorial Social Media (en)
Tutorial Social Media for the Browser - the TYPO3-frontend-engine. Use social bookmarks. Integrate your TYPO3 application to facebook.com.

Version: 3.4.1, 2010-08-25 - Version is corresponding with the version of the Browser.
Extension Key: browser_tut_socialmedia_en - Tutorial for the extension Browser (extkey: browser)
Language: en
Keywords: forAdmins, forDevelopers, forBeginners, forAdvanced, browser, tutorial, frontend-engine, frontend, engine, socialmedia, socialweb, social, media, web
Copyright 2010, Dirk Wildt, Die Netzmacher, <http://wildt.at.die- netzmacher.de>
This document is published under the Open Content License
available from http://www.opencontent.org/opl.shtml
The content of this document is related to TYPO3
a GNU/GPL CMS/Framework available from www.typo3.org
Table of Contents
Browser Tutorial Social Media (en) 1
Browser Manual and Browser Tutorial Basics 5
Bookmarks in List Views? Yes! 6
Prepare Your Plugin for the Facebook API 8
Integrate Your Plugin in Facebook 11
Introduction
What does it do?
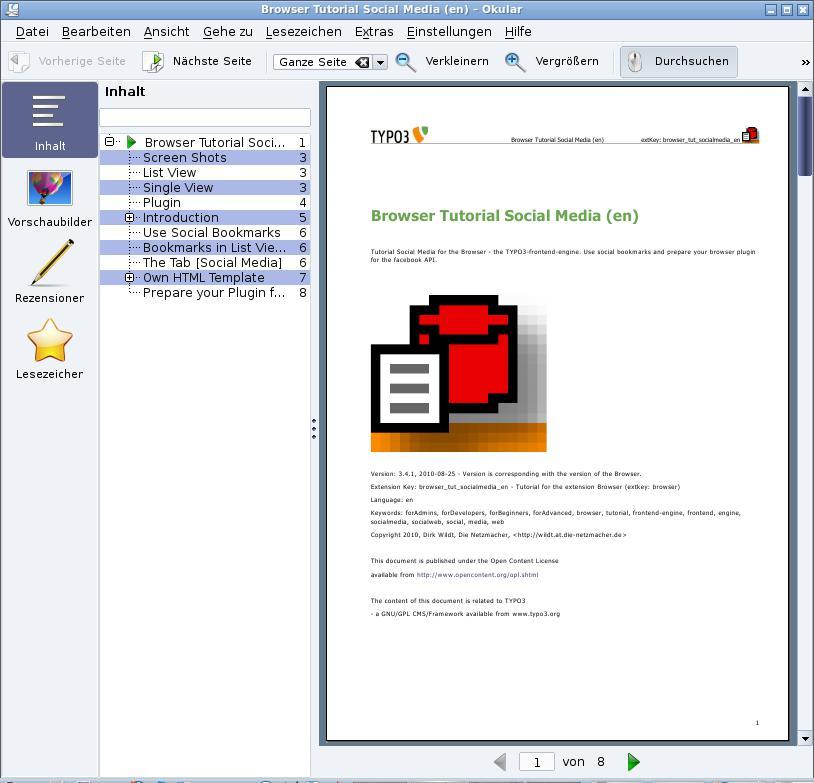 Illustration 5: Tutorial in PDF format
This is a tutorial for the extension Browser (extkey: browser). It is
- an introduction for using social bookmarks and
- for preparing your browser plugin for the facebook API
only.
Further Information
This tutorial in PDF format
You find this tutorial as a PDF file at
Browser Manual and Browser Tutorial Basics
Manual: The Browser has it's own manual (with the reference of course).
- HTML http://typo3.org/documentation/document-library/extension- manuals/browser/current/
- PDF: http://typo3.org/extensions/repository/view/browser/current/info /?tx_terfe_pi1%5BdownloadFile%5D=doc%252Fmanual.pdf
Tutorial Basics: A lot of step-by-step introductions.
Use Social Bookmarks
Bookmarks in List Views? Yes!
The Browser is the first TYPO3 extension, which enables bookmarks in list views! The clou: The bookmarks link to the single view.
The Tab [Social Media]
If you like to use social bookmarks, nothing seems to be easier. Please select the needed bookmarks in the tab [Social Media] of the Browser plugin.
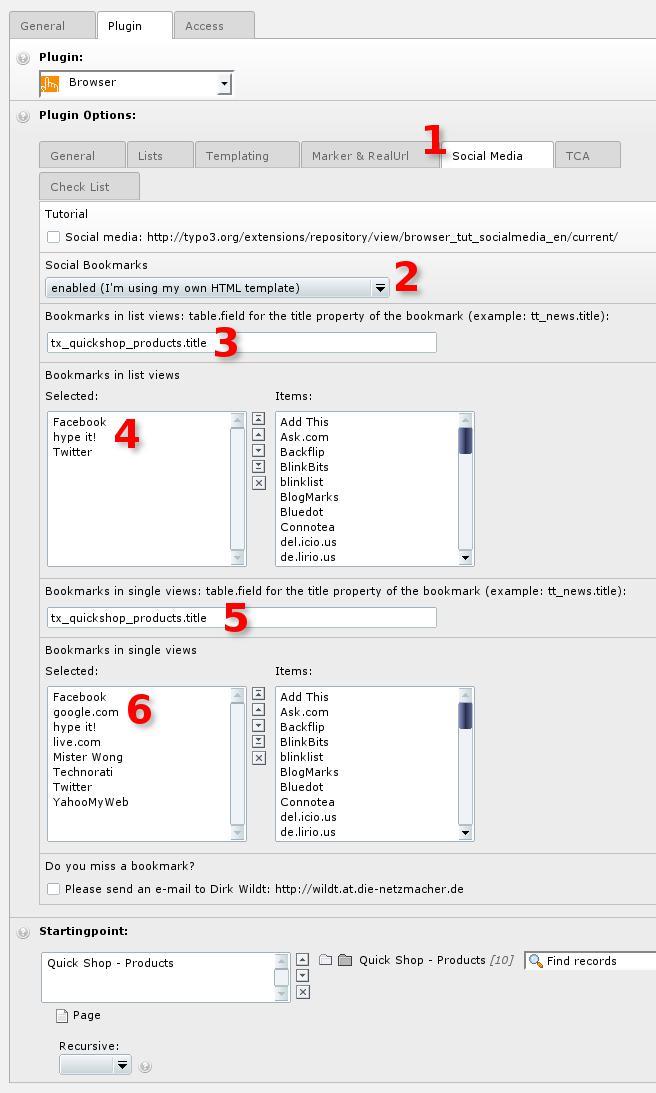 Illustration 6: The tab [Social Media] in the Browser plugin
The tab [Social Media]Enable social bookmarks in the pull down menu[Social Bookmarks].Because the Browser has a different workflow for own and foreign templates, the pull down menu offers both options: for a default browser template and for your own template.What your have to attend to your own template is described below.
If you are using a Browser default template, you have to fix the field for the position of your bookmarks in the list view.In every case you have to define the field for the title property of the bookmark of the bookmark providers.
Select the bookmarks for the list view.
This is the same like 3. but for single views.
This is the same like 4. but for single views.
Own HTML Template
The Bookmark Marker
If you are using your own HTML template please be aware to use the bookmark marker. Without this marker you won't see any bookmark. The bookmark marker is a so called system marker and has this syntax
###SOCIALMEDIA_BOOKMARKS###
HTML snippet
This is a snippet from the HTML template of the Quick Shop (extKey: quick_shop)
<h3>
###TX_QUICKSHOP_PRODUCTS.SHORT### ###SOCIALMEDIA_BOOKMARKS###
</h3>
As you guess the bookmarks will display on the right side in the header (h3) of a product.
Source of the illustration above: http://quick-shop.typo3-browser- forum.de/
If you are interested in the whole template as an example for your own development, please download the template:
Prepare Your Plugin for the Facebook API
Beforehand
You can use every TYPO3 database for publishing in facebook supported by the facebook API.
Examples for publishing are tt_news, tt_products or your own database.
The facebook API has some restrictions. For example don't use in your HTML code
- relative URLs
- external Javascript code
- tags like <colspan> or <iframe>
Example with the Quick Shop
Preparing your Browser plugin for the facebook API is easy.
You need an HTML code without the <head>-stuff and <body>-stuff like in the illustration below.
You have a ready configured page like in the illustration above on the left hand.
Then you need only the snippets below.
HTML Template
We need only three line HTML code like in the snippet below. TYPO3 replace the <div> with the id "content" with the content of the page while runtime.
<div id="content">
content
</div>
The HTML code is stored in the file base_quickshop/res/html/facebook_api.html in our example.
TypoScript
config {
disableAllHeaderCode = 1
absRefPrefix = http://quick-shop.typo3-browser-forum.de/
}
plugin.tx_automaketemplate_pi1 {
content.file = EXT:base_quickshop/res/html/facebook_api.html
}
plugin.tx_browser_pi1 {
marker.my_url.typolink.parameter = 1
}
Line 2: all header code will be disabled. This concerns the <head>-section and the <body>-section.
Line 3: TYPO3 will render absolute URLs
Line 7: Quick Shop is using the plugin automaketemplate for generating templates.We allocate our HTML code from the example above.
Line 11: If a visitor is clicking the [Reset]-button of the Browser search form, he should forwarded to the realhome page of the Quick Shop. We allocates the pid of the real home page like in the plugin (see below).
Plugin
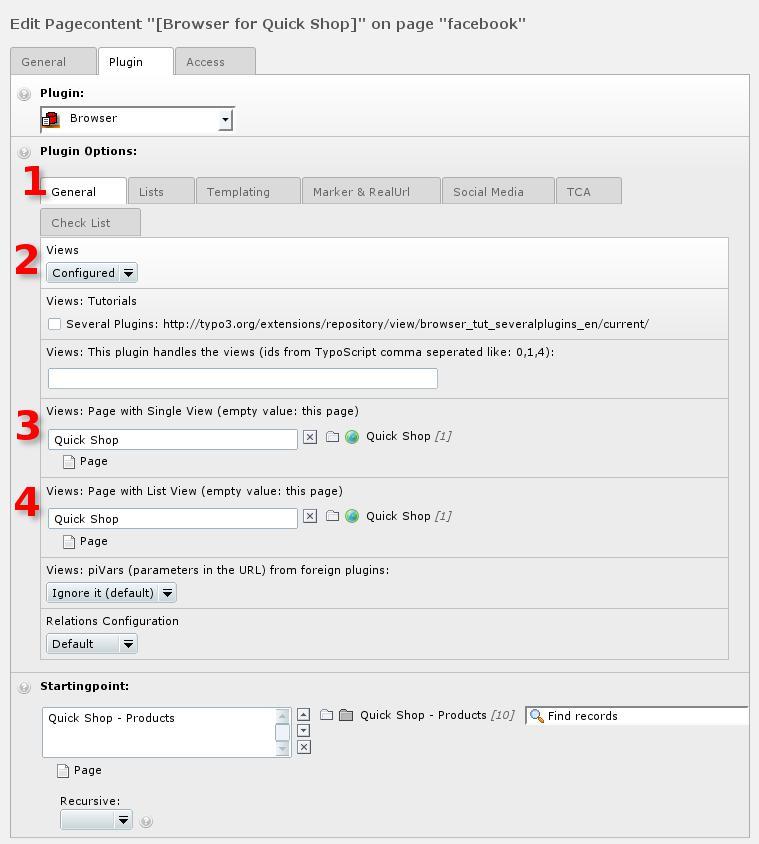 Illustration 10: The tab [General] in the Browser plugin
Visitors should be forwarded to our home page in every case. Thus we configure the pid for singe views and for list views. Tab [General]
Enable the configuration mode in the field "Views". Select [Configured].
Set the pid for single views to the pid of your home page.
Set the pid for list views to the pid of your home page.
CSS
Because we set 1.config.disableAllHeaderCode to 1, we have lost all CSS code.
We have to add the CSS code with the content element HTML.
Take your CSS code from your home page and copy it into an HTML element on your page for facebook
We have copied two stylesheets (see 3. in the illustration above).
Page Tree
There is a curiosity, we didn't understand: If you like a tab for your application in your facebook profile, you need a subpage.
Please copy your facebook page into your facebook page and call it like your application (or something else).
Our tree looks like:
Home page
Quick Shop
Integrate Your Plugin in Facebook
Conditions
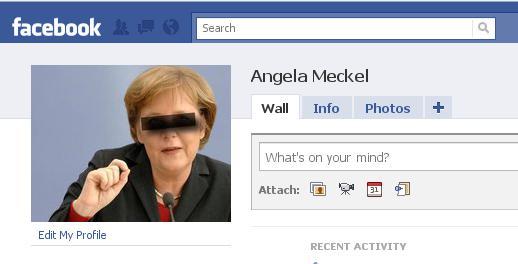 Illustration 13: Our facebook account
You need a facebook account only. We take the account of Angela Meckel. Please don't take our Angi for the other Angi - the German chancellor.
Work Flow
Login
Login to your facebook account
Create a New Application
Account > Application Settings
Developer(direct link: http://www.facebook.com/developers/ )
Button [+ Set Up New Application]
Name of your Application. I will displays in facebook contexts
Agree with facebook terms and conditions
Create your application
Captcha
Submit it!
Configure Your Application
Menu [Editing Settings]
Main menu [About]: Everything should be self explaining.
Main menu [Facebook Integration]
Canvas page: title for your application. Use only letters and underscores, because it will be a path.
Canvas URL: The URL of your website with the facebook application (first level)
Tab URL: The URL of your website with the facebook application (second
level) :sup:`0 <#sdfootnote1sym>`_
Test Your Application
Click the button [Go to your application]
Facebook should display your application like in the illustration above.
In Cases of Errors
Sometimes there are errors.
Be happy, if you get a qualified error message. If you get, please try to solve the described problems or bugs.
If you don't get a qualified error message or if you get an empty page, check your configuration please.
Add Your Application to Your Profile
Menu: Account
Item: Application settings
Menu [Edit settings] of your application
Tab [Profile] > Field "Tab": Available (add) <- Click on "add"
Tab [Quick Shop]
Helpful suggestions
If you have helpful suggestions, feel free to contact me: http://wildt.at.die-netzmacher.de.
To-Do List
Nothing to do.
Illustration Index
Illustration 1: Bookmarks in the list view 3
Illustration 2: Bookmarks in the single view 3
Illustration 3: Browser application on facebook.com 4
Illustration 4: Bookmarks in the Browser plugin 4
Illustration 5: Tutorial in PDF format 5
Illustration 6: The tab [Social Media] in the Browser plugin 6
Illustration 7: List view and HTML code 7
Illustration 8: Start page of the Quick Shop 8
Illustration 9: Quick Shop without <head> and <body> 8
Illustration 10: The tab [General] in the Browser plugin 9
Illustration 11: CSS as content elements 10
Illustration 12: Page in the page 10
Illustration 13: Our facebook account 11
Illustration 14: Select the developer application 11
Illustration 15: Create your application 11
Illustration 16: Create your application 12
Illustration 17: Submit it! 12
Illustration 18: Your application (here: Quick Shop) 12
Illustration 19: Your application (here: Quick Shop) 13
Illustration 20: Menu About 13
Illustration 21: Menu Facebook Integration 14
Illustration 22: Your application (here: Quick Shop) 14
Illustration 23: Go to your application 15
Illustration 24: Your application on facebook 15
Illustration 25: Go to application settings 16
Illustration 26: Edit the settings of your application 16
Illustration 27: The tab [Quick Shop] in your profile 17
Illustration 28: Your application (here: Quick Shop) in your profile 17
0 It seems, that you need a second level in every case, if you like a tab in your profile. If you find an easier way, please send me an e-mail.
21