DEPRECATION WARNING
This documentation is not using the current rendering mechanism and is probably outdated. The extension maintainer should switch to the new system. Details on how to use the rendering mechanism can be found here.
Create Calendar Categories
For organizational purposes, it is recommended that you create categories for your events. These categories can be attached either to one of the calendars or to all of them. Refer to Illustration 20.
- Category title: This is the only required field.
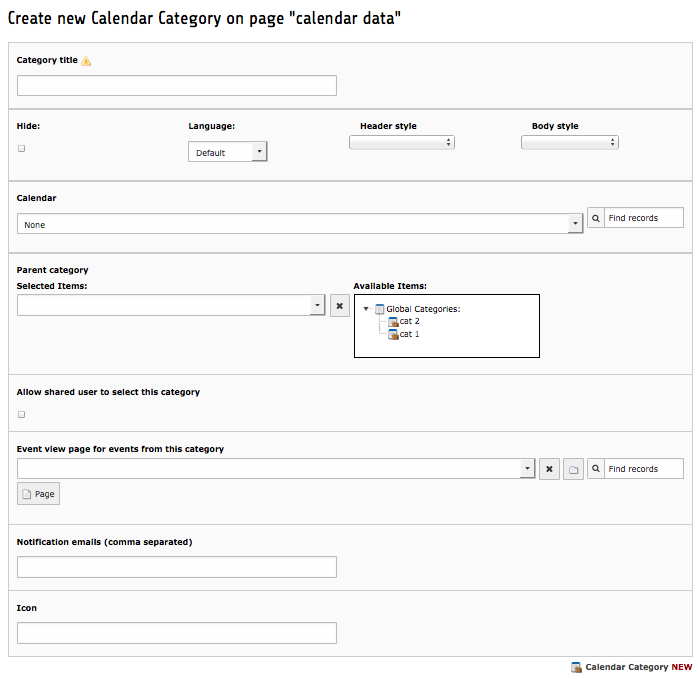 Illustration 20: Calendar Categories Record
- Hide: Hiding the Category will hide the Category and all associated events.
- Header Style: You can assign each category a different colored bullet that precedes the events in the Month View and the Header colors in the Day and Week views. To use the out-of-the-box bullet colors, simply enter the corresponding style in the Header Style field:
Blue Bullets:      default_catheader
Green Bullets:     green_catheader
Grey Bullets:        grey_catheader
Orange Bullets:       orange_catheader
Pink Bullets:       pink_catheader
Red Bullets:  red_catheader
Yellow Bullets:        yellow_catheader
- Body Style: You can assign each category a different colored “Busy Time” in the Day and Week views. To use the out-of-the-box Busy Time colors, simply enter the corresponding style in the Body Style field:
Blue:            default_catbody
Green:               green_catbody
Grey:          grey_catbody
Orange:         orange_catbody
Pink:         pink_catbody
Red:            red_catbody
Yellow:          yellow_catbody
 Note: If you would like to expand or change the color choices, you can do so by modifying the default style sheet (see Modifying the Default CSS).
Note: Starting with version 1.2.0 there is the possibility to define the according colors for the header- & body style fields in the page TS config. Per default there is already:
options.tx_cal_controller.headerStyles = default_catheader=#557CA3,green_catheader=#53A062,orange_catheader=#E84F25,pink_catheader=#B257A2,red_catheader=#D42020,yellow_catheader=#B88F0B,grey_catheader=#73738C

options.tx_cal_controller.bodyStyles = default_catbody=#6699CC,green_catbody=#4FC464,orange_catbody=#FF6D3B,pink_catbody=#EA62D4,red_catbody=#FF5E56,yellow_catbody=#CCB21F,grey_catbody=#9292A1'
The syntax is: “css_style=color”
As a result, you’ll get a drop down box, to choose the according color.
- Calendar: Determines which calendar you want to display this category. By limiting the category to a specific calendar, you can limit users or usergroups who can view the category’s events (see Using Multiple Calendars in the Advanced section).
- Parent category: This is an optional field that is only available when the Nested Categories option is selected in the Configuration form (see Calendar Base Configuration). This option allows you to create the category as a sub-category if you choose. Simply click on the Item you want the category to be associated with.
- Allow shared user to select this category: When enabled, a corresponding check box will appear with each category in the Legend box that allows Frontend users to hide or view particular categories. Events that are not associated with any category will appear in the Frontend regardless of the Frontend Category options selected.