DEPRECATION WARNING
This documentation is not using the current rendering mechanism and is probably outdated. The extension maintainer should switch to the new system. Details on how to use the rendering mechanism can be found here.
Installation
This installation manual assume that you are installing community in TYPO3 introduction package.
The first step to install the community extension is – of course – to import it into your TYPO3 environment using the extension manager. Import and install the extension.
The community extension relies on jQuery. It is recommended to use the t3jquery extension to make jQuery available on your TYPO3 installation. See: http://typo3.org/extensions/repository/view/t3jquery/
To add FE users through website registration you should install a registration extension. Good examples are datamints_feuser (see http://typo3.org/extensions/repository/view/datamints_feuser/ ) or fluid based sf_register (see http://typo3.org/extensions/repository/view/sf_register/ )
Install a login system (e.g. felogin)
Create page tree for the community extension:
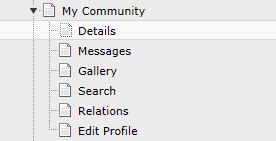
The pages "My Community”, “Details", “Messages”, “Gallery”, “Relations” and “Search” will be used in most installations. Of course you can choose to skip some of them or add other pages.
Add (include) static template from community in your template of page “My Community”
Create a "Users and groups" (storage folder). This might have been done while you have installed a registration and/or login system.
Insert the plugin as page content:
- On “My Community” page insert “Unconfirmed relations” and “SearchBox”
- On “Details” page insert “User details” and “User menu”, “list relations” and
- On “Gallery” page add “Gallery” plugin
- On “Search” page add “SearchBox” and “Search results”
- On “Messages” page add “Write message” and “Messages”
- On “Relations” page add “Relation Management” plugin
- On “Edit profile” page add “Edit profile” plugin
You need to set the following values in the TypoScript Constants:
// to "Users and groups" folder pid
plugin.tx_community.persistence.storagePid =

plugin.tx_community.adminEmail =
plugin.tx_community.serverEmail =

plugin.tx_community.settings {

    //Default login page PID, should be different from profile and action page
    loginPage =

    profilePage =

    //PID with edit profile plugin
    editProfilePage =

    //to “Messages” page pid
    messagePage =

    threadedMessagePage =

    //to “Gallery” page pid
    galleryPage =

    //to “Search” page pid
    searchPage =

    //to “Relations” page pid
    relationPage =

    wallPage =

    threadedMessagePage =
}
Important
IMPORTANT: Login page has to be different page than profile page
Flash messages
To display flash messages, the best way is to add "FlashMessagesDisplayer" plugin to your page with TypoScript, e.g. like this:
lib.content = COA
lib.content.10 < plugin.tx_community.flashMessagesDisplayer
lib.content.20 < styles.content.get
page.10.subparts.mainContent < lib.content
And configure in which part of a page this plugin should be displayed (done by js).
plugin.tx_community.settings.flashMessagesDisplayer.where = #mainContent