DEPRECATION WARNING
This documentation is not using the current rendering mechanism and is probably outdated. The extension maintainer should switch to the new system. Details on how to use the rendering mechanism can be found here.
Administrator Manual
Describes the installation and configuration of datamints_matomo.
Target group: Administrators
Installation
The extension can be installed using the extension manager.
Matomo Server
Before your website can be tracked by Matomo you have to add your website to Matomo via the administration area of your Matomo server. You will need the Matomo ID of your site to configure the tracking on your TYPO3 website. You don’t need the JavaScript tracking code that is provided by Matomo here, because the extension will build the appropriate Javascript code snippets.
It is recommended for security reasons to always use Matomo over https. Therefore make sure that your Matomo installation is reachable via SSL.
Basic configuration
Follow these three steps to get the Matomo tracking up and running on your website:
- Download the extension from the TYPO3 extension repository and enable it. The extension key is datamints_matomo.
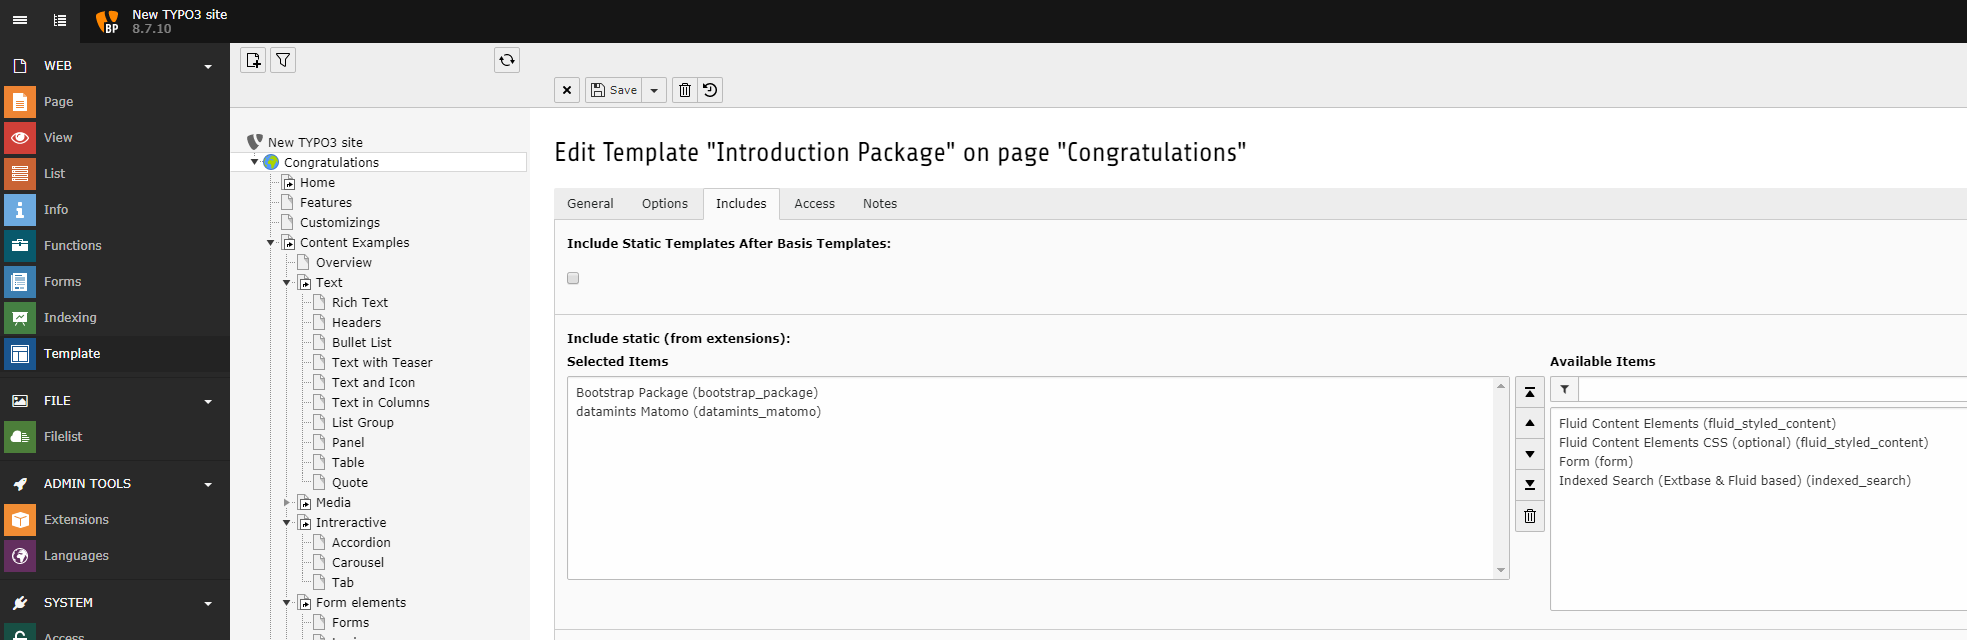
- Include the Static Template datamints Matomo into the TypoScript root template of your site.
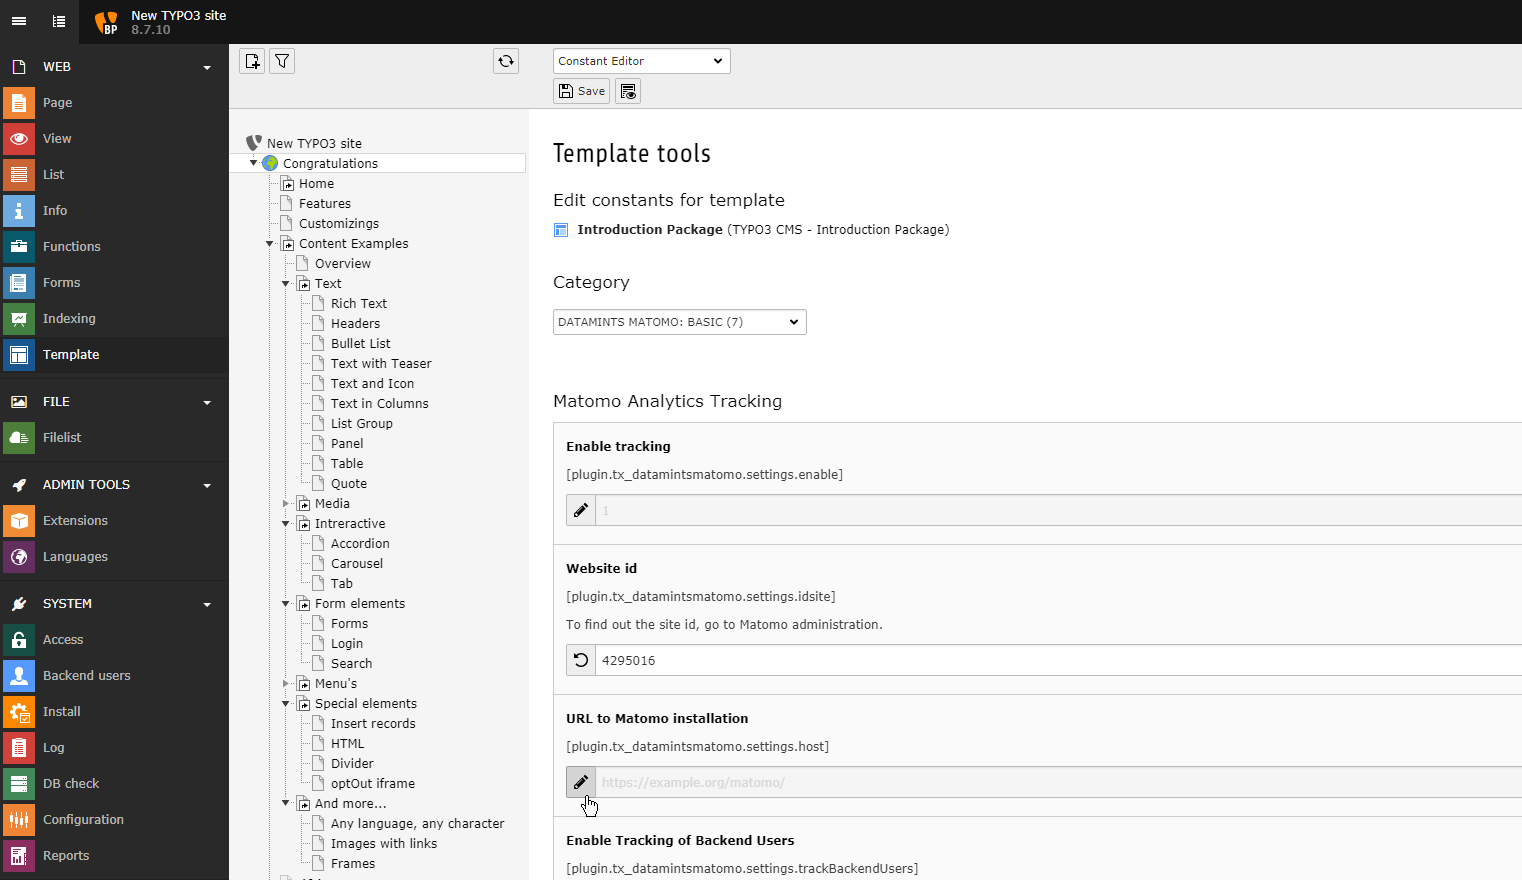
- Basic configuration for the Matomo Tracker is done using the constant editor in the category DATAMINTS MATOMO: BASIC. To Enable Matomo Analytics tracking in your website, you need to know at minimum your Site ID inside Matomo installation and the Path to Matomo installation.
The extension will now automatically add the Matomo JS Tracking code in the footer of all your pages.
Any constant is represented as a setup property as well (see Configuration).
Note: The static TypoScript template assumes that your main PAGE object is named “page”. If you named your main PAGE element differently then please don’t include the static TypoScript file. Instead just copy its content into a custom TypoScript template that is part of your setup and adapt the given code by replacing “page” with your own name for the PAGE element.
Advanced configuration
Advanced configuration ist only necessary for using datamints Webanalyse for the export of annotations. This function is not available for own Matomo installations. Please contact <service@datamints.com> for more information.
Connection settings to datamints Webanalyse can be made with constant editor in the category DATAMINTS MATOMO: ADVANCED
Scheduler Tasks
The extension provides the following Extbase CommandController Tasks to communicate with datamints Webanalyse:
Customize Matomo’s Opt-Out iframe
Css styles
The Matomo Plugin Custom Opt Out provides an easy way to change the opt-out CSS Styles.
Send iframe-height using Cross-window messaging API
With Matomo 3.x and the Matomo Plugin Custom Opt Out since version 1.0.3, you may inject Javascript to the Opt-out iframe. Using this feature (and the javascript code below) will fit the Opt-out plugin content to the size of the Opt-out iframe on page load.
/**
 * Determine the height of the iframe and use the postMessage method
 * to send the height to the datamints_matomo Extension, which contains an event listener for the message.
 */
(function sendHeight() {
    if (parent.postMessage) {
        var db = document.body;
        var dde = document.documentElement;
        var height = Math.max(db.scrollHeight, dde.scrollHeight, db.offsetHeight, dde.offsetHeight, db.clientHeight, dde.clientHeight);//$('#content-text').height();
        parent.postMessage(height, '*');
    }
})();