DEPRECATION WARNING
This documentation is not using the current rendering mechanism and is probably outdated. The extension maintainer should switch to the new system. Details on how to use the rendering mechanism can be found here.
Tutorial: Golive Template integration
| Author: | Kasper Skårhøj |
|---|---|
| Created: | 2002-11-01T00:32:00 |
| Changed by: | Kasper Skårhøj |
| Changed: | 2002-11-30T03:27:58 |
| Email: | kasper@typo3.com |
| Info 2: | |
| Info 3: | |
| Info 4: |
Tutorial: Golive Template integration
15th of December, 2000
Copyright 2000-2002, , <kasper@typo3.com>
This document is published under the Open Content License
available from http://www.opencontent.org/opl.shtml
The content of this document is related to Typo3
- a GNU/GPL CMS/Framework available from www.typo3.com
Table of Contents
Tutorial: Golive Template integration 1
Setting up an ordinary HTML template with Typo3 2
Content 7
The main menu 9
The submenu 12
Finetuning 14
The bottom menu 17
The complete code listing 19
The constants-field: 19
The setup-field: 19
Setting up an ordinary HTML template with Typo3
Welcome to this tutorial on setting up ordinary templates with Typo3. Originally Typo3 was designed to create templates with TypoScript which lets you wrap the content from the system in HTML-codes. This is not very easy to get a grip on, although TypoScript is very powerfull and still the backbone of Typo3 CMS.
This tutorial takes a simple page made with GoLive. It ships in a zip- file with this tutorial or can be downloaded from somewhere near...
- The first thing you should do is to install the standard Typo3 testsite and make that work.
- Then you copy the files and folders of this tutorial to the root of this testsite, except from "tmplpage.html" and "main.css" which you put into the "fileadmin/" folder. This file is the basic template for your website and must reside in this folder as Typo3 is supposed to access to that file.
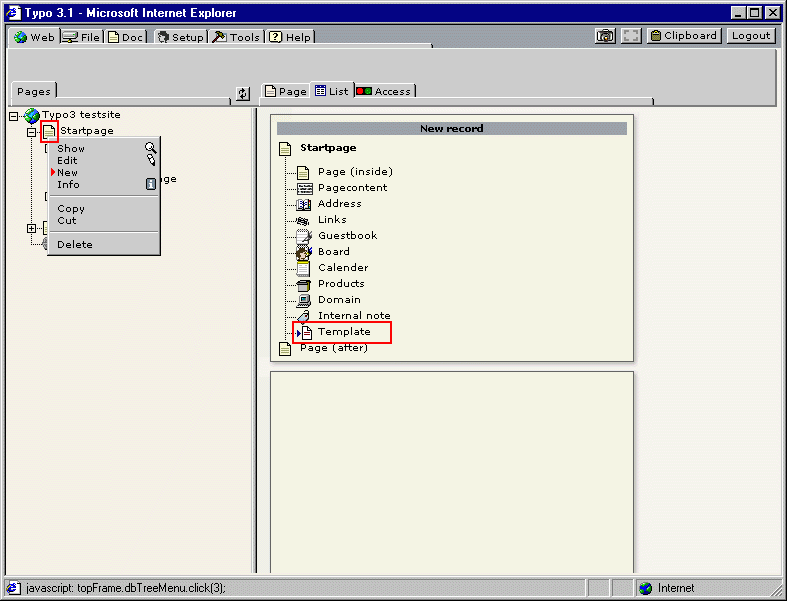
Now you should login into Typo3 of the testsite (as admin) and create a new "Template" record on the page "Startpage". It looks like this:
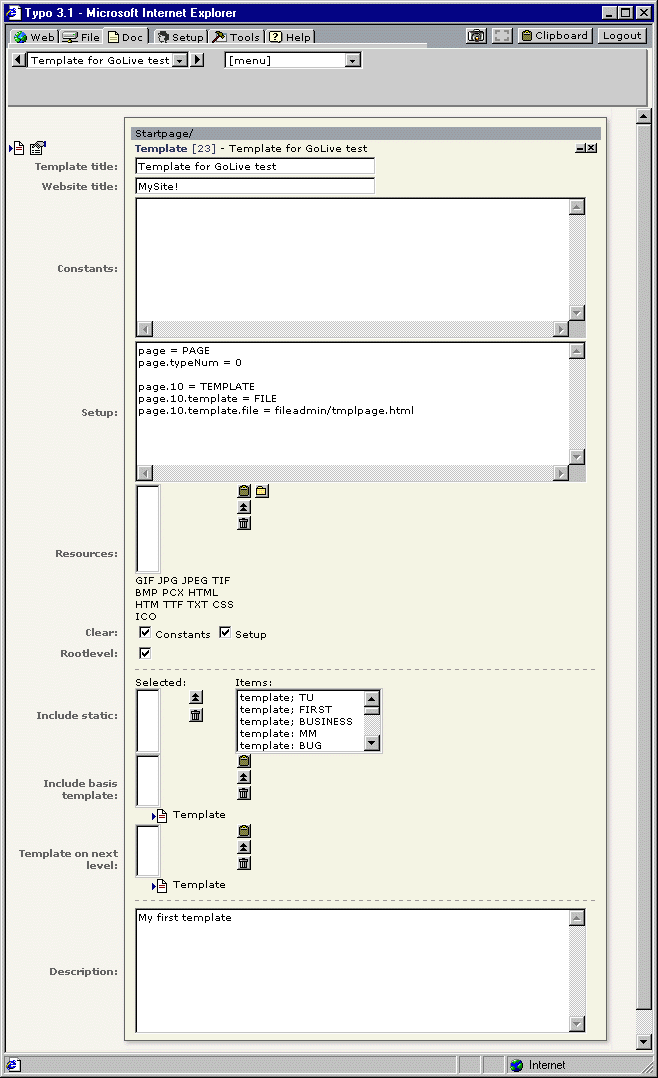
Enter the title of the template. This is not shown anywhere, just a title. You may use the description field at the bottom for documenting your template. Enter a "Website title". This is shown before the page- title in the <title>-field of every page, so choose wisely (if you enter anything... optional)
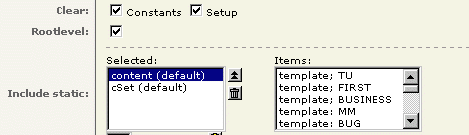
Set the "Clear"-flags (ensures the TypoScript to clear any preceeding templates in the page-tree) and the "Rootlevel"-flag (to indicate that you want to let this template initiate a new root of a website).
In the "Setup"-field, enter this:
page = PAGE
page.typeNum = 0

page.10 = TEMPLATE
page.10.template = FILE
page.10.template.file = fileadmin/tmplpage.html
This is TypoScript and it starts a new template by declaring a PAGE- object (page) and assigns the default type-number "0" to it. Then the template file is loaded as the input for a TEMPLATE content object placed in the cObject-array of the pageobject "page". Greek to you? Don't worry, you don't need to understand all details (which is why you read this tutorial, eh?)
The template should look like this now:
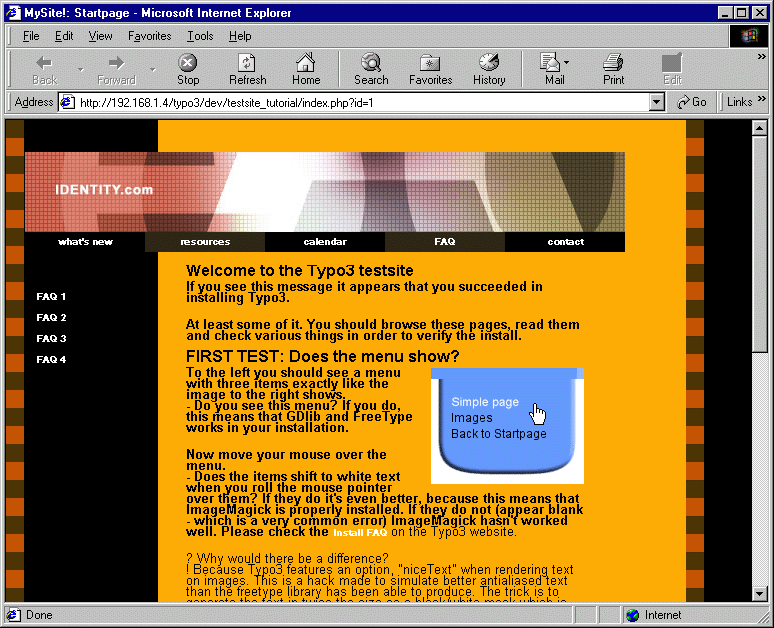
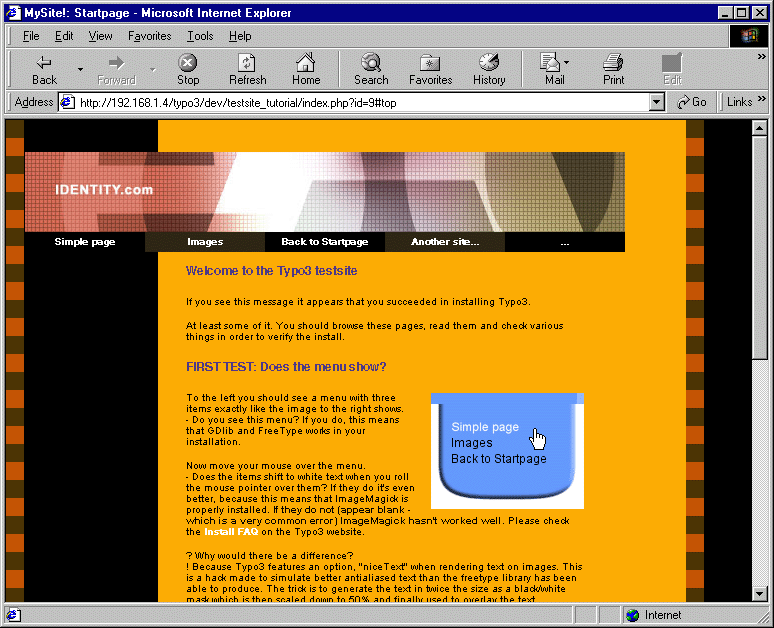
... and if you save the template and hit the frontend of the website you should see this:

Now this is exactly how the GoLive template looks, so that's perfect so far.
If you take a look at the HTML-code of the page, you'll see that the header-code of TypoScript is still inserted. There are two body tags and therefore we must conclude, that we're not finished yet.
I would definitely recommend that you keep the header code of Typo (although you may disable the header-output from TypoScript). I've already prepared the Golive template for this. Take a look at the position right after the body tag of the GoLive template. I've inserted a HTML-comment!:
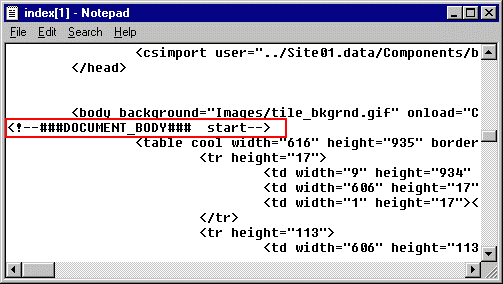
This is called a "subpart".
Modify the template-record inside of Typo3 to this :
page = PAGE
page.typeNum = 0

page.10 = TEMPLATE
page.10 {
  template = FILE
  template.file = fileadmin/tmplpage.html
  workOnSubpart = DOCUMENT_BODY
}
The new thing here is the addition of DOCUMENT_BODY. The rest is just a smarter way to write the TypoScript code...
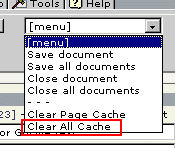
Save the template and remember to "Clear all cache" (because you updated a template, you always need to do this!)
Reload the page and you'll see this:
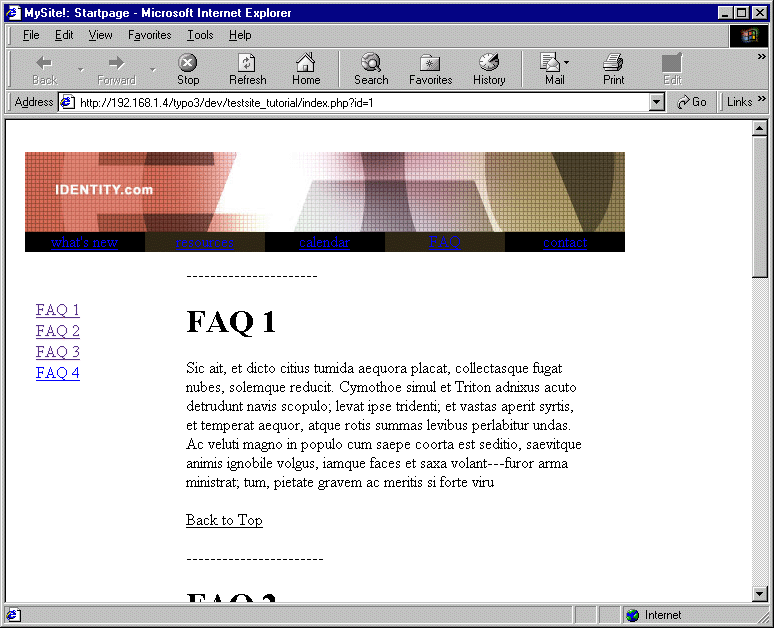
Looks awful, you think. Me too, but there's a good explanation: By the addition of
workOnSubpart = DOCUMENT_BODY
... only the part of the template between comments is inserted on the page. This leaves the header code with eg the stylesheet definition behind.
Looking at the header code of the template-file from GoLive we find that these parts are the only ones of interest to us:
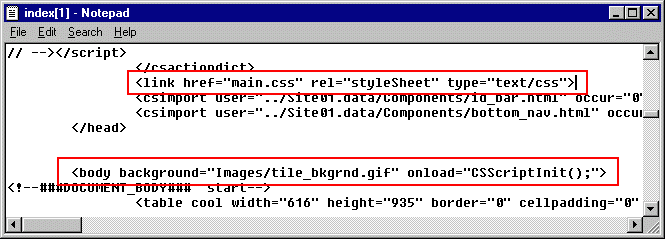
We compensate by adding this TypoScript to the template-record in Typo3:
page.stylesheet = fileadmin/main.css
page.bodyTag = <body background="Images/tile_bkgrnd.gif">
Save, clear all cache, view the page.
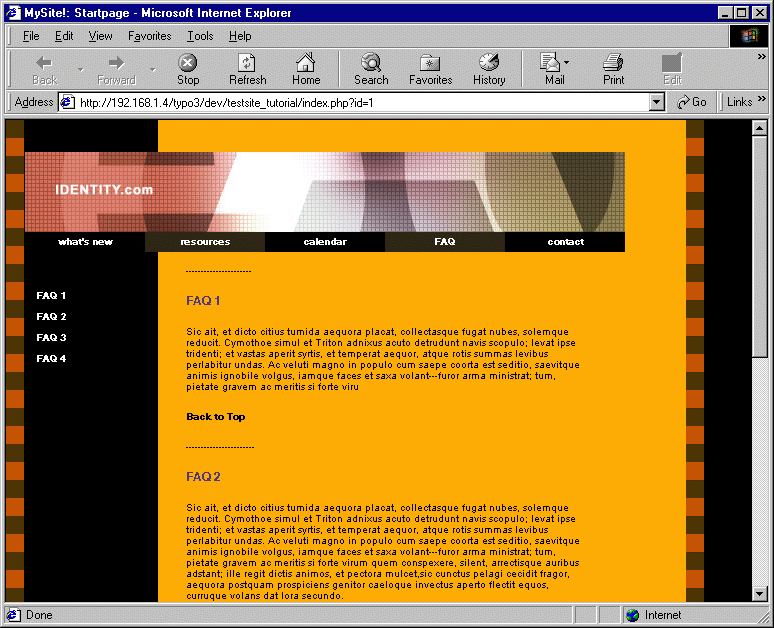
Much better.
Content
Of course we want our own content on the page, wich we entered in the Typo3 backend. For this purpose, we're now going to use the comments ###CONTENT### I have added to the template and substitute those subparts with the content from Typo3!
The formatting of the content is too complex to do from scratch so here I recommend that you learn how to manipulate the constants regarding content-rendering.
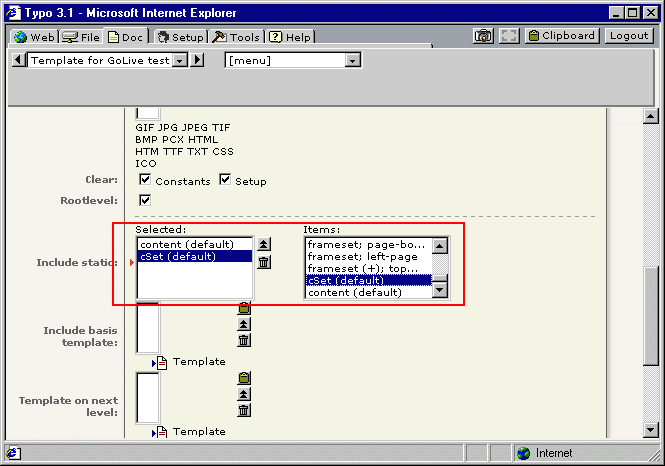
The content is rendered with the toplevel object "tt_content" of the TypoScript template. This basically means that whatever you do, you'll get nowhere if you don't include the static template "content (default)". You should also include "cSet" for an easy way to configure the most basic parameters of the template.
Add this to the TypoScript template:
page.10.subparts.CONTENT < styles.content.get
Wow!
The main menu
Now you want to create a menu based on the pages in Typo3. Here you'll also find that I have inserted comments in the template-file from GoLive. This time my thought has been to substitute the five menu- items under the image with links to pages from Typo3. But I also have to make sure that there will be only 5 items!
The HTML code looks like this:
<tr height="20">
<!--###MENU###  start-->
        <td width="120" height="20" bgcolor="black" nowrap>
                <center>
                        <a href="whatsnew.html">what's new</a></center>
        </td>
        <td width="120" height="20" bgcolor="#2f2714" nowrap>
                <center>
                        <a href="resources.html">resources</a></center>
        </td>
        <td width="120" height="20" bgcolor="black" nowrap>
                <center>
                        <a href="calendar.html">calendar</a></center>
        </td>
        <td width="120" height="20" bgcolor="#2f2714" nowrap>
                <center>
                        <a href="faq.html">FAQ</a></center>
        </td>
        <td width="120" height="20" bgcolor="black" nowrap>
                <center>
                        <a href="contact.html">contact</a></center>
        </td>
<!--###MENU###  stop-->
</tr>
As you see every menu-element is in a table-cell. So basically we need to "wrap" every item in a table-cell when we create the menu. Now, modify your template-record in Typo3 like this:
page = PAGE
page.typeNum = 0
page.stylesheet = fileadmin/main.css
page.bodyTag = <body background="Images/tile_bkgrnd.gif">

page.10 = TEMPLATE
page.10 {
  template = FILE
  template.file = fileadmin/tmplpage.html
  workOnSubpart = DOCUMENT_BODY
  subparts.CONTENT < styles.content.get

  subparts.MENU = HMENU
  subparts.MENU.minItems = 5
  subparts.MENU.maxItems = 5
  subparts.MENU.1 = TMENU
  subparts.MENU.1.NO {
    allWrap = <td>|</td>
  }
}
This inserts a menu of pages from the first level with forced 5 elements wrapped with table-cell tags. Now, it looks like this:
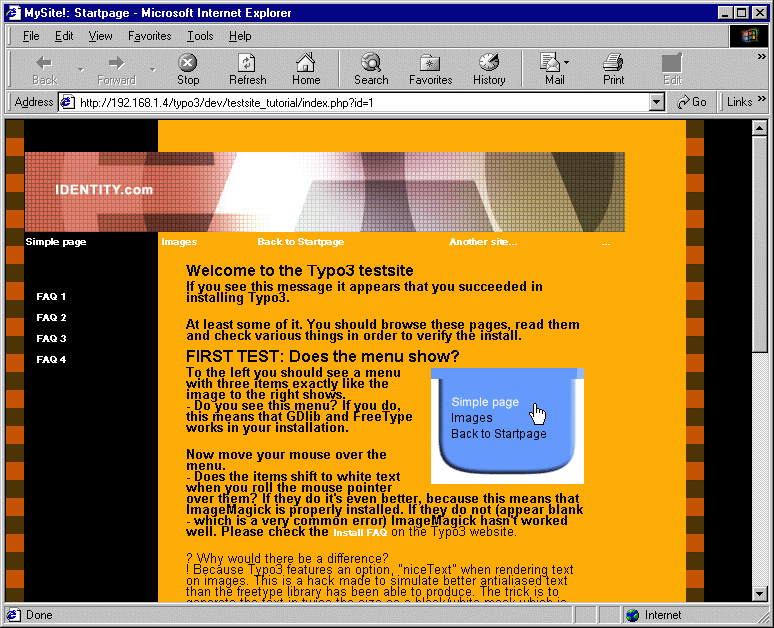
Looking at the original HTML-code we can see, that the elements are wrapped in a more sofisticated code. So we might insert this instead:
<td width="120" height="20" bgcolor="black" nowrap> | </td>
But we also see that the background color of the items shift! This can also be done by Typo3! This is called "optionSplit". Unfortunately this is very complicated, but it works and lets us define how the wrap of eg. the "first", the two "last" and the items in the middle of a menu should be wrapped.
The basic form of optionSplit we need is to let the wrap alter all the time between two choices. This is done by this:
|*| <td width="120" height="20" bgcolor="black" nowrap> | </td> || <td width="120" height="20" bgcolor="#2f2714" nowrap> | </td> |*|
I also entered the <center>-tags for all elements, but here I used another property of the TMENUITEM-object (which is the one used here. See the TypoScript reference).
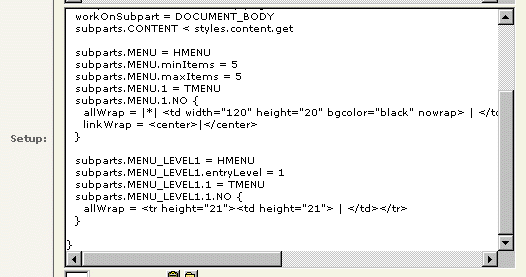
So modify the template-record like this:
subparts.MENU.1.NO {
  allWrap = |*| <td width="120" height="20" bgcolor="black" nowrap> | </td> || <td width="120" height="20" bgcolor="#2f2714" nowrap> | </td> |*|
  linkWrap = <center>|</center>
}
 (NO LINEBREAKS!!)
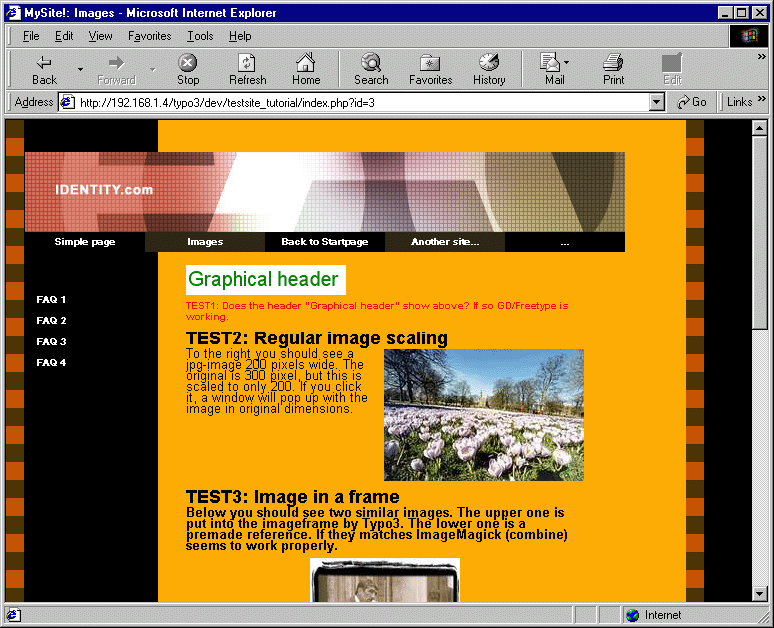
This is perfect! (But notice that the last menuitem was not found, therefore "..." is shown)
The submenu
The next thing we need is to make the little menu to the left on the page work as our submenu. I also prepared the GoLive template for this by adding comments:
<table border="0" cellpadding="0" cellspacing="0" width="150">
<!--###MENU_LEVEL1###  start-->
        <tr height="21">
                <td height="21"><a href="#Anchor_faq2">FAQ 1</a></td>
        </tr>
        <tr height="21">
                <td height="21"><a href="#Anchor_faq3">FAQ 2</a></td>
        </tr>
        <tr height="21">
                <td height="21"><a href="#Anchor_faq4">FAQ 3</a></td>
        </tr>
        <tr height="21">
                <td height="21"><a href="whatsnew.html">FAQ 4</a></td>
        </tr>
<!--###MENU_LEVEL1###  stop-->
</table>
This is much easier than the main menu. Just one thing bothers us: How will Typo3 select pages from the second level of pages on the site? This is done by the .entryLevel property of the HMENU object.
Just insert this in you template right after the previous menu:
subparts.MENU_LEVEL1 = HMENU
subparts.MENU_LEVEL1.entryLevel = 1
subparts.MENU_LEVEL1.1 = TMENU
subparts.MENU_LEVEL1.1.NO {
  allWrap = <tr height="21"><td height="21"> | </td></tr>
}
This is how the template-record looks now:
Click on the link "Simple page" in the frontend and you'll see this:
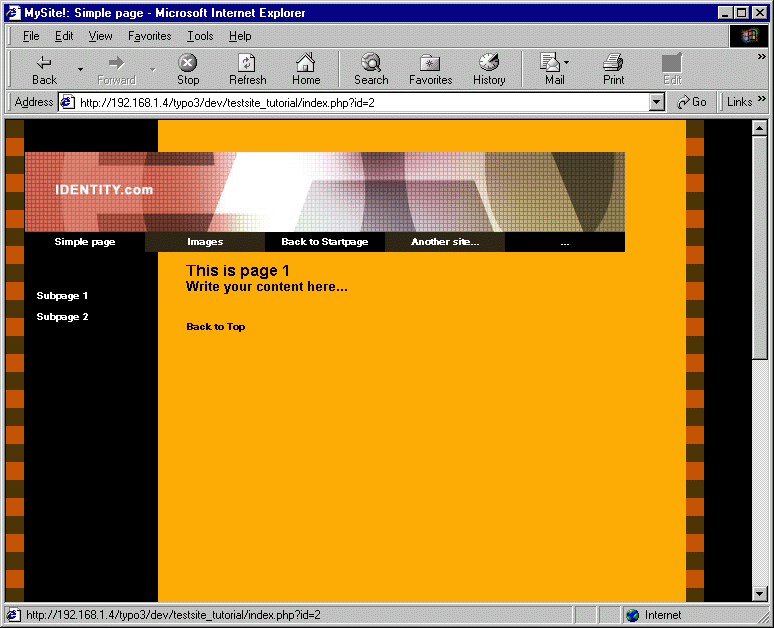
Finetuning
Using the static template "cSet" you have access to some constants that lets you define stuff like colors and fonts. You'll also have to adjust a few things as you're using a stylesheet for the layout.
Insert this in the Constants -field:
content {
  wrap.header1 = <h1> | </h1>
  wrap.bodytext = <p class="contenttext">|</p>
  headerSpace =
  space =
}
styles.content.textStyle {
  face =
  size=
  color =
}
cSet {
  pageColor = #FFA801
  tableCellColor = #CC6600
  color = black
  color1 = #666633
  color2 = #333300
  fontFace =  Arial
  fontFace.text =  Arial
}
# Image maximum widths, pixels
styles.content.imgtext.maxW = 460
# Targets, empty for no-frames websites
PAGE_TARGET =
content.pageFrameObj =
Insert this in the Setup -field:
lib.stdheader.10.stdWrap.wrap =
tt_content.stdWrap.dataWrap = <A name="{field:uid}"></a>
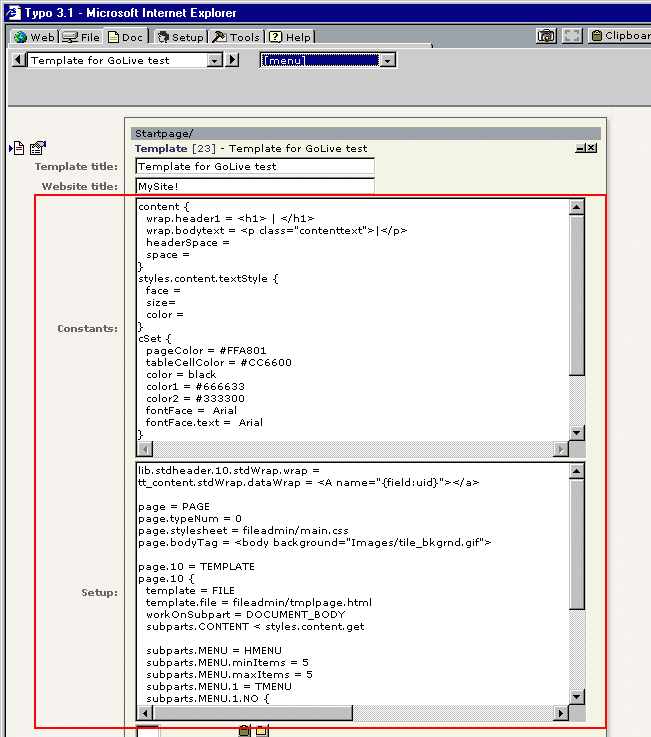 Now the template looks like this:
 Save the template, clear all cache (as usual...) and reload
the frontend page.
Save the template, clear all cache (as usual...) and reload
the frontend page.
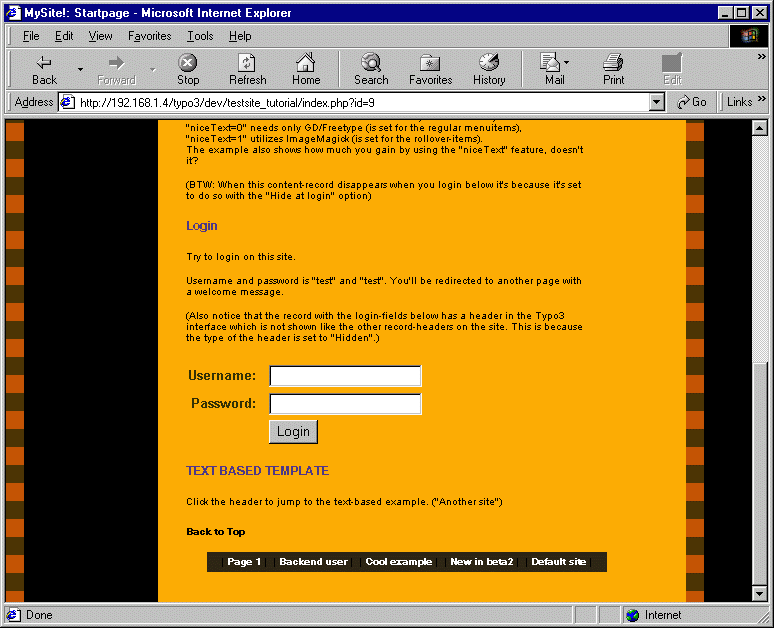
The bottom menu
Oups. I just forgot the bottom menu. This menu appears on all pages and links to pages which are kind of "outside" the ordinary tree- structure of the site.

But don't worry, we can create a menu for those also. Looking in the GoLive template file, you'll see the HTML-comment ###BOTTOM_MENU### which should be substituted. The only thing left is to figure out which pages should appear here. And to do this, we need to decide on a page, which should "hold" these pages. Looking in the tree structure, we can take the pages from the "Another site in ..." in the testsite. The only thing you need to do is to find the uid-number of this page, which is shown, if you hold your mousepointer still over the page- icon. It says "id=10".

Now add this code to the other menus:
subparts.BOTTOM_MENU = HMENU
subparts.BOTTOM_MENU.special = directory
subparts.BOTTOM_MENU.special.value = 10
subparts.BOTTOM_MENU.1 = TMENU
subparts.BOTTOM_MENU.1.wrap = <center> | </center>
subparts.BOTTOM_MENU.1.NO {
before = |
after = |*||*| |
}
That's it!
The complete code listing
The constants-field:
content {
  wrap.header1 = <h1> | </h1>
  wrap.bodytext = <p class="contenttext">|</p>
  headerSpace =
  space =
}
styles.content.textStyle {
  face =
  size=
  color =
}
cSet {
  pageColor = #FFA801
  tableCellColor = #CC6600
  color = black
  color1 = #666633
  color2 = #333300
  fontFace =  Arial
  fontFace.text =  Arial
}
# Image maximum widths, pixels
styles.content.imgtext.maxW = 460
# Targets, empty for no-frames websites
PAGE_TARGET =
content.pageFrameObj =
The setup-field:
lib.stdheader.10.stdWrap.wrap =
tt_content.stdWrap.dataWrap = <A name="{field:uid}"></a>
page = PAGE
page.typeNum = 0
page.stylesheet = fileadmin/main.css
page.bodyTag = <body background="Images/tile_bkgrnd.gif">
page.10 = TEMPLATE
page.10 {
template = FILE
template.file = fileadmin/tmplpage.html
workOnSubpart = DOCUMENT_BODY
subparts.CONTENT < styles.content.get
subparts.MENU = HMENU
subparts.MENU.minItems = 5
subparts.MENU.maxItems = 5
subparts.MENU.1 = TMENU
subparts.MENU.1.NO {
allWrap = |*| <td width="120" height="20" bgcolor="black" nowrap> | </td> || <td width="120" height="20" bgcolor="#2f2714" nowrap> | </td> |*|
linkWrap = <center>|</center>
}
subparts.MENU_LEVEL1 = HMENU
subparts.MENU_LEVEL1.entryLevel = 1
subparts.MENU_LEVEL1.1 = TMENU
subparts.MENU_LEVEL1.1.NO {
allWrap = <tr height="21"><td height="21"> | </td></tr>
}
subparts.BOTTOM_MENU = HMENU
subparts.BOTTOM_MENU.special = directory
subparts.BOTTOM_MENU.special.value = 10
subparts.BOTTOM_MENU.1 = TMENU
subparts.BOTTOM_MENU.1.wrap = <center> | </center>
subparts.BOTTOM_MENU.1.NO {
before = |
after = |*||*| |
}
}
The flags, that should be set and the included static templates:
The list of records for the page "Startpage". Notice the new template, you've made!
 Tutorial: Golive Template integration - 20