DEPRECATION WARNING
This documentation is not using the current rendering mechanism and is probably outdated. The extension maintainer should switch to the new system. Details on how to use the rendering mechanism can be found here.
EXT: event
| Author: | Kasper Skårhøj |
|---|---|
| Created: | 2002-11-01T00:32:00 |
| Changed: | 2011-11-13T15:48:39 |
| Author: | Joachim Ruhs |
| Email: | postmaster@joachim-ruhs.de |
| Info 3: | |
| Info 4: |
EXT: event
Extension Key: event
Copyright 2007, 2008 Joachim Ruhs, <postmaster@joachim-ruhs.de>
This document is published under the Open Content License
available from http://www.opencontent.org/opl.shtml
The content of this document is related to TYPO3
- a GNU/GPL CMS/Framework available from www.typo3.com
Table of Contents
EXT: event 1
Introduction 1
What does it do? 1
Sponsoring 1
Sponsorship 1
Screenshots 2
Installation 6
Setup a form 7
Configuration 9
Reference 9
FAQ 9
Appendix 9
Known problems 9
To-Do 9
Changelog 10
Introduction
What does it do?
Event is a frontend plugin to display a booking form for the customer to book an event. The customer is sent an email with an confirmation link. After confirming, the administrator is informed of the booking via email. Because different events have different attributes, the form can be setup with the attribute fields in the TYPO3 backend. In the additional fields you can set the prices for the attributes. In the admin view, the administrator can download a csv-file of the bookings or he can view the actual bookings of an event.
What's new
New fields are added to the tables, tx_event_event.maxparticipants, tx_event_event.timeofstart. The event list is now template based.
I have inserted the IP-address of the customer to the admin views and the csv-exports. There was also done a bugfix, see changelog of this manual.
The extension is in production at www.neulandwalk.de of the Sportpark Leverkusen.
Sponsoring
For further development of the extension, sponsoring is welcome – please contact the author.
Sponsorship
Thomas Heyse, heysemedia , http://www.heyse.de
Mag Helmut Prochart , http://www.sitedefinition.at
Screenshots
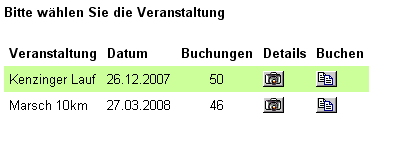 The event selection screen
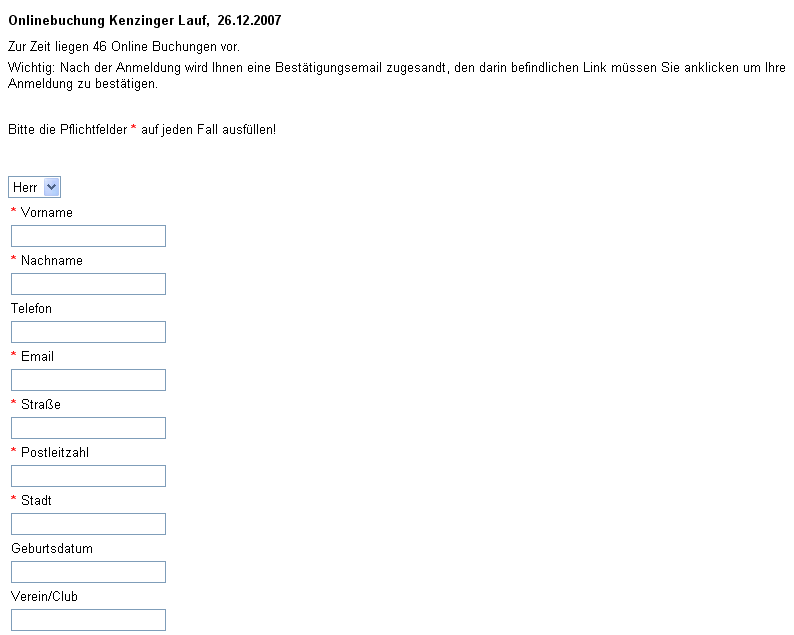
The input form screen
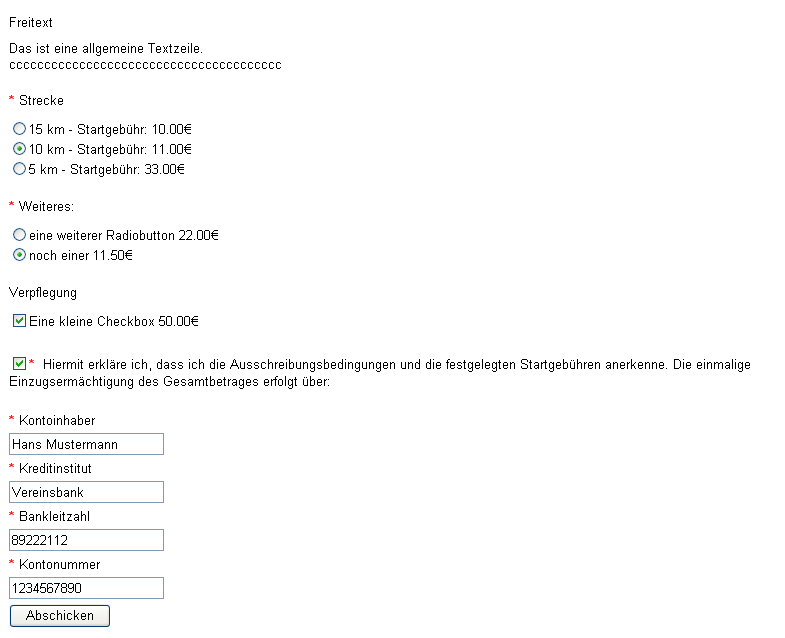
Second part of the input form

Confirmation mail which is sent to the customer with confirmation link
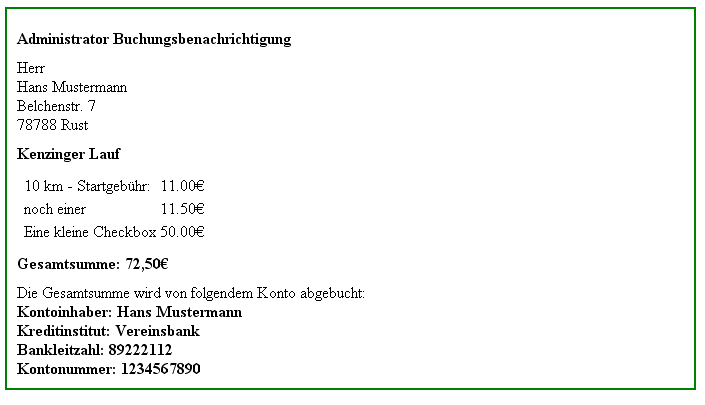
Administrator email which is sent to the administrator after the customer confirms the confirmation link

Admin page where details of the customers of an event can be shown or a csv export can be started
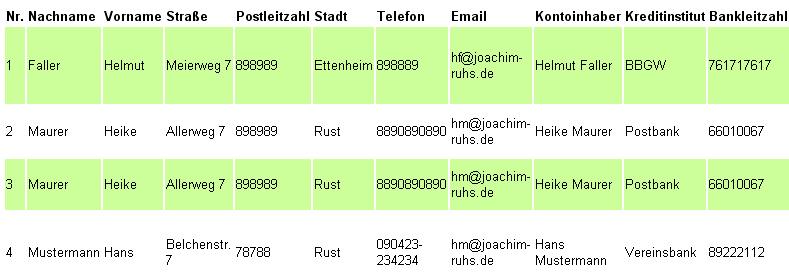
Admin details
Installation
Just install the extension like other extensions from the typo3 extension repository TER.
Create a page where you want to use the plugin.
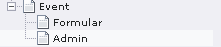
Put a new content element of the plugin event to this page.
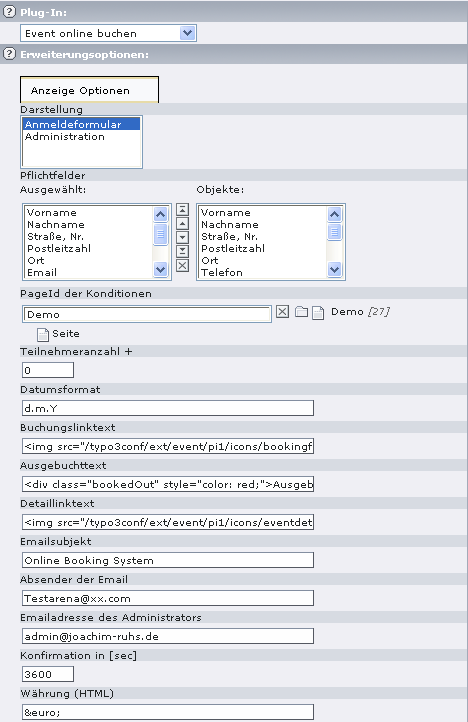
In the flexform setup make the necessary changes for your setup. Choose also a startingpoint where the datarecords will be located.
Because the extension sends emails, set up correct email addresses for the administrator.
Teilnehmerzahl + - this number is added to the count of bookers for advertising purposes only.
Konfirmation in [sec] – that's the time the confirmation code is valid.
Create another page where the administrator page will be located
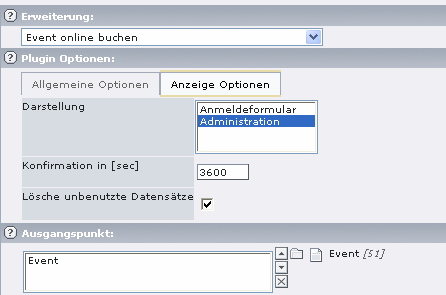
Make the necessary changes in the flexform setup, especially set the correct starting point for the plugin.
If all is done, you we set up an form with additional fields.
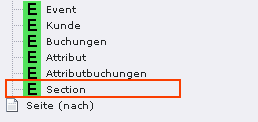
Additional fields in the form are located in sections. Therefore you need to set up one or more sections first. For this, go to the TYPO3 list module, select the startingpoint page and insert an event section.
Now you can set up additional fields in this sections (radio buttons, checkboxes and freetext). Radiobuttons are always required fields in the form. Checkboxes are optional.
When all is done, you can test your form.
Setup a form
In this chapter I will describe how to set up a form with two radiobuttons and 1 checkbox.
Go to the TYPO3 list module and select the page where the datarecords will be stored ( that is the startingpoint of the extension).
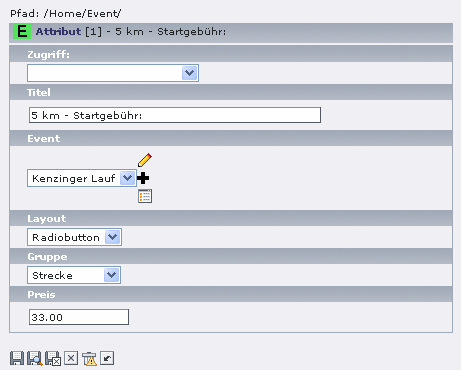
Create a new datarecord event-section. Name him “Strecke”.
Now you can create an event the same way (in our example “Kenzinger Lauf”).
 We create now some attributes for this event and this
section. Go to the TYPO3 list module and create a new data record
Attribute.
We create now some attributes for this event and this
section. Go to the TYPO3 list module and create a new data record
Attribute.
Give him a title, title will be shown in the form. Select the layout type and the event and also the section (“Gruppe”) where the radiobutton have to be located.
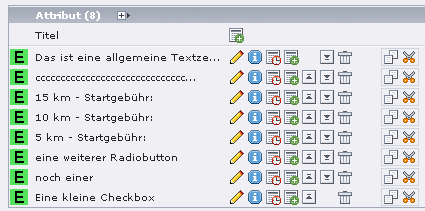
The same way create a second radiobutton and assign him to the same section.
Create a new section for the checkbox.
Create the checkbox in same manner.
In the list view of TYPO3 you can change the sorting of the attributes for your desires.
Now view the form and check if everything is ok.
Configuration
The configuration of the plugin is done in the flexform of the extension – most of them are self explaining. All flexform values can be overwritten by Typoscript code.
Reference
Options in the template SETUP:
If this options are set in the template setup, they overrule the flexform-settings.
plugin.tx_event_pi1 :
adminEmail
Property
adminEmail
Data type
string
Description
Email address where the admin emails are sent to
Default
bookingLink
Property
bookingLink
Data type
string
Description
The text of the booking link
Default
codeValidity
Property
codeValidity
Data type
int
Description
The time in seconds of the validity of the confimation link
Default
3600
conditionsPid
Property
conditionsPid
Data type
int
Description
The page-id of the form conditions
Default
counterStart
Property
counterStart
Data type
int
Description
This is the number added to the real bookings of an event
Default
0
currency
Property
currency
Data type
string
Description
Html-code of the used currency
Default
€
dateFormat
Property
dateFormat
Data type
string
Description
The formatstring for the date
Default
d.m.Y
debug
Property
debug
Data type
int
Description
Enable debug mode especially for the use with cc_debug
Default
0
detailLink
Property
detailLink
Data type
string
Description
The text of the detail link
Default
displayMode
Property
displayMode
Data type
string
Description
The display mode of the plugin. Values are adminView and formView
Default
emailSender
Property
emailSender
Data type
string
Description
The address of the sender
Default
emailSubject
Property
emailSubject
Data type
string
Description
The email subject
Default
noBookingLink
Property
noBookingLink
Data type
string
Description
The text if event is sold out
Default
removeExported
Property
removeExported
Data type
int
Description
If set, removes exported datarecords from the database
Default
0
removeUnused
Property
removeUnused
Data type
int
Description
If set, removes unused datarecords after the confimation time is exceeded
Default
1
requiredField
Property
requiredField
Data type
string
Description
A comma separated list of the required fields in the form
Default
Example: plugin.tx_event_pi1.codeValidity = 300
FAQ
In the admin view I can't see any customer or events.
Make sure you have choosen the same starting point as in the form is set.
Appendix
Known problems
- none
- if you catch bugs, please report to postmaster@joachim-ruhs.de
To-Do
Better documentation
Changelog
- 2009-09-05, version 0.30, the extension works now with simulate static documents too. New fields added to the tables.
- 2008-02-18, version 0.2.1, bugfix, if there were more than one attributes with the same price in a radio button group, only the first attribute was taken into the database. Now the attributes are selected via uid.
- 2008-01-30, version 0.1.0, first public version
- 2007-12-25, version 0.0.5,
 EXT: event - 11