DEPRECATION WARNING
This documentation is not using the current rendering mechanism and is probably outdated. The extension maintainer should switch to the new system. Details on how to use the rendering mechanism can be found here.
Administrator Manual
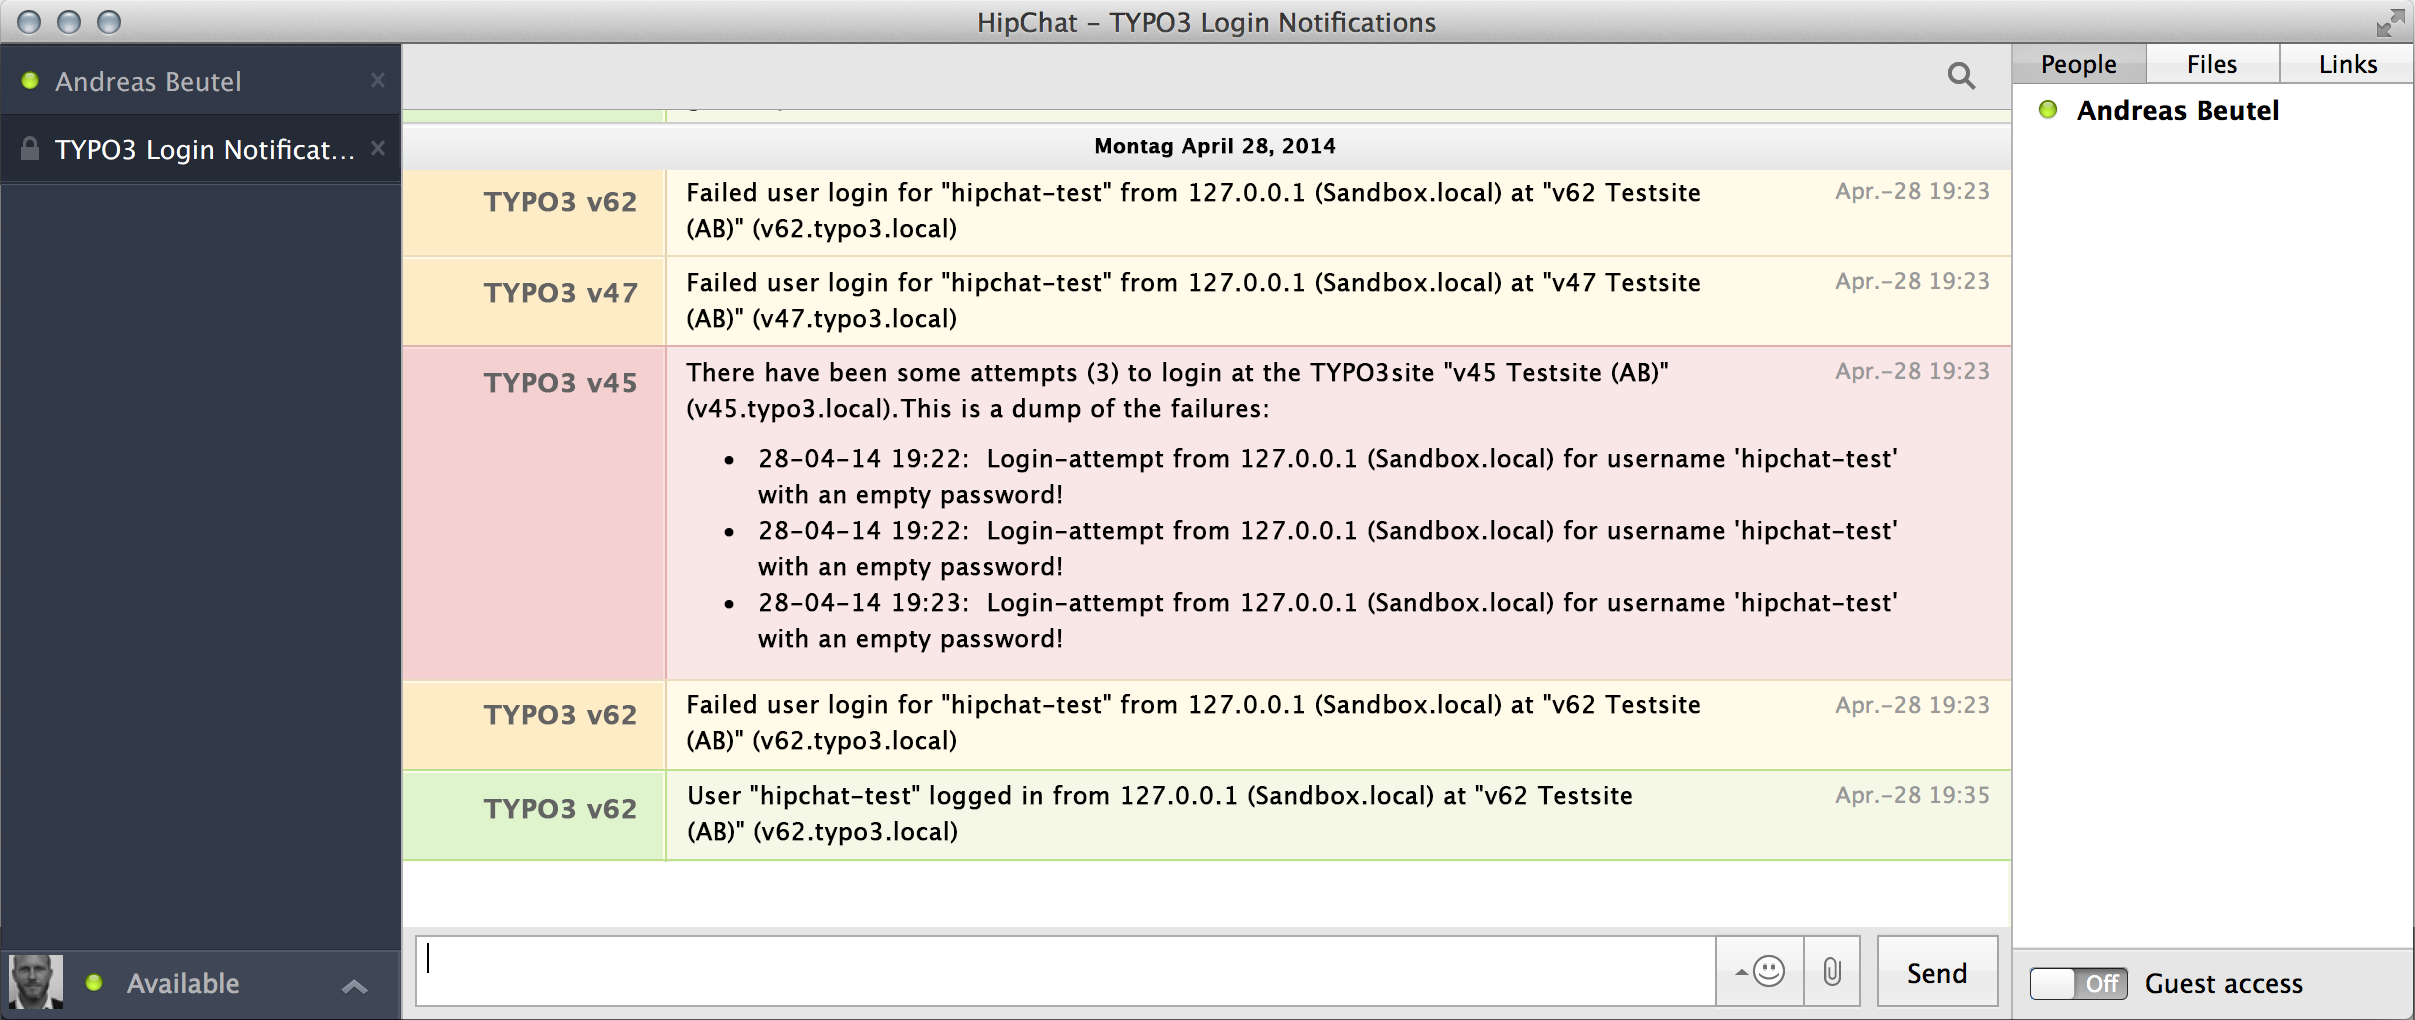
The HipChat extension provides methods to access the HipChat Rest API. Configuration is straightforward currently - only API Token, Room Name and »From« are required after installation.
Installation
Create a HipChat API Token for TYPO3 HipChat on the HipChat website https://www.hipchat.com/ if not already done. A notification token is sufficient in the current version of this extension.
Create Token
To create a token, sign in in on the HipChat site, navigate to »Group Admin« > API and create a token.
Tip
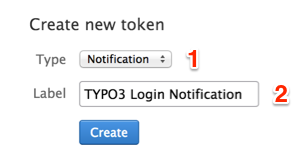
A notification (1) token is sufficient in the current version of this extension.
Use any token label (2) you like.
Manage Tokens
If the token has been created successfully, you should see it in the list view of the token overview for HipChat.
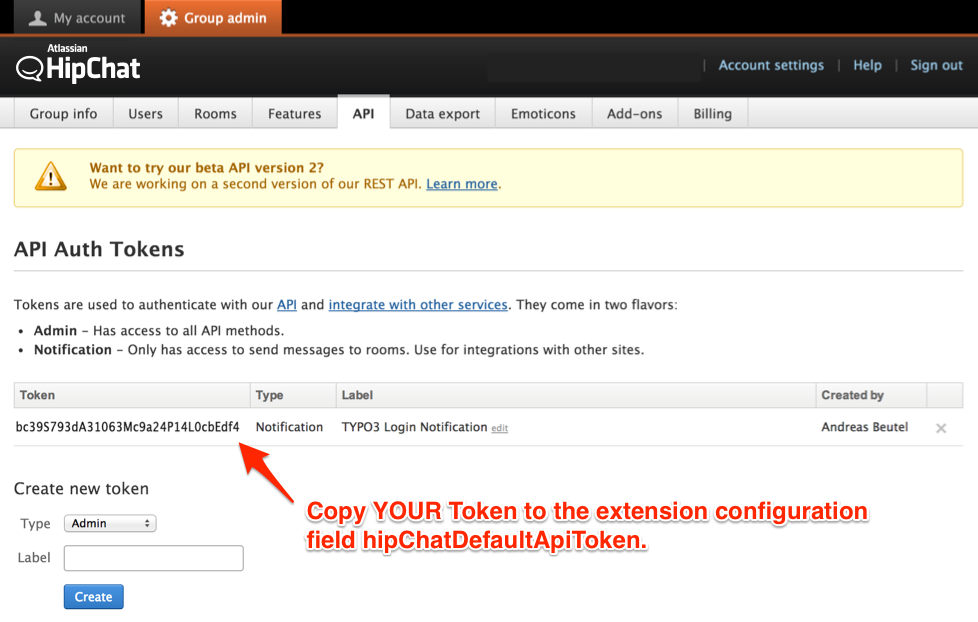
HipChat Token overview
Install and configure HipChat extension
Now install the extension and fill in the token value (1) and the room name (2). The room must exist and the name must be exactly the same as in HipChat. Choose a »from« name. Log out and in to test notifications.
Note: The hipChatCurlVerifySsl setting is for TYPO3 < 6.2 only. In TYPO3 >= 6.2 the Install Tool setting will be taken.
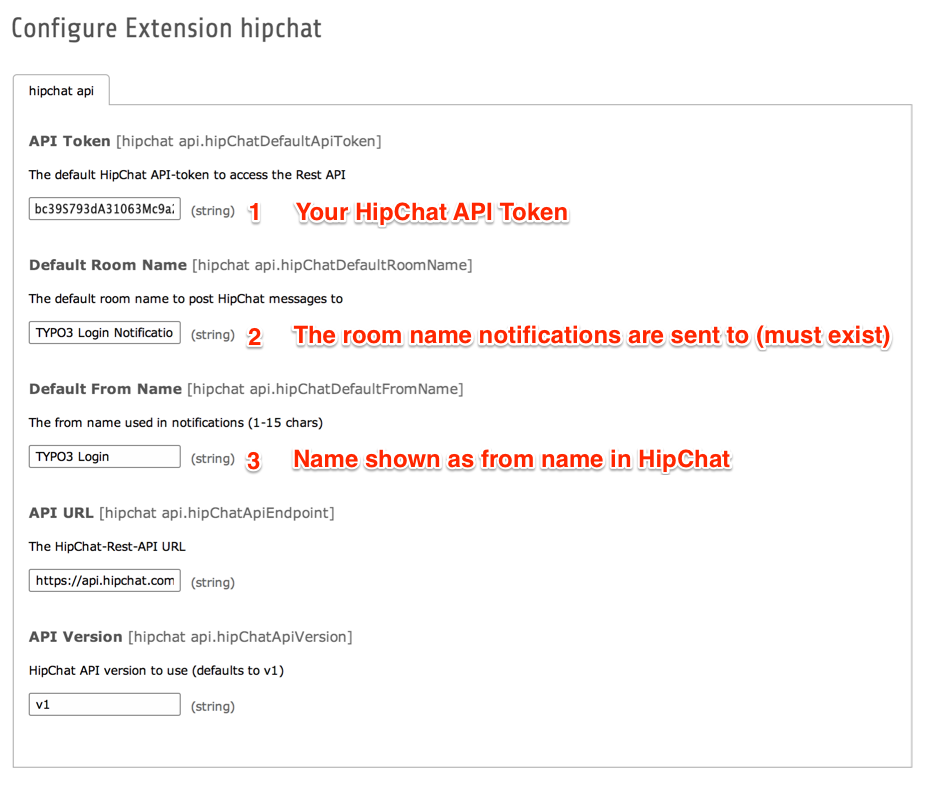
Extension Options for HipChat - fill with your values
In the Notification tab you may choose the desired way of notification tranmission. Choose email (disables HipChat notifications), HipChat and email notifications (default), or HipChat only to disable email notification.
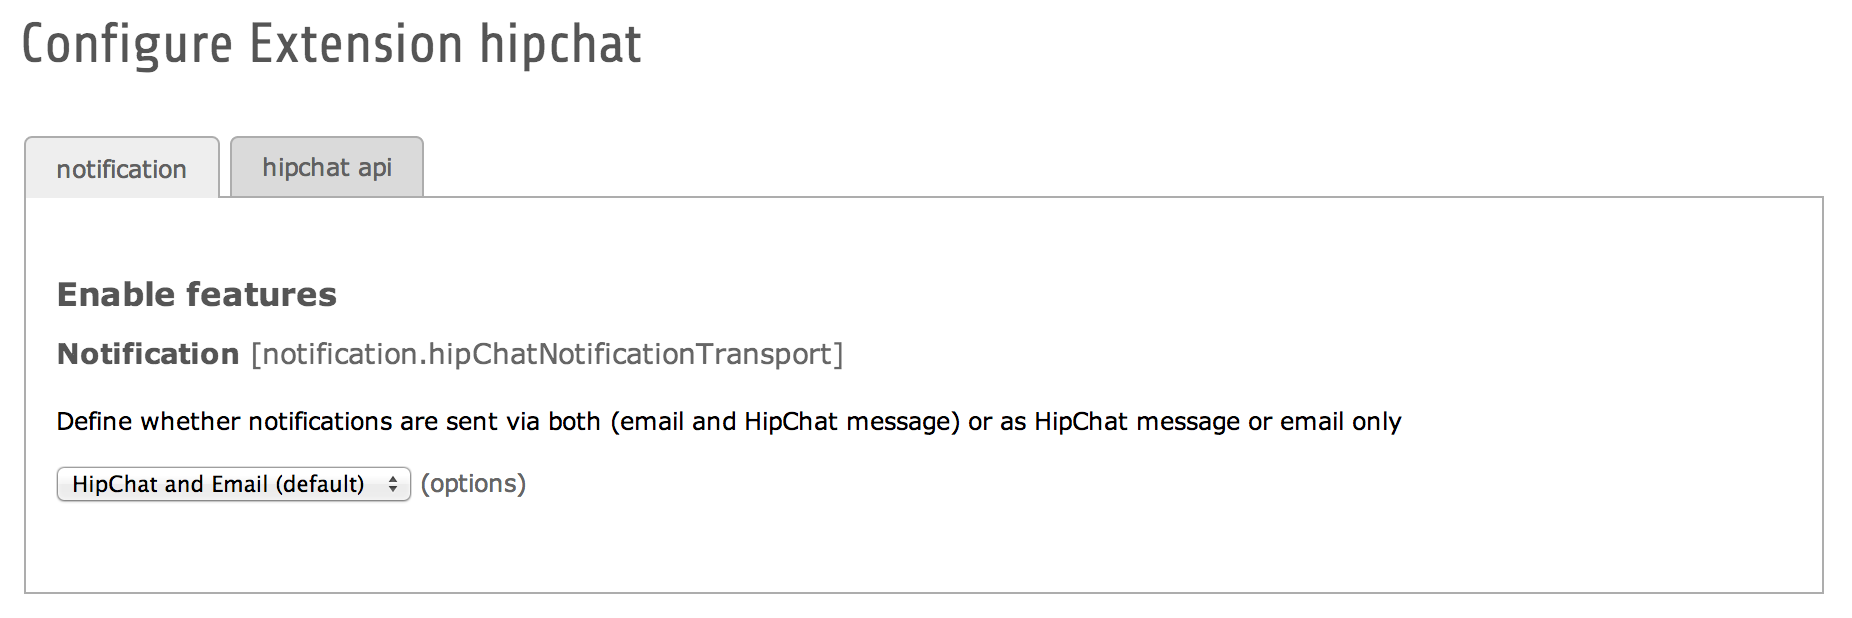
Extension Notification Options for HipChat - select your desired way of notification