DEPRECATION WARNING
This documentation is not using the current rendering mechanism and is probably outdated. The extension maintainer should switch to the new system. Details on how to use the rendering mechanism can be found here.
Create the list view
- Create or choose a front-end page which will contain the list of your realty objects. Set this page to “don’t cache”.
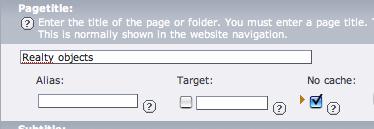 Figure 12: Create or choose a front-end page which will
contain the list of your realty objects
Figure 12: Create or choose a front-end page which will
contain the list of your realty objects
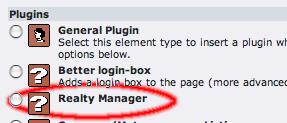 Figure 13: create the a content element: Plugins > Realty
Manager.
Figure 13: create the a content element: Plugins > Realty
Manager.On the list view page, create the a content element: Plugins > Realty Manager.
For “What should be displayed”, select “Realty list”.
As a starting point, select the system folder for realty objects. (This can also be done using TS setup instead of in the flexforms.) If you would like to have the contents of more than one folder listed, you can either select all those folders or a parent folder and then set the recursion depth.
 Figure 14: select the system folder for realty objects
Select the page for the single view. (This can also be done using TS setup instead of in the flexforms.)
Select the page for the favorites view.
Enable Google Maps in the Google Maps tab if you like. (See “Use GoogleMaps” section for further details.)
Save and close.
If needed, you can create more lists view pages, i.e. one for houses, one for apartments etc. They can either have separate single view pages (so that the root line and the navigation markers still show the corresponding list view page) or you can use the same single view page for all list views.
It is recommended to create separate list view pages for realties to rent and to buy.