DEPRECATION WARNING
This documentation is not using the current rendering mechanism and is probably outdated. The extension maintainer should switch to the new system. Details on how to use the rendering mechanism can be found here.
Users manual
New in version 1.1.0
Easy integration of jQuery lib. Just click on the extensions name in the extensionmanager and check the checkbox for jQuery integration from cdn in the footerLibs.
Basic instructions
Simply easy to use. No configuration is needed.
Step 1: Just download and install the extension after upload or install it directly from the extensionmanager.
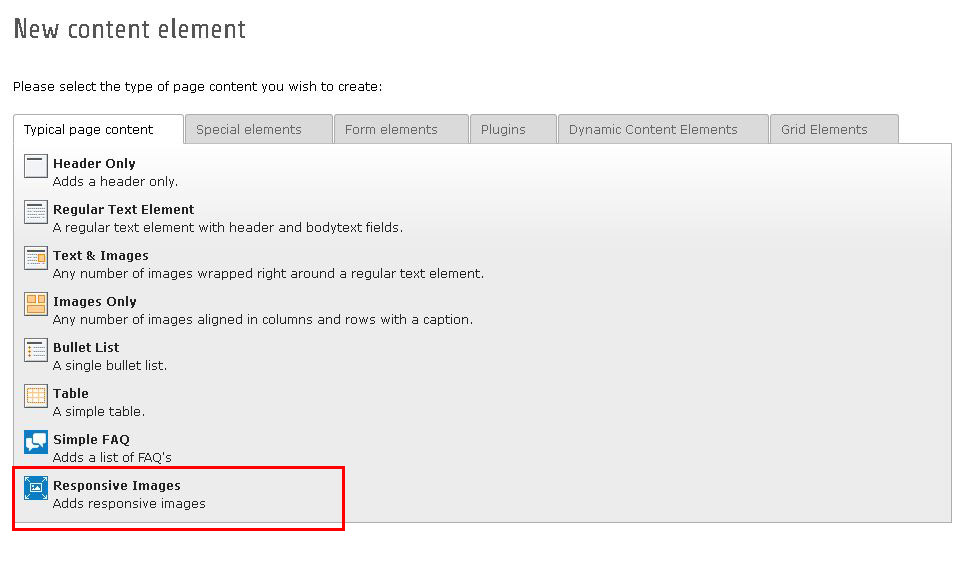
Step 2: Choose the page, which should display an responsive image an click on the wizard to add a custom content element, see screenshot:
Step 3: Adds as many images as you want. You can add a title and alt text as well as a figcaption and of course a link to.
Possible settings are:
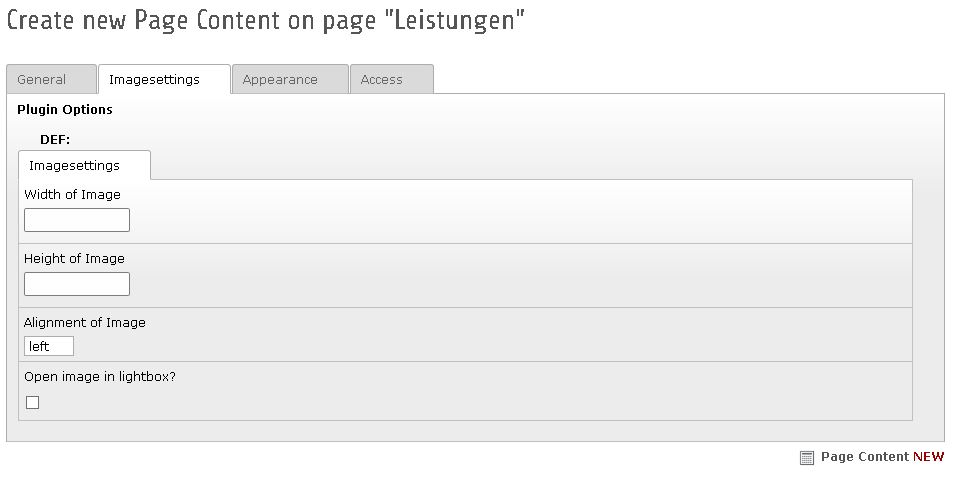
1. Set the width of image: If set, all images will be displayed in the choosen width. The images were created by typo3, not only downscaled ;-) The height of the image will be recalculate, so the image ratio won't break.
2. Set the height of image: If set, all images will be displayed in the choosen height. The images were created by typo3, not only downscaled ;-) The width of the image will be recalculate, so the image ratio won't break.
3. Alignment of the images: Choose 'left', 'center' or 'right' alignment
4. Open image in lightbox The extension comes with a ready to use lightbox. You don't have to include anything, the extension will do it by herself. Just click the checkbox and the images will open in a lightbox.
Additional informations (OPTIONAL):
If you use both, the width and the height of the images, the images were displayed in that exact dimension. The image ration can break.
The lighbox opens the image in the original size, which you uploaded and is responsive, too.