Exporting content from TYPO3 to XML or T3D
The export functionality is only available for admin users and backend users for which the Page TSconfig option options.impexp.enableExportForNonAdminUser has been enabled.
Attention
Exporting content may expose sensitive data or allow unwanted file access. Review the security considerations regarding exports before using this functionality.
Open the export module
In the page tree, right-click the page from which you want to start the export (1) and select More options ... > Export (2).
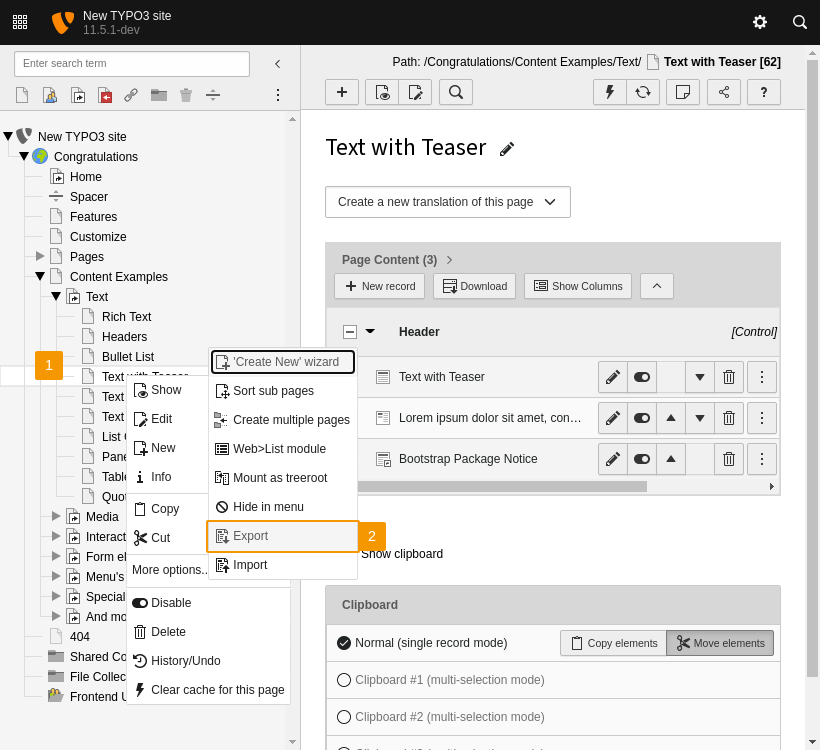
Select "More options... > Export"
Configure the export settings
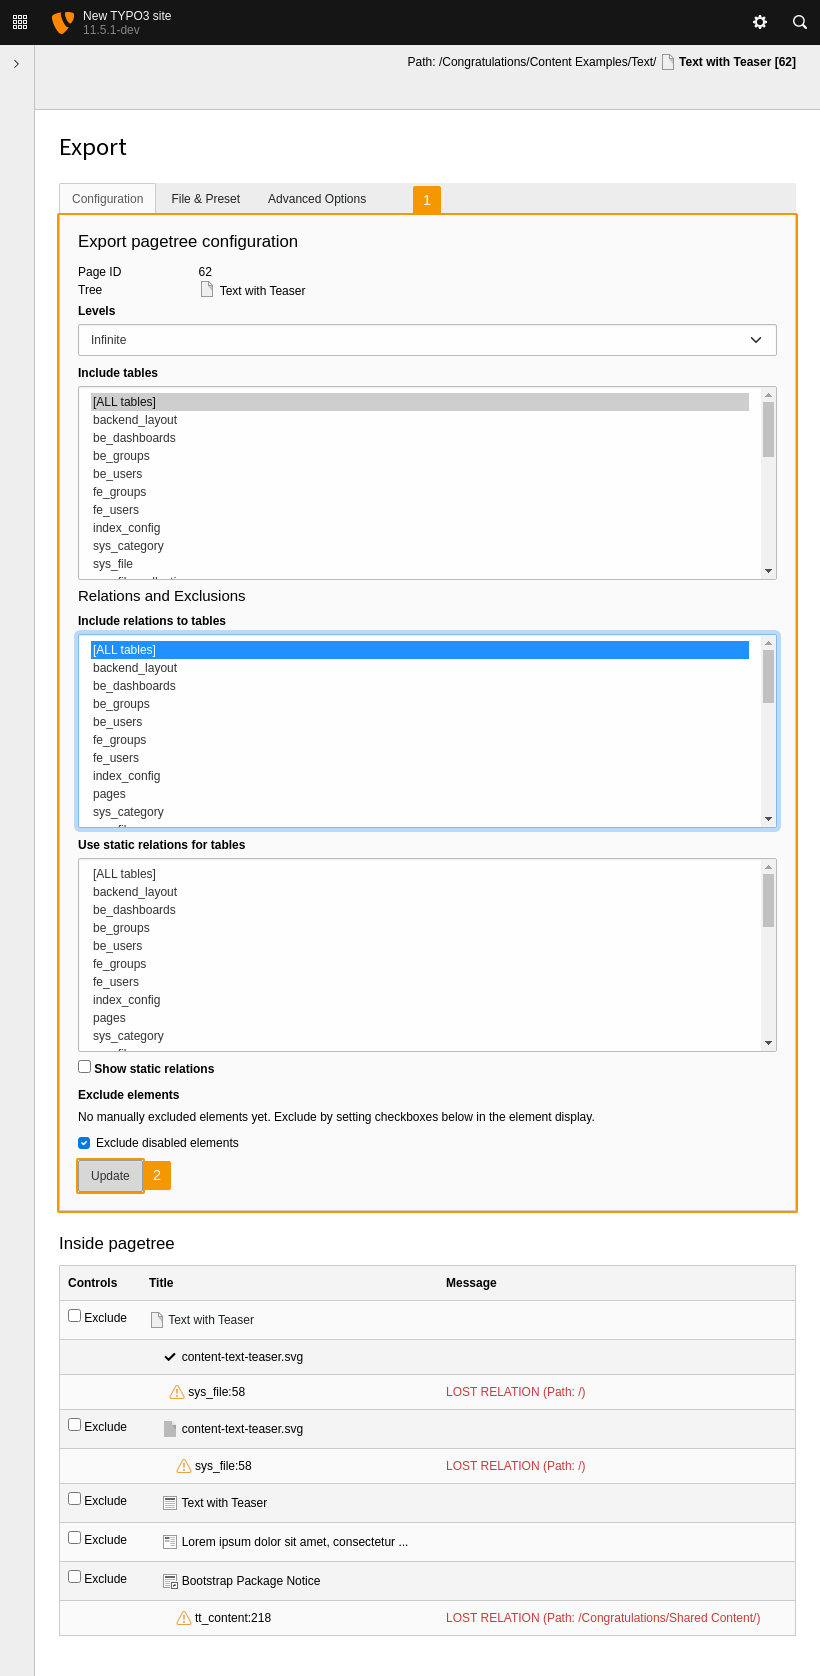
On the first tab of the export module you can fine-tune the export (1).
- If you want to export all data of the selected page including its subpages, select the "Infinite" option in the Levels selection box.
- Under Include tables you can limit the types of records to be exported.
- Under Include relations to tables you specify which relations of the records should be included in the export file. The related records will be included even if they are outside the pages selected for export.
- Under Use static relations for tables you select which relations should be included without including the related record. This is useful if the related record already exists in the target TYPO3 instance.
- If the same table is selected in both Include relations to tables and Use static relations for tables, the relation is treated as static.
- The Exclude disabled elements checkbox excludes records that are disabled according to their TCA configuration. This is checked by default.
Apply your changes via the Update button and repeat this step until the preview meets your expectations.
Configure the data to be exported
Review the records to be exported
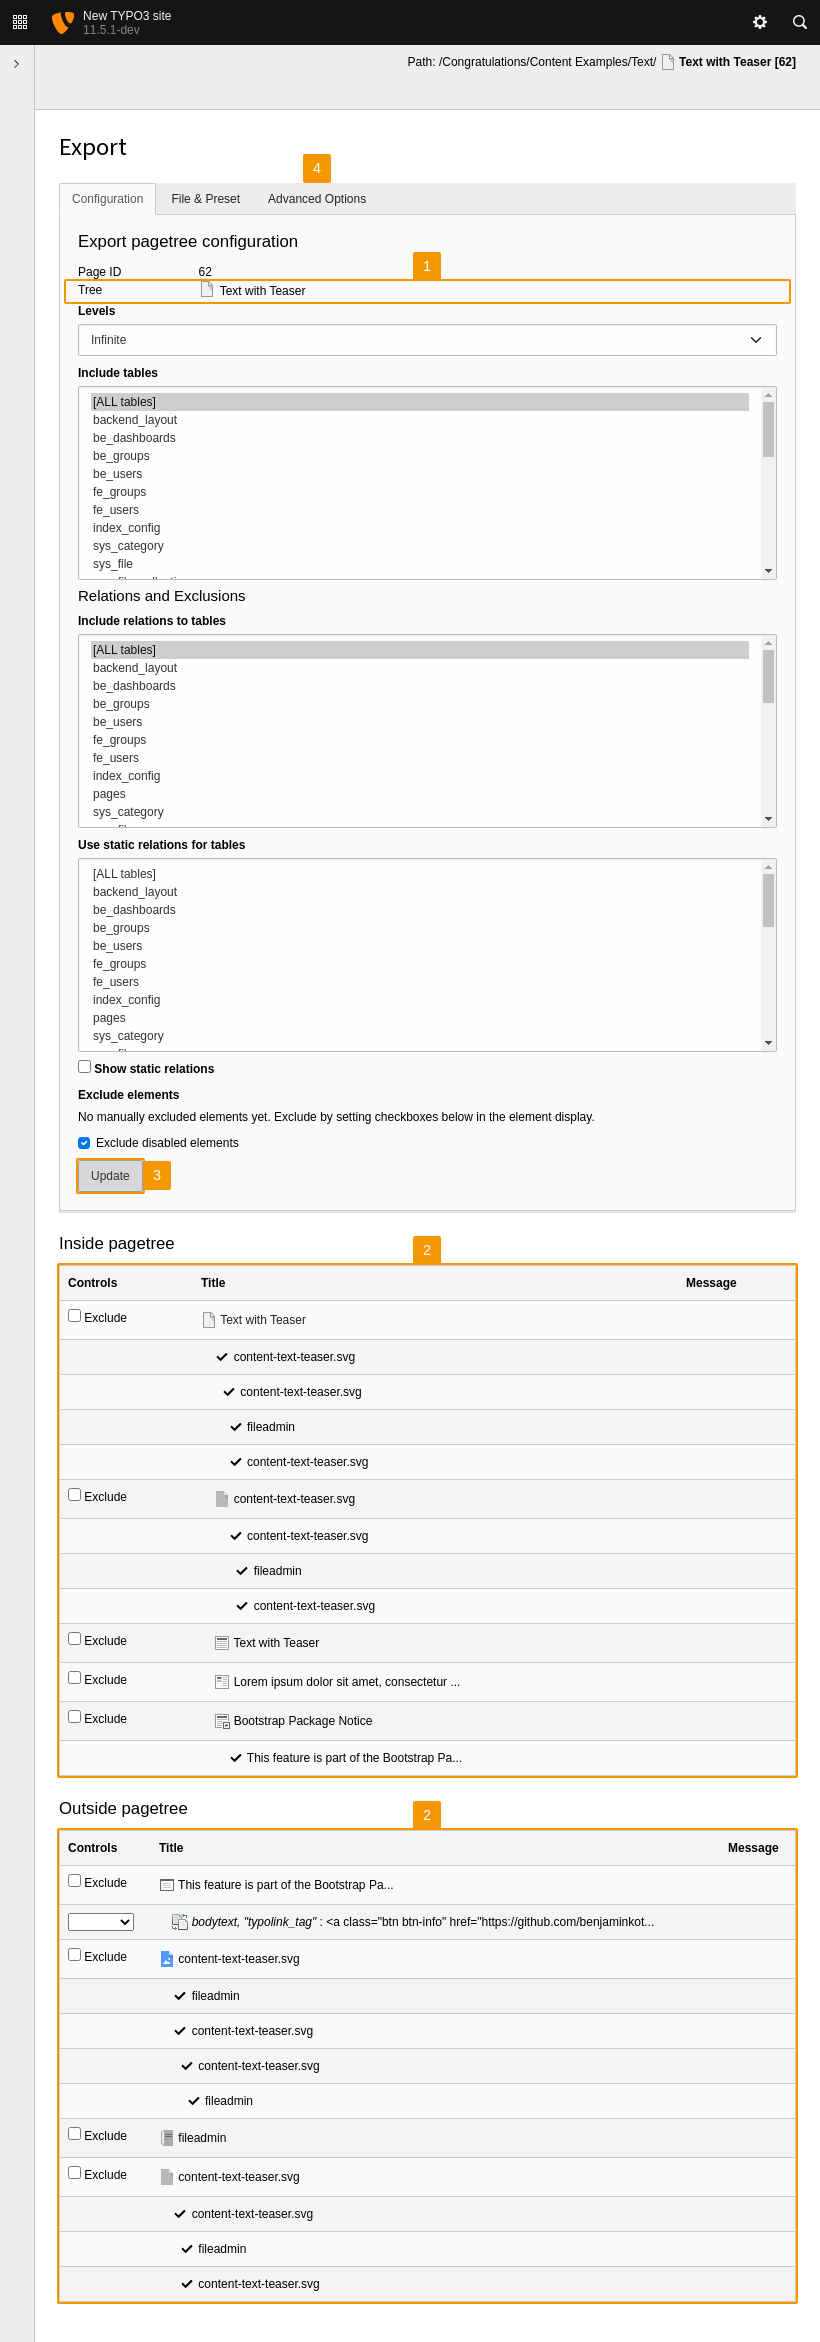
All pages selected for export are listed in the upper part of the dialog (1).
Below this is a detailed list of all data to be exported (2). Here you can exclude individual records or manually make them editable, if supported.
If the relation to records is lost, an orange exclamation mark will be shown. This happens if records are stored outside the export page tree or if excluded tables break relations.
Apply your changes by pressing the Update button and repeat this step as needed until the preview matches your expectations (3).
Then switch to the Advanced Options tab (4).
Check the exported data
Optionally select advanced export options
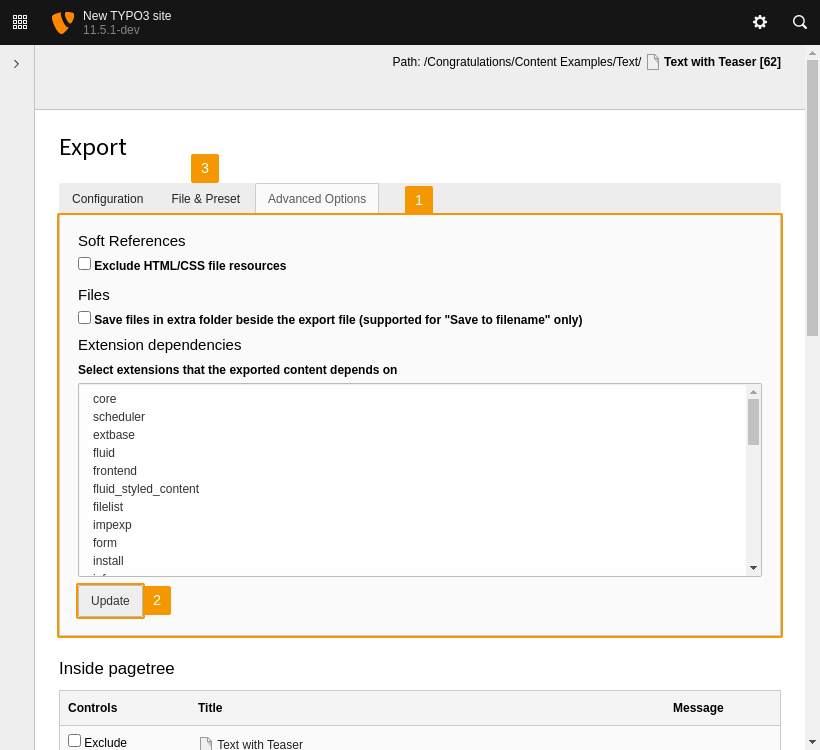
In the third tab of the export module you can specify further export options (1).
Checking Save files in extra folder .. saves linked files in a separate folder instead of embedding them in the export file. This is mandatory for distributions or useful when handling large file sets that would otherwise bloat the export file and potentially exhaust memory. The folder is named "{filename}.files".
Apply your changes via the Update button (2) and then switch to the File & Preset tab (3) to proceed.
Select advanced export options
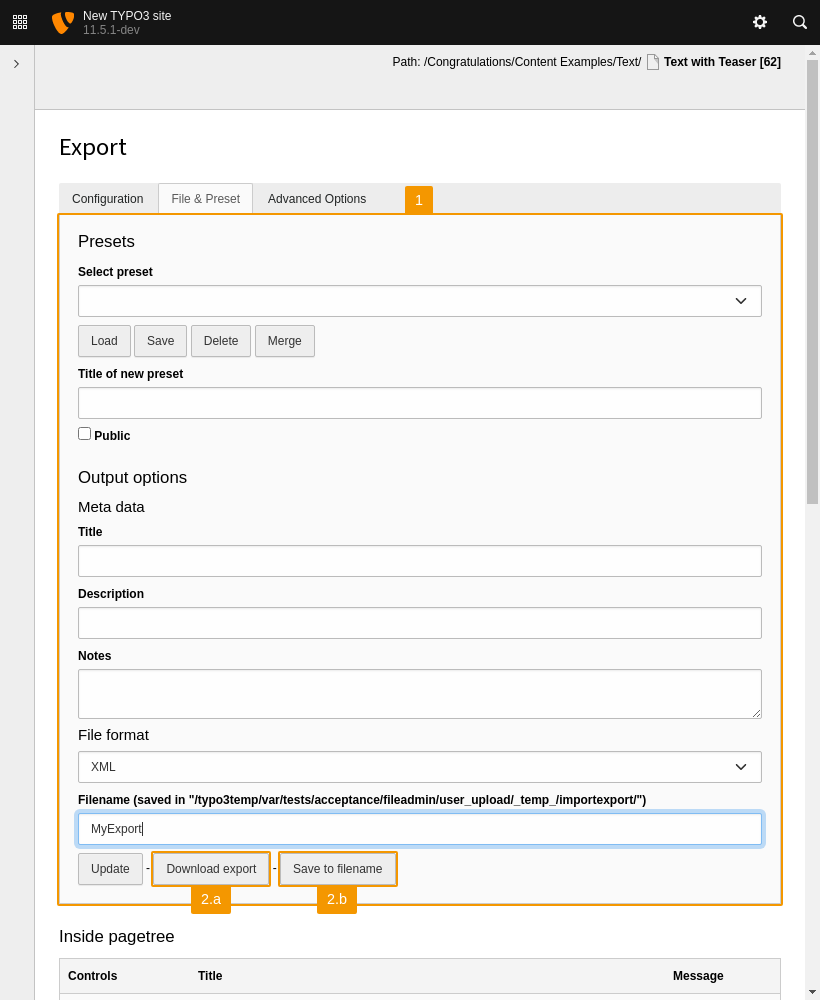
Perform the export
In the second tab of the export module you can specify the metadata for the export (1) before starting the export process.
You can then either:
- Download the export file (2.a), or
- Save it on the server (2.b).
Saving on the server is currently required if you have enabled saving related files in a separate folder (see Optionally select advanced export options).
Download the export data