Attention
TYPO3 v8 has reached its end-of-life March 31st, 2020 and is not maintained by the community anymore. Looking for a stable version? Use the version switch on the top left.
There is no further ELTS support. It is recommended that you upgrade your project and use a supported version of TYPO3.
Content Mapping
Having a perfect visual appearance of a website is pointless, if the content entered into the backend is not visible in the frontend. In the last step, we map some of the backend columns, which hold content elements such as text, images, etc. to areas in the frontend. This can be achieved easily by using custom TypoScript.
Dynamic Content Rendering in TypoScript
Create a new directory Configuration/TypoScript/Helper/ and inside this
directory, a new file called DynamicContent.typoscript with the following
content:
lib.dynamicContent = COA
lib.dynamicContent {
   10 = LOAD_REGISTER
   10 {
      colPos.cObject = TEXT
      colPos.cObject {
         field = colPos
         ifEmpty.cObject = TEXT
         ifEmpty.cObject {
            value.current = 1
            ifEmpty = 0
         }
      }
      pageUid.cObject = TEXT
      pageUid.cObject {
         field = pageUid
         ifEmpty.data = TSFE:id
      }
      contentFromPid.cObject = TEXT
      contentFromPid.cObject {
         data = DB:pages:{register:pageUid}:content_from_pid
         data.insertData = 1
      }
      wrap.cObject = TEXT
      wrap.cObject {
         field = wrap
      }
   }
   20 = CONTENT
   20 {
      table = tt_content
      select {
         includeRecordsWithoutDefaultTranslation = 1
         orderBy = sorting
         where = {#colPos}={register:colPos}
         where.insertData = 1
         pidInList.data = register:pageUid
         pidInList.override.data = register:contentFromPid
      }
      stdWrap {
         dataWrap = {register:wrap}
         required = 1
      }
   }
   30 = RESTORE_REGISTER
 }
Once again, describing what exactly this TypoScript does is not part of this
tutorial. The only fact that is important is, that the variable
lib.dynamicContent contains the content in subject to the column and
language in the backend. More details about the TypoScript can be found in the
TypoScript Reference.
Include Dynamic Content Rendering
To use the TypoScript, it needs to be loaded (included), so open file
Configuration/TypoScript/setup.typoscript and add line
<INCLUDE_TYPOSCRIPT: ... > as shown here in the second line:
<INCLUDE_TYPOSCRIPT: source="FILE:EXT:fluid_styled_content/Configuration/TypoScript/setup.txt">
<INCLUDE_TYPOSCRIPT: source="FILE:EXT:site_package/Configuration/TypoScript/Helper/DynamicContent.typoscript">

page = PAGE
page {
   // ...
}

config {
   // ...
}
Typoscript Mapping in Fluid Template
Open file Resources/Private/Templates/Page/Default.html and locate the
three columns. They all show a "Headline" (look for the <h2>-tags) and some
dummy content (look for the <p>-tags).
Simply replace these lines with the cObject-ViewHelper (<f:cObject ... >),
so that file Default.html shows the following HTML code. Make sure, you
specify the column positions correctly (1, 0 and 2) and
in exactly this order:
<f:layout name="Default" />
<f:section name="Main">

   <main role="main">

      <f:render partial="Jumbotron" />

      <div class="container">
         <div class="row">
            <div class="col-md-4">
               <f:cObject typoscriptObjectPath="lib.dynamicContent" data="{colPos: '1'}" />
            </div>
            <div class="col-md-4">
               <f:cObject typoscriptObjectPath="lib.dynamicContent" data="{colPos: '0'}" />
            </div>
            <div class="col-md-4">
               <f:cObject typoscriptObjectPath="lib.dynamicContent" data="{colPos: '2'}" />
            </div>
         </div>
      </div>

   </main>

</f:section>
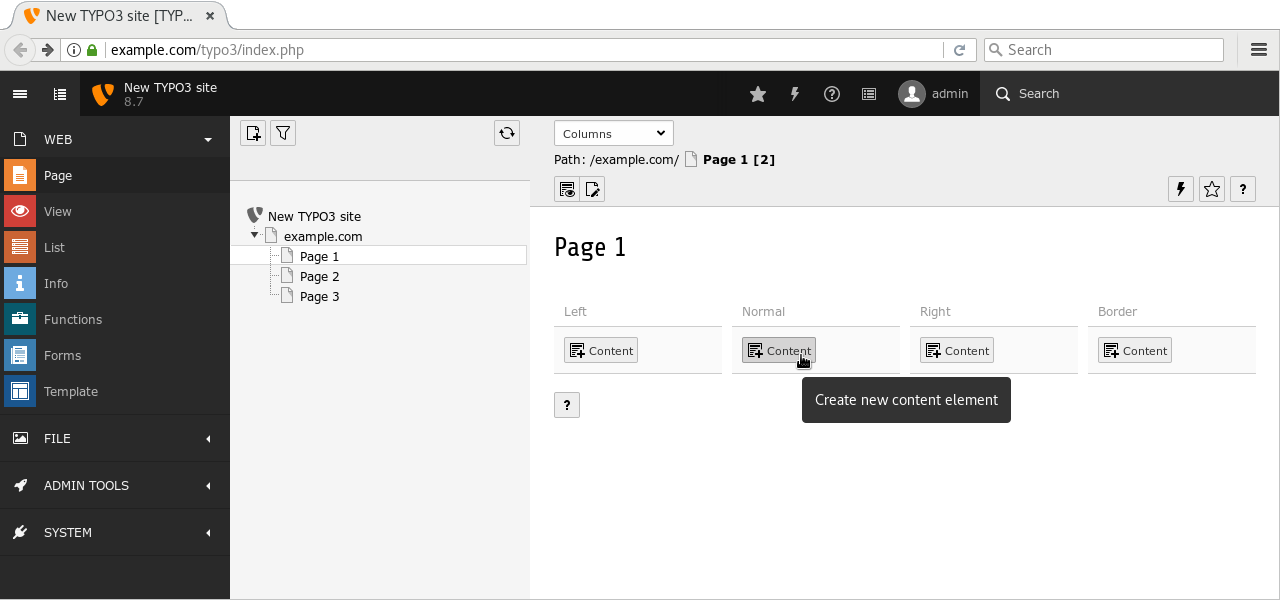
Add Content in the TYPO3 Backend
Now it's a great time to add some content in the backend. Go to WEB → Page and select any of the pages you created before (e.g. "Page 1"). Click the "plus" icon in the column labelled "normal" and choose the "Regular Text Element" content element.
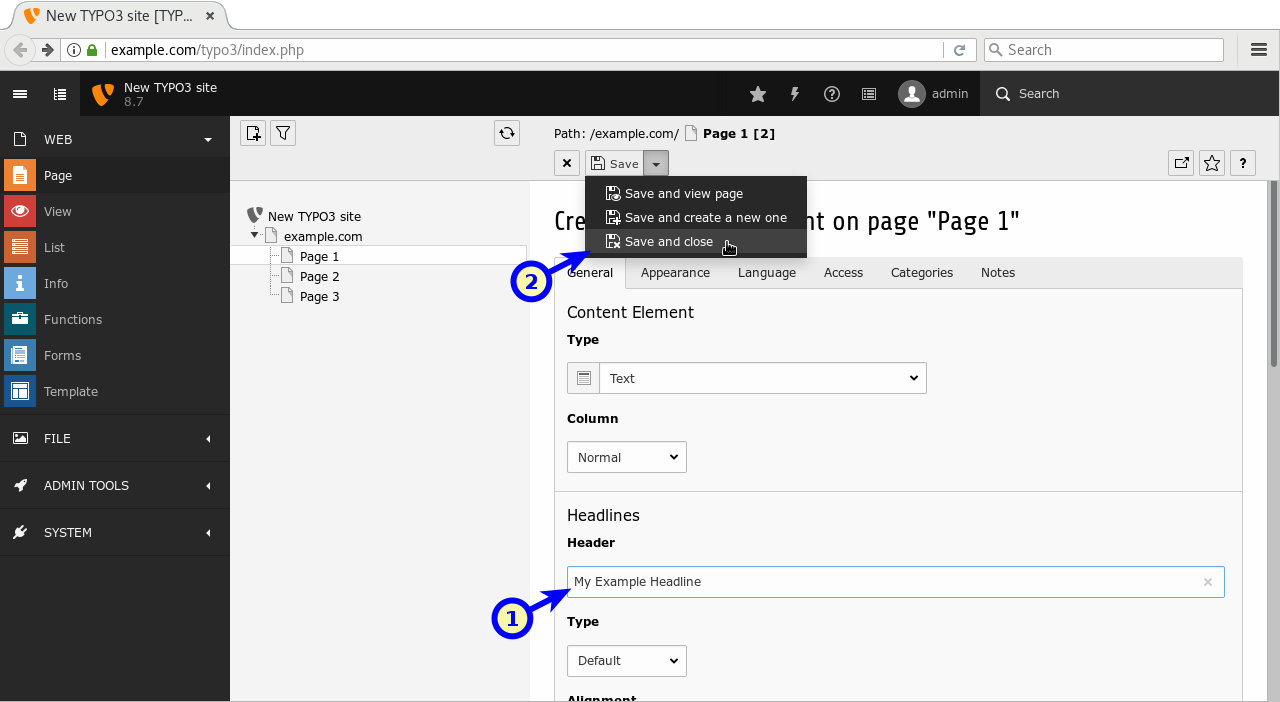
Enter a headline (marker 1), some arbitrary text in the Rich Text Editor (RTE) and save your changes by clicking button "Save and close" at the top (marker 2).
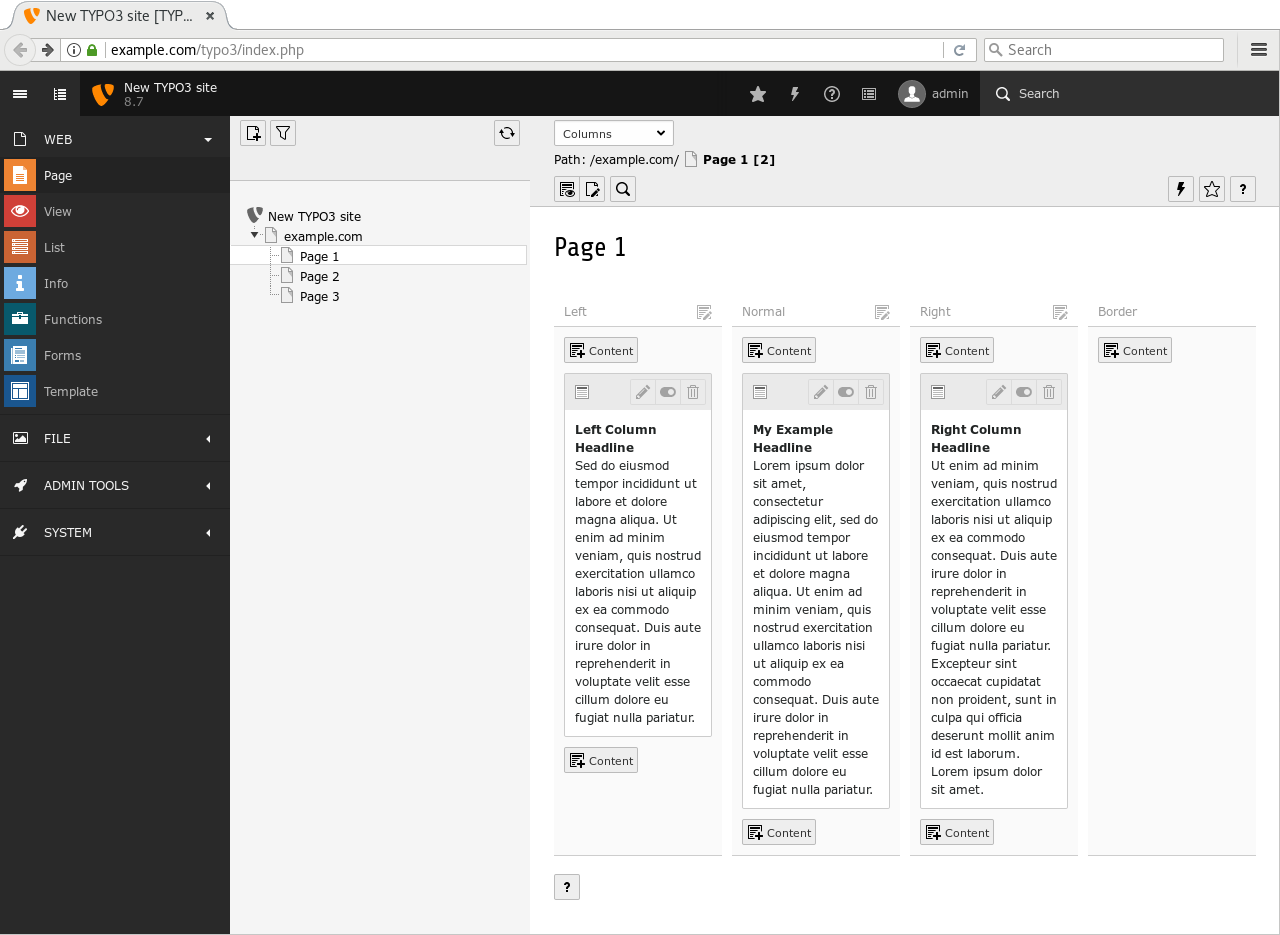
The new content element appears in the appropriate column. Repeat this process and enter some further content in columns "left" and "right", but leave column "border" empty.
Preview Page
Finally, clear the frontend cache and preview the page.
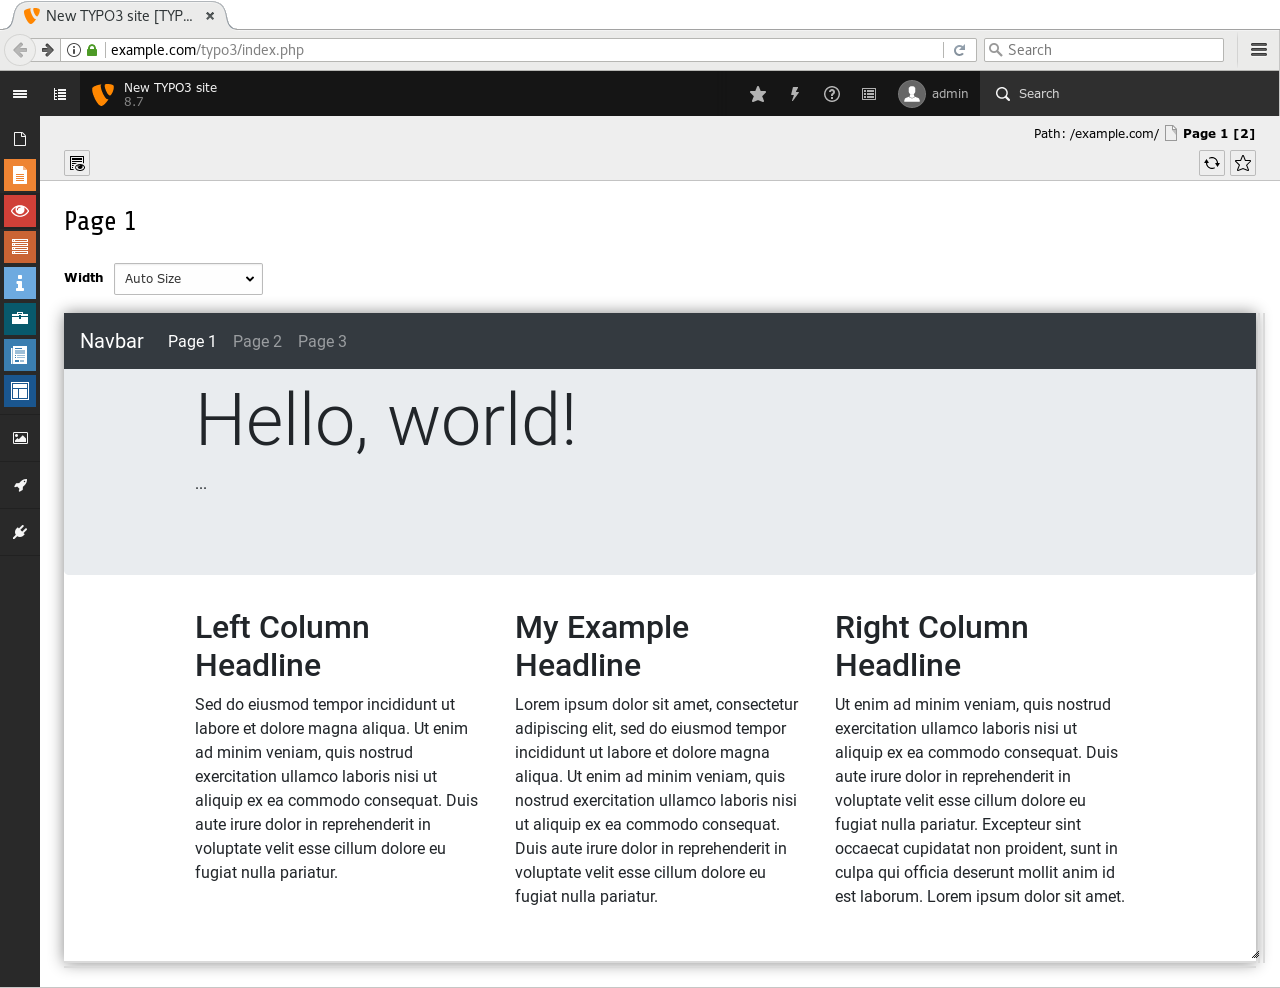
Each of the three columns shows the headline and content.
The last section of this tutorial summarises the achievements, discusses some shortfalls of the extension as it stands now and provides some suggestions what to do next.