TYPO3 DocCheck Login

Extension key

typo3_docchecklogin

Package name

antwerpes/typo3-docchecklogin

Version

2.1

Language

en

Author

Sabrina Zwirner

License

This document is published under the Open Content License available from http://www.opencontent.org/opl.shtml

Rendered

Mon, 15 Sep 2025 17:13:36 +0000


The content of this document is related to TYPO3, a GNU/GPL CMS/Framework available from www.typo3.org.


Introduction to the extension

How to install the extension

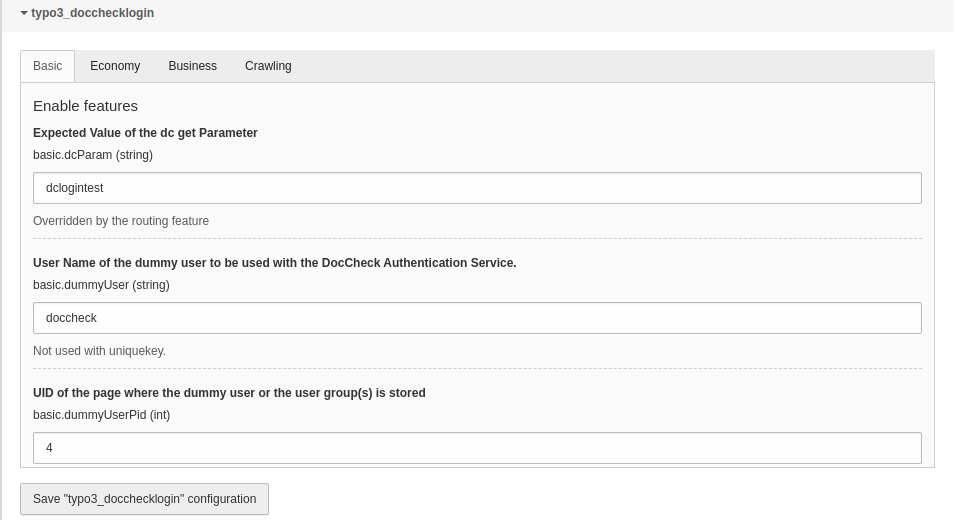
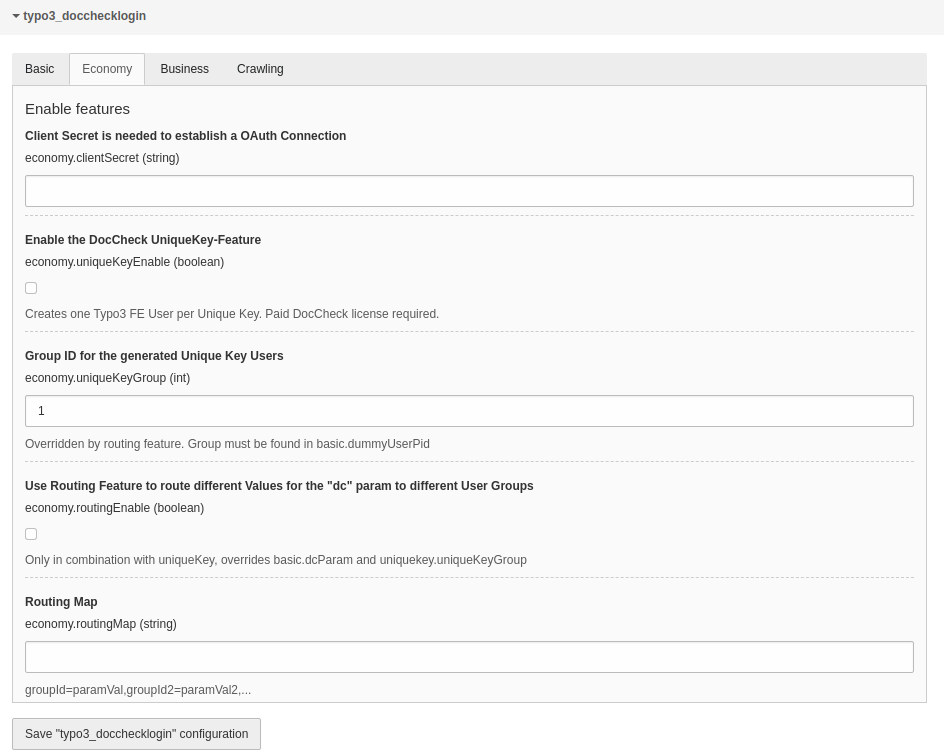
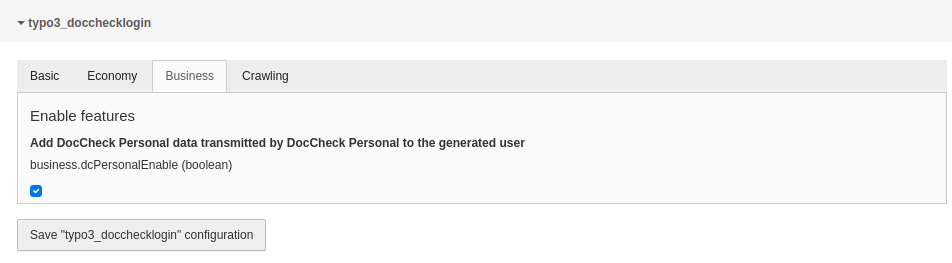
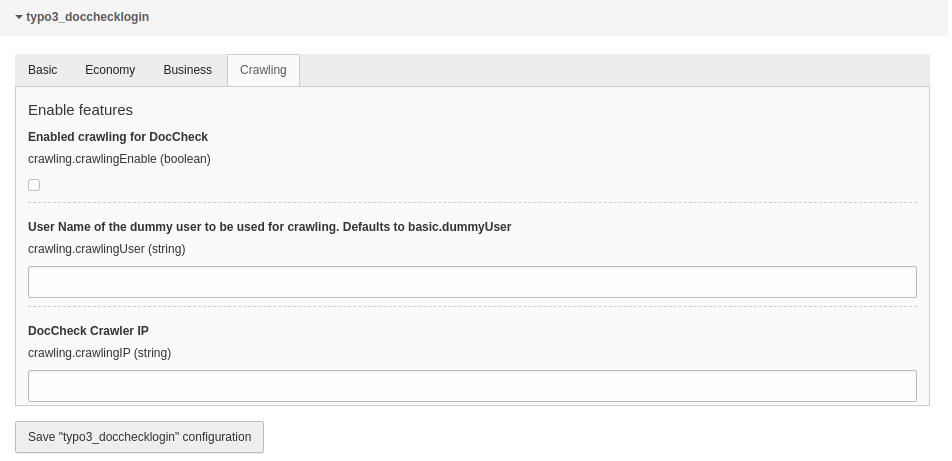
What configure options are needed and useable

Hooks that can be used to extend functionalities of the DocCheck Login plugin

Best practices and code examples

Introduction

If you find any errors or have feature requests please contact us on github.

What does it do?

This extension integrates the popular DocCheck Login service with your TYPO3 website. It is currently maintained by antwerpes ag (a subsidiary of DocCheck AG).

  • It supports the basic functionality by logging in a dummy frontend user whenever someone has been authorized by DocCheck.
  • It supports the UniqueKey-Feature (optional, requires license Economy or higher), which allows you to identify returning visitors, by creating one frontend user per unique DocCheck user.
  • It supports the DocCheck Routing-Feature family, allowing you to configure different frontend user groups for different routing targets.
  • It supports the DocCheck Personal-Feature (optional, requires license Business and the UniqueKey-Feature), which will augment your unique DocCheck user by some person-related data – given, that the user agrees to this data transmission.
  • It supports the DocCheck Crawling-Feature to add your protected content in the DocCheck Search Engine index. With this powerful feature your valuable content will be searchable for healthcare professionals.

Screenshots

Configuration screen

This are the extension configuration screens that are reachable from the TYPO3 backend.

For this navigate to SettingsExtension Configurationtypo3_docchecklogin

Basic

Configuration screen: Basic

Configuration screen: Basic

Economy

Configuration screen: Economy

Configuration screen: Economy

Business

Configuration screen: Business

Configuration screen: Business

Crawling

Configuration screen: Crawling

Configuration screen: Crawling

Plugin configuration

The settings within the plugin flexform

Configuration screen: Crawling

Configuration screen: Crawling

Frontend view

Language will vary.

Default Login-Form

Default Login-Form

Installation

Before you start

Before you can start to implement the DocCheck Login to your TYPO3 website, you will need a valid DocCheck Login ID, as well as access to DocCheck CReaM, the login configuration backend. For detailed instructions please read the technical manual.

Example CReaM settings

Login url

https://yourwebsite.com/login
Copied!

Target url

https://yourwebsite.com/login?logintype=login&dc=dcloginparam
Copied!

Step-by-step instruction

  1. Install the extension

    Install the extension using composer on the command-line:

    composer require antwerpes/typo3-docchecklogin
    Copied!
  2. Make sure the database-fields were created

    In the TYPO3 backend, switch to the Maintenance module and click on Analyze Database Structure. Create the database-fields for typo3_docchecklogin, if necessary. For information what database fields get includes see here.

  3. Include the TypoScript template

    In the TYPO3 backend, switch to the Template module and select your Root-Template. Edit the template record and include the static TypoScript configuration for typo3-docchecklogin.

  4. Create a login page and include the login plugin

    Navigate to the page of your choice, click on the + Content button and navigate to the tab Plugins. Here select the DocCheck Login plugin.

  5. Edit the plugin settings

    Under the tab Plugins set the Login ID for the plugin to work properly. To set a global Login ID please see here

  6. Create a user folder

    In your page tree create an user folder. Switch to the List View and create a usergroup and a user inside the newly created folder. The names can be free of your choice.

    An example you can see here:

    Example user folder

    Example user folder

  7. Edit the extension configuration

    For the plugin to work properly you need to set up the extension configuration accordingly to your login licence and your needs. To understand better which settings are usable by your licence the settings are grouped by so.

    For more detailed information about the extension configuration see here.

Extension configuration

For the plugin to work properly you need to set up the extension configuration accordingly to your login licence and your needs.

To understand better which settings are usable by your licence the settings are grouped by so. To know what the different licences are standing for please follow this page.

For the basic functionality, the free DocCheck Basic Licence should suffice.

If you don't have a licence yet and you are interested in buying one, please contact industry@doccheck.com. They will also provide you with test licenses if needed.

Each group in the extension configuration is based on the group before. The exception is the Crawling-Feature that can be used even when you dont have a licence.

To access the extension configuration navigate in the TYPO3 backend to SettingsExtension Configurationtypo3_DocChecklogin.

Basic

The Basic-Features don't require a DocCheck Login Licence.

dcParam

dcParam

dcParam
Required

true

type

string

Expected value of the dc GET-Parameter.

The extension will check $_GET['dc'] for this value after a successful DocCheck Login. Set it to an arbitrary string that can be used as a url parameter.

dummyUser

dummyUser

dummyUser
Required

true

type

string

Username of the dummy user to be used with the DocCheck Authentication Service.

This user will be logged in with your TYPO3 website, whenever a DocCheck user logs in successfully. The dummyuser must be stored in pid as determined in basic.dummyUserPid.

dummyUserPid

dummyUserPid

dummyUserPid
Required

true

type

int

Uid of the page/folder where the dummy user and the user group(s) is stored.

The extension will look for the dummy user or the configured user groups (when using the UniqueKey-Feature) on the page (or storage folder) with this id.

Economy

uniqueKeyEnable

uniqueKeyEnable

uniqueKeyEnable
Required

false

type

boolean

Enable the UniqueKey-Feature. Creates one TYPO3 frontend user per unique key.

clientSecret

clientSecret

clientSecret
Required

false (Only needed for the UniqueKey and Personal-Feature)

type

string

Client secret is needed to establish an oAuth connection.

uniqueKeyGroup

uniqueKeyGroup

uniqueKeyGroup
Required

false

type

int

Define the group id in which the unique users get sorted in. This group must be found in the page which you configured in basic.dummyUserPid.

This user will be overwritten when the Routing-Feature is enabled.

routingEnable

routingEnable

routingEnable
Required

false

type

boolean

Use Routing-Feature to route different values for the "dc" param to different user groups. Each dcParam will be routed to one frontend user group.

This requires you to set some routes in your DocCheck CReaM configuration.

Works only in combination with UniqueKey-Feature and overrides basic.dcParam and economy.uniqueKeyGroup

routingMap

routingMap

routingMap
Required

false

type

string

This map resolves each dc-Param to one frontend user group.

Format
<GROUP_ID>=<DC_PARAM>,<GROUP_ID>=<DC_PARAM>...
Example
2=akDJKw82,3=dk8Dkkv

Business

dcPersonalEnable

dcPersonalEnable

dcPersonalEnable
Required

false

type

boolean

Add user specific data to the created user account when the users agrees to it.

The UniqueKey-Feature needs to be activated for it to work properly.

Crawling

The Crawling-Feature allows an external crawler to bypass the DocCheck Login.

A crawler is a program that visits your website, loads its content and prepares it for searches. This is especially needed when you use your website with the DocCheck Search.

For more information visit this page.

crawlingEnable

crawlingEnable

crawlingEnable
Required

false

type

boolean

Enabled crawlers to bypass the DocCheck Login

crawlingUser

crawlingUser

crawlingUser
Required

false

type

string

Name of the user that will be used for crawling. Defaults to basic.dummyUser

crawlingIP

crawlingIP

crawlingIP
Required

false

type

string

IP of the crawler. To bypass the DocCheck Search crawler user the IP 195.82.66.150.

ExtTables

The plugin adds four new database fields to the fe_users table.

fe_users table columns

tx_typo3docchecklogin_profession

tx_typo3docchecklogin_profession

tx_typo3docchecklogin_profession
type

int

Stores the profession of the user when the Personal-Feature is enabled.

To get a list for what the ids stands for see here.

You can change the parameter language in the url to get the results for different languages.

tx_typo3docchecklogin_profession_parent

tx_typo3docchecklogin_profession_parent

tx_typo3docchecklogin_profession_parent
type

int

Stores the parent profession of the user when the Personal-Feature is enabled.

To get a list for what the ids stands for see here.

You can change the parameter language in the url to get the results for different languages.

tx_typo3docchecklogin_discipline

tx_typo3docchecklogin_discipline

tx_typo3docchecklogin_discipline
type

int

Stores the discipline of the User when the Personal-Feature is enabled.

To get a List for what the IDs stands for see here.

You can change the parameter language in the url to get the results for different languages.

tx_typo3docchecklogin_gender

tx_typo3docchecklogin_gender

tx_typo3docchecklogin_gender
type

varchar

Stores the gender of the user when the Personal-Feature is enabled.

  • m = male
  • f = female
  • c = company
  • o = other
  • u = unknown

TsConfig

This site covers options to configure the plugin. All written options can be overwritten with constants.

Custom view templates

templateLayouts

templateLayouts
type

array

You might want to change the HTML code that renders the iFrame.

To do so, copy the Resources/Private/Templates/DocCheckAuthentication/ and Resources/Private/Partials/DocCheckAuthentication/ folder to, for example, your <yourPathOfChoice>/Templates/DocCheckAuthentication and set the following constants in your TYPO3 setup:

Example:

plugin.tx_typo3docchecklogin.view.templateRootPath = <yourPathOfChoice>/Templates/DocCheckAuthentication
plugin.tx_typo3docchecklogin.view.partialRootPaths = <yourPathOfChoice>/Partials/DocCheckAuthentication
Copied!

Overwrite Login ID

loginOverrideId

loginOverrideId
type

string

Default

null

This numeric parameter overrides the used DocCheck Login ID. Especially useful for working in multiple environments.

Example:

[like(request.getNormalizedParams().getHttpHost(), '*stage.domain.com')]
     plugin.tx_typo3docchecklogin_doccheckauthentication.settings.loginOverrideId = 1111111111
[global]
Copied!

Test login user

To get a test user for the DocCheck Login you can visit the DocCheck CReaM website.

  1. Login to CReaM

    First login to CReaM, where you manage your DocCheck Login.

  2. Navigate to test password

    In the navigation navigate to Password protectionTest passwords.

    Navigation
  3. Click the button

    Click on the top right button Create new test password.

    Create new test password
  4. Select the project

    Select the target projects and save the selection.

  5. Set user information

    Give the user an username, password, profession etc. and save it.

    Done!

Hooks

Following hooks can be used to extend functionalities of the DocCheck Login plugin.

beforeRedirect

This extension offers the signal slot beforeRedirect, which is called before a successfully logged-in user will be redirected.

Usage from within your extension's ext_localconf.php:

$GLOBALS['TYPO3_CONF_VARS']['EXT']['typo3_docchecklogin']['beforeRedirect'][] =
\Vendor\Package\Hook\MyHook::class . '->beforeRedirect';
Copied!

Inline login

If you want to use the login template directly inside a fluid template, for example to use it in a popup, you can do so by creating a lib element.

Got to your typoscript configuration and add & edit the following code.

lib.login = USER
lib.login{
    userFunc = TYPO3\CMS\Extbase\Core\Bootstrap->run
    vendorName = Antwerpes
    extensionName = Typo3Docchecklogin
    pluginName = DocCheckAuthentication
    controller = DocCheckAuthentication
    features.requireCHashArgumentForActionArguments = 0
    view =< plugin.tx_typo3docchecklogin.view
    settings =< plugin.tx_typo3docchecklogin.settings
    settings.loginId = <yourLoginId>
    settings.loginLayout = xl
    settings.customLayout =
    settings.language = de
    settings.redirect = 1
}
Copied!

Afterwards you can use the code in the fluid template like the following:

<f:cObject typoscriptObjectPath="lib.login"/>
Copied!

403 error handling

When you have a restriced page and the user is clicking on it the user will normaly comes to a 403 page that you can define in the TYPO3 backend under Site ManagementError Handling.

If you want that the user get redirected to the login page and after login gets back to the requested page you can use this error handler.

  1. Create the file ErrorLoginHandler in you extension Classes folder

    The class can look like the following:

    <?php
    
    namespace Vendor\MyExtension;
    
    use Psr\Http\Message\ResponseInterface;
    use Psr\Http\Message\ServerRequestInterface;
    use TYPO3\CMS\Core\Context\Context;
    use TYPO3\CMS\Core\Error\PageErrorHandler\PageErrorHandlerInterface;
    use TYPO3\CMS\Core\Http\RedirectResponse;
    use TYPO3\CMS\Core\Utility\GeneralUtility;
    use TYPO3\CMS\Extbase\Utility\DebuggerUtility;
    
    class ErrorLoginHandler implements PageErrorHandlerInterface
    {
        public function handlePageError(
            ServerRequestInterface $request,
            string $message,
            array $reasons = []
        ): ResponseInterface {
            return new RedirectResponse('/login?redirect_url='.$request->getUri()->getPath(), 403);
        }
    }
    Copied!
  2. Navigate in the TYPO3 backend to

    SitesYour Site ConfigurationError Handling+ Create new

  3. The configurate should look like the following

    Example user folder

    Example configuration

  4. Save and enjoy

    Now the user should get redirected back to the requested url that he tried to access while he was not logged in.

Sitemap

Index