Introduction 

Example

What does it do? 

Tile Maps allows you to integrate OpenStreetMap maps into your site in compliance with GDPR and without any third party requests from the client. It is based on the Tile Proxy extension which realizes a proxy and caching mechanism for OpenStreetMap. Furthermore, tt_address entries can be output as markers.

Installation 

Installation Type 

Composer 

You can install Tile Maps with the following shell command:

composer req codemacher/tile_maps
Copied!

Extensionmanager 

If you want to install tile proxy traditionally with ExtensionManager, follow these steps:

  1. Open ExtensionManager
  2. Switch over to Get Extensions
  3. Search for tile_maps
  4. Install extension

Include TypoScript Template 

You need to include at least the basic TypoScript provided by this extension.

Go to the module Web > Template and select your root page. It should already have a TypoScript template record. Switch to the view Info/Modify and click on Edit the whole template record.

Switch to the tab Includes and add the following templates from the list on the right: Tile Maps (tile_maps).

Configuration 

Tile Maps requires no further configuration outside of the content element options. However, individual adjustments can still be made via TypoScript.

TypoScript 

To make adjustments to the output of markers, for example, you can use the following settings in your own extension.

view 

templateRootPaths 

Default: EXT:tile_maps/Resources/Private/Templates/

You can override our templates with TypoScript, but you can also use the constant plugin.tx_tilemaps.view.templateRootPath.

partialRootPaths 

Default: EXT:tile_maps/Resources/Private/Partials/

You can override our templates with TypoScript, but you can also use the constant plugin.tx_tilemaps.view.partialRootPath.

layoutsRootPaths 

Default: EXT:tile_maps/Resources/Private/Layouts/

You can override our templates with TypoScript, but you can also use the constant plugin.tx_tilemaps.view.layoutRootPath.

settings 

iconPath 

Default: EXT:tile_maps/Resources/Public/Icons/

Directory path in which the marker icons must be located.

defaultMarkerIcon 

Default: 

defaultMarkerIcon {
iconName = marker-icon.png iconName2x = marker-icon-2x.png shadowIconName = marker-shadow.png iconSize = 25, 41 iconAnchor = 12, 41 popupAnchor = 1, -34 tooltipAnchor = 16, -28 shadowSize = 41, 41

}

Defines the representation of a marker. This corresponds to the maker definition of Leaflet. You can find more information here: <https://leafletjs.com/examples/custom-icons/>

hightlightMarkerIcon 

Default: 

hightlightMarkerIcon {
iconName = marker-highlight-icon.png iconName2x = marker-highlight-icon-2x.png shadowIconName = marker-highlight-shadow.png iconSize = 25, 41 iconAnchor = 12, 41 popupAnchor = 1, -34 tooltipAnchor = 16, -28 shadowSize = 41, 41

}

Defines the representation of a highlighted marker. This corresponds to the maker definition of Leaflet. You can find more information here <https://leafletjs.com/examples/custom-icons/>

Usage 

First, a Tile Proxy endpoint must be defined, follow the instructions for Tile Proxy.

The corresponding Tile Proxy endpoint must first be selected under Plugin Options. 
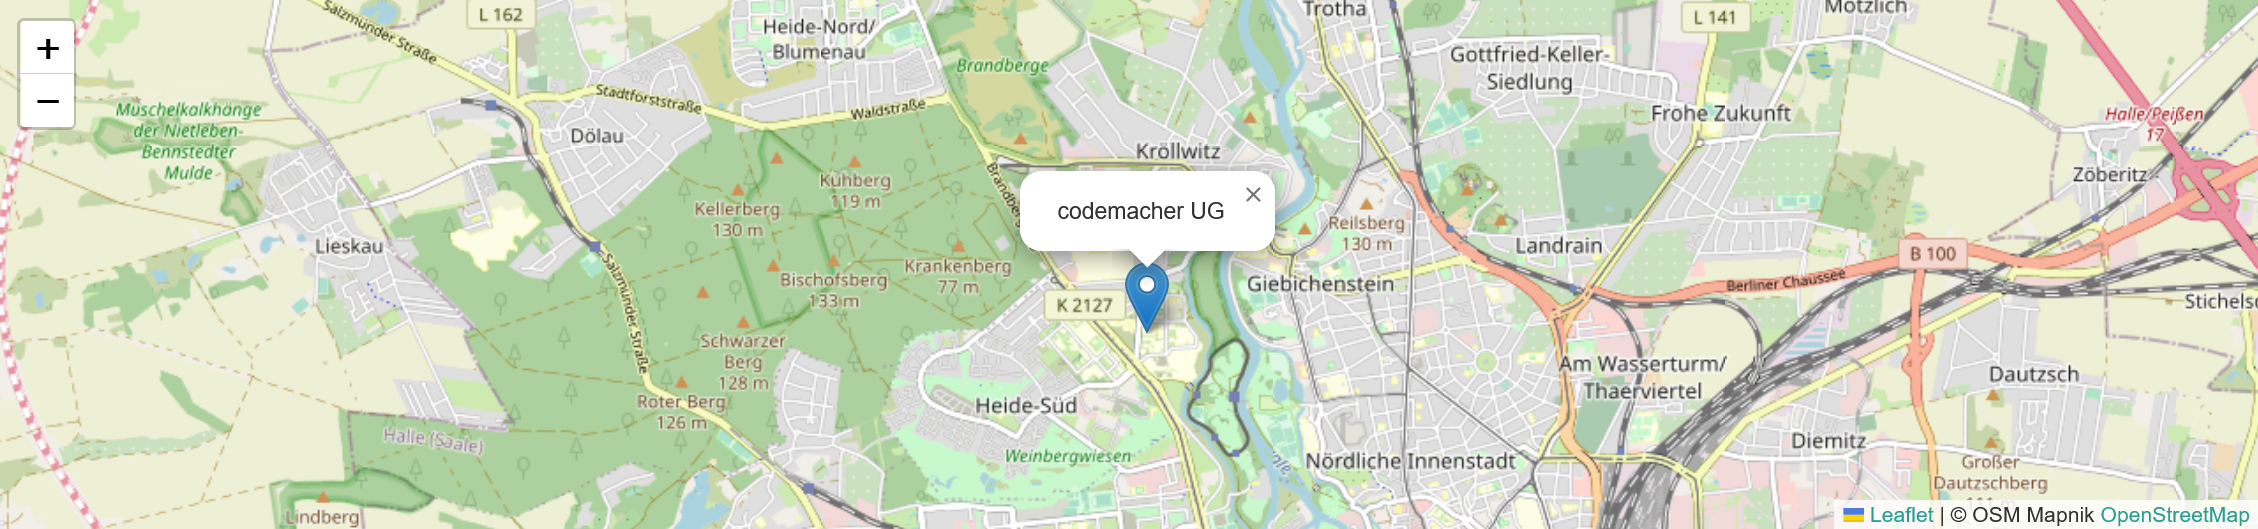
The initial map area with zoom level can now be selected under "Inital center and zoomlevel". To do this, simply move the map section to the appropriate position, including zoom.

Now all that remains is to select a source folder for markers, which must contain corresponding tt_address entries with geo-coordinates.

Additional settings 

Inital center and zoomlevel ( Format: Lng, Lat, Zoomlevel )

Sets the initial map section in the format "<Longitude>, <Latitude>, <ZoomLevel>", alternatively this can be determined by the interactive map.

Set the bounding box of the endpoint as maximum bounds of the map

If this is active, the maximum map section is taken from the tile proxy endpoint. This prevents the user from accessing another area outside the map.

Sets a map view that contains the marker with the maximum zoom level possible.

If this is active, the initial map section is determined by the bounding box of the markers.

Minimal Zoomlevel

Defines the minimum zoom level of the map.

Maximum Zoomlevel

Defines the maximum zoom level of the map.

Enable marker popup on click

If this option is active, a pop-up with address data is displayed, if you click on a marker.

Cluster the markers

If this option is active, a cluster layer is used for the markers.

Customize Marker Popup 

If you want to customize the output of the marker popup, you only need to overwrite the PopupContent.html partial.

Set the TS Constant plugin.tx_tilemaps.view.partialRootPath to your extension.

plugin.tx_tilemaps.view.partialRootPath = EXT:my_ext/Resources/Private/Partials/

Copied!

Create a PopupContent.html in EXT:my_ext/Resources/Private/Partials/

<html xmlns:f="http://typo3.org/ns/TYPO3/CMS/Fluid/ViewHelpers" data-namespace-typo3-fluid="true">
    <f:render partial="address" arguments="{item:item, exportLatLng:1}" />
<div class="general">
    <span property="name">{item.name}</span>
    <div property="address" typeof="PostalAddress">
        <span property="streetAddress">{item.address}</span>
        <div class="city">
            <span property="postalCode">{item.zip}</span>&nbsp;<span property="addressLocality">{item.city}</span>
        </div>
    </div>
    <span property="telephone">{item.phone}</span>
    <span>
        <f:link.email email="{item.email}" additionalAttributes="{property:'email'}" />
    </span>
    <f:if condition="{item.www}">
        <span>
        <f:link.external uri="{item.www}" target="_blank" additionalAttributes="{property:'url'}">{item.www}</f:link.external>
        </span>
    </f:if>
</div>
Copied!

Sitemap