TYPO3 Extension powermail - Documentation 

This documentation helps

  • Administrators to install and configure powermail
  • Editors to use powermail
  • Developers to extend powermail

What does powermail do? 

Powermail is a powerful and a very easy mailform extension with a wide range of tools and features for editors, admins and developers. Define your form in the backend with a few clicks and look at the final output in the frontend.

Some basic points:

  • Main features of this mailform extension is to store the mails into the database.
  • Export it from the backend module (xls, csv) or list the values in the frontend again (Pi2). XLS export in the backend is only possible for classic installation, if a phar file for phpspreadsheet is manually created (See docs of EXT:base_excel). In composer-based installation the neccessary package is installed automatically.
  • Powermail send one or more mails to a static receiver or to dynamic receivers or to a whole Frontend-User Group.
  • Different HTML-Templates (Fluid) and RTE fields in backend for all needed views.
  • Input Validation in different ways (HTML5, JavaScript and PHP).
  • A main focus of the form is to prevent spam (Captcha, Spam Factor, Different Checks, etc...).
  • Another focus is to track some interesting information of users (funnel, browser, language, country, etc...)
  • For Developers: Powermail is a very flexible extension, which also could be extended by your code or extension (hooks, events, own Finishers, own DataProcessors, own Spam-Prevention-Methods, own Validators, TypoScript cObjects and userFuncs, debugoutput, etc...).

Cut a long story short: With powermail editors are able to create complex mailforms without knowledge of html, php or javascript and that's the main difference between powermail and the most other form extensions

Example Screenshots 

Frontend: Show a form with different field types 

Example form

Example Form with Input, Textarea, Select, Multiselect, Checkboxes, Radiobuttons, and Submit

Frontend: Multistep Form 

Example form2

Example Multistep Form with clientside validation

Backend: Mail Listing 

backend1

Manage the delivered mails with a fulltext search and some export possibilities

Backend: Reporting 

backend2

See the reporting about the delivered mails (Form or Marketing Data Analyses are possible)

Documentation overview 

Changelog 

Note 1: This document is not updated after the v13 release anymore. For details please have a look at

Note 2: Releases with breaking changes are marked with !!!

See Upgrade instructions and breaking changes for some details on breaking changes and how to handle them.

Version Release Date Description
[!!!] 13.0.0 2025-07-11 Public support for TYPO3 13 (via EAP available sind Nov. 2024)
12.4.3 2024-10-16 Bugfix release for EXT:powermail v12; TYPO3 v13 compatibility work starts today :-)
12.4.2 2024-10-02 Major bugfix release for EXT:powermail v12
12.4.1 2024-09-17 Security release: Harden access checks to mail records.
[!!!] 12.4.0 2024-08-21 Security release: Harden access checks to mail records, remove export and rss views completely without any replacement.
12.3.5 2024-06-07 Bugfix release: Please see commit history for changes.
12.3.3 / 12.3.4 2024-06-03 Bugfix release: Please see commit history for changes.
12.3.2 2024-05-08 Bugfix release: Please see commit history for changes.
12.3.1 2024-04-10 Bugfix release: improved sql_mode compatibility
12.3.0 2024-03-20 php 8.3 compatibility, Bugfix.
12.2.1 2024-03-06 Bugfix release Please see commit history for changes.
12.2.0 2024-02-28 Bugfix and feature release Please see commit history for changes.
12.1.1 2024-02-08 Bugfix release Please see commit history for changes.
12.1.0 2024-02-02 Bugfixes and features. Please see commit history for changes.
12.0.3 2023-12-27 Public release of Powermail for TYPO3 V12
12.0.2 2023-12-14 Bugfix release for Powermail V12 / TYPO3 12. Please see commit history for changes.
12.0.1 2023-12-13 Bugfix release for Powermail V12 / TYPO3 12. Please see commit history for changes.
12.0.0 (!!!) 2023-10-06 Bugfix / feature release for Powermail V12 / TYPO3 12. Please see commit history for changes.
11.2.0 2023-09-29 Bugfix / feature release for Powermail V11 / TYPO3 12. Please see commit history for changes.
11.1.0 2023-09-18 Bugfix / feature release for Powermail V11 / TYPO3 12. Please see commit history for changes.
11.0.1 2023-08-18 Bugfix release for Powermail V11 / TYPO3 12. Please see commit history for changes.
11.0.0 2023-06-01 Support for TYPO3 12
10.7.3 2023-08-18 Bugfix release for Powermail V10 / TYPO3 11. Please see commit history for changes.
10.7.2 2023-03-23 Fix possible type error on Pi2 if there is no field availabe to an answer, documentation update
10.7.1 2023-02-21 Fix smaller PHP 8 issues, small documentation updates
10.7.0 2022-11-29 Make JS validation accessible, support also space as separator for emails, fix some links in backend context, fix export task (when called from CLI)
10.6.1 2022-11-25 Remove no_cache=1, fix missing array key for PHP8, some label bugfixes
10.6.0 2022-10-28 Allow usage of simple checkboxes in form validation now, Small "undefined array key" fix
10.5.0 2022-10-09 Some bugfixes with PHP 8.0 missing array keys, Fix manipulate values via TypoScript
10.4.3 2022-09-01 Prevent some PHP version related errors, update code style with an updated CS fixer configuration
10.4.2 2022-07-20 Catch some more undefined array key, fix creating new unique marker names, fix another possible exception in ForeignValidator class
10.4.1 2022-06-26 Respect class property types when creating fields in backend
10.4.0 2022-06-16 Reduce technical debt for easier upgrade for upcoming TYPO3 versions, fix file upload with confirmation page, small code cleanup
10.3.3 2022-06-13 Bugfix of undefined array key in PHP 8 (in FinisherRunner)
10.3.2 2022-06-08 Fix regression that prevented redirects after submit, Fix JS validation with reset buttons
10.3.1 2022-06-07 Small bugfix update: Prevent exception on form submit, repair CSV/XLS/RSS in Pi2
10.3.0 2022-06-06 JS validation opens tab with first error field on morestep forms, Fix overrule TS settings, Fix pagebrowser in backend module, Fix finisher runner, Some more smaller fixes and code cleanups
10.2.0 2022-05-25 Fix some tests, XLS export should be opened in a new window, fix some undefined array keys
10.1.0 2022-04-13 Feature: New form validation: Add callbacks on form submits with errors, scroll to error field on submit
10.0.0 (!!!) 2022-04-10 Feature: Remove jQuery, parsley.js and other old JS frameworks and replace it
9.0.0 (!!!) 2021-11-11 Feature: Add Support TYPO3 11, drop support for TYPO3 10
    Feature: Allow to disable ip-api.com (Stefan Busemann)
    Feature: Provide local dev environment (Marcus Schwemer)
    Feature: Make screenshots on acceptance test failure (Marcus Schwemer)
    Task: PHP8 compatibility (Marcus Schwemer / Georg Ringer)
    Task: Anonymize tests (Marcus Schwemer)
    Docs: Merge pull request #730 from DavidBruchmann/develop (David Bruchmann)
    Docs: add changes for TYPO3 11 (Stefan Busemann)
    Docs: Add general upgrade instructions (Stefan Busemann)
8.4.2 2022-08-23 Bugfix: Fix formlisting in plugins for editors with restricted page access
8.4.1 2021-08-11 Task: Also Sanitize CSV and XLS export in Pi2 (not only the export in the backend module)
8.4.0 2021-08-11 Task: Sanitize CSV and XLS export against excel hacks (see https://typo3.org/security/advisory/typo3-psa-2021-002)
    Task: Add automatic test via github actions
8.3.3 2021-07-27 Bugfix: Fix some more typehint problems
    Bugfix: Fix a problem with start- and endtime in backend records
8.3.2 2021-04-30 Bugfix: Fix typehint error with overwriteValueFromTypoScript()
8.3.1 2021-03-08 Bugfix: Don't validate captcha fields of already persisted mails (in double optin)
8.3.0 2021-02-16 Feature: Add autodeployment functionality to TER
    Bugfix: Foreign-Validator compatibility to core methods
    Bugfix: Reanimate sending emails to backend users
    Bugfix: Harden template utility functions against type errors
    Bugfix: Resolve LazyLoadingProxy to fe_users relations
8.2.4 2020-12-02 Bugfix: Fix possible exception when extending powermail with own validators and using a confirmation view
8.2.3 2020-11-08 Bugfix: Set tx_powermail_domain_model_mail.fe_user value for logged in users
    Bugfix: Fix link from PluginPreview to powermail module
    Bugfix: Prevent possible exception if not existing form is selected in a plugin (e.g. from old data garbage)
    Bugfix: Re-add english mail label for backend list view
    Task: Small code cleanup
    Task: Small documentation update
8.2.2 2020-10-21 Bugfix: Fix false positive error message in frontend "TypoScript is missing" together with marketing information
    Bugfix: Fix a possible type hint error logs when no referrer is available
    Bugfix: Fix a possible type hint exception if TSFE is not available
8.2.1 2020-10-05 Bugfix: Fix AJAX requests for hiding/enabling and deleting mails in backend module
    Bugfix: Fix a possible type hint exception when powermail gets extended from third party extensions
    Bugfix: Fix a possible type hint exception in Pi2
8.2.0 2020-09-22 Feature: Add a Services.yaml with a default configuration to improve extension possibilities
    Bugfix: Fix a possible type hint exception in FormSelectorUserFunc
    Bugfix: Add missing translations in TCA for default fields again
8.1.4 2020-09-01 Bugfix: Fix possible exception with logged in frontend users and optin
    Task: Fix typo in documentation
8.1.3 2020-08-31 Bugfix: Don't parse FlexForm field receivers if a different type is used
    Bugfix: Prevent exception when saving values to third party table
8.1.2 2020-07-10 Bugfix: Fix typo in TypoScript condition for Pi2
    Task: Small documentation update
8.1.1 2020-06-22 Bugfix: Fix mapping to fe_users and fe_groups
    Bugfix: Fix some wrong type hint declarations
    Bugfix: Fix missing filenames and extensions for XLS/CSV exports in Pi2
8.1.0 2020-03-29 Feature: Make $settings writable from signals in all controllers
    Bugfix: Unique validator should also work with double opt in feature
    Bugfix: Prevent exception if there are no mails stored yet
    Bugfix: Fix wrong signal name in documentation
    Bugfix: Fix field type in FlexForm for redirect after submit
    Bugfix: Support t3:// links for redirection now
    Bugfix: Preselect only if there is a "*" set in configuration (select, checkboxes, radiobuttons)
8.0.2 2020-02-22 Bugfix: Typehints in 8.x prevents plugins from inserting into pages with an exception
    Bugfix: Update some sql queries with changed fieldnames in powermail 8
8.0.1 2020-02-19 Bugfix: Small fix in ext_tables.sql for new fieldnames
8.0.0 (!!!) 2020-02-17 Please use the TYPO3 upgrade wizard for an update to powermail 8.x!
    Task: Support for TYPO3 10 (and only for this version)
    Task: Add typehints for all functions
    Task: Remove outdated functions
    Task: Update notations for validators, lazy loading, etc...
    Task: Replace old conditions with new symfony conditions
    Task: Use TSFE for all functions that listen to GET/POST now to support routing
    Task: Replace old extbase commandcontrollers with symfony commands
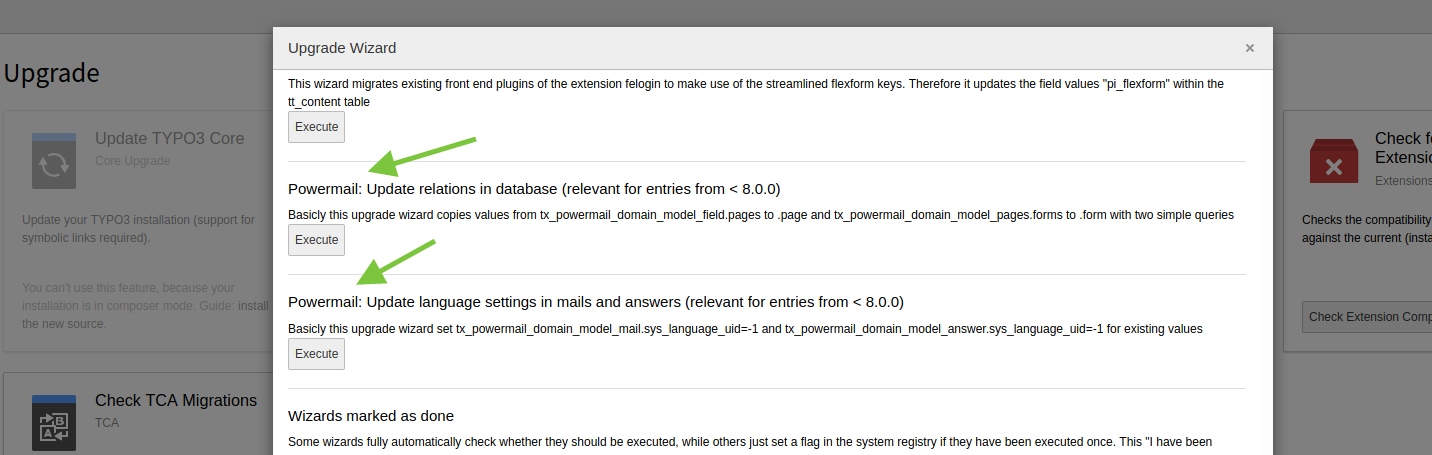
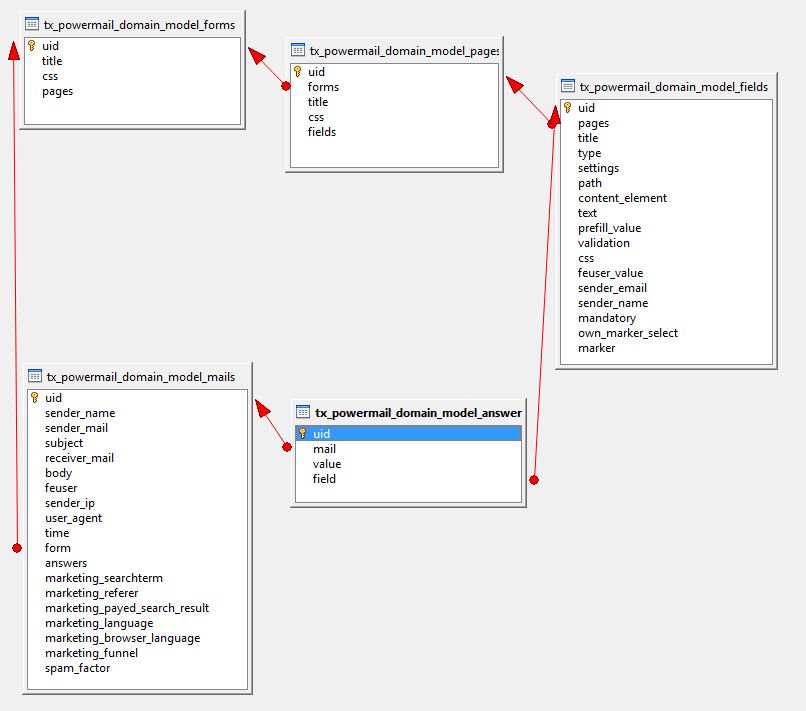
    Task: Rename _field.pages to .page and _page.forms to .form and add an upgrade wizard for this
    Task: _mail.sys_language_uid is now forced to -1 (also for _answer) and add an upgrade wizard for this
    Task: Change documentation from RST to markdown
    Task: Update automatic tests
    Task: Code cleanup
7.4.0 2019-08-27 Feature: Allow aborting of the email sending process via signal
    Feature: Add a new signal optinConfirmActionAfterPersist
    Feature: Use new documentation rendering
    Bugfix: Spamcheck fix while searching for links in answers with non-string values
    Bugfix: Fix double opt-in with an upload field
    Task: Change German wording for optin mails
    Task: Small cleanups
    Task: Update documentation
7.3.1 2019-05-21 Bugfix: Fix table fields for marketing information for mysql strict mode
    Bugfix: Ensure to render a-tags as absolute links in mails
7.3.0 2019-04-09 Task: Some small cleanup
    Feature: Support the usage in helhum/typo3-secure-web (Captcha, Export and Extension Icon)
    Feature: Pass $this->settings to initializeObjectSettings Signal for a manipulation of settings via SignalSlot
    Bugfix: Prevent exception in Pi2 in TYPO3 9.5 LTS
    Bugfix: Allow backend module usage together with EXT:securedownloads
7.2.0 2019-02-18 Task: Small code cleanup
    Feature: Add a transient property to mail model
    Bugfix: Prevent type hint exception in PrefillFieldViewHelper
    Bugfix: Fix a typo in a css class for a loading bar (AJAX submit)
    Bugfix: Fixed a small typo
7.1.0 (!!!) 2019-01-12 Task: Unit test update
    Task: Remove deprecated keys in ext_emconf.php
    !!! Bugfix: Make JavaScript work again in BE-Module in TYPO3 9.5 - Path of all JavaScript files changes from Resources/Public/JavaScripts/ to Resources/Public/JavaScript/ - maybe you have to adjust your TypoScript
    Bugfix: Allow default values directly in PrefillFieldViewHelper
    No mails are sent if database storing was disabled with the disclaimer feature
    Remove outdated eID inclusion
    Show only allowed froms in plugin (in TYPO3 9.5)
7.0.0 (!!!) 2019-01-12 Feature: Add a disclaimer link functionality to sender- and optinmail (sender can remove his own mail completely from database now)
    Task: Increase general hash length from 10 to 64 characters (optin links and new disclaimer links)
    Task: ome cleanup
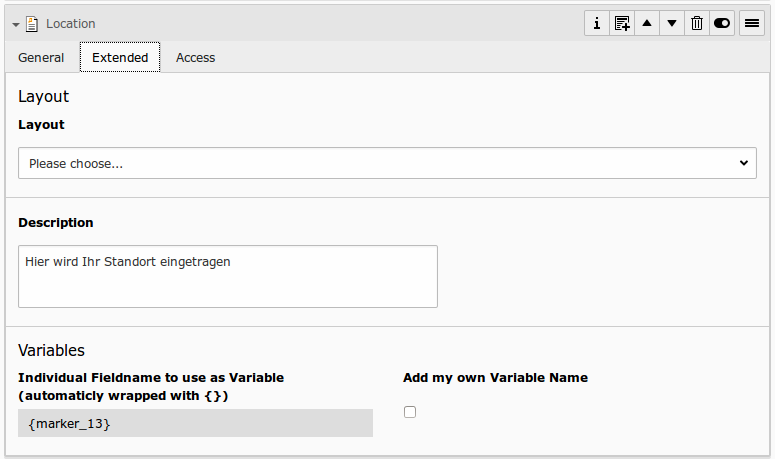
    Bugfix: Reanimate location field (broken because of change in the google API). Now we're using openstreetmap for this

Upgrade Instructions and breaking changes 

Version 13.0.0 

Breaking Changes 

Plugins pi2 - pi4 

These plugins were removed from EXT:powermail. They are available as a premium extension. If you need them, please contact service@in2code.de for a quote.

Debug functionality removed 

A bunch of debug options could be set.

  • debugMail
  • debugSettings
  • debugSaveToTable
  • debugSpamshield
  • debugVariables

These were removed without any replacement. No migration is available. You should use php standard methods like xdebug to debug the code.

For debugSpamshield there is still the possibility to send a notification email to an admin.

Version 12.4.0 

Breaking Change 

We removed the export and rss functionality completely without any replacement, because there is no reliable security concept behind it and is not easy to fix.

If you need this, please contact in2code for paid assistance or implement it yourself.

Version 12.0.0 

Upgrade - Wizards 

Unfortunately the bugfix for https://github.com/in2code-pro/powermail/issues/56 introduced a breaking change. There are now five submodules, instead of a single big one.

That means, permissions for backend usergroups must be changed in order to use the new modules.

The new version provides an upgrade wizard to migrate the old permission to the new submodules. Please visit the upgrade wizard in the backend or run it via cli.

Events 

Many events can now modify the transferred mail object.

If you use events, please check the following ones for changed signatures

  • FormControllerCreateActionAfterMailDbSavedEvent got the additional argument hash
  • FormControllerOptinConfirmActionBeforeRenderViewEvent uses the mail object instead of the mail uid
  • all setters in events do not return the event object (as stated in the official documenation)

Version 11.1 

In Version 11.1 the default behaviour for password fields is hashing the value with the default hashing algorithm before storing it in the database. If you want to restore the old behaviour you have to apply the changes described here.

Version 10.0 

In version 10 we completely removed jQuery, jQuery UI, Datetimepicker, Parsley.js and other old JS stuff from frontend rendering. We now use an own form framework, that runs with vanilla JS and can be included via async or defer and does not need any old jQuery version. To make the switch as smooth as possible for you, the validation output is nearly the same as with parsley.js. As a new feature we now validate while the input is done from the user.

Nevertheless, some HTML templates have changed:

  • Morestep validation is build in the HTML template:

    • EXT:powermail/Resources/Private/Partials/Form/Page.html
  • ViewHelper name changed from {vh:validation.enableParsleyAndAjax(form:form)} to {vh:validation.enableJavascriptValidationAndAjax(form:form)}:

    • EXT:powermail/Resources/Private/Templates/Form/Form.html
    • EXT:powermail/Resources/Private/Templates/Output/Edit.html
    • EXT:powermail/Resources/Private/Templates/Form/Confirmation.html
  • If you have added jQuery manually, you can remove the implementation (if it was only for powermail)

Version 9.0 

Version Description
Resources/Private/Partials/Form/Field/Html.html Uses now <f:sanitize> instead of <f:format.raw>. This means, that forms which uses the html element, will now clean the HTML for incorrect / possibly bad code.

EAP, development and branching model 

Early Access Program (EAP) 

The base for this development model is the Early Access Program (EAP). The EAP provides a private, early access to a version of Powermail, which is compatible with the youngest TYPO3 LTS version. The reason for an EAP program is, that EXT:powermail and related extensions are considered feature complete and we need at least a partial re-financing of the development efforts.

The code, developed while the EAP period, will become public nine months after the TYPO3 LTS was released. If you want to learn more about in2codes EAP program or have questions, please head over to in2code EAP or ask in the #ext-powermail channel on TYPO3 slack.

Which versions get which updates? 

TYPO3 - compatibility Support/Development Example (TYPO3 version) Branch name
upcoming TYPO3 LTS Security, Bugfixes, Features, Breaking changes v14 master
current TYPO3 LTS Security, Bugfixes, Features, Breaking changes (until powermail release 13.0) v13 (released October 2025) master
old TYPO3 LTS (before EAP becomes public) Security, Bugfixes, Features v12 (until July 2025) typo3_v12
old TYPO3 LTS (after EAP becomes public) Security, Bugfixes v12 (after July 2025) typo3_v12
TYPO3 ELTS Security, Bugfixes (paid) v11, v10, v09 typo3_v11, typo3_v10

Branching Model 

The development for the youngest (or upcoming) TYPO3 LTS compatible version happens in branch master. Each older version has its own compatibility branch. The branch name has nothing to do with the powermail version.

When the development for a recently published or upcoming TYPO3 LTS version starts a new branch for "LTS - 1" is created. For example, when the development for TYPO3 v13 compatibility starts, a new branch typo3-v12 is created. At this moment this will be the default branch for the public repository "for the time being". The base of all open pull requests (against master) will be changed to the new branch by the maintainer.

Development takes place in branches docs, feature and bugfix. Before merging they must meet following conditions:

  • necessary tests are added to the test suite
  • documentation is updated
  • branch is rebased onto the default branch
  • all tests are green: unit, acceptance, phpstan, codestyle

If everything is fine, the branch is merged as fast forward. This ensures a nice history and makes it possible to have pretty releases at github with all solved issues and attributions to contributors.

The development for public code takes place in the public repo. The private repository acts a mirror of these branches.

The development for the upcoming compatibility release happens in branch master of the private repository. Branch master is blocked for everyone (even the maintainer) in the public repo until the EAP development becomes public (TYPO3 LTS release + 9 months).

When the EAP phase is over, the code of branch master will be pushed as is to the public repo (including tags) and also available via packagist and the TYPO3 TER.

FAQ 

How to use responsive columns in powermail? 

Since powermail 4.0 it's possible to use wrapping containers for (e.g.) every 2/3/4 fields to get a markup like you already may know from bootstrap:

<div class="row">
    <div class="col-md-6">
        <label>Firstname</label>
        <input type="text" ... />
    </div>
    <div class="col-md-6">
        <label>Lastname</label>
        <input type="text" ... />
    </div>
</div>
<div class="row">
    <div class="col-md-6">
        <label>Email</label>
        <input type="text" ... />
    </div>
    <div class="col-md-6">
        <label>Phone</label>
        <input type="text" ... />
    </div>
</div>
Copied!

Have a look at TypoScript constants for some bootstrap class examples. Example TypoScript configuration:

plugin.tx_powermail.settings.setup {
    styles {
        numberOfColumns = 2
        framework {
            rowClasses = row
            fieldAndLabelWrappingClasses = col-md-6
        }
    }
}
Copied!

How does the magic work? There is a viewhelper in Page.html partial, that adds containers after x fields:

<vh:misc.createRowTags
    columns="{settings.styles.numberOfColumns}"
    class="{settings.styles.framework.rowClasses}"
    iteration="{iteration}"
    additionalAttributes="{data-foo:'bar'}
    tagName="div">

    <f:render partial="Field ..." />
</vh:misc.createRowTags>
Copied!
  • columns: Number of columns - 0 disables creation of new containers completely
  • class: Class name(s) for the new tag
  • iteration: The iteration array from a foreach viewhelper
  • additionalAttributes: Any additional attributes for the new tags (must be type of array)
  • tagName: Tagname for the new containers ("div" if not given)

How to solve SPF defiance? 

More and more email providers turn on SPF for their mailboxes (see https://en.wikipedia.org/wiki/Sender_Policy_Framework for details). Web forms should not send mails with the visitors email address as sender email address but with a server email address. Nevertheless powermail uses automatic reply email address from the sender.

To set a sender email address for the main email (to receiver), you could use this TypoScript:

plugin.tx_powermail.settings.setup.receiver.overwrite.senderEmail = TEXT
plugin.tx_powermail.settings.setup.receiver.overwrite.senderEmail.value = server@domain.org
plugin.tx_powermail.settings.setup.receiver.overwrite.senderName = TEXT
plugin.tx_powermail.settings.setup.receiver.overwrite.senderName.value = Server from domain.org
Copied!

To set a sender email address for the confirmation email (to sender), you could use this TypoScript:

plugin.tx_powermail.settings.setup.sender.overwrite.senderEmail = TEXT
plugin.tx_powermail.settings.setup.sender.overwrite.senderEmail.value = server@domain.org
plugin.tx_powermail.settings.setup.sender.overwrite.senderName = TEXT
plugin.tx_powermail.settings.setup.sender.overwrite.senderName.value = Server from domain.org
Copied!

To set a sender email address for the double-opt-in confirmation email (to sender), you could use this TypoScript:

plugin.tx_powermail.settings.setup.optin.overwrite.senderEmail = TEXT
plugin.tx_powermail.settings.setup.optin.overwrite.senderEmail.value = server@domain.org
plugin.tx_powermail.settings.setup.optin.overwrite.senderName = TEXT
plugin.tx_powermail.settings.setup.optin.overwrite.senderName.value = Server from domain.org
Copied!

To set a sender email address for the disclaimer email (to sender), you could use this TypoScript:

plugin.tx_powermail.settings.setup.disclaimer.overwrite.senderEmail = TEXT
plugin.tx_powermail.settings.setup.disclaimer.overwrite.senderEmail.value = server@domain.org
plugin.tx_powermail.settings.setup.disclaimer.overwrite.senderName = TEXT
plugin.tx_powermail.settings.setup.disclaimer.overwrite.senderName.value = Server from domain.org
Copied!

Please ask your server administrator for a valid email address.

No error messages / flash messages are shown, if using the redirect to a page 

Flash messages are shown, when using a powermail plugin on the page. If the user is redirected to another page, that does not have a powermail ce available, no flash messages are shown.

You can circumvent this by two means:

  1. Add the code <f:flashMessages queueIdentifier="extbase.flashmessages.tx_powermail_pi1"/> to your main template or layout.
  2. Add an empty powermail ce (without a form) to the target page.

Preferred solution is no 1.

Failure, mail could not be sent! What does this mean? 

If a mail could not be sent this message is coming up. You can turn on logs to see what's happening here (look at the documentation part for logging and debugging)

Can I attach files to any mail? 

Yes. You can simply add some files to any mail via TypoScript cObject – see TypoScript Main Template for details.

Short example:

plugin.tx_powermail.settings.setup.sender {
    addAttachment = TEXT
    addAttachment.value = fileadmin/file.pdf
}
Copied!

How to change the style selector with my own values (In Forms, Pages or Fields)? 

<select>
    <option value=”layout1”>Layout1</option>
    <option value=”layout2”>Layout2</option>
    <option value=”layout3”>Layout3</option>
</select>
Copied!

Changing values via page tsconfig:

TCEFORM {
    tx_powermail_domain_model_form {
        css {
            removeItems = layout1, layout2, layout3
            addItems {
                formgrey = Form grey
                form2cols = Form with 2 columns
                default = Default Form
            }
        }
    }
    tx_powermail_domain_model_page < .tx_powermail_domain_model_form
    tx_powermail_domain_model_field < .tx_powermail_domain_model_form
}
Copied!

This configuration produces this output in backend:

<select>
    <option value=”formgrey”>Form grey</option>
    <option value=”form2cols”>Form with 2 columns</option>
    <option value=”default”>Default Form</option>
</select>
Copied!

And adds the class “formgrey”, "form2cols" or “default” to all forms, pages and fields in the frontend.

faq_style

How to hide fields for editors? 

Hiding fields in tables form, page or field 

For editors (not administrators) fields can be disabled in the rights management of TYPO3 (see TYPO3 documentation how to show or hide fields for editors).

Another way is to hide fields for editors (and administrators) via Page TSConfig:

TCEFORM {
    tx_powermail_domain_model_form {
        css.disabled = 1
    }
    tx_powermail_domain_model_page {
        css.disabled = 1
    }
    tx_powermail_domain_model_field {
        css.disabled = 1
        feuser_value.disabled = 1
        placeholder.disabled = 1
    }
}
Copied!

You may also restrict this and other settings to non-admin users with a TypoScript condition (see https://docs.typo3.org/typo3cms/TSconfigReference/Conditions/Index.html).

Hiding fields from FlexForm 

If you add a powermail plugin, you will see some options in FlexForm. If you want to hide some of these fields (for editors and administrators), you can also do it via Page TSConfig:

TCEFORM {
    tt_content {
        pi_flexform {
            powermail_pi1 {
                main {
                    settings\.flexform\.main\.moresteps.disabled = 1
                    settings\.flexform\.main\.optin.disabled = 1
                    settings\.flexform\.main\.confirmation.disabled = 1
                    settings\.flexform\.main\.pid.disabled = 1
                }

                receiver {
                    settings\.flexform\.receiver\.fe_group.disabled = 1
                }

                thx {
                    settings\.flexform\.thx\.redirect.disabled = 1
                }
            }
        }
    }
}
Copied!

How to hide field types? 

If you want to completely remove fieldtypes (e.g. if you do not need a captcha field or other types), you can do this with a simple line of Page TSConfig:

TCEFORM.tx_powermail_domain_model_field.type.removeItems = captcha,location,typoscript

I want to use additionalAttributes in a field partial, but it's already in use 

All Field partials are original stored under EXT:powermail/Resources/Private/Partials/Form/Field/* Most of them are already using the parameter additionalAttributes to set data-attributes for clientside validation, etc... In some case you need to set your own additionalAttributes - see following code examples.

<!-- Original textfield example -->
<f:form.textfield
    ...
    additionalAttributes="{vh:validation.validationDataAttribute(field:field)}"
    ... />

<!-- Modified textfield example -->
<f:form.textfield
    ...
    additionalAttributes="{vh:validation.validationDataAttribute(field:field, additionalAttributes:'{autocomplete:\'off\',data-something:\'true\'}')}"
    ... />
Copied!

I want to use powermail on a news-detail-page, but the error Reason: No news entry found. comes up 

If you want to send a newstitle or something with powermail on a newsdetailpage, a form submit leads to a pagereload. But per default, powermail does not send the params &tx_news_pi1[news] again which leads to an error from the extension news.

This is easy to handle, just add this line of TypoScript to your Constants:

plugin.tx_powermail.settings.misc.addQueryString = 1

You need also set $GLOBALS['TYPO3_CONF_VARS']['FE]['cacheHash']['enforceValidation'] = false

I have a problem, what can I do? 

For administrators 

This chapter describes how you can install and configure powermail on your TYPO3 instance

  • Installation (Install powermail the right way)
  • BackendUserRights (How to configure powermail for your editors)
  • PowermailFrontend (Powermail can also show mails in a frontend context)
  • SchedulerTasks (Schedulertasks and Commands for administrative tasks)
  • BestPractice (A large best practice chapter for frequently asked tasks)
  • Privacy (What about GDPR and privacy in powermail?)
  • Upgrade (Some upgrade notes to powermail)

Backend User Rights 

Introduction 

A backend user without administration rights is not able to manage all fields in a powermail form by default. Maybe the Plugin looks like:

userrights_plugin_failure

Solution 

The user is not able to see the powermail fields. The problem is simple to solve. The admin should have a look into "Page Content: Plugin" and after that into "Page Content Plugin Options powermail_pi1" in the user or usergroup record.

userrights_plugin

userrights_flexform

After having all access rights, the plugin will look like:

plugin_tab1

Best practice in powermail 

This chapter show you some best practice how you can deal with your daily business together with powermail

AJAX Submit 

If you want to use submit via AJAX, you can enable this in TypoScript Setup (jQuery is needed for AJAX functions)

plugin.tx_powermail.settings.setup.misc.ajaxSubmit = 1

bestpractice_ajax

Overwrite Labels and Validation messages 

You can overwrite any label in powermail via TypoScript Setup. Have a look into locallang.xlf (EXT:powermail/Resources/Private/Language/locallang.xlf) for getting the relevant keys, that you want to overwrite (e.g. validationerror_mandatory).

plugin.tx_powermail {
    _LOCAL_LANG.default.validationerror_mandatory = Please insert a value
    _LOCAL_LANG.de.validationerror_mandatory = Bitte Pflichtfeld ausfüllen
}
Copied!

Convert a date into another format with a TypoScript UserFunc 

Powermail delivers a userFunc that could be used from administrators to convert date formats with TypoScript. This userFunc is not needed for the normal work of the extension. It is just an add-on for your special needs.

Example Use-Case:

  • Powermail with a date field is in use
  • After submit the date should be stored in a third-party-table (e.g. tx_ext_domain_model_table.endtime or tt_content.endtime)
  • The problem is, if someone would get the POST param from date field, it will be a readable string like "2015-12-31" but a timestamp is needed
# Convert 31.12.2015 to 2015-12-31
lib.test = USER
lib.test {
    userFunc = In2code\Powermail\UserFunc\DateConverter->convert
    includeLibs = EXT:powermail/Classes/UserFunc/DateConverter.php

    input = TEXT
    input.value = 31.12.2015

    inputFormat = TEXT
    inputFormat.value = d.m.Y

    outputFormat = TEXT
    outputFormat.value = Y-m-d
}
Copied!
# Convert 2015-12-31 into 1451516400
lib.test = USER
lib.test {
    userFunc = In2code\Powermail\UserFunc\DateConverter->convert
    includeLibs = EXT:powermail/Classes/UserFunc/DateConverter.php

    input = TEXT
    input.value = 2015-12-31

    inputFormat = TEXT
    inputFormat.value = Y-m-d

    outputFormat = TEXT
    outputFormat.value = U
}
Copied!
# Convert 2015-12-31 into 1451516400
plugin.tx_powermail.settings.setup.dbEntry.1 {
    # enable db entry
    _enable = TEXT
    _enable.value = 1

    # set table name
    _table = TEXT
    _table.value = tt_content

    # Fill with static value
    pid = TEXT
    pid.value = 123

    # Fill with current timestamp
    crdate = TEXT
    crdate.data = date:U

    # Fill header from powermail field with marker {header}
    header = TEXT
    header.data = GP:tx_powermail_pi1|field|header

    # Fill header from powermail field with marker {date} from Y-m-d to a unix timestamp
    starttime = USER
    starttime {
        userFunc = In2code\Powermail\UserFunc\DateConverter->convert
        includeLibs = EXT:powermail/Classes/UserFunc/DateConverter.php

        input = TEXT
        input.data = GP:tx_powermail_pi1|field|date

        inputFormat = TEXT
        inputFormat.value = Y-m-d

        outputFormat = TEXT
        outputFormat.value = U
    }
}
Copied!

Development Context 

It could be useful to set a test receiver email for all powermail forms in one TYPO3 instance.

Together with the context mode (introduced in TYPO3 6.2) you can test your forms on your development environment and deploy it to a production server without making changes in the database.

Activate Development Context 

You can activate the development context in your apache settings - e.g.:

<VirtualHost *:80>

    ...

    SetEnv TYPO3_CONTEXT Development
</VirtualHost>
Copied!

Or on your .htaccess - e.g.:

...
RewriteEngine On

# Enable TYPO3 development context for domain local.org
RewriteCond %{HTTP_HOST} ^local\.org$
RewriteRule (.*) $1 [E=TYPO3_CONTEXT:Development]

RewriteBase /
...
Copied!

Set Override-Email for Context 

Add a line to your AdditionalConfiguration.php - e.g.:

$GLOBALS['TYPO3_CONF_VARS']['EXT']['powermailDevelopContextEmail'] = 'overridereceiver@email.org';

This email is only active, if TYPO3 runs in Development Context!

Images 

Backend Module Function Check 

bestpractice_developmentcontext1

bestpractice_developmentcontext2

Plugin Information with note 

pluginInformation

Predefined Receiver 

In some case it could be useful, that the email receiver should be chosen by a selectfield value. E.g. if the visitor selects "receiver A" or "country B" in a dropdown, powermail should use receivera@domain.org and in all other cases receiverb@domain.org

bestpractice_predefinedreceivers1

Activate Predefined Receiver 

You can add a new option to the predefined receiver with a bit of page TSConfig

tx_powermail.flexForm.predefinedReceivers.addFieldOptions.receivers1 = receivers #1

bestpractice_predefinedreceivers2

Conditional receiver via TypoScript 

Small example 

In a simple example rec1@domain.org and rec2@domain.org should be always used, if the editor chooses "receivers2" in the plugin dropdown:

plugin.tx_powermail.settings.setup.receiver.predefinedReceiver {
    receivers2.email = TEXT
    receivers2.email.value = rec1@domain.org, rec2@domain.org
}
Copied!

Dynamic example 1 

In a bit more advanced example, we want to choose the receiver by a given value (e.g. of a select box). If value 1 is given in a field with marker {receiver}, receivera@domain.org should be chosen and if value 2 or something else is given, receiverb@domain.org should be chosen. See following TypoScript setup example:

plugin.tx_powermail.settings.setup.receiver.predefinedReceiver {

    receivers1.email = CASE
    receivers1.email {

        key.data = GP:tx_powermail_pi1|field|receiver

        1 = TEXT
        1.value = receivera@domain.org

        default = TEXT
        default.value = receiverb@domain.org
    }
}
Copied!

Dynamic example 2 

Here is another advanced example how to set a different email address for the receiver, by changing an integer into a frontend user email address (get it from database fe_users.email by given fe_users.uid). We just use some lines of TypoScript with cObject CONTENT (example for TYPO3 8). See following TypoScript setup example:

# Get Email address from fe_users by given POST-parameter
lib.receiver = CONTENT
lib.receiver {
    table = fe_users
    select {
        # Page with fe_users records
        pidInList = 33

        where {
            # UID of the fe_users record is given in field with marker {receiver}
            data = GP:tx_powermail_pi1|field|receiver

            wrap = uid=|
            intval = 1
        }
    }
    renderObj = TEXT
    renderObj {
            field = email
    }
}

plugin.tx_powermail.settings.setup.receiver.predefinedReceiver.receivers3.email < lib.receiver
Copied!

Additional note


The lib.receiver from the last example can also be used with predefined receivers or directly via
cObjectViewHelper in the receiver field in FlexForm - like:
*{f:cObject(typoscriptObjectPath:'lib.receiver')}*
Copied!

Filter Form Selection 

On large TYPO3 installations it is hard to keep an overview about all forms (see Backend Module "Form Overview") Especially if an editor can select a lot of forms in the plugin. Your editors may see forms from other trees, that are not relevant at the form chooser in the powermail plugin. You can use Page TSConfig to filter the list to relevant forms. Per default editors can only see forms, that are stored on pages where the editors have read access.

Note: We don't want to implement the element browser because we think it is easier for editors to choose a form from a select instead of opening a popup, clicks as long a s the relevant page is open and select a form. In short: We think the current solution is more editor friendly.

bestpractice_filterformselection1

You can filter this to the current page or to a tree. Just use Page TSConfig for a filter.

# Show only forms from the same page where the plugin is stored (and all subpages)
tx_powermail.flexForm.formSelection = current

# Show forms from page 46 (and all subpages)
tx_powermail.flexForm.formSelection = 46

# Show forms from page 46,49 and the current page where the plugin is stored (and all their subpages)
tx_powermail.flexForm.formSelection = 46,49,current

# Show all forms even for editors that may have no access to pages where forms are stored in
tx_powermail.flexForm.formSelection = *
Copied!

bestpractice_filterformselection2

Main TypoScript 

Constants are fix variables for your TYPO3 instance, that are often modified for an initial configuration. While TypoScript setup include the complete frontend configuration for powermail where constants are included.

Setup and constants are located in powermail at EXT:powermail/Configuration/TypoScript/Main/* (+ subfolders)

Some additional and optional TypoScript is stored in sibling folders.

TypoScript Constants 

plugin.tx_powermail {

  view {
    # cat=powermail_main/file; type=string; label= Path to template root (FE)
    templateRootPath = EXT:powermail/Resources/Private/Templates/

    # cat=powermail_main/file; type=string; label= Path to template partials (FE)
    partialRootPath = EXT:powermail/Resources/Private/Partials/

    # cat=powermail_main/file; type=string; label= Path to template layouts (FE)
    layoutRootPath = EXT:powermail/Resources/Private/Layouts/
  }

  settings {

    main {
      # cat=powermail_additional//0010; type=int+; label= Storage PID: Save mails in a defined Page (normally set via Flexform)
      pid =

      # cat=powermail_additional//0020; type=text; label= Form Uid: Commaseparated list of forms to show (normally set via Flexform)
      form =

      # cat=powermail_additional//0030; type=boolean; label= Confirmation Page Active: Activate Confirmation Page (normally set via Flexform)
      confirmation =

      # cat=powermail_additional//0040; type=boolean; label= Double Optin Active: Activate Double Optin for Mail sender (normally set via Flexform)
      optin =

      # cat=powermail_additional//0050; type=boolean; label= Morestep Active: Activate Morestep Forms (normally set via Flexform)
      moresteps =
    }

    validation {
      # cat=powermail_additional//0100; type=boolean; label= Native Browser Validation: Validate User Input with HTML5 native browser validation on clientside
      native = 1

      # cat=powermail_additional//0110; type=boolean; label= JavaScript Browser Validation: Validate User Input with JavaScript on clientside
      client = 1

      # cat=powermail_additional//0120; type=boolean; label= PHP Server Validation: Validate User Input with PHP on serverside
      server = 1
    }

    receiver {
      # cat=powermail_main/enable/0200; type=boolean; label= Receiver Mail: Enable Email to Receiver
      enable = 1

      # cat=powermail_main//0210; type=boolean; label= Receiver Attachments: Add uploaded files to emails
      attachment = 1

      # cat=powermail_main//0220; type=options[both,html,plain]; label= Receiver Mail Format: Change mail format
      mailformat = both

      default {
        # cat=powermail_additional//0230; type=text; label= Default Sender Name: Sendername if no sender name given
        senderName =

        # cat=powermail_additional//0240; type=text; label= Default Sender Email: Sender-email if no sender email given
        senderEmail =
      }

      overwrite {
        # cat=powermail_additional//0250; type=text; label= Receiver overwrite Email: Commaseparated list of mail receivers overwrites flexform settings (e.g. receiver1@mail.com, receiver1@mail.com)
        email =

        # cat=powermail_additional//0252; type=text; label= Receiver overwrite Name: Receiver Name overwrites flexform settings (e.g. Receiver Name)
        name =

        # cat=powermail_additional//0254; type=text; label= Receiver overwrite SenderName: Sender Name for mail to receiver overwrites flexform settings (e.g. Sender Name)
        senderName =

        # cat=powermail_additional//0256; type=text; label= Receiver overwrite SenderEmail: Sender Email for mail to receiver overwrites flexform settings (e.g. sender@mail.com)
        senderEmail =

        # cat=powermail_additional//0258; type=text; label= Receiver overwrite Mail Subject: Subject for mail to receiver overwrites flexform settings (e.g. New Mail from website)
        subject =

        # cat=powermail_additional//0260; type=text; label= Receiver CC Email Addresses: Commaseparated list of cc mail receivers (e.g. rec2@mail.com, rec3@mail.com)
        cc =

        # cat=powermail_additional//0262; type=text; label= Receiver BCC Email Addresses: Commaseparated list of bcc mail receivers (e.g. rec2@mail.com, rec3@mail.com)
        bcc =

        # cat=powermail_additional//0264; type=text; label= Receiver Mail Return Path: Return Path for emails to receiver (e.g. return@mail.com)
        returnPath =

        # cat=powermail_additional//0266; type=text; label= Receiver Mail Reply Mail: Reply Email address for mail to receiver (e.g. reply@mail.com)
        replyToEmail =

        # cat=powermail_additional//0268; type=text; label= Receiver Mail Reply Name: Reply Name for mail to receiver (e.g. Mr. Reply)
        replyToName =

        # cat=powermail_additional//0270; type=options[1,2,3,4,5]; label= Receiver Mail Priority: Set mail priority for mail to receiver (e.g. 3)
        priority = 3
      }

      senderHeader {
        # cat=powermail_additional//0060; type=text; label= Server-Mail: If set, the Mail-Header Sender is set (RFC 2822 - 3.6.2 Originator fields)
        email =

        # cat=powermail_additional//0070; type=text; label= Server-Name: you can define a name along with the mail address (optional)
        name =
      }
    }

    sender {
      # cat=powermail_main/enable/0400; type=boolean; label= Sender Mail: Enable Email to Sender
      enable = 1

      # cat=powermail_main//0410; type=boolean; label= Sender Attachments: Add uploaded files to emails
      attachment = 0

      # cat=powermail_main//0420; type=options[both,html,plain]; label= Sender Mail Format: Change mail format
      mailformat = both

      # cat=powermail_main//0425; type=boolean; label= Add disclaimer link: Add disclaimer link to the sender email (also in optin mail)
      addDisclaimerLink = 1

      default {
        # cat=powermail_additional//0430; type=text; label= Sender Mail - Default Sender Name: Sendername if no sender name given
        senderName =

        # cat=powermail_additional//0432; type=text; label= Sender Mail - Default Sender Email: Sender email address if no sender email given
        senderEmail =
      }

      overwrite {
        # cat=powermail_additional//0450; type=text; label= Sender overwrite Email: Comma-separated list of mail receivers overwrites flexform settings (e.g. receiver1@mail.com, receiver1@mail.com)
        email =

        # cat=powermail_additional//0452; type=text; label= Sender overwrite Name: Receiver Name overwrites flexform settings (e.g. Receiver Name)
        name =

        # cat=powermail_additional//0454; type=text; label= Sender overwrite SenderName: Sender Name for mail to sender overwrites flexform settings (e.g. Sender Name)
        senderName =

        # cat=powermail_additional//0456; type=text; label= Sender overwrite SenderEmail: Sender Email for mail to sender overwrites flexform settings (e.g. sender@mail.com)
        senderEmail =

        # cat=powermail_additional//0458; type=text; label= Sender overwrite Mail Subject: Subject for mail to sender overwrites flexform settings (e.g. Thx for your mail)
        subject =

        # cat=powermail_additional//0460; type=text; label= Sender CC Email Addresses: Comma-separated list of cc mail receivers (e.g. rec2@mail.com, rec3@mail.com)
        cc =

        # cat=powermail_additional//0462; type=text; label= Sender BCC Email Addresses: Comma-separated list of bcc mail receivers (e.g. rec2@mail.com, rec3@mail.com)
        bcc =

        # cat=powermail_additional//0464; type=text; label= Sender Mail Return Path: Return Path for emails to sender (e.g. return@mail.com)
        returnPath =

        # cat=powermail_additional//0466; type=text; label= Sender Mail Reply Mail: Reply Email address for mail to sender (e.g. reply@mail.com)
        replyToEmail =

        # cat=powermail_additional//0468; type=text; label= Sender Mail Reply Name: Reply Name for mail to sender (e.g. Mr. Reply)
        replyToName =

        # cat=powermail_additional//0470; type=options[1,2,3,4,5]; label= Sender Mail Priority: Set mail priority for mail to sender (e.g. 3)
        priority = 3
      }

      senderHeader {
        # cat=powermail_additional//0060; type=text; label= Server-Mail: If set, the Mail-Header Sender is set (RFC 2822 - 3.6.2 Originator fields)
        email =

        # cat=powermail_additional//0070; type=text; label= Server-Name: you can define a name along with the mail address (optional)
        name =
      }
    }

    db {
      # cat=powermail_main/enable/0600; type=boolean; label= Mail Storage enabled: Store Mails in database
      enable = 1

      # cat=powermail_additional//0610; type=boolean; label= Hidden Mails in Storage: Add mails with hidden flag (e.g. 1)
      hidden = 0
    }

    marketing {
      # cat=powermail_additional//0700; type=boolean; label= Enable Google Conversion: Enable JavaScript for google conversion - This is interesting if you want to track every submit in your Google Adwords account for a complete conversion.
      enable = 0

      # cat=powermail_additional//0710; type=int+; label= Google Conversion Id: Add your google conversion id (see www.google.com/adwords for details)
      google_conversion_id = 1234567890

      # cat=powermail_additional//0720; type=text; label= Google Conversion Label: Add your google conversion label (see www.google.com/adwords for details)
      google_conversion_label = abcdefghijklmnopqrs

      # cat=powermail_additional//0730; type=text; label= Google Conversion Language: Add your google conversion language (see www.google.com/adwords for details)
      google_conversion_language = en
    }

    misc {
      # cat=powermail_additional//0800; type=boolean; label= Allow html in html fields: Per default output of fields of type HTML is parsed through a htmlspecialchars() function to avoid Cross-Site-Scripting for security reasons. If you are aware of possible XSS-problems, caused by editors, you can enable it and your original HTML is shown in the Frontend.
      htmlForHtmlFields = 0

      # cat=powermail_additional//0802; type=boolean; label= Allow html in field labels: Per default labels are generated with htmlspecialchars() to prevent xss. This also disables links in labels. If you aware of possible XSS-problems, caused by editors, you can enable it.
      htmlForLabels = 0

      # cat=powermail_additional//0803; type=boolean; label= Show only filled values: If the user submits a form, even not filled values are viewable. If you only want to show labels with filled values, use this setting
      showOnlyFilledValues = 1

      # cat=powermail_additional//0805; type=boolean; label= AJAX Submit Form: Submit Powermail Forms with AJAX (browser will not reload complete page)
      ajaxSubmit = 0

      # cat=powermail_additional//0808; type=boolean; label= Enable AddQueryString: Keep GET-params in form Action (e.g. to use powermail on a tx_news detail page)
      # You need also set `$GLOBALS['TYPO3_CONF_VARS']['FE]['cacheHash']['enforceValidation'] = false`
      addQueryString = 0

      # cat=powermail_additional//0809; type=string; label= Use EXT:static-info-tables instead of CountryAPI, Possible Values are 0, 1
      useStaticInfoTables = 0

      # cat=powermail_additional//0810; type=text; label= Misc Upload Folder: Define the folder where files should be uploaded with upload fields (e.g. fileadmin/uploads/)
      uploadFolder = uploads/tx_powermail/

      # cat=powermail_additional//0820; type=int+; label= Misc Upload Filesize: Define the maximum filesize of file uploads in bytes (10485760 Byte -> 10 MB)
      uploadSize = 10485760

      # cat=powermail_additional//0830; type=text; label= Misc Upload Fileextensions: Define the allowed filetypes with their extensions for fileuploads and separate them with commas (e.g. jpg,jpeg,gif)
      uploadFileExtensions = jpg,jpeg,gif,png,tif,txt,doc,docx,xls,xlsx,ppt,pptx,pdf,mpg,mpeg,avi,mp3,zip,rar,ace,csv,svg

      # cat=powermail_additional//0840; type=boolean; label= Randomized Filenames: Uploaded filenames can be randomized to respect data privacy
      randomizeFileName = 1

      # cat=powermail_additional//0840; type=boolean; label= Prepend original file name: Prepend original file name to randomized file name if randomizeFileName is enabled
      randomizePrependOriginalFileName = 0
    }

    spamshield {
      # cat=powermail_spam//0900; type=boolean; label= SpamShield Active: En- or disable Spamshield for Powermail
      enable = 1

      # cat=powermail_spam//0910; type=int+; label= Spamshield Spamfactor in %: Set limit for spamfactor in powermail forms in % (e.g. 85)
      factor = 75

      # cat=powermail_spam//0920; type=text; label= Spamshield Notifymail: Admin can get an email if he/she wants to get informed if a mail failed. Let this field empty and no mail will be sent (e.g. admin@mail.com)
      email =

      # cat=powermail_spam//0925; type=text; label= Spamshield Notifymail sendermail: Define sender email address for mails
      senderEmail =

      # cat=powermail_spam//0930; type=text; label= Spamshield Notifymail Subject: Subject for notification Email to Admin
      emailSubject = Spam in powermail form recognized

      # cat=powermail_spam//0940; type=text; label= Spamshield Notifymail Template: Template for notification Email to Admin
      emailTemplate = EXT:powermail/Resources/Private/Templates/Mail/SpamNotification.html

      # cat=powermail_spam//0950; type=text; label= Spamshield Log Template Location: Path of log file, ie. typo3temp/logs/powermail_spam.log, if empty, logging is deactivated
      logfileLocation =

      # cat=powermail_spam//0960; type=text; label= Spamshield Log Template: Template for entries written to log file
      logTemplate = EXT:powermail/Resources/Private/Templates/Log/SpamNotification.html
    }

    captcha {
      # cat=powermail_spam//0930; type=text; label= Captcha Background: Set own captcha background image (e.g. fileadmin/bg.png)
      image = EXT:powermail/Resources/Private/Image/captcha_bg.png

      # cat=powermail_spam//0940; type=text; label= Captcha Font: Set TTF-Font for captcha image (e.g. fileadmin/font.ttf)
      font = EXT:powermail/Resources/Private/Fonts/Segment16cBold.ttf

      # cat=powermail_spam//0950; type=text; label= Captcha Text Color: Define your text color in hex code - must start with # (e.g. #ff0000)
      textColor = #111111

      # cat=powermail_spam//0960; type=int+; label= Captcha Text Size: Define your text size in px (e.g. 24)
      textSize = 32

      # cat=powermail_spam//0970; type=text; label= Captcha Text Angle: Define two different values (start and stop) for your text random angle and separate it with a comma (e.g. -10,10)
      textAngle = -5,5

      # cat=powermail_spam//0980; type=text; label= Captcha Text Distance Hor: Define two different values (start and stop) for your text horizontal random distance and separate it with a comma (e.g. 20,80)
      distanceHor = 20,100

      # cat=powermail_spam//0990; type=text; label= Captcha Text Distance Ver: Define two different values (start and stop) for your text vertical random distance and separate it with a comma (e.g. 30,60)
      distanceVer = 30,45
    }

    # CSS classes for frameworks
    styles {
      framework {
        # cat=powermail_styles//0020; type=int+; label= Number of columns
        numberOfColumns = 2

        # cat=powermail_styles//0100; type=text; label= Framework classname(s) for containers to build rows
        rowClasses = row

        # cat=powermail_styles//0105; type=text; label= Framework classname(s) for form
        formClasses =

        # cat=powermail_styles//0110; type=text; label= Framework classname(s) for overall wrapping container of a field/label pair e.g. "col-md-6"
        fieldAndLabelWrappingClasses = col-md-6

        # cat=powermail_styles//0120; type=text; label= Framework classname(s) for wrapping container of a field
        fieldWrappingClasses = powermail_field

        # cat=powermail_styles//0130; type=text; label= Framework classname(s) for fieldlabels e.g. "form-label"
        labelClasses = form-label powermail_label

        # cat=powermail_styles//0140; type=text; label= Framework classname(s) for fields e.g. "form-control"
        fieldClasses = form-control

        # cat=powermail_styles//0150; type=text; label= Framework classname(s) for fields with an offset e.g. "col-sm-offset-2"
        offsetClasses =

        # cat=powermail_styles//0160; type=text; label= Framework classname(s) especially for radiobuttons e.g. "form-check"
        radioClasses = form-check powermail_radiowrap

        # cat=powermail_styles//0170; type=text; label= Framework classname(s) especially for checkboxes e.g. "form-check"
        checkClasses = form-check powermail_checkwrap

        # cat=powermail_styles//0180; type=text; label= Framework classname(s) for the submit button e.g. "btn btn-primary"
        submitClasses = btn btn-primary

        # cat=powermail_styles//0190; type=text; label= Framework classname(s) for "create" message after submit
        createClasses = powermail_create
      }
    }
  }
}
Copied!

Manipulate values 

Manipulate values from {powermail_all} marker 

If you want to manipulate some values (for {powermail_all} marker), in different views, you can simple use TypoScript stdWrap for this.

All you need is the:

  • Marker name of the field that you want to manipulate - e.g. {markerName}

on different views:

  • Confirmation Page
  • Submit Page
  • Mail to Sender
  • Mail to Receiver
  • Optin Mail to Sender

See following TypoScript Setup example, how to manipulate values. If the value for {markerName} is "1", the value "red" is shown. In all other cases the value "blue" will be shown.

Note: You have access to the user send values with .field=value in TypoScript.

plugin.tx_powermail {
    settings {
        setup {

            # Manipulate values from {powermail_all} by markername
            manipulateVariablesInPowermailAllMarker {
                # On Confirmation Page (if activated)
                confirmationPage {
                    # manipulate values by given marker (e.g. firstname, email, referrer) with TypoScript - available fieldnames (access with .field=): value, label
                    markerName = CASE
                    markerName {
                        key.field = value

                        1 = TEXT
                        1.value = Override for value 1

                        default = TEXT
                        default.field = label
                    }
                }

                # On Submitpage
                submitPage {
                    # manipulate values by given marker (e.g. firstname, email, referrer) with TypoScript - available fieldnames (access with .field=): value, label
                    markerName = CASE
                    markerName {
                        key.field = value

                        1 = TEXT
                        1.value = Override for value 1

                        default = TEXT
                        default.field = label
                    }
                }

                # In Mail to receiver
                receiverMail {
                    # manipulate values by given marker (e.g. firstname, email, referrer) with TypoScript - available fieldnames (access with .field=): value, label
                    markerName = CASE
                    markerName {
                        key.field = value

                        1 = TEXT
                        1.value = Override for value 1

                        default = TEXT
                        default.field = label
                    }
                }

                # In Mail to sender (if activated)
                senderMail {
                    # manipulate values by given marker (e.g. firstname, email, referrer) with TypoScript - available fieldnames (access with .field=): value, label
                    markerName = CASE
                    markerName {
                        key.field = value

                        1 = TEXT
                        1.value = Override for value 1

                        default = TEXT
                        default.field = label
                    }
                }

                # In double-opt-in Mail to sender (if activated)
                optinMail {
                    # manipulate values by given marker (e.g. firstname, email, referrer) with TypoScript - available fieldnames (access with .field=): value, label
                    markerName = CASE
                    markerName {
                        key.field = value

                        1 = TEXT
                        1.value = Override for value 1

                        default = TEXT
                        default.field = label
                    }
                }
            }
        }
    }
}
Copied!

Manipulate single called values 

Of course you can use a combination of FLUID and TypoScript to also manipulate single values of variables.

Let's say the user should select a number as option from a selectbox (marker could be {receiver}) 1, 2 or 3 and on the submitpage you don't want to show the number, but a name.

FLUID (RTE or HTML-Template):

Thank you for your feedback

Your mail will be send to {receiver -> f:cObject(typoscriptObjectPath:'lib.receiver')}
Copied!

TypoScript setup:

lib.receiver = CASE
lib.receiver {
    key.field = 0
    1 = TEXT
    1.value = Alex
    2 = TEXT
    2.value = Andreas
    3 = TEXT
    3.value = Tim
}
Copied!

Password Field 

The password field is automatically hashed with the default algorithm that is configured in TYPO3.

The hashed password is saved to the table tx_powermail_domain_model_answers. It is possible to deactivate hashing with an EventListener listening to MailFactoryBeforePasswordIsHashedEvent and setting the property passwordShouldBeHashed to true.

In all Mails you can access the original value with the placeholder {passwordfieldname_originalValue}.

In the Finisher SaveToAnyTableFinisher you can use the field passwordfieldname_originalValue in the typoscript configuration and the plaintext password will be saved to the table.

In your own Finisher you can use the field passwordfieldname_originalValue to do whatever you want to do with the plaintext value.

Restoring the old (insecure) behaviour 

If you want to restore the old behaviour, to store the password in plaintext, you can apply the following changes.

1. Change Typoscript 

This changes are all based upon the default configuration of powermail, if you have your own configuration applied you should change it accordingly.

plugin.tx_powermail.settings.setup {
  excludeFromPowermailAllMarker {
    receiverMail {
      excludeFromFieldTypes >
    }
    senderMail {
      excludeFromFieldTypes >
    }
    optinMail {
      excludeFromFieldTypes >
    }
  }
}
Copied!

2. Integrate an Event Listener 

<?php

declare(strict_types=1);

namespace Vendor\Ext\EventListener;

use In2code\Powermail\Domain\Model\Answer;
use In2code\Powermail\Events\MailFactoryBeforePasswordIsHashedEvent;

final class DontHashPasswordEventListener
{
    public function dontHash(MailFactoryBeforePasswordIsHashedEvent $event): void
    {
        if ($event->getAnswer()->getValueType() === Answer::VALUE_TYPE_PASSWORD) {
            $event->setPasswordShouldBeHashed(false);
        }
    }
}
Copied!

3. Add EventListener to services.yaml 

services:
  Vendor\Ext\EventListener\DontHashPasswordEventListener:
    tags:
      - name: 'event.listener'
        identifier: 'vendor-ext/dont-hash-password'
        method: 'dontHash'
Copied!

After this changes the password will be stored in plaintext again in the answer table.

Prefill or preselect a field 

The standard way 

Prefilling (input, textarea, hidden) or preselecting (select, check, radio) of fields will be done by the PrefillFieldViewHelper. It listen to the following methods and parameters (in this ordering):

1. GET/POST param like &tx_powermail_pi1[field][marker]=value 

NOTE: If you want to a get parameter to prefill a form field, you need to exclude this parameter in [FE][cacheHash][excludedParameters], otherwise you will create 404 request, if [FE][pageNotFoundOnCHashError] is enabled (what should be enabled for security reasons!)

Example part in the LocalConfiguration.php:

'FE' => [
    'cacheHash' => [
        'excludedParameters' => [
            'L',
            'utm_source',
            'utm_medium',
            'utm_campaign',
            'utm_term',
            'utm_content',
            'tx_powermail_pi1[field][marker]',
        ]
    ]
],
Copied!

2. If field should be filled with values from FE_User (see field configuration) 

3. If field should be prefilled from static Setting (see field configuration) 

4. Fill with TypoScript cObject like 

plugin.tx_powermail.settings.setup.prefill {
    # Fill field with marker {email}
    email = TEXT
    email.value = mail@domain.org
}
Copied!

5. Fill with simple TypoScript like 

plugin.tx_powermail.settings.setup.prefill {
    # Fill field with marker {email}
    email = mail@domain.org
}
Copied!

6. Fill with your own PHP with a EventListener. 

Look at In2code\Powermail\ViewHelpers\Misc\PrefillFieldViewHelper::render()

Example markup 

prefill_frontend_output

Generating select options out of TypoScript 

You can dynamicly generate a select (or radio-buttons or checkboxes) field in powermail with some lines of TypoScript. To use this feature, you have to leave the field "Options" empty and you should fill the field "Create from TypoScript" with a TypoScriptObjectPath. See the following example:

prefill_select_typoscript1

prefill_select_typoscript2

Example 1 

After this, you can define your TypoScript setup:

lib.options = TEXT
lib.options.value = red[\n]blue[\n]pink
Copied!

This will result in a HTML like:

<select ...>
    <option>red</option>
    <option>blue</option>
    <option>pink</option>
</select>
Copied!

Example 2 

You can also define it with different labels and values:

lib.options = TEXT
lib.options.value = Red shoes|red[\n]Blue shoes|blue|*[\n]Pink shoes|pink
Copied!

This will result in a HTML like:

<select ...>
    <option value="red">Red shoes</option>
    <option value="blue" selected="selected">Blue shoes</option>
    <option value="pink">Pink shoes</option>
</select>
Copied!

Example 3 

Or maybe the visitor should select a category from table sys_category:

lib.options = CONTENT
   lib.options {
       table = sys_category
       select.pidInList = 156
       renderObj = COA
       renderObj {
           10 = TEXT
           10.field = title

           20 = TEXT
           20.value = |

           30 = TEXT
           30.field = uid

           stdWrap.wrap = |[\n]
       }
   }
Copied!

This will result in a HTML like:

<select ...>
    <option value="23">Category 1</option>
    <option value="24">Category 1</option>
    <option value="25">Category 1</option>
</select>
Copied!

Prevent Email duplicates 

Introduction 

In some use cases it could happen, that visitors double- (or triple-) click the submitbutton. Powermail is not able to prevent duplicates automatically and will store those mails/answers twice or even more. If you dig into the issue "Preventing double-click in html forms" in general it will turn out that it's not that simple to solve. Nevertheless, I will give you some hints how to get rid of those problems in powermail or mail-forms.

1. Solving usability issues 

We took over a large TYPO3 instance of an insurance company with a lot of powermail forms on their webpage. Facts like an old TYPO3 and PHP version, a small server and some bad caching configuration pulled the performance down. In addition, there was no feedback for the visitors on a form submit.

Going into details: If the visitor clicked submit, he could not see if a validation rule stops the submit-process or if the server is simply too slow to answer within 5 seconds. It turned out, that the visitors wanted to pass huge forms with a couple of validation rules and tried several times to submit, but clientside validation prevented sending the form. Because the visitors where more and more bothered, they tend to click submit multiple times.

How to improve mail form usability on web projects:

  • Show your visitors what validation rules are needed to pass a form before they click on submit
  • Give a quick feedback on submit (probably a loading image in submit button, etc...)
  • If you have large forms, split them into smaller parts
  • Think about enabling the submit button if all validation rules are passed (e.g. change color from grey to blue)
  • Think about removing useless fields in your forms. Large Forms reduced your conversion rate.

2. Prevent duplicates with serverside technology 

Beside the usability stuff, it must be possible to use some magic to prevent duplicates. You could use validation.unique settings in powermail TypoScript to prevent duplicated emails. If a form had a hidden field, that is filled automatically on form-load with a timestamp (or even better with a random value), a validation rule should check on submit if this value is unique otherwise show a message (see TypoScript example below how to enable it).

The downside: On slow servers/instances you will see that if you double-click a submit very fast, that the second request will be handled even before the first request was stored into the database, so a serverside validation may be the wrong way.

plugin.tx_powermail.settings.setup {
    # Prefill all fields {timestamppreventduplicates} with current timestamp
    prefill.timestamppreventduplicates = TEXT
    prefill.timestamppreventduplicates.data = date:U

    # turn unique validation off per default
    validation.unique.timestamppreventduplicates = 0

    # remove timestamp from powermail all variable
    excludeFromPowermailAllMarker {
        confirmationPage.excludeFromMarkerNames = timestamppreventduplicates
        submitPage.excludeFromMarkerNames = timestamppreventduplicates
        receiverMail.excludeFromMarkerNames = timestamppreventduplicates
        senderMail.excludeFromMarkerNames = timestamppreventduplicates
        optinMail.excludeFromMarkerNames = timestamppreventduplicates
    }
}

# turn validation on if GET/POST param with field timestamppreventduplicates exists
[traverse(request.getParsedBody(), 'tx_powermail_pi1/field/timestamppreventduplicates') > 0]
    plugin.tx_powermail.settings.setup.validation.unique.timestamppreventduplicates = 1
[end]
Copied!

3. Prevent duplicates with clientside technology 

If you face issues like I described it in 2. you will think about a faster solution to prevent duplicates. That was the time when JavaScript came into my mind. A played a lot and it was still not that simple to solve the issues on different browsers with different forms with different validation settings.

After some tests and proves on a live system the best solution was to disable the submit button if it's clicked more then one time and enabling it after some seconds again (probably some validation rules have to be satisfied before submitting)

See a possible solution for an inline JavaScript in the Submit-Partial of powermail:

<div class="powermail_fieldwrap powermail_fieldwrap_type_submit powermail_fieldwrap_{field.marker} {field.css} {settings.styles.framework.fieldAndLabelWrappingClasses}">
    <div class="{settings.styles.framework.fieldWrappingClasses} {settings.styles.framework.offsetClasses}">
        <f:form.submit value="{field.title}" class="{settings.styles.framework.submitClasses}" />

        <f:comment>
            New from here: Prevent duplicate clicks within 6 seconds
        </f:comment>
        <f:asset.css identifier="powermailSubmit">
            input.{settings.styles.framework.submitClasses}[disabled] {
                opacity: 0.3;
            }
        </f:asset.css>
        <f:asset.script identifier="powermailSubmit">
            let submitAmount = 0;
            const elements = document.querySelectorAll('.powermail_fieldwrap input[type="submit"]');

            elements.forEach(function(element) {
                element.addEventListener('click', function(event) {
                    submitAmount++;
                    if (submitAmount > 1) {
                        event.target.disabled = true;
                        setTimeout(
                            function() {
                                element.disabled = false;
                                submitAmount = 0;
                            }, 6000
                        );
                    }
                });
            });
        </f:asset.script>
    </div>
</div>
Copied!

Remove single values from {powermail_all} marker 

If you don't want to show secondary values like captcha result or the value of your hiddenfields on the submitpage and in the mail to the user, you can configure fieldtypes or markernames, that should be excluded from {powermail_all}

You can separate between:

  • Marker Names AND
  • Field Types

on different views:

  • Confirmation Page
  • Submit Page
  • Mail to Sender
  • Mail to Receiver
  • Opt-in Mail to Sender

See following TypoScript Setup example, how to avoid values from {adminonly} and {referrer} and all fields of type hidden and captcha on all webviews and in the mail to the user. In other words - those field values should only be seen by the admin in the mail to the receiver:

plugin.tx_powermail {
    settings {
        setup {

            # Exclude values from {powermail_all} by markername or fieldtype
            excludeFromPowermailAllMarker {
                # On Confirmation Page (if activated)
                confirmationPage {
                    # add some markernames (commaseparated) which should be excluded
                    excludeFromMarkerNames = adminonly, referrer

                    # add some fieldtypes (commaseparated) which should be excluded
                    excludeFromFieldTypes = hidden, captcha
                }

                # On Submitpage
                submitPage {
                    # add some markernames (commaseparated) which should be excluded
                    excludeFromMarkerNames = adminonly, referrer

                    # add some fieldtypes (commaseparated) which should be excluded
                    excludeFromFieldTypes = hidden, captcha
                }

                # In Mail to receiver
                receiverMail {
                    # add some markernames (commaseparated) which should be excluded
                    excludeFromMarkerNames =

                    # add some fieldtypes (commaseparated) which should be excluded
                    excludeFromFieldTypes =
                }

                # In Mail to sender (if activated)
                senderMail {
                    # add some markernames (commaseparated) which should be excluded
                    excludeFromMarkerNames = adminonly, referrer

                    # add some fieldtypes (commaseparated) which should be excluded
                    excludeFromFieldTypes = hidden, captcha
                }

                # In double-opt-in Mail to sender (if activated)
                optinMail {
                    # add some markernames (commaseparated) which should be excluded
                    excludeFromMarkerNames = adminonly, referrer

                    # add some fieldtypes (commaseparated) which should be excluded
                    excludeFromFieldTypes = hidden, captcha
                }
            }
        }
    }
}
Copied!

Save values to a session 

You can save values after a submit to a session. This could be helpful if a user should not fill out a form field twice. So a form could be prefilled with values that a user submitted before.

You can also use TypoScript stdWrap functionallity to manipulate those values.

See following example:

plugin.tx_powermail.settings.setup {

    # Save submitted values in a session to prefill forms for further visits. Define each markername for all forms.
    saveSession {
        # Method "temporary" means as long as the browser is open. "permanently" could be used together with a frontend-user session. If method is empty, saveSession is deactivated.
        _method = temporary

        firstname = TEXT
        firstname.field = firstname

        lastname = TEXT
        lastname.field = lastname
    }
}
Copied!

Saving Values to Third Party Table 

Introduction 

Powermail is able to save the values from a submitted form into a third-party-table (like news, tt_news, tt_address, tt_content, fe_users, pages, or something else...).

Note: If you want to use _ifUnique functionality (see below for a description), your table must have a field "uid"

Example for table tt_address:

plugin.tx_powermail.settings.setup {
    # Save values to any table (see following example)
    dbEntry {

        #####################################################
        ### EXAMPLE for adding values to table tt_address ###
        #####################################################

        1 {
            # Enable or disable db entry for table tt_address
#			_enable = TEXT
#			_enable.value = 1

            # Set tableName to "tt_address"
#			_table = TEXT
#			_table.value = tt_address

            # Write only if any field is not yet filled with current value (e.g. test if an email is already in database)
                # default: always add new records (don't care about existing values)
                # update: update record if there is an existing entry (e.g. if email is already there)
                # none: no entry if field is filled (do nothing if record already exists)
#			_ifUnique.email = update

            # optional: add additional where clause (only in mode "update") for search if a record still exists. You could use a plain string (see example below) or a cObject if needed
#			_ifUniqueWhereClause = AND pid = 123

            # Fill tt_address.email with a static value => mail@mail.com
#			email = TEXT
#			email.value = mail@mail.com

            # Fill tt_address.pid with the current pid (e.g. 12)
#			pid = TEXT
#			pid.data = TSFE:id

            # Fill tt_address.tstamp with the current time as timestamp (like 123456789)
#			tstamp = TEXT
#			tstamp.data = date:U

            # Fill tt_address.address with the current formatted time (like "Date: 20.01.2013")
#			address = TEXT
#			address.data = date:U
#			address.strftime = Date: %d.%m.%Y

            # Fill tt_address.name with the value from powermail {firstname}
#			name = TEXT
#			name.field = firstname

            # Fill tt_address.last_name with the value from powermail {lastname}
#			last_name = TEXT
#			last_name.field = lastname

            # Fill tt_address.company with the value from powermail {company}
#			company = TEXT
#			company.field = company

            # Fill tt_address.position with the uid of the mail record
#			position = TEXT
#			position.field = uid


        }


        ##############################################################
        ### EXAMPLE for building a relation to tt_address_group    ###
        ### over the MM table tt_address_group_mm                  ###
        ### Add relation to an existing address group with uid 123 ###
        ##############################################################

        2 {
            # Enable or disable db entry for table tt_address_group_mm
#			_enable = TEXT
#			_enable.value = 1

            # Set tableName to "tt_address_group_mm"
#			_table = TEXT
#			_table.value = tt_address_group_mm

            # Fill tt_address_group_mm.uid_local with uid of tt_address record from above configuration 1. (usage .field=uid_[key])
#			uid_local = TEXT
#			uid_local.field = uid_1

            # Fill new record of table "tt_address_group_mm" with field "uid_foreign" with uid 123
#			uid_foreign = TEXT
#			uid_foreign.value = 123
        }
    }
}
Copied!

Best practice 

If you want to enable the function not for every form but for some special cases, the whole world of TypoScript is open to you

# Enable function only if a special marker is given
plugin.tx_powermail.settings.setup.dbEntry.1._enable = TEXT
plugin.tx_powermail.settings.setup.dbEntry.1._enable.value = 1
plugin.tx_powermail.settings.setup.dbEntry.1._enable.if.isTrue.data = GP:tx_powermail_pi1|field|anymarkername
Copied!
# Enable function only if the form is located on a defined PID (e.g. 123 in this case)
plugin.tx_powermail.settings.setup.dbEntry.1._enable = TEXT
plugin.tx_powermail.settings.setup.dbEntry.1._enable.value = 1
plugin.tx_powermail.settings.setup.dbEntry.1._enable.if.value = 123
plugin.tx_powermail.settings.setup.dbEntry.1._enable.if.equals.data = TSFE:id
Copied!

Another possibility would be to use a TypoScript condition to enable some lines of TypoScript only if a condition is true (e.g. on a defined page or if a GET/POST param is set, etc...). Please look at the original TYPO3 TypoScript reference from some condition examples.

How to send attachments 

Defined by TypoScript 

In versions < 12.5 it was only possible to define, whether attachments are sent or not, via TypoScript. This setting was used for all forms and plugins (unless you used conditions or set the value in the database).

plugin.tx_powermail.settings.setup {
    receiver {
        attachment = {$plugin.tx_powermail.settings.receiver.attachment}
    }
    sender {
        attachment = {$plugin.tx_powermail.settings.sender.attachment}
    }
}
Copied!

Defined by editors 

Since version 12.5 it is possible, that editors define, whether attachments should be sent or not. This feature is "hidden" behind a feature toggle and restrictive page tsconfig settings.

Steps for activation 

  1. Activate the feature toggle in site settings
$GLOBALS['TYPO3_CONF_VARS']['SYS']['features']['powermailEditorsAreAllowedToSendAttachments'] = true;
Copied!
  1. Activate the fields in PageTSconfig

Due to security reasons these fields are hidden by default, so that the admin must take an additional step. Editors should not get more permissions, than necessary by a feature release. ;-)

TCEFORM {
  tt_content {
    pi_flexform {
      powermail_pi1 {
        sender {
          settings\.flexform\.sender\.attachment {
            disabled = 0
          }
        }
        receiver {
          settings\.flexform\.receiver\.attachment {
            disabled = 0
          }
        }
      }
    }
  }
}
Copied!

Sending Values to a third-party Software (e.g. a CRM) 

Powermail is also able to send the values to a third-party-software like a CRM or aMarketing-Automation-Tool (Salesforce, Eloqua, etc...).

Note: This is not a redirect, this feature send the values blind with CURL to any script.

TypoScript example 

plugin.tx_powermail.settings.setup {
    marketing {
        # Send Form values to CRM like salesforce or eloqua
        sendPost {
            # Activate sendPost (0/1)
            _enable = TEXT
            _enable.value = 0

            # Target URL for POST values (like http://www.target.com/target.php)
            targetUrl = http://eloqua.com/e/f.aspx

            # Basic Auth Protection - leave empty if Target is not protected
            username =
            password =

            # build your post values like &param1=value1&param2=value2
            values = COA
            values {
                10 = TEXT
                10 {
                    # value from field {firstname}
                    field = vorname
                    wrap = &firstname=|
                }

                20 = TEXT
                20 {
                    # value from field {e_mail}
                    field = e_mail
                    wrap = &email=|
                }

                30 = TEXT
                30 {
                    # value from field {comment}
                    field = comment
                    wrap = &text=|
                }
            }

            # activate debug - log all configuration from curl settings to devlog (use extension devlog to view this values)
            debug = 0
        }
    }
}
Copied!

Own implementation 

If this configuration doesn't help you because you need an individual solution to send values to a third-party-sofware or an API, please have a look into the "Finisher" part under "for Developers". It' very simple to add own finisher classes and do such magic via only a small lines of PHP code.

Set PID for new forms 

Maybe you want to define where new forms should be saved if editors are using the add link in plugin, you can do this with a bit of page TSConfig.

bestpractice_setpidfornewforms

# Save new forms on page 123
tx_powermail.flexForm.newFormPid = 123
Copied!

Spam Prevention 

Spamcheck in powermail 

Introduction 

bestpractice_spamshield1

Spamshield is a method to protect your mailforms from spam without the usage of a captcha field. After a submit, different spammethods must be passed:

  • Honeypot: An invisible field is added to the form. When it contains a value, the submission is spam.
  • Linkcheck: Checks if any of the field values contain an URL. When the configured URL limit is passed, the submission is spam.
  • Namecheck: Check if first- and last name fields contain the same value.
  • Sessioncheck: Check if the user loaded the form page before submitting it.
  • UniqueValues: Check if all the field values are distinct. If at least two values are the same, spam chance increases.
  • String Blacklist: Check if field values contain a word from a configured list of disallowed words.
  • IP-Address Blacklist: User IP address must not be on the list of disallowed addresses.
  • Rate limiting: User IP address may submit form only N times within a time frame

Every submitted form will be checked with this methods. Every failed method adds a Spam-Indication-Number to a storage. The sum of the Spam-Indication-Numbers leads to a Spam-Factor (from 0 to 100%). Per default every mail with a Spam-Factor of 75% is declined with a message.

Configuration via TypoScript 

plugin.tx_powermail {
    settings.setup {
        spamshield {
            _enable = 1
            factor = 75
            email = administrator@domain.org
            emailSubject = Spam in powermail form recognized
            emailTemplate = EXT:powermail/Resources/Private/Templates/Mail/SpamNotification.html
            logfileLocation = typo3temp/logs/powermail_spam.log
            logTemplate = EXT:powermail/Resources/Private/Templates/Log/SpamNotification.html

            methods {
                # Honeypot check
                1 {
                    _enable = 1

                    # Spamcheck name
                    name = Honey Pot

                    # Class
                    class = In2code\Powermail\Domain\Validator\SpamShield\HoneyPodMethod

                    # if this check failes - add this indication value to indicator (0 disables this check completely)
                    indication = 5

                    # method configuration
                    configuration {
                    }
                }

                # Link check
                2 {
                    _enable = 1

                    # Spamcheck name
                    name = Link check

                    # Class
                    class = In2code\Powermail\Domain\Validator\SpamShield\LinkMethod

                    # if this check failes - add this indication value to indicator (0 disables this check completely)
                    indication = 3

                    # method configuration
                    configuration {
                        # number of allowed links
                        linkLimit = 2
                    }
                }

                # Name check
                3 {
                    _enable = 1

                    # Spamcheck name
                    name = Name check

                    # Class
                    class = In2code\Powermail\Domain\Validator\SpamShield\NameMethod

                    # if this check failes - add this indication value to indicator (0 disables this check completely)
                    indication = 3

                    # method configuration
                    configuration {
                    }
                }

                # Session check
                4 {
                    _enable = 1

                    # Spamcheck name
                    name = Session check

                    # Class
                    class = In2code\Powermail\Domain\Validator\SpamShield\SessionMethod

                    # if this check failes - add this indication value to indicator (0 disables this check completely)
                    indication = 5

                    # method configuration
                    configuration {
                    }
                }

                # Unique check
                5 {
                    _enable = 1

                    # Spamcheck name
                    name = Unique check

                    # Class
                    class = In2code\Powermail\Domain\Validator\SpamShield\UniqueMethod

                    # if this check failes - add this indication value to indicator (0 disables this check completely)
                    indication = 2

                    # method configuration
                    configuration {
                    }
                }

                # Value blacklist check
                6 {
                    _enable = 1

                    # Spamcheck name
                    name = Value blacklist check

                    # Class
                    class = In2code\Powermail\Domain\Validator\SpamShield\ValueBlacklistMethod

                    # if this check failes - add this indication value to indicator (0 disables this check completely)
                    indication = 7

                    # method configuration
                    configuration {
                        # Blacklisted values (could also get read from a file - simply with FLUIDTEMPLATE)
                        values = TEXT
                        values.value = viagra,sex,porn,p0rn
                    }
                }

                # IP blacklist check
                7 {
                    _enable = 1

                    # Spamcheck name
                    name = IP blacklist check

                    # Class
                    class = In2code\Powermail\Domain\Validator\SpamShield\IpBlacklistMethod

                    # if this check failes - add this indication value to indicator (0 disables this check completely)
                    indication = 7

                    # method configuration
                    configuration {
                        # Blacklisted values (could also get read from a file - simply with FLUIDTEMPLATE)
                        values = TEXT
                        values.value = 123.132.125.123,123.132.125.124
                    }
                }

                # Rate limiter
                8 {
                    _enable = 1

                    # Spamcheck name
                    name = IP rate limiter

                    # Class
                    class = In2code\Powermail\Domain\Validator\SpamShield\RateLimitMethod

                    # if this check fails - add this indication value to indicator (0 disables this check completely)
                    indication = 100

                    # method configuration
                    configuration {
                        #see "DateTimeInterval" class for allowed values
                        interval = 5 minutes

                        #number of form sumissions within the interval
                        limit = 10

                        # Parts of the rate limiting key
                        # - placeholders: __ipAddress, __formIdentifier
                        # - form values: {email}
                        # - hard coded values: foo
                        restrictions {
                            10 = __ipAddress
                            20 = __formIdentifier
                        }
                    }
                }
            }
        }
    }
}
Copied!

Debug and finetune the Spamsettings 

It is useful to activate a notify mail to the admin (for an initial time period e.g.) if a submit failed (see TypoScript above how to enable). In the mail, you see which checks failed and the overall Spam Factor. This is an example of the mail content:

Possible spam in powermail form on page with PID 3

Spamfactor of this mail: 92%


Failed Spamchecks:
0: nameCheck failed
1: uniqueCheck failed
2: blacklistStringCheck failed


Given Form variables:
2: Alex
9: Alex
10: alexander.kellner@in2code.de
3: Viagra and Free P0rn
See link on http://freeporn.de or http://freeporn.com

Senders IP address: 155.233.10.8
Copied!

As an alternative, you can enable a logfile (see TypoScript above how to enable), where all spam is logged. This is an example content of the logfile:

----------------------------------------------------

2015-10-19 12:03:39

PID: 184
Spamfactor of this mail: 92%
Failed Spamchecks:
- linkCheck failed
- uniqueCheck failed
- blacklistStringCheck failed

Given Form variables:
- Name: Viagra
- E-Mail: Viagra
- Text: http://www.test.de
http://www.test.de
http://www.test.de

Senders IP addess: 127.0.0.1
Copied!

Register own spamcheck methods 

Of course you can register own spamshield methods. See manual part "for developers" for examples.

Disable spamcheck on some condition 

Of course you can disable all spamshield methods on some conditions. See manual part "for developers" for examples.

Captcha 

Using a captcha extension also helps to prevent spam. You can simply add a new field of type captcha. A build-in calculating captcha will be shown in frontend. If you want to use another extension, you can install the extension "captcha" from TER and configure powermail to use this extension for every captcha:

plugin.tx_powermail.settings.setup.captcha.use = captcha

Templates 

Using your own templates 

Powermail brings a lot of templates, layouts and partials to your system. You can add additional paths via TypoScript Setup. If you want to overwrite single files (e.g. Resources/Private/Templates/Form/Form.html) you can copy this single file to your sitepackage or to a fileadmin folder or else where (see values with "1" below). "0" is defined as fallback folder by default for the non-existing files in your defined folder:

plugin.tx_powermail {
    view {
        templateRootPaths {
            0 = EXT:powermail/Resources/Private/Templates/
            1 = fileadmin/templates/powermail/Templates/
        }
        partialRootPaths {
            0 = EXT:powermail/Resources/Private/Partials/
            1 = fileadmin/templates/powermail/Partials/
        }
        layoutRootPaths {
            0 = EXT:powermail/Resources/Private/Layouts/
            1 = fileadmin/templates/powermail/Layouts/
        }
    }
}
Copied!

Because constants are used for .1 in setup by default, you can also use TypoScript Constants like:

plugin.tx_powermail.view {
    templateRootPath = fileadmin/templates/powermail/Templates/
    partialRootPath = fileadmin/templates/powermail/Partials/
    layoutRootPath = fileadmin/templates/powermail/Layouts/
}
Copied!

Do not change the original templates of an extension, otherwise it's hard to update the extension!

Using Variables (former known as Markers) 

In Fluid you can use all available fields (that you see in the backend)

Dear Admin,

there is a new mail from {firstname} {lastname}

all values:
{powermail_all}

The subject of this mail is {mail.subject}
{label_firstname}: {firstname}
Copied!

See the hints in the template files or do a debug output with the debug ViewHelper

<f:debug>{firstname}</f:debug>
<f:debug>{mail}</f:debug>
<f:debug>{_all}</f:debug>
Copied!

You can also use the variables in the RTE fields in backend:

Dear {firstname} {lastname},
thank you for your mail.

Your text was:
{text -> f:format.nl2br()}

All transmitted values are:
{powermail_all}
Copied!

Using TypoScript in Templates or RTE fields 

Do you need some dynamic values from TypoScript in your Template or RTE? Use a cObject ViewHelper:

{f:cObject(typoscriptObjectPath:'lib.test')}

Using ViewHelpers in Templates of RTE fields 

Instead of TypoScript it is also possible to use an own ViewHelper in the templates. To avoid escaping the tag of the ViewHelper, the inline notation should be used.

{namespace yournamespace=Vendor\Extension\ViewHelpers} {yournamespace:doMagic()}

{namespace yournamespace=Vendor\Extension\ViewHelpers} {yournamespace:doMagicAndPassValue(data:'{firstname}')}

Look at the official documentation how to add own ViewHelpers to your sitepackage.

TypoScript Conditions 

Powermail offers 2 conditions, that could make your live easier

If a powermail form was submitted 

[isPowermailSubmitted()]
   // Yes, powermail just submitted, add own stuff
[end]
Copied!

If a powermail plugin is included into current page 

[isPowermailOnCurrentPage()]
    // Powermail plugin Pi1 (Form) is on the current page, add own stuff (include CSS or JS, etc...)
[end]
Copied!

Unique Values 

As you may know from powermail 1.x you can enforce that every value of a field should only exist once. This could be helpful if you want to start a competition with powermail and every email should only saved once.

plugin.tx_powermail.settings.setup.validation {
   unique {
       # Enable unique check for {email} - every email must be unique on the page where mails are stored
       email = 1

       # Enable a max limit of 3 times for the same entry for {event}
       event = 3
   }
}
Copied!

Installation 

Import for installation 

Just require this extension via composer

composer require in2code/powermail

Activate 

Install the extension and follow the instructions in TYPO3.

extension_manager

Note: If you update your powermail extension to version 8.0.0 (or higher) from a version under 8, you have to execute the upgrade wizard. Two steps are added from powermail 8.0.0

  • Copy values from tx_powermail_domain_model_field.pages to .page and from tx_powermail_domain_model_page.forms to .form
  • Set sys_language_uid to -1 for tx_powermail_domain_model_mail and tx_powermail_domain_model_answer

upgrade_wizard

Extension Manager Settings 

Main configuration for powermail for CMS wide settings.

Field Description Default value
Disable IP logging If you generally don't want to save the sender IP address in the database, you can use this checkbox. 1
Disable marketing information If you want to disable all marketing relevant information of powermail, you can enable this checkbox (effected: mail to admin, backend module, mail records, no static typoscript template). 0
Disable BE module You can disable the backend module if you don't store mails in your database or if you don't need the module. 0
Disable plugin information Below every powermail plugin is a short info table with form settings. You can disable these information. 0
Disable plugin information mail preview The plugin information shows 3 latest mails. If you want to disable this preview, you can check the button. 0
Enable Form caching With this setting, you can enable the caching of the form generation, what speeds up sites with powermail forms in the frontend. On the other hand, some additional features (like prefilling values from GET paramter, etc...) are not working any more. 0
Enable Merge for l10n_mode All fields with l10n_mode exclude should change their translation behaviour to mergeIfNotBlank. This allows you to have different field values in different languages. 0
ElementBrowser replaces IRRE Editors can add pages within a form table via IRRE. If this checkbox is enabled, an element browser replaces the IRRE Relation. Note: this is a beta-feature and not completely tested! 0

Static Templates 

Add powermail static templates for full functions

static_templates

Field Description
Main template (powermail) Main functions and settings for all powermail forms.
Powermail_Styling If you want to add a default styling, color customizable via CSS custom properties.
Powermail_Frontend (powermail) If you want to use show mails in frontend (Pi2), choose this template.
Marketing Information (powermail) If you want to see some marketing information about your visitors, you have to add this Template to your root Template. An AJAX function (needs jQuery) sends basic information to a powermail script (Visitors Country, Page Funnel, etc...).

Note TypoScript can be modified to configure powermail in the way you want to use powermail. See BestPractice/MainTypoScript for an overview over the complete TypoScript.

Site sets 

Since version 13 Powermail provides two sets of site sets for all TypoScript templates:

  • one site set as a drop-in, that reflects the current typoscript template behavior
  • one site set as a future-proof siteset, that replaces typoscript constants with settings.definitions.yaml.

Migration 

DropIn - SiteSet 

For the drop-in site set, you just need remove the inclusion of the TypoScript template and add the SiteSet to your installation. No other steps need to be done.

Future-proof SiteSet 

For this site-set there are some more steps to perform.

  • remove the inclusion of the typoscript template
  • add the necessary site set(s) without the "DropIn" prefix to your site
  • migrate TypoScript constants to your site settings. All constant names remain the same.

Default classes 

Powermail comes with classes for Bootstrap 5.x by default. You can change the default classes with the constants editor. The full TypoScript constants are:

plugin.tx_powermail {
	settings {
		styles {
			framework {
				# cat=powermail_styles//0020; type=int+; label= Number of columns
				numberOfColumns = 2

				# cat=powermail_styles//0100; type=text; label= Framework classname(s) for containers to build rows
				rowClasses = row

				# cat=powermail_styles//0105; type=text; label= Framework classname(s) for form
				formClasses =

				# cat=powermail_styles//0110; type=text; label= Framework classname(s) for overall wrapping container of a field/label pair e.g. "col-md-6"
				fieldAndLabelWrappingClasses = col-md-6

				# cat=powermail_styles//0120; type=text; label= Framework classname(s) for wrapping container of a field
				fieldWrappingClasses = powermail_field

				# cat=powermail_styles//0130; type=text; label= Framework classname(s) for fieldlabels e.g. "form-label"
				labelClasses = form-label powermail_label

				# cat=powermail_styles//0140; type=text; label= Framework classname(s) for fields e.g. "form-control"
				fieldClasses = form-control

				# cat=powermail_styles//0150; type=text; label= Framework classname(s) for fields with an offset e.g. "col-sm-offset-2"
				offsetClasses =

				# cat=powermail_styles//0160; type=text; label= Framework classname(s) especially for radiobuttons e.g. "form-check"
				radioClasses = form-check powermail_radiowrap

				# cat=powermail_styles//0170; type=text; label= Framework classname(s) especially for checkboxes e.g. "form-check"
				checkClasses = form-check powermail_checkwrap

				# cat=powermail_styles//0180; type=text; label= Framework classname(s) for the submit button e.g. "btn btn-primary"
				submitClasses = btn btn-primary

				# cat=powermail_styles//0190; type=text; label= Framework classname(s) for "create" message after submit
				createClasses = powermail_create
			}
		}
	}
}
Copied!

Add default styling 

You can add the static template "Powermail_Styling" to get a default styling for Powermail. You can change the colors using CSS custom properties:

--pm-primary-color: var(--pm-blue);
--pm-secondary-color: var(--pm-grey-2);

/**
 * Form fields
 *
 */

/* Input */
--pm-input-background-color: var(--pm-white);
--pm-input-border-color: var(--pm-grey-2);
--pm-input-color: var(--pm-black);
--pm-input-placeholder-color: var(--pm-grey-3);
--pm-input-invalid-background-color: var(--pm-input-background-color);
--pm-input-invalid-border-color: var(--pm-red);
--pm-input-invalid-color: var(--pm-input-color);

/* Select */
--pm-select-background-color: var(--pm-white);
--pm-select-border-color: var(--pm-grey-2);
--pm-select-color: var(--pm-black);

/* Checkbox */
--pm-check-background-color: var(--pm-white);
--pm-check-border-color: var(--pm-grey-2);
--pm-check-color: var(--pm-primary-color);

/* Radio */
--pm-radio-background-color: var(--pm-white);
--pm-radio-border-color: var(--pm-grey-2);
--pm-radio-color: var(--pm-primary-color);

/**
 * Buttons
 *
 */
--pm-button-background-color: transparent;
--pm-button-color: currentcolor;
--pm-button-border-color: transparent;
--pm-button-hover-background-color: transparent;
--pm-button-hover-border-color: transparent;
--pm-button-hover-color: currentcolor;

/* Primary */
--pm-button-primary-background-color: var(--pm-primary-color);
--pm-button-primary-border-color: var(--pm-primary-color);
--pm-button-primary-color: var(--pm-white);
--pm-button-primary-hover-background-color: color-mix(in srgb, var(--pm-primary-color), var(--pm-black) 20%);
--pm-button-primary-hover-border-color: color-mix(in srgb, var(--pm-primary-color), var(--pm-black) 20%);
--pm-button-primary-hover-color: var(--pm-white);

/* Secondary */
--pm-button-secondary-background-color: var(--pm-secondary-color);
--pm-button-secondary-border-color: var(--pm-secondary-color);
--pm-button-secondary-color: var(--pm-black);
--pm-button-secondary-hover-background-color: color-mix(in srgb, var(--pm-secondary-color), var(--pm-black) 20%);
--pm-button-secondary-hover-border-color: color-mix(in srgb, var(--pm-secondary-color), var(--pm-black) 20%);
--pm-button-secondary-hover-color: var(--pm-black);

/* Active */
--pm-button-active-background-color: var(--pm-primary-color);
--pm-button-active-border-color: var(--pm-primary-color);
--pm-button-active-color: var(--pm-white);
--pm-button-active-hover-background-color: color-mix(in srgb, var(--pm-primary-color), var(--pm-black) 20%);
--pm-button-active-hover-border-color: color-mix(in srgb, var(--pm-primary-color), var(--pm-black) 20%);
--pm-button-active-hover-color: var(--pm-white);

/* Warning */
--pm-button-warning-background-color: var(--pm-orange);
--pm-button-warning-border-color: var(--pm-orange);
--pm-button-warning-color: var(--pm-black);
--pm-button-warning-hover-background-color: color-mix(in srgb, var(--pm-orange), var(--pm-black) 20%);
--pm-button-warning-hover-border-color: color-mix(in srgb, var(--pm-orange), var(--pm-black) 20%);
--pm-button-warning-hover-color: var(--pm-black);

/* Danger */
--pm-button-danger-background-color: var(--pm-red);
--pm-button-danger-border-color: var(--pm-red);
--pm-button-danger-color: var(--pm-white);
--pm-button-danger-hover-background-color: color-mix(in srgb, var(--pm-red), var(--pm-black) 20%);
--pm-button-danger-hover-border-color: color-mix(in srgb, var(--pm-red), var(--pm-black) 20%);
--pm-button-danger-hover-color: var(--pm-white);

/**
 * Table
 *
 */

/* Head */
--pm-table-thead-tr-background-color: var(--pm-white);
--pm-table-thead-tr-color: var(--pm-black);
--pm-table-thead-th-border-color: var(--pm-grey-2);

/* Body */
--pm-table-tbody-tr-background-color: var(--pm-white);
--pm-table-tbody-tr-color: var(--pm-black);
--pm-table-tbody-tr-odd-background-color: var(--pm-grey-1);
--pm-table-tbody-tr-odd-color: var(--pm-black);
--pm-table-tbody-tr-hover-background-color: color-mix(in srgb, var(--pm-grey-1), var(--pm-black) 8%);
--pm-table-tbody-tr-hover-color: var(--pm-black);
--pm-table-tbody-th-border-color: var(--pm-grey-2);
--pm-table-tbody-td-border-color: var(--pm-grey-2);
Copied!

Privacy (GDPR / DSGVO) 

Introduction 

This page provides you some useful tips how to handle privacy settings for your visitors with powermail. Please note that this page is just a help but not a legal binding declaration.

Cookies 

Powermail does not store a cookie per default on the visitors browser since version 6.0. Nevertheless there are two reasons why powermail is forced to store a cookie because of its settings:

  • Marketing Static Template is added: If you are collecting information about page funnel or other useful information about your visitor, powermail needs to store a TYPO3 frontend cookie.
  • Session check - spam prevention: If you turn on a session check via TypoScript, a TYPO3 frontend cookie will be used.

Note: Session check is turned off by default with powermail. In older versions the session check is turned on by default and must be disabled via configuration:

plugin.tx_powermail.settings.setup.spamshield.methods.4._enable = 0

or disable all spamshield methods:

plugin.tx_powermail.settings.setup.spamshield._enable = 0

IP-Address 

Powermail does not store the IP-address of the visitor by default since version 6.0. If you want to store this information (to provide some anti-spam or anti-hack-methods) you have to turn this feature on in the extension manager settings.

Note: If you update your TYPO3, the configuration to save the IP-address may be already stored and must be turned off.

Note: If you enable "Marketing" information, the IP Adress is collected and is send via http to ip-api.com. Please refer https://ip-api.com/docs/legal for further information.

The service IP-API can be disabled via: plugin.tx_powermail.settings.settings.setup.marketing.determineCountry = 0 (default setting is off)

Disable storing of mails in database 

If you don't need to store mails in the database, you can simply turn it off with a bit of TypoScript:

plugin.tx_powermail.settings.db.enable = 0

If you use the OptIn Feature the mail is stored in the database until the user confirms it. If it is not confirmed you can delete it with a cleanup task after a defined period with the cleanuptask.

Deleting of old mails 

See the Scheduler section in the manual to see how you can remove old mails from the database.

Notes 

Please consider to not ask your website visitors for more information then you need for the request to meet the requirements of the GDPR.

The GDPR also requires that you only store data with personal information as long as is necessary for the purpose for which it was obtained. This only applies to records containing personal data (which is already the case if you obtained email address or name).

Scheduler tasks and symfony commands in powermail 

1. ExportCommand 

Introduction 

Generate a mail with an export file from saved mails as attachment

You can generate mails with a link to an exportfile or simply attach an export file to this mail. With this task you can (e.g.) send yourself 1 time a day a mail with all mails from the last 24h.

Configuration 

Propertyname Description Default value
receiverEmails Add one or more (comma-separated) recevier email addresses for mail generation [required]
senderEmail Add a sender email address sender@domain.org
subject Add a subject for the mail New mail export
pageUid You have to enter the page uid where the mails are stored that you want to export 0
domain Enter a domainname with a trailingslash for linkgeneration in mail https://domain.org
period You can define a timeperiod (in seconds) from now to the past. If you enter 86400 if you want to get the mails from the last 24 hours 2592000
attachment If you want to get the export file as attachment to the mail 1
fieldList Define the sorting of the fields that should be in the export file. If this field is empty, all default fields are exported. A commaseparated list with field uids configures the export file. In addition you can use values like crdate, sender_name, sender_mail, receiver_mail, subject, marketing_referer_domain, marketing_referer, marketing_frontend_language, marketing_browser_language, marketing_country marketing_mobile_device, marketing_page_funnel, user_agent, time, sender_ip, uid, feuser [empty]
format Define the export format. "xls" or "csv" is supported. xls
storageFolder Define where the export files should be stored. typo3temp/assets/tx_powermail/
fileName You can define a fix filename for your export file without fileextension. If you let this field empty, a randomized filename will be used.Privacy note: Take care, that your export file is not available for all website-users, especially if there are deserving protection datas in your export-files. [empty]
emailTemplate Path and filename to the email template EXT:powermail/Resources/Private/Templates/Module/ExportTaskMail.html

Example via scheduler 

scheduler_export1

scheduler_export2

scheduler_export3

Console examples 

You can call a scheduler task directly from the console - see this example (called from your TYPO3 project root):

./vendor/bin/typo3 powermail:export receiver@domain.org sender@domain.org "New mail subject" 112

Note 

If you need your own HTML-Template for XLS- or CSV-generating, you can define the templateRootPath in your root TypoScript

module.tx_powermail.view.templateRootPaths.1 = fileadmin/yourPath/Templates/

After that, you can copy the ExportXls.html and/or ExportCsv.html to fileadmin/yourPath/Templates/Module/ExportXls.html and modify it.

2. Table garbage collector 

Remove old mails and answers

If you choose table garbage collection in your scheduler, you can use the existing task to remove old entries of registered database tables. Also mails and answers from powermail are registered.

You should add a number for days that should decide how old entries in tx_powermail_domain_model_mail and _answer can be to be deleted.

Note: Deleted records are completely removed from the database! There is no way to reactivate them without a backup.

scheduler_garbage_collector

3. CleanupUnusedUploadsCommand 

Remove unused images via Scheduler

Introduction 

If you want to remove unused, uploaded files from the server, you can use a scheduler task for this. Define a folder, where powermail should search for unused files. All file which have no relation to a Mail record and is older than 1h will be removed. Note: This is irreversible - Please take care of a backup

Image example 

scheduler_cleanunusedfiles

Console example 

You can call a scheduler task directly from the console - see this example (called from your TYPO3 project root):

./vendor/bin/typo3 powermail:cleanupUnusedUploads

# or with path to uploads
./vendor/bin/typo3 powermail:cleanupUnusedUploads typo3temp/assets/tx_powermail
Copied!

4. CleanupExportsCommand 

Clean typo3temp/assets/tx_powermail/ folder

Introduction 

If you want to clean the typo3temp/assets/tx_powermail/ folder to remove generated export files, you can use this scheduler task.

Image example 

scheduler_cleanexportfiles

Console example 

You can call a scheduler task directly from the console - see this example (called from your TYPO3 project root):

# Remove all files that are older then 3600 seconds:
./vendor/bin/typo3 powermail:cleanupExports 3600
Copied!

5. CleanupUploadsCommand 

Clean uploads/tx_powermail/ folder

Introduction 

If you want to clean the uploads/tx_powermail/ folder to remove uploaded files (maybe for privacy reasons), you can use this scheduler task.

Image example 

scheduler_cleanupload

Console example 

You can call a scheduler task directly from the console - see this example (called from your TYPO3 project root):

# Remove all files that are older then 3600 seconds:
./vendor/bin/typo3 powermail:cleanupUploads 3600
Copied!

6. ResetMarkersCommand 

Reset all markers from fields within a form

Introduction 

If you want to reset marker names, you can use this scheduler task. Normally it should not be possible to create forms with duplicated or empty marker names in sys_language_uid=0 but in some special cases (updates, imports or misconfiguration) it could be, that there are forms with broken markers (see image below). You can use this scheduler task to reset markers of one or all forms.

Note: If you open a form and see following notice, the marker names are broken:

Error: Non-Unique marker names in the fields of this form detected This should not happen in powermail. Please check marker names of all fields to this form and fix it manually.

Image example 

scheduler_resetmarkers1

Console example 

You can call a scheduler task directly from the console - see this example (called from your TYPO3 project root):

# Reset markers from form with uid 280 and don't enforce it
./vendor/bin/typo3 powermail:resetMarkers 280 0

# Reset markers from all forms and enforce it!!!
./vendor/bin/typo3 powermail:resetMarkers 0 1
Copied!

Upgrade Powermail 

Introduction 

Maybe you need to upgrade powermail to this version. The following instructions should help you to upgrade as smooth as possible. Note: Please do not modify any extension files to ensure easy upgrading.

Upgrade Instructions 

You find instructions for each major version. Upgrade Instructions

Any Upgrade 

Description 

Do you have problems after a powermail upgrade?

Follow these steps 

Please follow these steps before you create a bug entry on GitHub:

  • Clean all caches in the Install Tool
  • Remove all files and folders in typo3temp/
  • Try to use the default TypoScript (comment out your TypoScript)
  • Try to use default Templates (and Partials and Layouts)
  • Are there any upgrade wizard steps regarding to powermail that you can execute?
  • Reload Frontend
  • Reload Backend
  • Check again
  • Still problems? Please report to GitHub

Bugfix Upgrade 

Example 

Upgrade from Powermail 8.0.x to 8.0.y

Details 

No breaking changes in database or HTML-Template-Files.

An upgrade should be very easy. Follow these steps:

  • Upgrade powermail via composer or oldschool with the Extension Manager
  • Clean all caches in the Install Tool (just removing all files in typo3temp/* may not help you!)
  • Reload Frontend
  • Reload Backend
  • Done

Minor Upgrade 

Example 

Upgrade from Powermail 8.x.a to 8.y.b

Details 

Normally there are no breaking changes. If there is a required change, the update is marked with !!! in TER and in Changelog. Probably there are changes in the Database, but the already stored values keep working.

Follow these steps:

  • Upgrade powermail via composer or oldschool with the Extension Manager
  • Use original HTML-Files (Templates, Partials, Layouts) for testing
  • Clean all caches in the Install Tool (just removing all files in typo3temp/* may not help you!)
  • Reload Frontend
  • Reload Backend
  • Update Backend User Rights for the new powermail version
  • Done

Major Upgrade 

Example 1 

Upgrade from Powermail 7.x to 8.x

Details 1 

Many breaking changes in database, Template Files, Scheduler Tasks, etc... are possible. You have to upgrade your own HTML-Templates (and Partials and Layouts) by your own. In addition the used TypoScript could have modifications - upgrade your TypoScript config.

Follow these steps:

  • Upgrade powermail via composer or oldschool with the Extension Manager
  • Are there any upgrade wizard steps regarding to powermail that you can execute? Execute them.
  • Clean all caches in the Install Tool (just removing all files in typo3temp/* may not help you!)
  • Use original HTML-Files (Templates, Partials, Layouts) for testing if there are still problems
  • Use original TypoScript configuration for testing if there are still problems
  • Reload Frontend
  • Reload Backend
  • Update Backend User Rights for the new powermail version
  • Done

For contributors 

If you want to contribute to the TYPO3 extension powermail, you are very welcome.

To make it easier to contribute, we provide a ddev enviroment, with a complete TYPO3 setup and ready to use.

Prerequisites 

Project setup 

  • open a console in the project root
  • run ddev start
  • run ddev initialize

Now you will be able to work with the website

Frontend: https://powermail-<TYPO3-version>.ddev.site/ Backend: https://powermail-<TYPO3-version>.ddev.site/typo3

Username: admin Password: password

PHP tests 

There are several test types preconfigured in EXT:powermail. These are

  • phplint
  • php-cs-fixer
  • phpstan
  • php unit test

All can be triggered locally via composer.

ddev exec composer run test:php:phpstan
Copied!

PHPstan: Update baseline 

As the time of this writing (while introducing phpstan in Sept. 2024), there are slightly over 1000 issues in the phpstan base. (Hopefully) They will be reduced, in future development. If you fixed one or more of them, it will be reported in the github pipeline or locally. If done so, they must be removed from the baseline with the following command.

ddev exec composer run test:php:phpstan:generate-baseline
Copied!

Behaviour tests 

More information on running behaviour tests is available here: Behaviour tests

Frontend Development 

There are some javascript libraries and (s)css files necessary for EXT:powermail to work properly in frontend context.

The sources files are located in Resources/Private/Build.

There is a small build pipeline to build the assets. The artifacts are committed into the repository.

  • have nvm installed (https://github.com/nvm-sh/nvm#install--update-script)
  • nvm i will install the correct npm version
  • nvm use will change to needed npm version
  • npm i will install the node modules (if not yet installed)
  • npm run build will build the necessary files
  • npm run watch will watch the files and rebuild them on changes

Render the Documentation 

You can render the documentation locally with

composer render:docs
Copied!

Add Data Processors 

Introduction 

Let's say you want to easily add some own php functions, that should be called before the mail object will be persisted and send to the receivers or if you want to override original DataProcessors from powermail, a DataProcessor will be the best choice.

Maybe you want to:

  • Change user inputs
  • Do a redirect before mails will be sent
  • Add additional information before the mail object will be stored
  • Something else...

Small example 

Just define which classes should be used. Every method like *DataProcessor() will be called - e.g. myNewDataProcessor():

plugin.tx_powermail.settings.setup {
   dataProcessors {
       1 {
           class = Vendor\Ext\DataProcessor\DoSomethingDataProcessor
       }
   }
}
Copied!

Add a php-file and extend your class with the AbstractDataProcessor from powermail:

<?php
namespace Vendor\Ext\DataProcessor;

use In2code\Powermail\DataProcessor\AbstractDataProcessor;

/**
* Class DoSomethingDataProcessor
*
* @package Vendor\Ext\DataProcessor
*/
class DoSomethingDataProcessor extends AbstractDataProcessor
{

   /**
    * MyDataProcessor
    *
    * @return void
    */
   public function doSomethingElseDataProcessor()
   {
       // do some magic ...
   }
}
Copied!

Extended example 

See the advanced example with some configuration in TypoScript and with the possibility to load the file (useful if file could not be loaded from autoloader because it's stored in fileadmin or elsewhere)

plugin.tx_powermail.settings.setup {
   dataProcessors {
       1 {
           # Classname that should be called with method *DataProcessor()
           class = Vendor\Ext\DataProcessor\DoSomethingDataProcessor

           # optional: Add configuration for your PHP
           config {
               foo = bar

               fooCObject = TEXT
               fooCObject.value = do something with this text
           }

           # optional: If file will not be loaded from autoloader, add path and it will be called with require_once
           require = fileadmin/powermail/dataProcessor/DoSomethingDataProcessor.php
       }
   }
}
Copied!

Add your php-file again and extend your class with the AbstractDataProcessor from powermail:

<?php
namespace Vendor\Ext\DataProcessor;

use In2code\Powermail\Domain\Model\Mail;
use In2code\Powermail\DataProcessor\AbstractDataProcessor;

/**
* Class DoSomethingDataProcessor
*
* @package Vendor\Ext\DataProcessor
*/
class DoSomethingDataProcessor extends AbstractDataProcessor
{

   /**
    * @var Mail
    */
   protected $mail;

   /**
    * @var array
    */
   protected $configuration;

   /**
    * @var array
    */
   protected $settings;

   /**
    * Will be called always at first
    *
    * @return void
    */
   public function initializeDataProcessor()
   {
   }

   /**
    * Will be called before myDataProcessor()
    *
    * @return void
    */
   public function initializeMyDataProcessor()
   {
   }

   /**
    * MyDataProcessor
    *
    * @return void
    */
   public function doSomethingElseDataProcessor()
   {
       // get value from configuration
       $foo = $this->configuration['foo'];

       // get subject from mail
       $subject = $this->getMail()->getSubject();

       // get a value by markername
       $value = $mail->getAnswersByFieldMarker()['markerName']->getValue();

       // get a value by field uid
       $value = $mail->getAnswersByFieldUid()[123]->getValue();

       // do some more magic ...
   }
}
Copied!

Some notices 

  • All methods which are ending with "DataProcessor" will be called - e.g. uploadDataProcessor()
  • The method initializeDataProcessor() will always be called at first
  • Every dataProcessor method could have its own initialize method, which will be called before. Like initializeMyDataProcessor() before myDataProcessor()
  • Classes in extensions (if namespace and filename fits) will be automaticly included from TYPO3 autoloader. If you place a single file in fileadmin, use "require" in TypoScript
  • Per default 10 and 20 is already in use from powermail itself (SessionDataProcessor, UploadDataProcessor).

Add Finisher Classes 

Introduction 

Let's say you want easily add some own php functions that should be called after a user submits a form or if you want to override original Finishers from powermail, a Finisher is the best choice.

Maybe you want to handle the user input to:

  • Send it to an API
  • Store it in a logfile
  • Save it into a table
  • Something else...

Small example 

Just define which classes should be used. Every method like *Finisher() will be called - e.g. myFinisher():

plugin.tx_powermail.settings.setup {
   finishers {
       1 {
           class = Vendor\Ext\Finisher\DoSomethingFinisher
       }
   }
}
Copied!

Add a php-file DoSomethingFinisher.php and extend your class with the AbstractFinisher from powermail:

<?php
namespace Vendor\Ext\Finisher;

use In2code\Powermail\Finisher\AbstractFinisher;

/**
* Class DoSomethingFinisher
*
* @package Vendor\Ext\Finisher
*/
class DoSomethingFinisher extends AbstractFinisher
{

   /**
    * MyFinisher
    *
    * @return void
    */
   public function myFinisher()
   {
       // do some magic ...
   }
}
Copied!

Extended example 

See the advanced example with some configuration in TypoScript and with the possibility to load the file (useful if file could not be loaded from autoloader because it's stored in fileadmin or elsewhere)

plugin.tx_powermail.settings.setup {
   finishers {
       1 {
           # Classname that should be called with method *Finisher()
           class = Vendor\Ext\Finisher\DoSomethingFinisher

           # optional: Add configuration for your PHP
           config {
               foo = bar

               fooCObject = TEXT
               fooCObject.value = do something with this text
           }

           # optional: If file will not be loaded from autoloader, add path and it will be called with require_once
           require = fileadmin/powermail/finisher/DoSomethingFinisher.php
       }
   }
}
Copied!

Add your php-file DoSomethingFinisher.php again and extend your class with the abstract class AbstractFinisher from powermail:

<?php
namespace Vendor\Ext\Finisher;

use In2code\Powermail\Domain\Model\Mail;
use In2code\Powermail\Finisher\AbstractFinisher;

/**
* Class DoSomethingFinisher
*
* @package Vendor\Ext\Finisher
*/
class DoSomethingFinisher extends AbstractFinisher
{

   /**
    * @var Mail
    */
   protected $mail;

   /**
    * @var array
    */
   protected $configuration;

   /**
    * @var array
    */
   protected $settings;

   /**
    * Will be called always at first
    *
    * @return void
    */
   public function initializeFinisher()
   {
   }

   /**
    * Will be called before myFinisher()
    *
    * @return void
    */
   public function initializeMyFinisher()
   {
   }

   /**
    * MyFinisher
    *
    * @return void
    */
   public function myFinisher()
   {
       // get value from configuration
       $foo = $this->configuration['foo'];

       // get subject from mail
       $subject = $this->getMail()->getSubject();

       // get a value by markername
       $value = $this->getMail()->getAnswersByFieldMarker()['markerName']->getValue();

       // get a value by field uid
       $value = $this->getMail()->getAnswersByFieldUid()[123]->getValue();

       // do some more magic ...
   }
}
Copied!

Some notices 

  • All methods which are ending with "finisher" will be called - e.g. saveFinisher().
  • The method initializeFinisher() will always be called at first.
  • Every finisher method could have its own initialize method, which will be called before. Like initializeMyFinisher() before myFinisher().
  • Classes in extensions (if namespace and filename fits) will be automatically included from TYPO3 autoloader. If you place a single file in fileadmin, use "require" in TypoScript.
  • Per default 10, 20 and 100 is already in use from powermail itself (SaveToAnyTableFinisher, SendParametersFinisher, RedirectFinisher).
  • The RedirectFinisher is automatically treated as a "finally" finisher and will always execute last. This ensures that all other finishers, including custom finishers from other extensions, are executed before the redirect.
  • Developers can continue to define finishers with numeric keys. These finishers will run in order, but the RedirectFinisher will always run at the end.
  • The full configuration of the RedirectFinisher, including config and require options, is preserved.

Execution Order and the RedirectFinisher 

Powermail finishers are executed in the order of their numeric keys. Previously, a RedirectFinisher with a lower numeric key could prevent finishers with higher keys from executing, because it throws a PropagateResponseException.

To solve this, the RedirectFinisher is now always executed last by default, regardless of its numeric key. This guarantees that:

  • Custom finishers from your extensions or other integrations will run reliably.
  • Redirects happen only after all other finishers have finished their work.
  • You do not need to add a special finally key yourself — it is handled automatically.

Add new Field Properties 

Introduction 

You can extend powermail fields with new properties to insert (e.g.) a checkbox for readonly or disabled or something else.

Following example shows two new fields in a new tab "Powermailextended". The first is an input field of type textarea. If the user entered text for this field this text shall be displayed. The second field is a checkbox. If this checkbox was checked from an editor, the input field should use the html-attribute readonly="readonly".

developer_new_fieldproperties1

developer_new_fieldproperties2

Extend powermail with an own extension 

You have to add one or more fields into tx_powermail_domain_model_field, describe it with additional TCA, add new Models and change the HTML-Template as you want. You can add a new extension with an example key powermailextended.

EXT:powermailextended/ext_tables.sql:

#
# Table structure for table 'tx_powermail_domain_model_field'
#
CREATE TABLE tx_powermail_domain_model_field (
 tx_powermailextended_powermail_text varchar(255) DEFAULT '' NOT NULL,
 tx_powermailextended_powermail_readonly tinyint(4) unsigned DEFAULT '0' NOT NULL
);
Copied!

EXT:powermailextended/ext_tables.php:

<?php
/**
 * Include Static TypoScript
 */
\TYPO3\CMS\Core\Utility\ExtensionManagementUtility::addStaticFile(
    $_EXTKEY,
    'Configuration/TypoScript',
    'Powermail Addition (after Powermail Template)'
);

/**
 * extend powermail fields tx_powermail_domain_model_field
 */
$tempColumns = [
    'tx_powermailextended_powermail_text' => [
        'exclude' => 1,
        'label' => 'Text before field',
        'config' => [
            'type' => 'text',
            'cols' => 32,
            'rows' => 2,
        ],
    ],
    'tx_powermailextended_powermail_readonly' => [
        'exclude' => 1,
        'label' => 'Readonly',
        'config' => [
            'type' => 'check',
        ],
    ],
];
\TYPO3\CMS\Core\Utility\ExtensionManagementUtility::addTCAcolumns(
    'tx_powermail_domain_model_field',
    $tempColumns
);
\TYPO3\CMS\Core\Utility\ExtensionManagementUtility::addToAllTCAtypes(
    'tx_powermail_domain_model_field',
    '--div--;Powermailextended, tx_powermailextended_powermail_text, tx_powermailextended_powermail_readonly',
    '',
    'after:own_marker_select'
);
Copied!

EXT:powermailextended/Configuration/TypoScript/setup.txt:

# Add own Partials
plugin.tx_powermail.view {
    partialRootPaths {
        1 = EXT:powermailextended/Resources/Private/Partials/
    }
}
# Add new Field Properties
config.tx_extbase{
    persistence{
        classes{
            In2code\Powermail\Domain\Model\Form {
                subclasses {
                    0 = In2code\Powermailextended\Domain\Model\Form
                }
            }
            In2code\Powermail\Domain\Model\Page {
                subclasses {
                    0 = In2code\Powermailextended\Domain\Model\Page
                }
            }
            In2code\Powermail\Domain\Model\Field {
                subclasses {
                    0 = In2code\Powermailextended\Domain\Model\Field
                }
            }
            In2code\Powermailextended\Domain\Model\Form {
                mapping {
                    tableName = tx_powermail_domain_model_form
                }
            }
            In2code\Powermailextended\Domain\Model\Page {
                mapping {
                    tableName = tx_powermail_domain_model_page
                }
            }
            In2code\Powermailextended\Domain\Model\Field {
                mapping {
                    tableName = tx_powermail_domain_model_field
                }
            }
        }
    }
    objects {
        In2code\Powermail\Domain\Repository\FormRepository.className = In2code\Powermailextended\Domain\Repository\FormRepository
    }
}
Copied!

EXT:powermailextended/Resources/Private/Partials/Form/Field/Input.html:

{namespace vh=In2code\Powermail\ViewHelpers}

<div id="powermail_fieldwrap_{field.uid}" class="powermail_fieldwrap powermail_fieldwrap_input powermail_fieldwrap_{field.uid} {field.css}">
<h2>
    {field.txPowermailextendedPowermailText}
</h2>
<label for="powermail_field_{field.marker}" class="powermail_label" title="{field.description}">
    <vh:string.escapeLabels>{field.title}</vh:string.escapeLabels><f:if condition="{field.mandatory}"><span class="mandatory">*</span></f:if>
</label>
<f:if condition="{field.txPowermailextendedPowermailReadonly}">
    <f:then>
        <f:form.textfield
                type="{vh:Validation.FieldTypeFromValidation(field:field)}"
                property="{field.marker}"
                placeholder="{field.placeholder}"
                readonly="readonly"
                value="{vh:Misc.PrefillField(field:field, mail:mail)}"
                class="powermail_field powermail_input {vh:Validation.ErrorClass(field:field, class:'powermail_field_error')}"
                additionalAttributes="{vh:Validation.ValidationDataAttribute(field:field)}"
                id="powermail_field_{field.marker}" />
    </f:then>
    <f:else>
        <f:form.textfield
                type="{vh:Validation.FieldTypeFromValidation(field:field)}"
                property="{field.marker}"
                placeholder="{field.placeholder}"
                value="{vh:Misc.PrefillField(field:field, mail:mail)}"
                class="powermail_field powermail_input {vh:Validation.ErrorClass(field:field, class:'powermail_field_error')}"
                additionalAttributes="{vh:Validation.ValidationDataAttribute(field:field)}"
                id="powermail_field_{field.marker}" />
    </f:else>
</f:if>

</div>
Copied!

EXT:powermailextended/Classes/Domain/Model/Field.php:

<?php
namespace In2code\Powermailextended\Domain\Model;

class Field extends \In2code\Powermail\Domain\Model\Field
{
    /**
     * New property text
     *
     * @var string $txPowermailextendedPowermailText
     */
    protected $txPowermailextendedPowermailText;

    /**
     * New property readonly
     *
     * @var string $txPowermailextendedPowermailReadonly
     */
    protected $txPowermailextendedPowermailReadonly;

    /**
     * @param string $txPowermailextendedPowermailReadonly
     * @return void
     */
    public function setTxPowermailextendedPowermailReadonly($txPowermailextendedPowermailReadonly)
    {
        $this->txPowermailextendedPowermailReadonly = $txPowermailextendedPowermailReadonly;
    }

    /**
     * @return string
     */
    public function getTxPowermailextendedPowermailReadonly()
    {
        return $this->txPowermailextendedPowermailReadonly;
    }

    /**
     * @param string $txPowermailextendedPowermailText
     * @return void
     */
    public function setTxPowermailextendedPowermailText($txPowermailextendedPowermailText)
    {
        $this->txPowermailextendedPowermailText = $txPowermailextendedPowermailText;
    }

    /**
     * @return string
     */
    public function getTxPowermailextendedPowermailText()
    {
        return $this->txPowermailextendedPowermailText;
    }
}
Copied!

EXT:powermailextended/Classes/Domain/Model/Page.php:

<?php
namespace In2code\Powermailextended\Domain\Model;

class Page extends \In2code\Powermail\Domain\Model\Page
{
    /**
     * Powermail Fields
     *
     * @var \TYPO3\CMS\Extbase\Persistence\ObjectStorage<\In2code\Powermailextended\Domain\Model\Field>
     */
    protected $fields = null;

    /**
     * @param \TYPO3\CMS\Extbase\Persistence\ObjectStorage $fields
     * @return void
     */
    public function setFields($fields)
    {
        $this->fields = $fields;
    }

    /**
     * @return \TYPO3\CMS\Extbase\Persistence\ObjectStorage
     */
    public function getFields()
    {
        return $this->fields;
    }
}
Copied!

EXT:powermailextended/Classes/Domain/Model/Form.php:

<?php
namespace In2code\Powermailextended\Domain\Model;

class Form extends \In2code\Powermail\Domain\Model\Form
{
    /**
     * pages
     *
     * @var \TYPO3\CMS\Extbase\Persistence\ObjectStorage<\In2code\Powermailextended\Domain\Model\Page>
     */
    protected $pages;

    /**
     * @param \TYPO3\CMS\Extbase\Persistence\ObjectStorage $pages
     * @return void
     */
    public function setPages($pages)
    {
        $this->pages = $pages;
    }

    /**
     * @return \TYPO3\CMS\Extbase\Persistence\ObjectStorage
     */
    public function getPages()
    {
        return $this->pages;
    }
}
Copied!

EXT:powermailextended/Classes/Domain/Repository/FormRepository.php:

<?php
namespace In2code\Powermailextended\Domain\Repository;

class FormRepository extends \In2code\Powermail\Domain\Repository\FormRepository
{
}
Copied!

Last but not least don't forget to add your static TypoScript template to your powermail page, otherwise the partials will not be used.

Example Code 

Look at https://github.com/einpraegsam/powermailextended for an example extension. This extension allows you to:

  • Extend powermail with a complete new field type (Just a small "Show Text" example)
  • Extend powermail with an own Php and JavaScript validator (ZIP validator - number has to start with 8)
  • Extend powermail with new field properties (readonly and prepend text from Textarea)
  • Extend powermail with an example SignalSlot (see ext_localconf.php and EXT:powermailextended/Classes/Controller/FormController.php)

Add new Fields 

Keep it simple 

Per default, there are a lot of Field-Types available in Powermail.

developer_new_fields1

If you want to add further fields, you can do this with a little bit of Page TSConfig.

tx_powermail.flexForm.type.addFieldOptions.new = New Field

# The label could also be written with LLL: to localize the label
# Example to grab a value from locallang.xml or locallang.xlf
#tx_powermail.flexForm.type.addFieldOptions.new = LLL:EXT:ext/Resources/Private/Language/locallang.xlf:label

# Tell powermail that the new fieldtype will transmit anything else then a string (0:string, 1:array, 2:date, 3:file)
# Example for dataType array
#tx_powermail.flexForm.type.addFieldOptions.new.dataType = 1

# The new field is not just a "show some text" field. It's a field where the user can send values and powermail stores the values?
# You can tell powermail that this new field should be exportable in backend module and via CommandController
#tx_powermail.flexForm.type.addFieldOptions.new.export = 1
Copied!

With this TSConfig a new Option is available:

developer_new_fields2

If an editor chose the new field, powermail searches by default for a Partial with Name New.html (Default Path is powermail/Resources/Private/Partials/Form/Field/New.html).

Because you should not modify anything within an extension-folder (because of upcoming extension-updates), you should create a new file in your fileadmin folder - e.g.: fileadmin/powermail/Partials/Form/Field/New.html

Example Content: 

<div>
  <h2>This is a complete new Field</h2>
</div>
Copied!

Let's take TypoScript Setup to tell powermail, where to find the new partial:

plugin.tx_powermail.view.partialRootPaths {
  0 = EXT:powermail/Resources/Private/Partials/
  1 = fileadmin/powermail/Partials/
}
Copied!

Example Code 

Look at https://github.com/einpraegsam/powermailextended for an example extension. This extension allows you to:

  • Extend powermail with a complete new field type (Just a small "Show Text" example)
  • Extend powermail with an own Php and JavaScript validator (ZIP validator - number has to start with 8)
  • Extend powermail with new field properties (readonly and prepend text from Textarea)
  • Extend powermail with an example SignalSlot (see ext_localconf.php and EXT:powermailextended/Classes/Controller/FormController.php)

Add new FlexForm properties 

Introduction 

If you want to add new fields to the FlexForm in the plugin, you can simply use a bit of Page TSConfig to do this. Of course you can access values in new fields with <f:debug>{settings}</f:debug> if the fieldname starts with "settings".

developer_new_flexformfield

Example TSConfig 

tx_powermail.flexForm.addField.settings\.flexform\.main\.test._sheet = main
tx_powermail.flexForm.addField.settings\.flexform\.main\.test.label = New Field XX
tx_powermail.flexForm.addField.settings\.flexform\.main\.test.config.type = input
tx_powermail.flexForm.addField.settings\.flexform\.main\.test.config.eval = trim
Copied!

Additional notes 

  • It's only possible to extend the FlexForm of Pi1 at the moment
  • Allowed sheets are: main, receiver, sender, thx
  • Once you've added a new field and the editor saves values to the new field, you have access in all templates (e.g. {settings.main.test})
  • Of course you could also use TYPO3 localization features in sheet labels (e.g. with LLL:EXT:ext/path/locallang_db.xlf:key)
  • New fields will be added at the end of the sheet
  • In this example only a default input field is rendered. See TCA documentation of TYPO3 which fieldtypes are possible.

Add spamshield methods 

Introduction 

Powermail adds spamshield methods per default. If you want to add own spamshield methods or if you want to override a original method, you can do that with a bit of TypoScript and a PHP-file.

Maybe you want to:

  • Validate IP addresses
  • Validate duplicate entries
  • Add external spam prevention methods
  • Something else...

Small example 

Just define which classes should be used. Every method like *Finisher() will be called - e.g. myFinisher():

plugin.tx_powermail.settings.setup {
   spamshield.methods {
       10 {
           class = Vendor\Ext\Domain\Validator\Spamshield\SpamPreventionMethod
       }
   }
}
Copied!

Add a php-file and extend your class with the AbstractMethod from powermail:

<?php
namespace Vendor\Ext\Domain\Validator\Spamshield;

use In2code\Powermail\Domain\Validator\SpamShield\AbstractMethod;

/**
* Class DoSomethingDataProcessor
*/
class DoSomethingDataProcessor extends AbstractMethod
{

    /**
     * My spamcheck
     *
     * @return bool true if spam recognized
     */
    public function spamCheck()
    {
       // ...
    }
}
Copied!

Extended example 

See the advanced example with some configuration in TypoScript

plugin.tx_powermail.settings.setup {
   spamshield.methods {
       10 {
           # enable or disable this check
           _enable = 1

           # Spamcheck name for log, email and validation message in frontend
           name = IP blacklist check

           # Classname to load with method spamCheck()
           class = Vendor\Ext\Domain\Validator\Spamshield\SpamPreventionMethod

           # if this check failes - add this indication value to indicator
           indication = 7

           # method configuration
           configuration {
               myConfiguration = something
           }
       }
   }
}
Copied!

Add your php-file again and extend your class with the AbstractMethod from powermail:

<?php
namespace Vendor\Ext\Domain\Validator\Spamshield;

use In2code\Powermail\Domain\Validator\SpamShield\AbstractMethod;

/**
* Class SpamPreventionMethod
*/
class SpamPreventionMethod extends AbstractMethod
{

    /**
     * @var null|Mail
     */
    protected $mail = null;

    /**
     * @var array
     */
    protected $configuration = [];

    /**
     * @var array
     */
    protected $arguments = [];

    /**
     * @var array
     */
    protected $settings = [];

   /**
    * Will be called always at first
    *
    * @return void
    */
   public function initialize()
   {
   }

   /**
    * Will be called before spamCheck()
    *
    * @return void
    */
   public function initializeSpamCheck()
   {
   }

   /**
    * My spam check
    *
    * @return void true if spam recognized
    */
   public function spamCheck()
   {
       // get value from configuration
       $foo = $this->configuration['myConfiguration'];

       foreach ($this->mail->getAnswers() as $answer) {
           if ($answer->getField()->getMarker() === 'markerName') {
               if ($answer->getValue() === 'foo') {
                   // if spam recognized, return true
                   return false;
               }
           }
       }

       return true;
   }
}
Copied!

Some notices 

  • Method spamCheck() will be called always
  • The method initialize() and initializeSpamCheck() will always be called at first
  • Per default 1 - 7 is already in use from powermail itself (HoneyPodMethod, LinkMethod, NameMethod, etc...).

Database Model 

developer_database_model

Disable spamshield 

Introduction 

Spamshield is a nice feature of powermail to prevent spam. Nevertheless sometimes you want to test powermail but spamshield blocks your tests. Wouldn't it be great to disable spamshield on some conditions (like on your IP-Address)?

Available since version 

powermail 5.1.0

Small example 

Just define which classes should be used. Extend your class with \In2code\Powermail\Domain\Validator\SpamShield\Breaker\AbstractBreaker and add a method isDisabled()

plugin.tx_powermail.settings.setup {
   spamshield._disable {
       1 {
         class = Vendor\PowermailExtended\Domain\Validator\SpamShield\Breaker\MyBreaker
     }
   }
}
Copied!
<?php
namespace Vendor\PowermailExtended\Domain\Validator\SpamShield\Breaker;

use In2code\Powermail\Domain\Validator\SpamShield\Breaker\AbstractBreaker;

/**
* Class MyBreaker
*/
class MyBreaker extends AbstractBreaker
{

    /**
     * @return bool true if spamshield should be disabled
     */
    public function isDisabled(): bool
    {
       return true;
    }
}
Copied!

Extended examples and existing breakers 

There are already two breakers that can be used in powermail

plugin.tx_powermail.settings.setup {
   spamshield._disable {
     1 {
         # Disable spamcheck if visitor is in IP-Range
         class = In2code\Powermail\Domain\Validator\SpamShield\Breaker\IpBreaker
         configuration {
             // Commaseparated list of IPs. Use * for wildcards in the IP-address
             ipWhitelist = 127.0.0.1,192.168.0.*
         }
     }
     2 {
         # Disable spamcheck if any field contains a given value - like "powermailTestCase"
         class = In2code\Powermail\Domain\Validator\SpamShield\Breaker\ValueBreaker
         configuration {
             value = powermailTestCase
         }
     }
   }
}
Copied!

Have a look into the extension PHP-Files to get some inspirations:

<?php
declare(strict_types=1);
namespace In2code\Powermail\Domain\Validator\SpamShield\Breaker;

use In2code\Powermail\Domain\Model\Answer;

/**
* Class ValueBreaker
*/
class ValueBreaker extends AbstractBreaker
{

   /**
    * @return bool
    */
   public function isDisabled(): bool
   {
       $configuration = $this->getConfiguration();
       $this->checkConfiguration($configuration);
       foreach ($this->getMail()->getAnswers() as $answer) {
           /** @var $answer Answer */
           if ($answer->getValue() === $configuration['value']) {
               return true;
           }
       }
       return false;
   }

   /**
    * @param array $configuration
    * @return void
    */
   protected function checkConfiguration(array $configuration)
   {
       if (empty($configuration['value'])) {
           throw new \UnexpectedValueException('No value given to check for', 1516025541289);
       }
   }
}
Copied!
<?php
declare(strict_types=1);
namespace In2code\Powermail\Domain\Validator\SpamShield\Breaker;

use TYPO3\CMS\Core\Utility\GeneralUtility;

/**
* Class IpBreaker
*/
class IpBreaker extends AbstractBreaker
{

   /**
    * @return bool
    */
   public function isDisabled(): bool
   {
       foreach ($this->getIpAddresses() as $ipAddress) {
           if ($this->isIpMatching(GeneralUtility::getIndpEnv('REMOTE_ADDR'), $ipAddress)) {
               return true;
           }
       }
       return false;
   }

   /**
    * @param string $givenIp like "127.0.0.1"
    * @param string $ipRange like "127.0.0.1" or "192.168.*.*"
    * @return bool
    */
   protected function isIpMatching(string $givenIp, string $ipRange): bool
   {
       if (stristr($ipRange, '*')) {
           $rangeParts = explode('.', $ipRange);
           $givenParts = explode('.', $givenIp);
           if (count($rangeParts) !== count($givenParts)) {
               throw new \UnexpectedValueException(
                   'Number of segments between current ip and compared ip does not match',
                   1516024779382
               );
           }
           foreach (array_keys($rangeParts) as $key) {
               if ($rangeParts[$key] === '*') {
                   $givenParts[$key] = '*';
               }
           }
           $givenIp = implode('.', $givenParts);
       }
       return $givenIp === $ipRange;
   }

   /**
    * @return array
    */
   protected function getIpAddresses(): array
   {
       $configuration = $this->getConfiguration();
       if (empty($configuration['ipWhitelist'])) {
           throw new \UnexpectedValueException(
               'Setup ...spamshield.disable.NO.configuration.ipWhitelist not given',
               1516024283512
           );
       }
       return GeneralUtility::trimExplode(',', $configuration['ipWhitelist'], true);
   }
}
Copied!

Some notices 

  • You have to add the method isDisabled() and you have to return a boolean value
  • The method initialize() will always be called at first

PSR-14 EventDispatcher 

Overview 

Powermail offers a lot of events (modern pendant to hooks) to extend functions and properties with your extension. Please report to https://github.com/einpraegsam/powermail/issues if you need a new event anywhere.

Location Event Description
In2code\Powermail\Domain\Validator\CustomValidator::isValid() In2code\Powermail\Events\CustomValidatorEvent Add your own serverside Validation
In2code\Powermail\Controller\FormController::formAction() In2code\Powermail\Events\FormControllerFormActionEvent Listeners are called before the form is rendered
In2code\Powermail\Controller\FormController::createAction() In2code\Powermail\Events\FormControllerCreateActionBeforeRenderViewEvent Listeners are called before the mail and answers are persisted and before the emails are sent
In2code\Powermail\Controller\FormController::createAction() In2code\Powermail\Events\FormControllerCreateActionAfterMailDbSavedEvent Listeners are called directly after the mail was persisted
In2code\Powermail\Controller\FormController::createAction() In2code\Powermail\Events\FormControllerCreateActionAfterSubmitViewEvent Listeners are called after the create message was rendered
In2code\Powermail\Controller\FormController::createAction() In2code\Powermail\Events\CheckIfMailIsAllowedToSaveEvent It is possible to deny saving of the mail with this event
In2code\Powermail\Controller\FormController::confirmationAction() In2code\Powermail\Events\FormControllerConfirmationActionEvent Listeners are called before the confirmation view is rendered
In2code\Powermail\Controller\FormController::optinConfirmAction() In2code\Powermail\Events\FormControllerOptinConfirmActionBeforeRenderViewEvent Listeners are called before the optin confirmation view is rendered (only if Double-Opt-In is in use)
In2code\Powermail\Controller\FormController::initializeObject() In2code\Powermail\Events\FormControllerInitializeObjectEvent Change Settings from Flexform or TypoScript before Action is called
In2code\Powermail\ViewHelpers\Misc\PrefillFieldViewHelper::render() In2code\Powermail\Events\PrefillFieldViewHelperEvent Prefill fields by your own magic
In2code\Powermail\ViewHelpers\Misc\PrefillMultiFieldViewHelper::render() In2code\Powermail\Events\PrefillMultiFieldViewHelperEvent Prefill multiple fields by your own magic
In2code\Powermail\Domain\Service\Mail\ReceiverMailReceiverPropertiesService::setReceiverEmails() In2code\Powermail\Events\ReceiverMailReceiverPropertiesServiceSetReceiverEmailsEvent Manipulate receiver emails short before the mails will be send
In2code\Powermail\Domain\Service\Mail\ReceiverMailReceiverPropertiesService::getReceiverName() In2code\Powermail\Events\ReceiverMailReceiverPropertiesServiceGetReceiverNameEvent Manipulate receiver name when getting it
In2code\Powermail\Domain\Service\Mail\SendMailService::prepareAndSend() In2code\Powermail\Events\SendMailServicePrepareAndSendEvent Change the message object before sending
In2code\Powermail\Domain\Service\Mail\SendMailService::createEmailBody() In2code\Powermail\Events\SendMailServiceCreateEmailBodyEvent Manipulate standaloneView-object before the mail object will be rendered
In2code\Powermail\Domain\Service\Mail\ReceiverMailReceiverPropertiesService::setReceiverEmails() In2code\Powermail\Events\ReceiverMailReceiverPropertiesServiceSetReceiverEmailsEvent Manipulate given receiver email addresses
In2code\Powermail\Domain\Service\Mail\ReceiverMailReceiverPropertiesServicegetReceiverName() In2code\Powermail\Events\ReceiverMailReceiverPropertiesServiceGetReceiverNameEvent Manipulate given receiver name
In2code\Powermail\Domain\Service\Mail\ReceiverMailSenderPropertiesService::getSenderEmail() In2code\Powermail\Events\ReceiverMailSenderPropertiesGetSenderEmailEvent Manipulate given sender email addresses
In2code\Powermail\Domain\Service\Mail\ReceiverMailSenderPropertiesService::getSenderName() In2code\Powermail\Events\ReceiverMailSenderPropertiesGetSenderNameEvent Manipulate given sender name
In2code\Powermail\Domain\Service\UploadService::preflight() In2code\Powermail\Events\UploadServicePreflightEvent Change files from upload-fields before they will be validated, stored and send
In2code\Powermail\Domain\Service\UploadService::getFiles() In2code\Powermail\Events\UploadServiceGetFilesEvent Change files array from upload-fields whenever files will be read
In2code\Powermail\Domain\Model\File::getNewPathAndFilename() In2code\Powermail\Events\GetNewPathAndFilenameEvent Change path and filename of a single file for uploading, attaching to email or something else
In2code\Powermail\ViewHelpers\Validation\ValidationDataAttributeViewHelper::render() In2code\Powermail\Events\ValidationDataAttributeViewHelperEvent Useful if you want to hook into additionalAttributes and set your own attributes to fields
In2code\Powermail\Domain\Repository\MailRepository::getVariablesWithMarkersFromMail() In2code\Powermail\Events\MailRepositoryGetVariablesWithMarkersFromMailEvent If you want to register your own markers use this event

How to add a listener 

There is a very good documentation how to work with EventDispatcher in TYPO3: https://docs.typo3.org/m/typo3/reference-coreapi/main/en-us/ApiOverview/Events/EventDispatcher/Index.html

Example Code 

Look at https://github.com/einpraegsam/powermailextended for an example extension. This extension allows you to:

  • Extend powermail with a complete new field type (Just a small "Show Text" example)
  • Extend powermail with an own Php and JavaScript validator (ZIP validator - number has to start with 8)
  • Extend powermail with new field properties (readonly and prepend text from Textarea)
  • Extend powermail with an example SignalSlot (see ext_localconf.php and EXT:powermailextended/Classes/Controller/FormController.php)

Local Development with Docker 

Preparation:

  1. Ensure the git-lfs is installed (GIt Large File System) - see https://git-lfs.github.com
  2. Checkout the source code via git

Powermail delivers two options for local development with docker:

  • DDEV Support
  • Native Docker Support (in2code Standard)

DDEV 

Use DDEV as it is described in the DDEV documentation. Take care, that you use the latest version of DDEV.

  1. open the terminal in the root folder of the extension
  2. start the project with: ddev start
  3. import the test data: ddev initialize (this step is only needed, if you start the project for the first time)

Native Docker Support 

  1. open the terminal in the root folder of the extension
  2. Prepare the project with make install-project
  3. start the http proxy with docker run -d -v /var/run/docker.sock:/tmp/docker.sock:ro -v ~/.dinghy/certs:/etc/nginx/certs -p 80:80 -p 443:443 -p 19322:19322/udp -e DNS_IP=127.0.0.1 -e CONTAINER_NAME=http-proxy --name http-proxy in2code/http-proxy
  4. Start the project with make start
  5. If you stop the project use make stop

Tip: To stop the http-proxy use: docker stop $(docker ps -a -q) docker rm http-proxy

Note: You cannot run DDEV Setup next to the "native" docker setup

userFuncs with cObject 

Introduction 

It's very easy to extend powermail with cObject Viewhelpers, which are calling a userFunc from TypoScript.

Where can you use cObject Viewhelpers in powermail 

  • In every HTML Template (and Partial and Layout)
  • In every RTE field in flexform
  • In the subject, receiver, receiverName, sender, senderName field of the flexform

What can you do with this flexibility 

If you need to call a userFunc after submitting a form or if you need dynamic text in a view. Some examples:

  • Create an extension for transaction keys in powermail
  • Manipulate the receiver from a userFunc depending on a field value (see below)
  • Log something special in a database table after a submit
  • etc...

Example to manipulate the receiver of a form 

With pure TypoScript 

Example Call in Flexform Settings 

developer_cobject

Example call in TypoScript 

# TypoScript Setup Example for ViewHelper {f:cObject(typoscriptObjectPath:'lib.test')}
lib.test = TEXT
lib.test.value = newReceiver@mail.com
Copied!

With a userFunc on TypoScript depending on a field value 

Example Call in Flexform Settings 

developer_cobject

Example call in TypoScript 

# TypoScript Setup Example for ViewHelper {f:cObject(typoscriptObjectPath:'lib.test')}
# Note: includeLibs does not work in TYPO3 8 any more. UserFuncs must be added in an own extension to use composer autoload.
includeLibs.manipulatePowermailReceiver = typo3conf/ext/myext/Classes/ManipulateReceiver.php
lib.test = USER
lib.test.userFunc = Vendor\Myext\ManipulateReceiver->getEmail
Copied!

Example PHP Script 

<?php
namespace Vendor\Myext;

class ManipulateReceiver
{

       public function getEmail($content = '', $conf = array())
       {
               $variables = \TYPO3\CMS\Core\Utility\GeneralUtility::_GP('tx_powermail_pi1');
               $email = 'email1@domain.org';

               if ($variables['field']['firstname'] === 'Alex') {
                       $email = 'email2@domain.org';
               }
               return $email;
       }
}
Copied!

Extend FlexForm values 

Add new fieldtypes to powermail 

Just use some lines of page TSConfig to add new fieldtypes to powermail

# Powermail will search for the Partial Newfield.html
tx_powermail.flexForm.type.addFieldOptions.newfield = New Field Name
tx_powermail.flexForm.type.addFieldOptions.new.dataType = 0
tx_powermail.flexForm.type.addFieldOptions.new.export = 1
Copied!

Add new validationtypes to powermail 

Just use some lines of page TSConfig to add new validationtypes to powermail

tx_powermail.flexForm.validation.addFieldOptions.newfield = New Validation Name

Add new fe_user fields for prefill powermail fields 

Just use some lines of page TSConfig to add new fe_user fields

tx_powermail.flexForm.feUserProperty.addFieldOptions.newfield = New fe_user Property

Add new Validators 

Introduction 

In powermail a combination of different validation types is possible:

  • Serverside Validation (PHP)
  • Clientside Validation (JavaScript)
  • Clientside Validation (Native with HTML5)

You can enable or disable or combine some validation methods via TypoScript

plugin.tx_powermail.settings.setup {
   validation {
      native = 1
      client = 1
      server = 1
   }
}
Copied!

Meanwhile, we added an own robust JavaScript validation which also supports native HTML5 validation

developer_new_validation2

Serverside Validation Example

developer_new_validation1

Clientside Validation Example

1. Add a new validation type 

A new validation type is a validation that can be selected for a single field by the editor. The following example includes clientside and serverside validation.

Add new Option 

Per default, all standard validators are available for a field

developer_new_validationtype1

If you want to add a new validation, use Page TSConfig for this. In this case, we want to validate for a ZIP-Code which is greater than 79999 (for bavarian ZIP within Germany):

tx_powermail.flexForm.validation.addFieldOptions.100 = Bavarian ZIP Code

This leads to a new validation option for the editors:

developer_new_validationtype2

Add new JavaScript Validation 

You will see an HTML-Code like this for this field

<input type="text" ... data-powermail-error-message="" data-powermail-custom100="80000" />

Add a new Extension or simply a JavaScript File with this content. Please pay attention to the ordering. This code must be included after all JavaScripts of powermail.

page.includeJSFooter.powermailextended = EXT:powermailextended/Resources/Public/JavaScripts/ZipValidation.js
page.includeJSFooter.powermailextended.defer = 1
Copied!
/**
 * Add a ZIP validation to all powermail forms on the current page and listen to those fields:
 * <input type="text" data-powermail-custom100="80000" data-powermail-error-message="Please try again" />
 */
const forms = document.querySelectorAll('.powermail_form');
forms.forEach(function(form) {
    let formValidation = form.powermailFormValidation;

    formValidation.addValidator('custom100', function(field) {
        if (field.hasAttribute('data-powermail-custom100')) {
            // return true means validation has failed
            return field.value < parseInt(field.getAttribute('data-powermail-custom100'));
        }
        return false;
    });
});
Copied!

See Extension powermailextended https://github.com/einpraegsam/powermailextended for details

Add new PHP Validation 

First of all, you have to register a PHP Class for your new validation via TypoScript (and an errormessage in case of a negative validation).

plugin.tx_powermail {
    settings.setup {
        validation {
            customValidation {
                100 = In2code\Powermailextended\Domain\Validator\ZipValidator
            }
        }
    }
    _LOCAL_LANG.default.validationerror_validation.100 = Please add a ZIP with 8 begginning
}
Copied!

In this case we choose a further Extension "powermailextended" and add a new file and folders powermailextended/Classes/Domain/Validator/ZipValidator.php

The content:

<?php
namespace In2code\Powermailextended\Domain\Validator;

/**
* ZipValidator
*/
class ZipValidator
{

    /**
     * Check if given number is higher than in configuration
     *
     * @param string $value
     * @param string $validationConfiguration
     * @return bool
     */
    public function validate100($value, $validationConfiguration)
    {
        if (is_numeric($value) && $value >= $validationConfiguration) {
            return true;
        }
        return false;
    }
}
Copied!

Example Code 

Look at https://github.com/einpraegsam/powermailextended for an example extension. This extension allows you to:

  • Extend powermail with a complete new field type (Just a small "Show Text" example)
  • Extend powermail with an own Php and JavaScript validator (ZIP validator - number has to start with 8)
  • Extend powermail with new field properties (readonly and prepend text from Textarea)
  • Extend powermail with an example SignalSlot (see ext_localconf.php and EXT:powermailextended/Classes/Controller/FormController.php)

2. Add own global serverside validators 

A global validator is something that could normally not be selected by an editor.

2a. Use a validator class 

Introduction 

Let's say you want to easily add your own php function to validate user inputs, that should be called after a user submits a form, but of course before the createAction() is called.

Small example 

Just define which classes should be used. Method validate() will be called:

plugin.tx_powermail.settings.setup {
    validators {
        1 {
            class = Vendor\Ext\Domain\Model\DoSomethingValidator
        }
    }
}
Copied!

Add a php-file and extend your class with the AbstractValidator from powermail:

<?php
namespace Vendor\Ext\Domain\Model;

use In2code\Powermail\Domain\Validator\AbstractValidator;
use TYPO3\CMS\Extbase\Error\Error;
use TYPO3\CMS\Extbase\Error\Result;

/**
* Class DoSomethingValidator
*/
class DoSomethingValidator extends AbstractValidator
{

    /**
     * @param Mail $mail
     * @return Result
     */
    public function validate($mail)
    {
        // throw error
        $result = new Result();
        $result->addError(new Error('Error', 123456789, ['marker'=> 'firstname']));
        return $result;
    }
}
Copied!

Extended example 

See the advanced example with some configuration in TypoScript and with the possibility to load the file (useful if file could not be loaded from autoloader because it's stored in fileadmin or elsewhere)

plugin.tx_powermail.settings.setup {
    validators {
        1 {
            # Classname that should be called with method *Validator()
            class = Vendor\Ext\Domain\Model\AlexValidator

            # optional: Add configuration for your PHP
            config {
                allowedValues = alex, alexander
                form = 210
            }

            # optional: If file will not be loaded from autoloader, add path and it will be called with require_once
            require = fileadmin/powermail/validator/AlexValidator.php
        }
    }
}
Copied!

Add your php-file again and extend your class with the AbstractValidator from powermail:

<?php
namespace Vendor\Ext\Domain\Model;

use In2code\Powermail\Domain\Model\Mail;
use In2code\Powermail\Domain\Validator\AbstractValidator;
use TYPO3\CMS\Core\Utility\GeneralUtility;
use TYPO3\CMS\Extbase\Error\Result;
use TYPO3\CMS\Extbase\Error\Error;

/**
* Class AlexValidator
*
* @package Vendor\Ext\Validator
*/
class AlexValidator extends AbstractValidator
{
  /**
   * Field to check - select by {markername}
   *
   * @var string
   */
  protected string $fieldMarker = 'firstname';

  /**
   * Validator configuration
   *
   * @var array
   */
  protected array $configuration = [];

  /**
   * Check if value in Firstname-Field is allowed
   *
   * @param Mail $mail
   * @return Result
   */
  public function validate($mail)
  {
      $result = new Result();
      if ((int)$this->configuration['form'] === $mail->getForm()->getUid()) {
          foreach ($mail->getAnswers() as $answer) {
              if ($answer->getField()->getMarker() === $this->fieldMarker && !$this->isAllowedValue($answer->getValue())) {
                  $result->addError(new Error('Firstname must be "Alexander"', 123456789, ['marker' => $this->fieldMarker]));
              }
          }
      }
      return $result;
  }

  /**
   * Check if this value is allowed
   *
   * @return bool
   */
  protected function isAllowedValue(string $value): bool
  {
      $allowedValues = GeneralUtility::trimExplode(',', $this->configuration['allowedValues'], true);
      return in_array(strtolower($value), $allowedValues);
  }
}
Copied!

developer_new_validation2

2b. Use an event with CustomValidator 

Introduction 

You can also use the CustomValidator (used twice in powermail FormsController: confirmationAction and createAction) to write your own field validation after a form submit.

The customValidator is located at powermail/Classes/Domain/Validator/CustomValidator.php. An eventdispatcher within the class waits for your extension.

Call the Custom Validator from your Extension 

Add a new extension (example key powermail_extend).

Register a new listener in Configuration/Services.yaml:

services:
  Vendor\PowermailExtend\EventListeners\CustomValidator:
    tags:
      - name: event.listener
        identifier: 'customValidator'
        event: In2code\Powermail\Events\CustomValidatorEvent
Copied!

Example file:

class Vendor\PowermailExtend\EventListeners\CustomValidator
{
    public function __invoke(\In2code\Powermail\Events\CustomValidatorEvent $event): void
    {
        // $field failed - set error
        $event->getCustomValidator()->setErrorAndMessage($field, 'error message');;
    }
}
Copied!

Example Code 

Look at https://github.com/einpraegsam/powermailextended for an example extension. This extension allows you to:

  • Extend powermail with a complete new field type (Just a small "Show Text" example)
  • Extend powermail with an own Php and JavaScript validator (ZIP validator - number has to start with 8)
  • Extend powermail with new field properties (readonly and prepend text from Textarea)
  • Extend powermail with an example SignalSlot (see ext_localconf.php and EXT:powermailextended/Classes/Controller/FormController.php)

3. Add own global clientside validators 

A global validator is something that could normally not be selected by an editor.

Javascript validation introduction 

Example form, validated with form validation framework, with a required and an email field. In addition to HTML5, this input fields are validated now:

<form data-powermail-validate>
    <input type="text" name="firstname" required="required" />

    <input type="email" name="email" />

    <input type="submit" />
</form>
Copied!

Own JavaScript validator 

Quick example 

See how you can relate a JavaScript validator to a field with a data-attribute. In addition we recommend to set the message also via data-attribute:

<input type="text" data-powermail-emailverification="@" data-powermail-emailverification-message="No email address" />
    [...]
<script type="text/javascript">
    const field = document.querySelector('[data-powermail-emailverification]');
    const form = field.closest('form');
    const formValidation = form.powermailFormValidation;

    formValidation.addValidator('emailverification', function(field) {
        if (field.hasAttribute('data-powermail-emailverification')) {
            return field.value.indexOf(field.getAttribute('data-powermail-emailverification')) === false;
        }
    });
</script>
Copied!

Step by step 

Let's build an own field (look at the section how to easily extend powermail with own fieldtypes) with two fields where the user should add his/her email address twice. A validator should check if both strings are identical.

The example fluid template (partial):

{namespace vh=In2code\Powermail\ViewHelpers}

<div class="powermail_fieldwrap powermail_fieldwrap_type_emailverification powermail_fieldwrap_{field.marker} {field.css} {settings.styles.framework.fieldAndLabelWrappingClasses}">
	<label for="powermail_field_{field.marker}" class="{settings.styles.framework.labelClasses}" title="{field.description}">
		<vh:string.escapeLabels>{field.title}</vh:string.escapeLabels><f:if condition="{field.mandatory}"><span class="mandatory">*</span></f:if>
	</label>

	<div class="{settings.styles.framework.fieldWrappingClasses}">
		<f:form.textfield
				type="email"
				id="powermail_field_{field.marker}"
				property="{field.marker}"
				value=""
				additionalAttributes="{data-powermail-emailverification-message:'{f:translate(key:\'powermail.validation.emailverification\',extensionName:\'In2template\')}',data-powermail-emailverification:'{field.marker}_mirror'}"
				class="powermail_emailverification {settings.styles.framework.fieldClasses} {vh:Validation.ErrorClass(field:field, class:'powermail_field_error')}" />
	</div>
</div>

<div class="powermail_fieldwrap powermail_fieldwrap_type_emailverification powermail_fieldwrap_{field.marker}_mirror {field.css} {settings.styles.framework.fieldAndLabelWrappingClasses}">
	<label for="powermail_field_{field.marker}_mirror" class="{settings.styles.framework.labelClasses}">
		<f:translate key="writePasswordAgain" /><f:if condition="{field.mandatory}"><span class="mandatory">*</span></f:if>
	</label>

	<div class="{settings.styles.framework.fieldWrappingClasses}">
		<f:form.textfield
				type="email"
				id="powermail_field_{field.marker}_mirror"
				property="{field.marker}_mirror"
				value=""
				additionalAttributes="{data-powermail-emailverification-message:'{f:translate(key:\'powermail.validation.emailverification\',extensionName:\'In2template\')}',data-powermail-emailverification:'{field.marker}'}"
				class="powermail_emailverification {settings.styles.framework.fieldClasses} {vh:Validation.ErrorClass(field:field, class:'powermail_field_error')}" />
	</div>
</div>
Copied!

The example JavaScript:

<script type="text/javascript">
    const field = document.querySelector('[data-powermail-emailverification]');
    const form = field.closest('form');
    const formValidation = form.powermailFormValidation;

    formValidation.addValidator('emailverification', function(field) {
        if (field.hasAttribute('data-powermail-emailverification')) {
            const id = field.getAttribute('id');
            return field.value !== document.querySelector('#' + id + '_mirror').value;
        }
        return error;
    });
</script>
Copied!

Example Code 

Look at https://github.com/einpraegsam/powermailextended for an example extension. This extension allows you to:

  • Extend powermail with a complete new field type (Just a small "Show Text" example)
  • Extend powermail with an own Php and JavaScript validator (ZIP validator - number has to start with 8)
  • Extend powermail with new field properties (readonly and prepend text from Textarea)
  • Extend powermail with an example SignalSlot (see ext_localconf.php and EXT:powermailextended/Classes/Controller/FormController.php)

For editors 

This chapter describes how to work with powermail from the view of an editor.

Add a new Form 

Introduction 

A powermail forms is the main record which contains multiple pages and fields. So if you create and store a form, you can use this on one or more pages. A form that is included in a pagecontent (in a plugin) will be shown in frontend and can be used by website visitors.

First step 

Choose a page (could also be a folder) where to store the new form-record and change to the list view. Click on the New Button to add a new record to this page and choose “Forms".

powermail_records

Form settings 

record_form_detail1

Field Description Explanation Tab
Title Add a title for your form. The title is used to find the form in the backend. You can also show the title in the frontend. General
Pages Add one or more pages to a form. A form collects a couple of pages. You need minimum 1 page to show a form. If you choose a multistep form, every step is splitted in one page. General
Layout Choose a layout. This adds a CSS-Class to the frontend output. Administrator can add, remove or rename some of the entries and switch the frontend layout of your form. Extended
Language Choose a language. Choose in which frontend language this form should be rendered. Access
Hide Disable the form Enable or disable a form with all pages and fields. Access
Start Startdate for this record. Same function as known from default content elements or pages in TYPO3. Access
Stop Stopdate for this record. Same function as known from default content elements or pages in TYPO3. Access

Page Settings 

record_page_detail1

Field Description Explanation Tab
Title Add a title for your page. The title is used to find the page in the backend. You can also show the title in the frontend. General
Fields Add one or more fields to this page. A page collects a couple of fields. You need minimum 1 field to show a form. General
Note Just a small Note (in some cases). This note shows you if there is no Sendermail or Sendername marked in the fields. Without this information powermail will set default values for the Sendername and Senderemail. If you are aware of this and you don’t want to see this information in future (for this form), you can disable this note. General
Layout Choose a layout. This adds a CSS-Class to the frontend output. Administrator can add, remove or rename some of the entries. Extended
Language Choose a language. Choose in which frontend language this record should be rendered. Access
Hide Disable the form Enable or disable this record. Access
Start Startdate for this record. Same function as known from default content elements or pages in TYPO3. Access
Stop Stopdate for this record. Same function as known from default content elements or pages in TYPO3. Access

Field Settings 

General 

Backend Configuration Example 

record_field_input_tab1

record_field_input_tab2

Explanation 
Field Description Explanation Tab
Title Add a label for this field. The label is shown in the frontend near to this field. General
Type Choose a fieldtype. See explanation below for a special fieldtype. Different fields are related to some fieldtypes – not all fields are shown on every type. General
Email of sender Check this if this field contains the email of the sender. This is needed to set the correct sender-email-address. If there is no field marked as Senderemail within the current form, powermail will use a default value for the Senderemail. General
Name of sender Check this if this field contains the name (or a part of the name) of the sender. This is needed to set the correct sender-name. If there is no field marked as Sendername within the current form, powermail will use a default value for the Sendername. General
Mandatory Field This field must contain input. Check this if the field must contain input, otherwise submitting the form is not possible. Extended
Validation Validate the user input with a validator. Possible Validation Methods are: Email, URL, Phone, Numbers only, Letters only, Min Number, Max Number, Range, Length, Pattern (RegEx) Extended
Prefill with value Prefill field value with a static content. Other possibilities to prefill a field: TypoScript, GET or POST params Extended
Placeholder Add a placeholder for this input field. A placeholder text is an example, that should help the user to fill out an input field. This text is shown in bright grey within the input field. If you have a name field, you could use the placeholder “John Doe". Extended
Value from logged in Frontend User Check if field should be filled from the FE_Users table of a logged in fe_user. This value overwrites a static value, if set. Extended
Layout Choose a layout. This adds a CSS-Class to the frontend output. Administrator can add, remove or rename some of the entries. Extended
Description Add a description for this field. Per default a description will be rendered as title-attribute in the labels in frontend. Extended
Variables – Individual Fieldname This is a marker of this field. Use a field variable with {marker} in any RTE or HTML-Template. The marker name is equal in any language. Extended
Add own Variable Check this, if you want to set your own marker (see row before). After checking this button, TYPO3 ask you to reload. After a reload, you see a new field for setting an own marker. Extended
Language Choose a language. Choose in which frontend language this record should be rendered. Access
Hide Disable the form Enable or disable this record. Access
Start Startdate for this record. Same function as known from default content elements or pages in TYPO3. Access
Stop Stopdate for this record. Same function as known from default content elements or pages in TYPO3. Access
Field types 
Field Description HTML Tab Example
Textfield (input) Simple text field (one line) <input type="text" /> Standard example_field_input
Textfield with more rows (Textarea) Text field with more lines <textarea></textarea> Standard example_field_textarea
Selectfield Selector box (Dropdown) <select><option>X</option></select> Standard example_field_select
Checkboxes Checkbox (Possibility to select more than only one) <input type="checkbox" /> Standard example_field_checkbox
Radiobuttons Radio Buttons (Possibility to check only one) <input type="radio" /> Standard example_field_radio
Submit Send Form <input type="submit" /> Standard example_field_submit
Captcha Captcha Check against spam <input type="text" /> Extended example_field_captcha
Reset Reset cleans all fieldvalues in the form <input type="reset" /> Extended example_field_reset
Show some text This field let you show some text in the form This is a Test Extended example_field_label
Content Element Show an existing Content Element Text with <img src="…" /> Extended example_field_content
Show HTML Add some html text. Per default output of fields of type HTML is parsed through a htmlspecialchars() function to avoid Cross-Site-Scripting for security reasons. If you are aware of possible XSS-problems, caused by editors, you can enable it and your original HTML is shown in the Frontend. This is a <b>Test</b> Extended example_field_html
Password Field Two fields for a password check <input type="password" /> <input type="password" /> Extended example_field_password
File Upload Upload one or more files <input type="file" /> Extended example_field_file
Hidden Field Renders a hidden field, where you can store some additional information within the form. <input type="hidden" /> Extended  
Date Datepicker field (Date, Datetime or Time) <input type="date" /> Extended example_field_date
Countryselection Choose a Country <select><option>France</option><option>Germany</option></select> Extended example_field_country
Location Location field. Browser will ask the user if it’s ok to fill the field with his current location. <input type="text" /> Extended example_field_location
TypoScript Fill values from TypoScript This is a <b>Test</b> Extended example_field_typoscript
Type documentation details 

Add a new Plugin 

Introduction 

If you want to show an existing Powermail form (see :ref:addANewForm) in Frontend, you have to insert a page content to any page and make some main configuration (select form, insert email, subject, etc...)

First step 

Choose a page where you want to show a powermail form in the Frontend and go to the page module. Click on the New Button to add a new content element to this page and choose “powermail”.

plugin1

Plugin Settings 

You will find the plugin settings within the tab “Plugin”. In this area you see another four tabs (Main Settings, Receiver, Sender, Submit Page).

plugin2

Main Settings 

Example Configuration 

plugin_tab1

Explanation 

Field Description Explanation Tab
Choose a Powermail Form Choose an existing powermail form. Choose an existing form or create a new one by clicking the plus symbol. With this the form (with all pages and fields) will be created on the same page. Main Settings
Form Table The table shows some form information If you choose a form and save this content element, a table is visible which gives you some interesting information about the chosen form (Form Name, Form is stored in Page, Number of Pages, Number of Fields). You can edit the form, by clicking the edit icon or the Form Name. If you want to open the page, where the form is stored in, click the Page Title. Main Settings
Confirmation Page Enable a confirmation page. This enables a confirmation page (Are these values correct?) to the frontend Main Settings
Double-Opt-In Add Double-Opt-In feature to this form. A user has to confirm his email by clicking a link in a mail first before the main mail is sent. Note: You can overwrite the email to the user by administrators email address with TypoScript. Main Settings
Step by step Enable morestep form. Each page (fieldset) will be splittet to one page in the frontend. With JavaScript the user can switch between the pages. Main Settings
Where to save Mails Choose a page where to store the mails in the database. You can select a page or a folder. Leaving this empty will store the mails on the same page. Main Settings

Receiver 

Example Configuration 

plugin_tab2

Explanation 

Field Description Explanation Tab
Receivers Name Add the name of the main receiver name. - Add a static value- Add a variable like {firstname} - Add a viewhelper call like {f:cObject(typoscriptObjectPath:'lib.test')} to get a value from TypoScript or a userFunc- or mix dynamic and static values Mail to Receiver
Receivers Mail Add the email address of one or more receivers - Add one or more static values (split with a new line)- Add a variable like {email}- Add a viewhelper call like {f:cObject(typoscriptObjectPath:'lib.test')} to get a value from TypoScript or a userFunc- or mix dynamic and static values Mail to Receiver
Frontend User Group Choose a Frontend User Group. Select an existing group to send the mail to all users of a given group. Mail to Receiver
Subject Subject for mail to receiver. - Add a static value- Add a variable like {firstname} Add a viewhelper call like {f:cObject(typoscriptObjectPath:'lib.test')} to get a value from TypoScript or a userFunc- or mix dynamic and static values Mail to Receiver
Bodytext Add some text for the mail to the receiver. - Add a static value- Add {powermail_all} to get all values from the form in one table (with labels)- Add a variable like {firstname}- Add a viewhelper call like {f:cObject(typoscriptObjectPath:'lib.test')} to get a value from TypoScript or a userFunc- or mix dynamic and static values Mail to Receiver

Sender 

Example Configuration 

plugin_tab3

Explanation 

Field Description Explanation Tab
Senders Name Add the name of the sender for confirmation mail. Add the name of the sender for the mail that will be send as confirmation mail back to the user. That is normally a static value. If you want to overwrite it or set it dynamically, please use TypoScript (see Setup). Mail to User
Sender Email Add the email address of the sender for confirmation mail. Add the email of the sender for the mail that will be send as confirmation mail back to the user. That is normally a static value. If you want to overwrite it or set it dynamically, please use TypoScript (see Setup). Mail to User
Subject Subject for confirmation mail to sender. Leaving subject empty disables the mail to the sender. - Add a static value- Add a variable like {firstname}- Add a viewhelper call like {f:cObject(typoscriptObjectPath:'lib.test')} to get a value from TypoScript or a userFunc or mix dynamic and static values Mail to User
Bodytext Add some text for the confirmation mail to sender. - Add a static value- Add {powermail_all} to get all values from the form in one table (with labels)- Add a variable like {firstname}- Add a viewhelper call like {f:cObject(typoscriptObjectPath:'lib.test')} to get a value from TypoScript or a userFunc- or mix dynamic and static values Mail to User

Submit Page 

Example Configuration 

plugin_tab4

Explanation 

Field Description Explanation Tab
Text on submit page Add some text for submit message. This text will be shown right after a successful submit. - Add a static value- Add {powermail_all} to get all values from the form in one table (with labels)- Add a variable like {firstname}- Add a viewhelper call like {f:cObject(typoscriptObjectPath:'lib.test')} to get a value from TypoScript or a userFunc- or mix dynamic and static values Submit Page
Redirect Add a redirect target instead of adding text (see row above). As soon as the form is submitted, the user will be redirected to the target (internal page, external URL, document, mail address), even if there are values in the field "Text on submit page" Submit Page

Powermail content element in page module 

When you save your plugin and go back to the page module, you will see the content element with some additional information. If you do not want to see this information, you can turn it off in the Extension Manager.

Example Image 

pluginInformation

Part Description Link
Title of content element You will see the title of the content element If you click on the title or the edit icon aside, the content element will be opened for editing
Form title Title of the chosen form If you click on the form title or the edit icon aside, the form record will be opened for editing
Receiver email address This part shows the configured receiver email address. If TYPO3 runs in development context, and there is an email set for development context, you will see this in red letters. -
Receiver name This part shows the configured receiver name. -
Mail subject This part shows the configured mail subject. -
Confirmation page activated This part shows if a confirmation page was activated. -
Double-opt-in activated This part shows if a double-opt-in page was activated. -
Last mails This part shows the last three mails that where submitted to the same form (If the form is used on different pages, you will also see mails from different pages). Note: This part can be deactivated in the Extension Manager If you click on a mail subject or the icon aside, the mail record will be opened to edit.If you click on more or the search icon aside, the powermail backend module will be opened.

Mail Backend Module 

Introduction 

Per default powermails adds a new backend module to the TYPO3 backend. This module helps you to manage mails and forms.

First step 

Open the Mail Backend Module and choose a page with mails in the foldertree. You will see all stored mails.

backend_module_menu

The Backend Module will start with the mail listing.

backend_module_menu2

Mail List 

If the page contains mails, all mails will be listet. The area over the mail list is splitted into two parts (Search part and Export part).

backend_module_list

Search Area 
Field Description Explanation
Fulltext Search This is the main search field for a full text search. If you enter a searchterm all fields of the mail and of the answers are searched by your term (technical note: OR and LIKE %term%)
Filter List Button Submit Button for search. This is the main submit button which should be clicked if you're using the fulltext search, even if you use some other fields (like Start, Stop, etc...).
Start Choose a Start Date for the filter list. A datepicker will be opened on click (if the browser do not respect html5 datetime) to set Date and Time for the beginning of the timeframe.
Stop Choose a Stop Date for the filter list. A datepicker will be opened on click (if the browser do not respect html5 datetime) to set Date and Time for the ending of the timeframe.
Sender Name Search through the sender name field of the stored mail. All fields are related to each other with OR.
Sender Email Search through the sender email field of the stored mail. All fields are related to each other with OR.
Subject Search through the subjtect field of the stored mail. All fields are related to each other with OR.
Deactivated Mails Show only activated or deactivated mails. Deactivated mails could be interesting if you use Double-Opt-In e.g.
Additional Fields One or more fields - depending on the form - are listed (e.g. firstname, lastname, email, etc...). All fields are related to each other with OR.
Export Area 

Export Area gives you the possibility to export your mails in XLS or CSV format. Note: For editors only enabled fields are free to export.

If it is not possible to select any fields, please check if the form itself is disabled or a start / stop date is set. For the export to work, the form must be in an "active" state.

backend_module_export

Field Description Explanation
XLS Button If you want to export the current list in XLS-Format, click the button.XLS-Files can be opened with Microsoft Excel or Open Office (e.g.). If you filter or sort the list before, the export will only export the filtered mails.See “Columns in Export File” if you want to change the export file columns.
CSV Button If you want to export the current list in CSV-Format, click the button.CSV-Files can be opened with Microsoft Excel or Open Office (e.g.). If you filter or sort the list before, the export will only export the filtered mails.See “Columns in Export File” if you want to change the export file columns.
Columns in Export File This area shows the columns and the ordering of the rows in the export-file. You can play around with drag and drop. Change sorting: Drag and drop a line up or downAdd row: Choose a line of the “Available Columns” and drop on “Columns in Export File”Remove row: Drag line and move to the “Available Columns”
Available Columns This area shows the available columns that can be used in the export file See Row before for an explanation.

Form Overview 

This is a very helpful list with all powermail forms of your installation. This table helps you to manage your forms, even in large installations.

Field Description Explanation
Form Title Form Title Click on Form title will open the form edit view. Mouseover will show you the Form UID.
Stored on Page This form is stored in this Page Click on Page title will open the page in page view. Mouseover will show you the Page UID.
Used on Page This form can be used on different Pages. One line for one page. Click on a Page title will open the page in page view. Mouseover will show you the Page UID.
Powermail Pages Amount of Powermail Pages within this form Mouseover will show you the Powermail-Page-Names.
Powermail Fields Amount of Powermail Fields within this form Mouseover will show you the Powermail-Field-Names.
Edit Icon Edit the form Same function as click on Form name.

Reporting (Form) 

This view helps you to get a small overview over form values. Filter Mails in the same way as the listing with the filter area. Below the Filter Area you will see some small diagrams (one diagram for each field in the form on this page).

backend_module_reportingform

Reporting (Marketing) 

This view helps you to get a small overview over the most important information about your visitors. Filter Mails in the same way as the listing with the filter area. Below the Filter Area you will see some small diagrams (Referer Domain, Referer URI, Visitors Country, Visitor uses a Mobile Device, Website Language, Browser Language, Page Funnel). Note: To activate the marketing information, please add the Powermail Marketing Static Template to your Root page.

backend_module_reportingmarketing

Function check 

This views helps you to identify problems with your TYPO3-Installation and Powermail. Beside some basic checks there is a mail function. This function basicly works like the main powermail mail function. Test this function if your forms don't send mails.

Note: This view is for admins only.

backend_module_functioncheck

Captcha Field 

What does it do? 

  • General: Want to prevent spam? Spamshield is integrated in powermail 2.x. In addtion you can add a calculating-captcha field to the form. The form can only be submitted if the result of the captcha is correct. You can use another captcha extension instead of the build-in calculating captcha (see TypoScript part).

Frontend Output Example 

example_field_captcha

Backend Configuration Example 

record_field_captcha_tab1

record_field_captcha_tab2

Explanation 

Field Description Explanation Tab
Title Add a label for this field. The label is shown in the frontend near to this field. General
Type Choose a fieldtype. See explanation below for a special fieldtype. Different fields are related to some fieldtypes – not all fields are shown on every type. General
Description Add a description for this field. Per default a description will be rendered as title-attribute in the labels in frontend. Extended
Variables – Individual Fieldname This is a marker of this field. Use a field variable with {marker} in any RTE or HTML-Template. The marker name is equal in any language. Extended
Add own Variable Check this, if you want to set your own marker (see row before). After checking this button, TYPO3 ask you to reload. After a reload, you see a new field for setting an own marker. Extended
Language Choose a language. Choose in which frontend language this record should be rendered. Access
Hide Disable the form Enable or disable this record. Access
Start Startdate for this record. Same function as known from default content elements or pages in TYPO3. Access
Stop Stopdate for this record. Same function as known from default content elements or pages in TYPO3. Access

Checkboxes 

What does it do? 

  • General: Checkboxes are made for a multiselecting of options. The user can check one or more options.
  • Mandatory: This field could be marked as mandatory, so the user must fill min 1 checkbox, otherwise the form can not be submitted.
  • Prefill: The field can be preselected from FlexForm, TypoScript, GET/Post-Params or from FE_User table.
  • Special: Options could also filled by TypoScript in powermail 2.1 and higher (static or dynamic)

Frontend Output Example 

example_field_checkbox

Backend Configuration Example 

record_field_check_tab1

record_field_check_tab2

Explanation 

Field Description Explanation Tab
Title Add a label for this field. The label is shown in the frontend near to this field. General
Type Choose a fieldtype. See explanation below for a special fieldtype. Different fields are related to some fieldtypes – not all fields are shown on every type. General
Options Options to check Separate each with a new line. Note: see following table for examples, how to precheck or clean a value General
Email of sender Check this if this field contains the email of the sender. This is needed to set the correct sender-email-address. If there is no field marked as Senderemail within the current form, powermail will use a default value for the Senderemail. General
Name of sender Check this if this field contains the name (or a part of the name) of the sender. This is needed to set the correct sender-name. If there is no field marked as Sendername within the current form, powermail will use a default value for the Sendername. General
Mandatory Field This field must contain input. Check this if the field must contain input, otherwise submitting the form is not possible. Extended
Value from logged in Frontend User Check if field should be filled from the FE_Users table of a logged in fe_user. This value overwrites a static value, if set. Extended
Create from TypoScript Fill Options from TypoScript If you want to create your options (see above) from TypoScript, you can use this field. Please split each line in your TypoScript with [\n] Extended
Layout Choose a layout. This adds a CSS-Class to the frontend output. Administrator can add, remove or rename some of the entries. Extended
Description Add a description for this field. Per default a description will be rendered as title-attribute in the labels in frontend. Extended
Variables – Individual Fieldname This is a marker of this field. Use a field variable with {marker} in any RTE or HTML-Template. The marker name is equal in any language. Extended
Add own Variable Check this, if you want to set your own marker (see row before). After checking this button, TYPO3 ask you to reload. After a reload, you see a new field for setting an own marker. Extended
Language Choose a language. Choose in which frontend language this record should be rendered. Access
Hide Disable the form Enable or disable this record. Access
Start Startdate for this record. Same function as known from default content elements or pages in TYPO3. Access
Stop Stopdate for this record. Same function as known from default content elements or pages in TYPO3. Access

Option examples for selectbox 

Example option HTML Output
Red <label>Red</label><input type="checkbox" value=”Red” />
Yellow | 1 <label>Yellow</label><input type="checkbox" value=”1” />
Blue | <label>Blue</label><input type="checkbox" value=”” />
Black Shoes | black | * <label>Black Shoes</label><input type="checkbox" value=”black” checked=”checked” />
White | | * <label>White</label><input type="checkbox" value=”” checked=”checked” />
Red Shoes | red | *
Yellow Shoes | yellow | *
<label>Red Shoes</label><input type="checkbox" value=”red” checked=”checked” />
<label>Yellow Shoes</label><input type="checkbox" value=”yellow” checked=”checked” />

Content Element 

What does it do? 

  • General: If you want to show a content element within your form (text, text with image, etc...), use this field. An element browser allows you to select a tt_content record. This text is not submitted.

Frontend Output Example 

example_field_content

Backend Configuration Example 

record_field_content_tab1

record_field_content_tab2

Explanation 

Field Description Explanation Tab
Title Add a label for this field. The label is shown in the frontend near to this field. General
Type Choose a fieldtype. See explanation below for a special fieldtype. Different fields are related to some fieldtypes – not all fields are shown on every type. General
Select Content Element Select an existing content element to show. Select any existing content element in the element browser. This Content Element will be rendered in the frontend. General
Variables – Individual Fieldname This is a marker of this field. Use a field variable with {marker} in any RTE or HTML-Template. The marker name is equal in any language. Extended
Add own Variable Check this, if you want to set your own marker (see row before). After checking this button, TYPO3 ask you to reload. After a reload, you see a new field for setting an own marker. Extended
Language Choose a language. Choose in which frontend language this record should be rendered. Access
Hide Disable the form Enable or disable this record. Access
Start Startdate for this record. Same function as known from default content elements or pages in TYPO3. Access
Stop Stopdate for this record. Same function as known from default content elements or pages in TYPO3. Access

Country 

What does it do? 

  • General: This field is rendered as selectfield (see above). But the field is filled with countries. Per default the countrylist is a static list. If you want to change the sorting, value or labels, use the extension static_info_tables and have a look into the country partial HTML-File.
  • Prefill: Country field can be preselected with it's value (like DEU for Germany)

Frontend Output Example 

example_field_country

Backend Configuration Example 

record_field_country_tab1

record_field_country_tab2

Explanation 

Field Description Explanation Tab
Title Add a label for this field. The label is shown in the frontend near to this field. General
Type Choose a fieldtype. See explanation below for a special fieldtype. Different fields are related to some fieldtypes – not all fields are shown on every type. General
Prefill with value Prefill field value with a static content. Other possibilities to prefill a field: TypoScript, GET or POST params Extended
Value from logged in Frontend User Check if field should be filled from the FE_Users table of a logged in fe_user. This value overwrites a static value, if set. Extended
Layout Choose a layout. This adds a CSS-Class to the frontend output. Administrator can add, remove or rename some of the entries. Extended
Description Add a description for this field. Per default a description will be rendered as title-attribute in the labels in frontend. Extended
Variables – Individual Fieldname This is a marker of this field. Use a field variable with {marker} in any RTE or HTML-Template. The marker name is equal in any language. Extended
Add own Variable Check this, if you want to set your own marker (see row before). After checking this button, TYPO3 ask you to reload. After a reload, you see a new field for setting an own marker. Extended
Language Choose a language. Choose in which frontend language this record should be rendered. Access
Hide Disable the form Enable or disable this record. Access
Start Startdate for this record. Same function as known from default content elements or pages in TYPO3. Access
Stop Stopdate for this record. Same function as known from default content elements or pages in TYPO3. Access

Date 

What does it do? 

  • General: Do you want to render a datepicker for date (or datetime or time), you can use this field type. Per default html5 date fields are used in modern browsers.

Frontend Output Example 

example_field_date

Backend Configuration Example 

record_field_date_tab1

record_field_date_tab2

Explanation 

Field Description Explanation Tab
Title Add a label for this field. The label is shown in the frontend near to this field. General
Type Choose a fieldtype. See explanation below for a special fieldtype. Different fields are related to some fieldtypes – not all fields are shown on every type. General
Mandatory Field This field must contain input. Check this if the field must contain input, otherwise submitting the form is not possible. Extended
Layout Choose a layout. This adds a CSS-Class to the frontend output. Administrator can add, remove or rename some of the entries. Extended
Datepicker Mode Choose Date, Datetime or Time Choose the frontend datepicker with date only, time only or a mix of both Extended
Description Add a description for this field. Per default a description will be rendered as title-attribute in the labels in frontend. Extended
Variables – Individual Fieldname This is a marker of this field. Use a field variable with {marker} in any RTE or HTML-Template. The marker name is equal in any language. Extended
Add own Variable Check this, if you want to set your own marker (see row before). After checking this button, TYPO3 ask you to reload. After a reload, you see a new field for setting an own marker. Extended
Language Choose a language. Choose in which frontend language this record should be rendered. Access
Hide Disable the form Enable or disable this record. Access
Start Startdate for this record. Same function as known from default content elements or pages in TYPO3. Access
Stop Stopdate for this record. Same function as known from default content elements or pages in TYPO3. Access

Date Formats 

You can define the dateformat for the JavaScript Datepicker. Depending on the datepicker settings (date, datetime, time), there are different entries in the locallang files. You can overwrite that via TypoScript:

plugin.tx_powermail {
    _LOCAL_LANG {
        default {
            datepicker_format_date = Y/m/d
            datepicker_format_time = Y/m/d H:i:s
            datepicker_format_datetime = H:i:s
        }
        fr {
            datepicker_format_date = Y/m/d
            datepicker_format_time = Y/m/d H:i:s
            datepicker_format_datetime = H:i:s
        }
    }
}
Copied!

File Upload 

What does it do? 

  • General: Enable a fileupload in frontend with this field. Multiupload is possible with modern browsers (HTML5 needed). Allowed filesize and fileextensions and a randomize Filename function can be set via TypoScript.

Frontend Output Example 

example_field_file

Backend Configuration Example 

record_field_file_tab1

record_field_file_tab2

Explanation 

Field Description Explanation Tab
Title Add a label for this field. The label is shown in the frontend near to this field. General
Type Choose a fieldtype. See explanation below for a special fieldtype. Different fields are related to some fieldtypes – not all fields are shown on every type. General
Mandatory Field This field must contain input. Check this if the field must contain a file for an upload, otherwise submitting the form is not possible. Extended
Layout Choose a layout. This adds a CSS-Class to the frontend output. Administrator can add, remove or rename some of the entries. Extended
Multiselect Allow upload of more than only one file. Multiupload via HTML5 - the visitors browser must support this feature. If not, only one file could be uploaded. Extended
Description Add a description for this field. Per default a description will be rendered as title-attribute in the labels in frontend. Extended
Variables – Individual Fieldname This is a marker of this field. Use a field variable with {marker} in any RTE or HTML-Template. The marker name is equal in any language. Extended
Add own Variable Check this, if you want to set your own marker (see row before). After checking this button, TYPO3 ask you to reload. After a reload, you see a new field for setting an own marker. Extended
Language Choose a language. Choose in which frontend language this record should be rendered. Access
Hide Disable the form Enable or disable this record. Access
Start Startdate for this record. Same function as known from default content elements or pages in TYPO3. Access
Stop Stopdate for this record. Same function as known from default content elements or pages in TYPO3. Access

Hidden Field 

What does it do? 

  • General: It could be useful to send some values within the form, that should not be displayed in frontend. Use a hidden field for this.
  • Prefill: This field can be prefilled from FlexForm, TypoScript, GET/Post-Params or from FE_User table.

Frontend Output Example 

Because it is "hidden", there is no visible frontend output :)

Backend Configuration Example 

record_field_hidden_tab1

record_field_hidden_tab2

Explanation 

Field Description Explanation Tab
Title Add a label for this field. The label is shown in the frontend near to this field. General
Type Choose a fieldtype. See explanation below for a special fieldtype. Different fields are related to some fieldtypes – not all fields are shown on every type. General
Email of sender Check this if this field contains the email of the sender. This is needed to set the correct sender-email-address. If there is no field marked as Senderemail within the current form, powermail will use a default value for the Senderemail. General
Name of sender Check this if this field contains the name (or a part of the name) of the sender. This is needed to set the correct sender-name. If there is no field marked as Sendername within the current form, powermail will use a default value for the Sendername. General
Prefill with value Prefill field value with a static content. Other possibilities to prefill a field: TypoScript, GET or POST params Extended
Value from logged in Frontend User Check if field should be filled from the FE_Users table of a logged in fe_user. This value overwrites a static value, if set. Extended
Variables – Individual Fieldname This is a marker of this field. Use a field variable with {marker} in any RTE or HTML-Template. The marker name is equal in any language. Extended
Add own Variable Check this, if you want to set your own marker (see row before). After checking this button, TYPO3 ask you to reload. After a reload, you see a new field for setting an own marker. Extended
Language Choose a language. Choose in which frontend language this record should be rendered. Access
Hide Disable the form Enable or disable this record. Access
Start Startdate for this record. Same function as known from default content elements or pages in TYPO3. Access
Stop Stopdate for this record. Same function as known from default content elements or pages in TYPO3. Access

Show HTML 

What does it do? 

  • General: If you want to show some html-text in the form, use this field. This text is not submitted. Per default the text is parsed through a htmlspecialchars() function, which makes no HTML tags possible. If your editors are aware of possible security problems, the admin can enable HTML under Constants::

    plugin.tx_powermail.settings.misc.htmlForHtmlFields = 1.

Frontend Output Example 

example_field_html

Backend Configuration Example 

record_field_html_tab1

record_field_html_tab2

Explanation 

Field Description Explanation Tab
Title Add a label for this field. The label is shown in the frontend near to this field. General
Type Choose a fieldtype. See explanation below for a special fieldtype. Different fields are related to some fieldtypes – not all fields are shown on every type. General
Add some text This is the field for the html tags and text HTML Tags are not allowed for security reasons by default. Can be enabled from the administrator by TypoScript constants. General
Variables – Individual Fieldname This is a marker of this field. Use a field variable with {marker} in any RTE or HTML-Template. The marker name is equal in any language. Extended
Add own Variable Check this, if you want to set your own marker (see row before). After checking this button, TYPO3 ask you to reload. After a reload, you see a new field for setting an own marker. Extended
Language Choose a language. Choose in which frontend language this record should be rendered. Access
Hide Disable the form Enable or disable this record. Access
Start Startdate for this record. Same function as known from default content elements or pages in TYPO3. Access
Stop Stopdate for this record. Same function as known from default content elements or pages in TYPO3. Access

Textfield (Input) 

What does it do? 

  • General: An input field is the most used field for forms. The user can fill it in just one line.
  • Mandatory: This field could be marked as mandatory, so the user must fill out this field, otherwise the form can not be submitted.
  • Validation: This field can also be validated (HTML5, JavaScript and/or PHP) for different inputtypes (email, url, phone, numbers only, letters only, min number, max number, range, length, pattern)
  • Prefill: An input field can be prefilled from FlexForm, TypoScript, GET/Post-Params or from FE_User table.

Frontend Output Example 

example_field_input

Backend Configuration Example 

record_field_input_tab1

record_field_input_tab2

Explanation 

Field Description Explanation Tab
Title Add a label for this field. The label is shown in the frontend near to this field. General
Type Choose a fieldtype. See explanation below for a special fieldtype. Different fields are related to some fieldtypes – not all fields are shown on every type. General
Email of sender Check this if this field contains the email of the sender. This is needed to set the correct sender-email-address. If there is no field marked as Senderemail within the current form, powermail will use a default value for the Senderemail. General
Name of sender Check this if this field contains the name (or a part of the name) of the sender. This is needed to set the correct sender-name. If there is no field marked as Sendername within the current form, powermail will use a default value for the Sendername. General
Mandatory Field This field must contain input. Check this if the field must contain input, otherwise submitting the form is not possible. Extended
Validation Validate the user input with a validator. Possible Validation Methods are: Email, URL, Phone, Numbers only, Letters only, Min Number, Max Number, Range, Length, Pattern (RegEx) Extended
Prefill with value Prefill field value with a static content. Other possibilities to prefill a field: TypoScript, GET or POST params Extended
Placeholder Add a placeholder for this input field. A placeholder text is an example, that should help the user to fill out an input field. This text is shown in bright grey within the input field. If you have a name field, you could use the placeholder “John Doe". Extended
Value from logged in Frontend User Check if field should be filled from the FE_Users table of a logged in fe_user. This value overwrites a static value, if set. Extended
Layout Choose a layout. This adds a CSS-Class to the frontend output. Administrator can add, remove or rename some of the entries. Extended
Description Add a description for this field. Per default a description will be rendered as title-attribute in the labels in frontend. Extended
Variables – Individual Fieldname This is a marker of this field. Use a field variable with {marker} in any RTE or HTML-Template. The marker name is equal in any language. Extended
Add own Variable Check this, if you want to set your own marker (see row before). After checking this button, TYPO3 ask you to reload. After a reload, you see a new field for setting an own marker. Extended
Language Choose a language. Choose in which frontend language this record should be rendered. Access
Hide Disable the form Enable or disable this record. Access
Start Startdate for this record. Same function as known from default content elements or pages in TYPO3. Access
Stop Stopdate for this record. Same function as known from default content elements or pages in TYPO3. Access

Validation 

Administrator can enable or disable the validation in general with TypoScript (see TypoScript part in manual).

  • HTML5 Validation
  • Clientside Validation with own JavaScript framework
  • Serverside Validation with PHP
Validation Type Description Examples Note
Mandatory This simple checkbox forces the user to add a value for the current field. any text The HTML5 attribute required="required" is used, if HTML5-Validation is turned on.
Email If email validation is turned on, the visitor has to fill in the field with a correct email address or let it empty. firstname.lastname@domain.orgname@subdomain.domain.org input with type="email" is used, if HTML5-Validation is turned on.
URL If url validation is turned on, the visitor has to fill in the field with a correct url. http://www.test.org<br>www.test.org No HTML5 type - type="text" is used
Phone If turned on, visitor must leave a string with a phone syntax. 012345678900123 45678900123 456 789(0123) 45678 - 900012 345 678 90120012 (0)345 / 67890 - 12+123456789012+12 345 678 9012+12 3456 7890123+49 (0) 123 3456789+49 (0)123 / 34567 - 89 input with type="tel" is used, if HTML5-Validation is turned on.
Numbers only If turned on, visitor can only fill in numbers (no space or other characters allowed) 12368465135135135185 input with type="number" is used if HTML5-Validation is turned on.Leading zeros are removed, so this validation type cannot be used to validate German ZIP codes. Use the pattern type instead.
Letters only If turned on, visitor can only fill in letters (no space, no numbers, no special characters, no umlauts and no accent allowed) abcqwertz No HTML5 type - type="text" is used
Min Number Min Number is used to check if a number (integer) is greater then a configured number. So the visitor has to insert an integer.If turned on, an additional field "Validation Configuration" comes up. Validation depends on the value in this field. The editor should enter an integer in this field - e.g. 3 3 => 4 or 5 or 1000 or more123 => 124 or 1000 or 99999 or more input with type="number" is used, if HTML5-Validation is turned on.
Max Number Max Number is used to check if a number (integer) is less then a configured number. So the visitor has to insert an integer.If turned on, an additional field "Validation Configuration" comes up. Validation depends on the value in this field. The editor should enter an integer in this field - e.g. 3 3 => 2 or 1 or 0123 => 122 or 100 or 10 or less input with type="number" is used, if HTML5-Validation is turned on.
Range Range allows the visitor to add an integer between a start and a stop value.If turned on, an additional field "Validation Configuration" comes up. Validation depends on the value in this field. The editor should enter a start and a stop value - e.g. 5,15 for start with 5 and stop with 15 5,15 => 5 or 10 or 150,100 => 1 or 25 or 100 input with type="range" is used, if HTML5-Validation is turned on.
Length Length allows the visitor to add characters and numbers. But the length is validated.If turned on, an additional field "Validation Configuration" comes up. Validation depends on the value in this field. The editor should enter a start and a stop length - e.g. 5,15 for startlength on 5 and stoplength on 15 5,15 => ab or abc23efg or abcdefghijklmno0,3 => 1 or ab or abc No HTML5 type - type="text" is used
Pattern The visitors input will be validated against a regulare expression.If turned on, an additional field "Validation Configuration" comes up. Validation depends on the value in this field. The editor can add a regulare expression in this field. See http://html5pattern.com/ or http://bueltge.de/php-regular-expression-schnipsel/917/ for a lot of examples and an introduction to pattern. ~https?://.+~=> An url with https beginning - https://www.test.org^[A-Za-z\u00C0-\u017F]+$=> letters with umlauts, accents and other special letters^[A-Za-z\s\u00C0-\u017F]+$=> letters with umlauts and space^[a-zA-Z][a-zA-Z0-9-_\.]{1,20}$=> letters/digits for a username with dash, underscore, point (1-20 signs)[0-9]{5}=> German ZIP Code (5 digits)\d+(,\d{2})?=> Price like 2,20 No HTML5 type - type="text" is used

Location 

What does it do? 

  • General: The location field is an input field, which could be prefilled with JavaScript. The user is asked if he wants to allow the filling with his current location. If he clicks on yes, the field is prefilled with Street, Streetnumber and Country.

Frontend Output Example 

example_field_location

Backend Configuration Example 

record_field_location_tab1

record_field_location_tab2

Explanation 

Field Description Explanation Tab
Title Add a label for this field. The label is shown in the frontend near to this field. General
Type Choose a fieldtype. See explanation below for a special fieldtype. Different fields are related to some fieldtypes – not all fields are shown on every type. General
Layout Choose a layout. This adds a CSS-Class to the frontend output. Administrator can add, remove or rename some of the entries. Extended
Description Add a description for this field. Per default a description will be rendered as title-attribute in the labels in frontend. Extended
Variables – Individual Fieldname This is a marker of this field. Use a field variable with {marker} in any RTE or HTML-Template. The marker name is equal in any language. Extended
Add own Variable Check this, if you want to set your own marker (see row before). After checking this button, TYPO3 ask you to reload. After a reload, you see a new field for setting an own marker. Extended
Language Choose a language. Choose in which frontend language this record should be rendered. Access
Hide Disable the form Enable or disable this record. Access
Start Startdate for this record. Same function as known from default content elements or pages in TYPO3. Access
Stop Stopdate for this record. Same function as known from default content elements or pages in TYPO3. Access

Password Field 

What does it do? 

  • General: If you want to show two password field in the frontend, use this fieldtype. Password-fields can be set to mandatory fields. A validator checks if both values are the same. Passwords are stored as cleartext into database.

Frontend Output Example 

example_field_password

Backend Configuration Example 

record_field_password_tab1

record_field_password_tab2

Explanation 

Field Description Explanation Tab
Title Add a label for this field. The label is shown in the frontend near to this field. General
Type Choose a fieldtype. See explanation below for a special fieldtype. Different fields are related to some fieldtypes – not all fields are shown on every type. General
Mandatory Field This field must contain input. Check this if the field must contain input, otherwise submitting the form is not possible. Extended
Layout Choose a layout. This adds a CSS-Class to the frontend output. Administrator can add, remove or rename some of the entries. Extended
Description Add a description for this field. Per default a description will be rendered as title-attribute in the labels in frontend. Extended
Variables – Individual Fieldname This is a marker of this field. Use a field variable with {marker} in any RTE or HTML-Template. The marker name is equal in any language. Extended
Add own Variable Check this, if you want to set your own marker (see row before). After checking this button, TYPO3 ask you to reload. After a reload, you see a new field for setting an own marker. Extended
Language Choose a language. Choose in which frontend language this record should be rendered. Access
Hide Disable the form Enable or disable this record. Access
Start Startdate for this record. Same function as known from default content elements or pages in TYPO3. Access
Stop Stopdate for this record. Same function as known from default content elements or pages in TYPO3. Access

Radio Buttons 

What does it do? 

  • General: Radiobuttons are made for a single select of an options in the same layout as checkboxes.
  • Mandatory: This field could be marked as mandatory, so the user must fill min 1 radiobutton, otherwise the form can not be submitted.
  • Prefill: The field can be preselected from FlexForm, TypoScript, GET/Post-Params or from FE_User table.
  • Special: Options could also filled by TypoScript in powermail 2.1 and higher (static or dynamic)

Frontend Output Example 

example_field_radio

Backend Configuration Example 

record_field_radio_tab1

record_field_radio_tab2

Explanation 

Field Description Explanation Tab
Title Add a label for this field. The label is shown in the frontend near to this field. General
Type Choose a fieldtype. See explanation below for a special fieldtype. Different fields are related to some fieldtypes – not all fields are shown on every type. General
Options Options to check Separate each with a new line. Note: see following table for examples, how to precheck or clean a value General
Email of sender Check this if this field contains the email of the sender. This is needed to set the correct sender-email-address. If there is no field marked as Senderemail within the current form, powermail will use a default value for the Senderemail. General
Name of sender Check this if this field contains the name (or a part of the name) of the sender. This is needed to set the correct sender-name. If there is no field marked as Sendername within the current form, powermail will use a default value for the Sendername. General
Mandatory Field This field must contain input. Check this if the field must contain input, otherwise submitting the form is not possible. Extended
Value from logged in Frontend User Check if field should be filled from the FE_Users table of a logged in fe_user. This value overwrites a static value, if set. Extended
Create from TypoScript Fill Options from TypoScript If you want to create your options (see above) from TypoScript, you can use this field. Please split each line in your TypoScript with [\n] Extended
Layout Choose a layout. This adds a CSS-Class to the frontend output. Administrator can add, remove or rename some of the entries. Extended
Description Add a description for this field. Per default a description will be rendered as title-attribute in the labels in frontend. Extended
Variables – Individual Fieldname This is a marker of this field. Use a field variable with {marker} in any RTE or HTML-Template. The marker name is equal in any language. Extended
Add own Variable Check this, if you want to set your own marker (see row before). After checking this button, TYPO3 ask you to reload. After a reload, you see a new field for setting an own marker. Extended
Language Choose a language. Choose in which frontend language this record should be rendered. Access
Hide Disable the form Enable or disable this record. Access
Start Startdate for this record. Same function as known from default content elements or pages in TYPO3. Access
Stop Stopdate for this record. Same function as known from default content elements or pages in TYPO3. Access

Option examples for selectbox 

Example option HTML Output
Red <label>Red</label><input type="radio" value=”Red” />
Yellow | 1 <label>Yellow</label><input type="radio" value=”1” />
Blue | <label>Blue</label><input type="radio" value=”” />
Black Shoes | black | * <label>Black Shoes</label><input type="radio" value=”black” checked=”checked” />
White | | * <label>White</label><input type="radio" value=”” checked=”checked” />
Red Shoes | red | *
Yellow Shoes | yellow | *
<label>Red Shoes</label><input type="radio" value=”red” checked=”checked” />
<label>Yellow Shoes</label><input type="radio" value=”yellow” checked=”checked” />

Reset 

What does it do? 

  • General: The pendant to a submit field is the reset field. If the user clicks on reset, old input values are deleted from the current form.

Frontend Output Example 

example_field_reset

Backend Configuration Example 

record_field_reset_tab1

record_field_reset_tab2

Explanation 

Field Description Explanation Tab
Title Add a label for this field. The label is shown in the frontend near to this field. General
Type Choose a fieldtype. See explanation below for a special fieldtype. Different fields are related to some fieldtypes – not all fields are shown on every type. General
Variables – Individual Fieldname This is a marker of this field. Use a field variable with {marker} in any RTE or HTML-Template. The marker name is equal in any language. Extended
Add own Variable Check this, if you want to set your own marker (see row before). After checking this button, TYPO3 ask you to reload. After a reload, you see a new field for setting an own marker. Extended
Language Choose a language. Choose in which frontend language this record should be rendered. Access
Hide Disable the form Enable or disable this record. Access
Start Startdate for this record. Same function as known from default content elements or pages in TYPO3. Access
Stop Stopdate for this record. Same function as known from default content elements or pages in TYPO3. Access

Selectfield 

What does it do? 

  • General: A select field is also called "dropdown", "combobox" or "picklist". The user can choose an option. It's also possible to config a multiselectfield - the user can choose more than only one option by holding the CRTL-Key when clicking a second option. Add some options and separate it with a new line.
  • Mandatory: This field could be marked as mandatory, so the user must fill out this field, otherwise the form can not be submitted.
  • Prefill: The field can be preselected from FlexForm, TypoScript, GET/Post-Params or from FE_User table.
  • Special: Options could also filled by TypoScript in powermail 2.1 and higher (static or dynamic)

Frontend Output Example 

Default:

example_field_select

Multiple:

example_field_select

Backend Configuration Example 

record_field_select_tab1

record_field_select_tab2

Explanation 

Field Description Explanation Tab
Title Add a label for this field. The label is shown in the frontend near to this field. General
Type Choose a fieldtype. See explanation below for a special fieldtype. Different fields are related to some fieldtypes – not all fields are shown on every type. General
Options Options to select Separate each with a new line. Note: see following table for examples, how to preselect or clean a value General
Email of sender Check this if this field contains the email of the sender. This is needed to set the correct sender-email-address. If there is no field marked as Senderemail within the current form, powermail will use a default value for the Senderemail. General
Name of sender Check this if this field contains the name (or a part of the name) of the sender. This is needed to set the correct sender-name. If there is no field marked as Sendername within the current form, powermail will use a default value for the Sendername. General
Mandatory Field This field must contain input. Check this if the field must contain input, otherwise submitting the form is not possible. Extended
Value from logged in Frontend User Check if field should be filled from the FE_Users table of a logged in fe_user. This value overwrites a static value, if set. Extended
Create from TypoScript Fill Options from TypoScript If you want to create your options (see above) from TypoScript, you can use this field. Please split each line in your TypoScript with [\n]Example:lib.options = TEXTlib.options.value = red[\n]blue[\n]pink(see more examples below) Extended
Layout Choose a layout. This adds a CSS-Class to the frontend output. Administrator can add, remove or rename some of the entries. Extended
Description Add a description for this field. Per default a description will be rendered as title-attribute in the labels in frontend. Extended
Multiselect Choose a layout. This adds a CSS-Class to the frontend output. Administrator can add, remove or rename some of the entries. Extended
Variables – Individual Fieldname This is a marker of this field. Use a field variable with {marker} in any RTE or HTML-Template. The marker name is equal in any language. Extended
Add own Variable Check this, if you want to set your own marker (see row before). After checking this button, TYPO3 ask you to reload. After a reload, you see a new field for setting an own marker. Extended
Language Choose a language. Choose in which frontend language this record should be rendered. Access
Hide Disable the form Enable or disable this record. Access
Start Startdate for this record. Same function as known from default content elements or pages in TYPO3. Access
Stop Stopdate for this record. Same function as known from default content elements or pages in TYPO3. Access

Option examples for selectbox 

Example option HTML Output
Red <option value=”Red”>Red</option>
Yellow | 1 <option value=”1”>Yellow</option>
Blue | <option value=””>Blue</option>
Black Shoes | black | * <option value=”black” selected=”selected”>Black Shoes</option>
White | | * <option value=”” selected=”selected”>White</option>
Please choose... |
red
blue
<option value="">Please choose...</option><option>red</option><option>blue</option>

Submit 

What does it do? 

  • General: A click on the submit field sends the form to the server.

Frontend Output Example 

example_field_submit

Backend Configuration Example 

record_field_submit_tab1

record_field_submit_tab2

Explanation 

Field Description Explanation Tab
Title Add a label for this field. The label is shown in the frontend near to this field. General
Type Choose a fieldtype. See explanation below for a special fieldtype. Different fields are related to some fieldtypes – not all fields are shown on every type. General
Layout Choose a layout. This adds a CSS-Class to the frontend output. Administrator can add, remove or rename some of the entries. Extended
Variables – Individual Fieldname This is a marker of this field. Use a field variable with {marker} in any RTE or HTML-Template. The marker name is equal in any language. Extended
Add own Variable Check this, if you want to set your own marker (see row before). After checking this button, TYPO3 ask you to reload. After a reload, you see a new field for setting an own marker. Extended
Language Choose a language. Choose in which frontend language this record should be rendered. Access
Hide Disable the form Enable or disable this record. Access
Start Startdate for this record. Same function as known from default content elements or pages in TYPO3. Access
Stop Stopdate for this record. Same function as known from default content elements or pages in TYPO3. Access

Show some Text 

What does it do? 

  • General: If you want to show some text in the form, use this field. This text is not submitted.

Frontend Output Example 

example_field_label

Backend Configuration Example 

record_field_text_tab1

record_field_text_tab2

Explanation 

Field Description Explanation Tab
Title Add a label for this field. The label is shown in the frontend near to this field. General
Type Choose a fieldtype. See explanation below for a special fieldtype. Different fields are related to some fieldtypes – not all fields are shown on every type. General
Add some text This is the field for the text HTML Tags are not allowed for security reasons General
Variables – Individual Fieldname This is a marker of this field. Use a field variable with {marker} in any RTE or HTML-Template. The marker name is equal in any language. Extended
Add own Variable Check this, if you want to set your own marker (see row before). After checking this button, TYPO3 ask you to reload. After a reload, you see a new field for setting an own marker. Extended
Language Choose a language. Choose in which frontend language this record should be rendered. Access
Hide Disable the form Enable or disable this record. Access
Start Startdate for this record. Same function as known from default content elements or pages in TYPO3. Access
Stop Stopdate for this record. Same function as known from default content elements or pages in TYPO3. Access

Text with more rows (Textarea) 

What does it do? 

  • General: A texarea basicly works like a normal input field, but offers the possibility to write in multiple lines.
  • Mandatory: This field could be marked as mandatory, so the user must fill out this field, otherwise the form can not be submitted.
  • Validation: This field can also be validated (HTML5, JavaScript and/or PHP) for different inputtypes (email, url, phone, numbers only, letters only, min number, max number, range, length, pattern)
  • Prefill: An input field can be prefilled from FlexForm, TypoScript, GET/Post-Params or from FE_User table.

Frontend Output Example 

example_field_textarea

Backend Configuration Example 

record_field_textarea_tab1

record_field_textarea_tab2

Explanation 

Field Description Explanation Tab
Title Add a label for this field. The label is shown in the frontend near to this field. General
Type Choose a fieldtype. See explanation below for a special fieldtype. Different fields are related to some fieldtypes – not all fields are shown on every type. General
Email of sender Check this if this field contains the email of the sender. This is needed to set the correct sender-email-address. If there is no field marked as Senderemail within the current form, powermail will use a default value for the Senderemail. General
Name of sender Check this if this field contains the name (or a part of the name) of the sender. This is needed to set the correct sender-name. If there is no field marked as Sendername within the current form, powermail will use a default value for the Sendername. General
Mandatory Field This field must contain input. Check this if the field must contain input, otherwise submitting the form is not possible. Extended
Validation Validate the user input with a validator. Possible Validation Methods are: Email, URL, Phone, Numbers only, Letters only, Min Number, Max Number, Range, Length, Pattern (RegEx) Extended
Prefill with value Prefill field value with a static content. Other possibilities to prefill a field: TypoScript, GET or POST params Extended
Placeholder Add a placeholder for this input field. A placeholder text is an example, that should help the user to fill out an input field. This text is shown in bright grey within the input field. If you have a name field, you could use the placeholder “John Doe". Extended
Value from logged in Frontend User Check if field should be filled from the FE_Users table of a logged in fe_user. This value overwrites a static value, if set. Extended
Layout Choose a layout. This adds a CSS-Class to the frontend output. Administrator can add, remove or rename some of the entries. Extended
Description Add a description for this field. Per default a description will be rendered as title-attribute in the labels in frontend. Extended
Variables – Individual Fieldname This is a marker of this field. Use a field variable with {marker} in any RTE or HTML-Template. The marker name is equal in any language. Extended
Add own Variable Check this, if you want to set your own marker (see row before). After checking this button, TYPO3 ask you to reload. After a reload, you see a new field for setting an own marker. Extended
Language Choose a language. Choose in which frontend language this record should be rendered. Access
Hide Disable the form Enable or disable this record. Access
Start Startdate for this record. Same function as known from default content elements or pages in TYPO3. Access
Stop Stopdate for this record. Same function as known from default content elements or pages in TYPO3. Access

TypoScript 

What does it do? 

  • General: Do you want to display something special? Use TypoScript for the frontend rendering.

Frontend Output Example 

example_field_typoscript

Backend Configuration Example 

record_field_typoscript_tab1

record_field_typoscript_tab2

Explanation 

Field Description Explanation Tab
Title Add a label for this field. The label is shown in the frontend near to this field. General
Type Choose a fieldtype. See explanation below for a special fieldtype. Different fields are related to some fieldtypes – not all fields are shown on every type. General
TypoScript Path Add TypoScript path to show in frontend. Example TypoScript could be:lib.test = TEXTlib.test.value = xyz General
Variables – Individual Fieldname This is a marker of this field. Use a field variable with {marker} in any RTE or HTML-Template. The marker name is equal in any language. Extended
Add own Variable Check this, if you want to set your own marker (see row before). After checking this button, TYPO3 ask you to reload. After a reload, you see a new field for setting an own marker. Extended
Language Choose a language. Choose in which frontend language this record should be rendered. Access
Hide Disable the form Enable or disable this record. Access
Start Startdate for this record. Same function as known from default content elements or pages in TYPO3. Access
Stop Stopdate for this record. Same function as known from default content elements or pages in TYPO3. Access

Support 

Free support 

A list of all known bugs and feature requests is available on GitHub https://github.com/in2code-de/powermail/issues. If something is missing please do not hesitate to open an issue there.

If you are a member of the Early Access Program (EAP) there is a private issue tracker related especially to the eap versions of EXT:powermail.

Please be aware, that we try to answer the issues as soon as possible. But there is no guaranteed response time due to the available resources.

Commercial Support 

If you want commercial support or a specific feature implemented, please reach out to our service or use the contact form at https://www.in2code.de/en/contact/.

Early Access Program (EAP) 

If you want to support the development of EXT:powermail, you can do this via our Early Access Program. For details please refer to https://www.in2code.de/en/agency/typo3-extensions/early-access-program/