Usage
Target group: Integrators, Administrators
Module
The connections to JobRouter® installations are managed in the backend module JobRouter > Connections.
Note
The module is only available in the live workspace.
On your first visit after installing the extension and generating the key you should see the following screen:
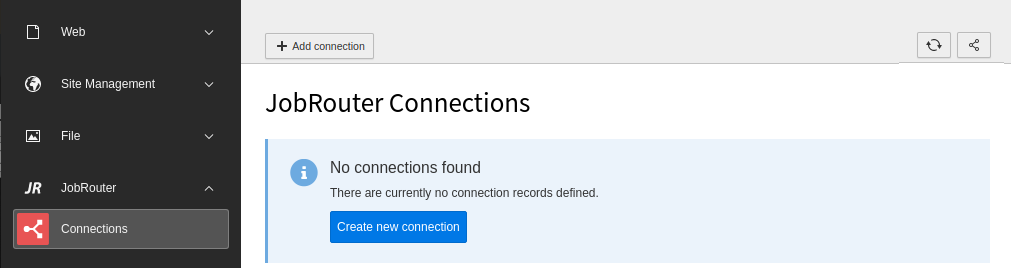
Initial Connections module screen
Note
If you get the error message that the key file does not exist, first generate the key.
Create a connection
To create a new connection, click on the + Add connection button in the upper menu bar, which displays a form:
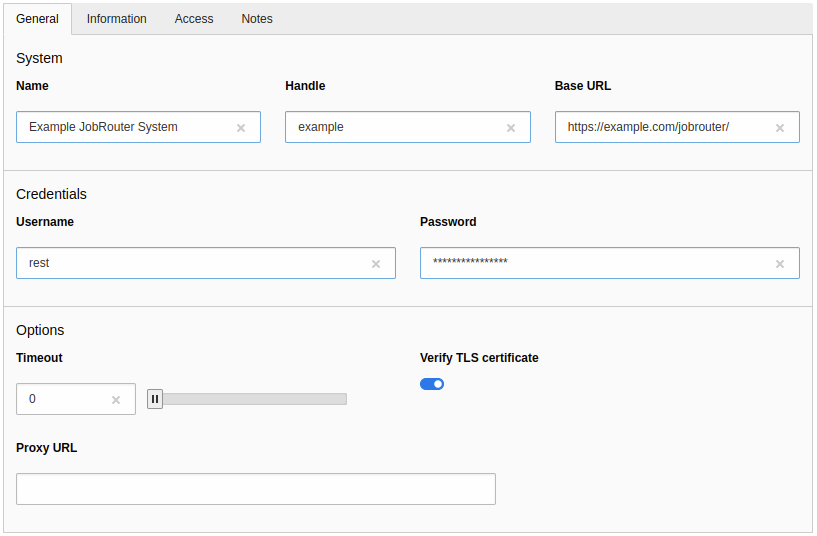
Create a connection
The following fields are available:
General
- Name
- Use a name you recognise. This can be the name of the JobRouter® installation or the purpose for which it is used. It is only descriptive.
- Handle
- Enter a unique short handle. It can be used to create a connection programmatically and independent of the internal uid.
- Base URL
-
The base URL of the JobRouter® installation.
Caution
The JobRouter® installation should be accessible only over TLS (https), so that the credentials are transmitted encrypted.
- Username
-
The username to sign in over the REST API.
Tip
For security reasons, use a JobRouter® user who only has the access rights required for the purpose (technical user). It is also possible to create more than one connection to the same JobRouter® installation with different users.
- Password
- The password to be used. It will be stored encrypted in the database.
- Timeout
-
The maximum number of seconds to execute a request.
Default:
0 - Verify TLS certificate
-
The TLS certificate of the JobRouter® installation is checked when connecting.
Default: activated
Important
This should only be disabled when connecting to a test or development installation as this introduces security issues.
- Proxy URL
-
Enter the URL when connecting through a proxy to the JobRouter® installation.
Default: (empty)
Information
- JobRouter Version
- The version of the JobRouter® installation. The version is automatically detected when a connection is established and is therefore read-only.
Access
- Enabled
- In the Access tab you can enable or disable the connection. Disabled connections cannot be used.
Notes
- Description
- This is a descriptive field only. You can enter additional remarks for a connection.
Connection list
After creating one or more connections, you will see a list of connections when calling the module:

Connection list
If a connection is not enabled, this is indicated by the addition "(disabled)" in the name.
There are three buttons available for each connection:

- You can edit a connection with the pencil.
- Click on the bug icon to test a connection. This will also update the JobRouter® version if necessary.
- The last icon is a link to the JobRouter® installation.
Delete a connection
To delete a connection, open the editing page of the connection. In the upper menu bar you will find the Delete button.
Note
Currently, there is no check during deletion whether a connection is used in other records.