IDP-Configurations
Identity Provider Metadata Configurations (Using XML Metadata)
- Either download the IDP Metadata file or copy the IDP Metadata URL from your Identity Provider
- Navigate to the IDP Settings tab of the plugin and click on Upload IDP Metadata button
- Add the name of your Identity Provider.
- add the downloaded IDP Metadata file or paste the IDP Metadata URL copied from your Identity Provider and save it.
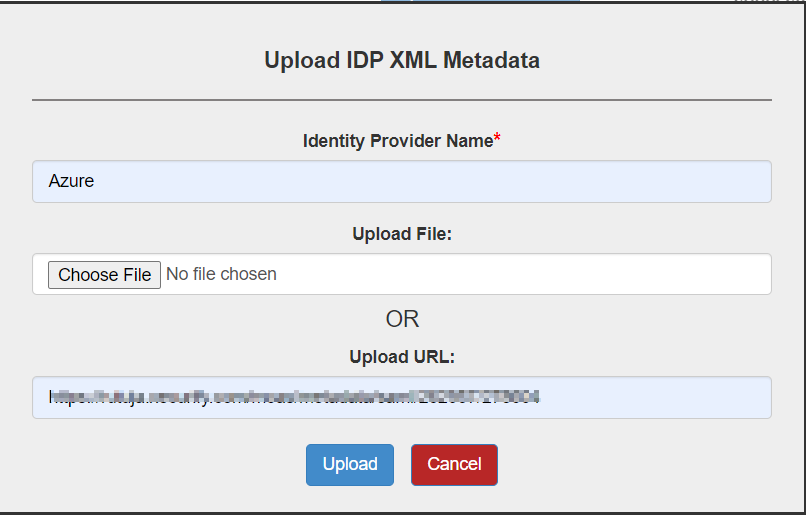
- Once you save the settings all the Metadata details will be fetched automatically.
OR
Identity Provider Metadata Configurations (Manually)
- Identity Provider Name: {Add your Identity Provider Name}
- IDP Entity ID: {Add your Identity Provider Entity ID}
- SAML Login URL: {Add your Identity Provider Single Sign On Service URL}
- SAML x509 Certificate: {Add your Identity Provider x509 certificate}
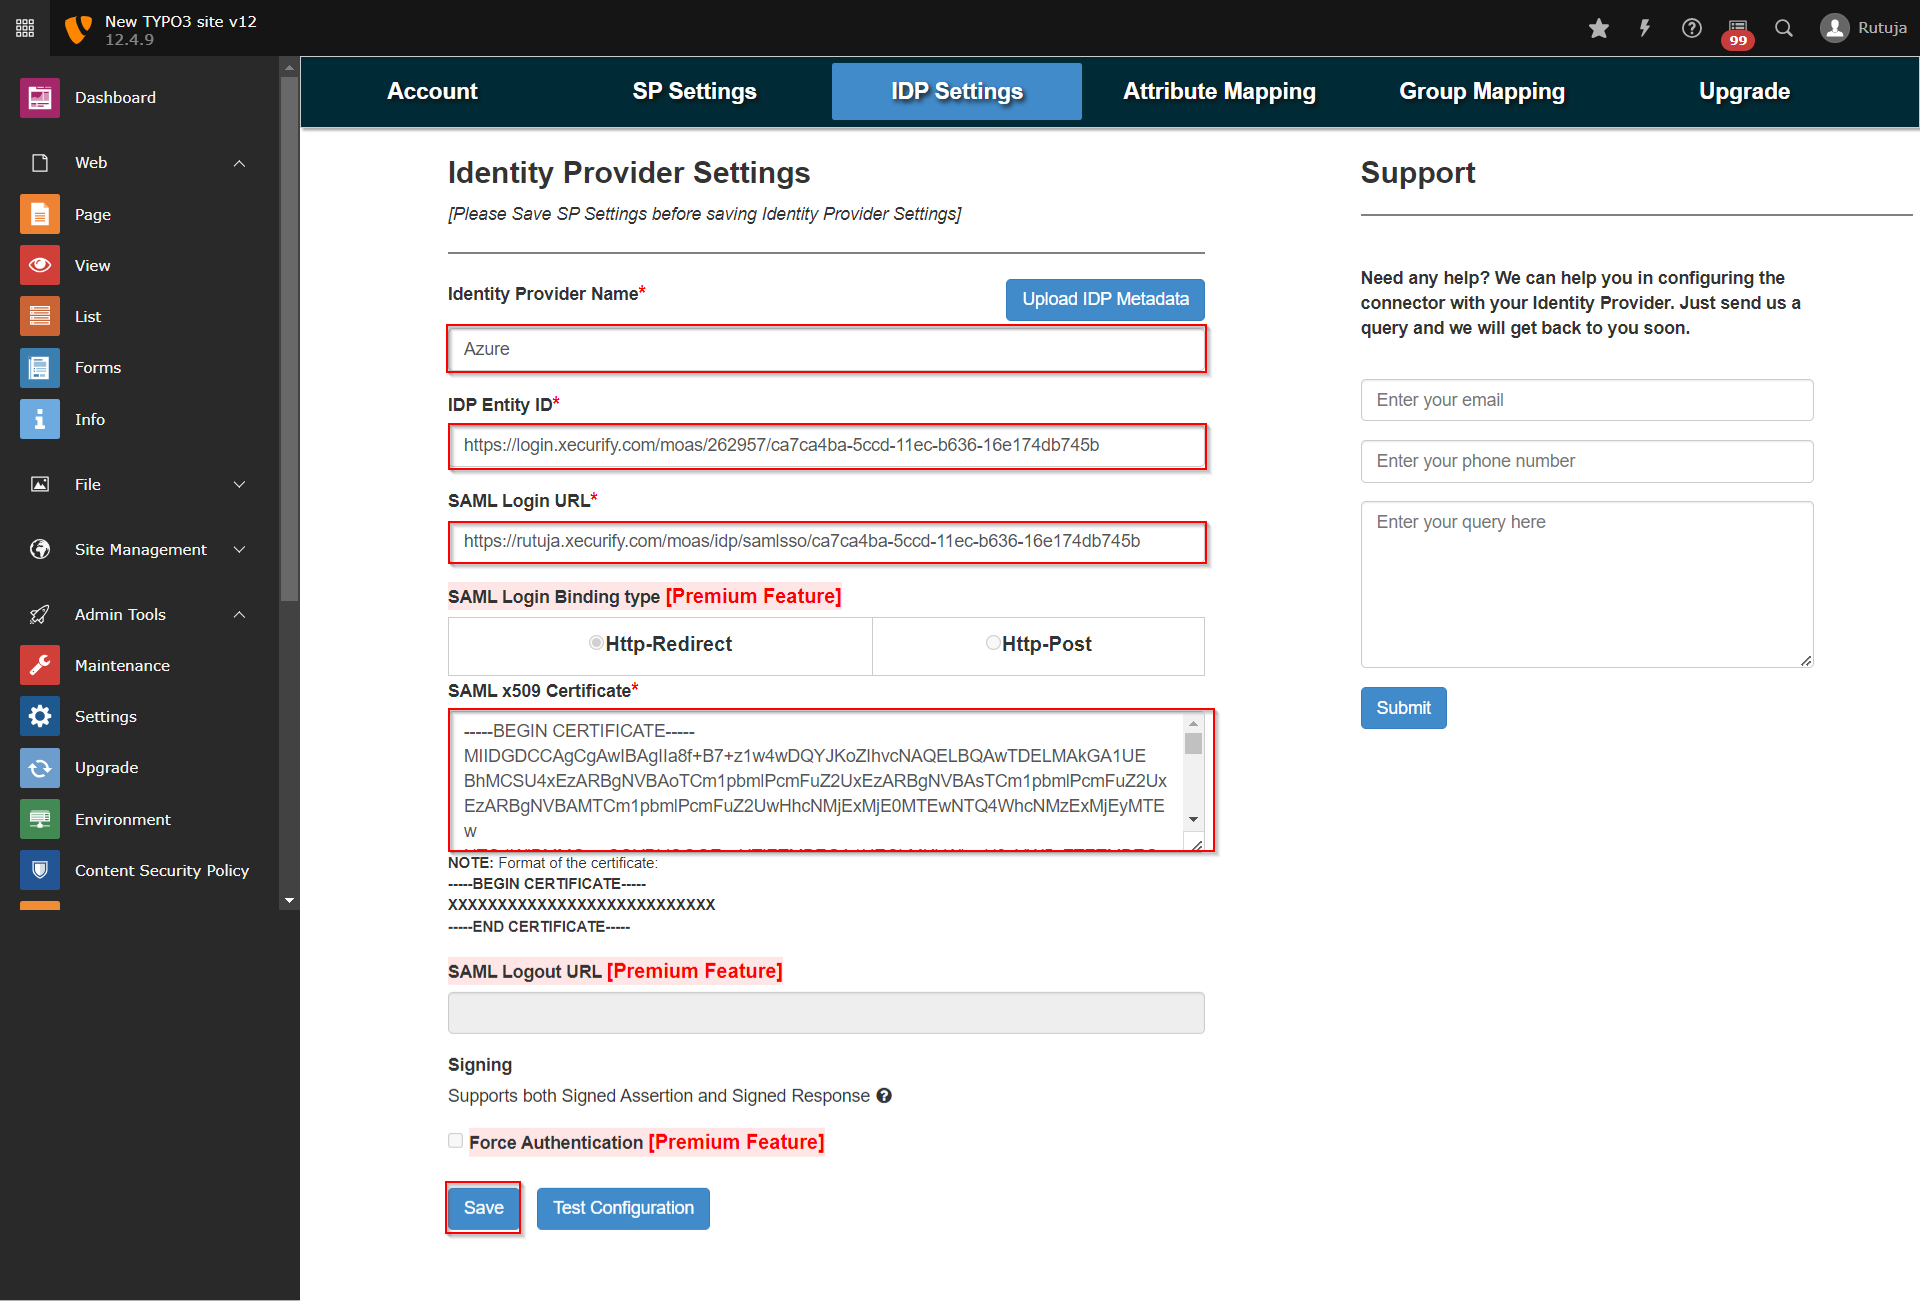
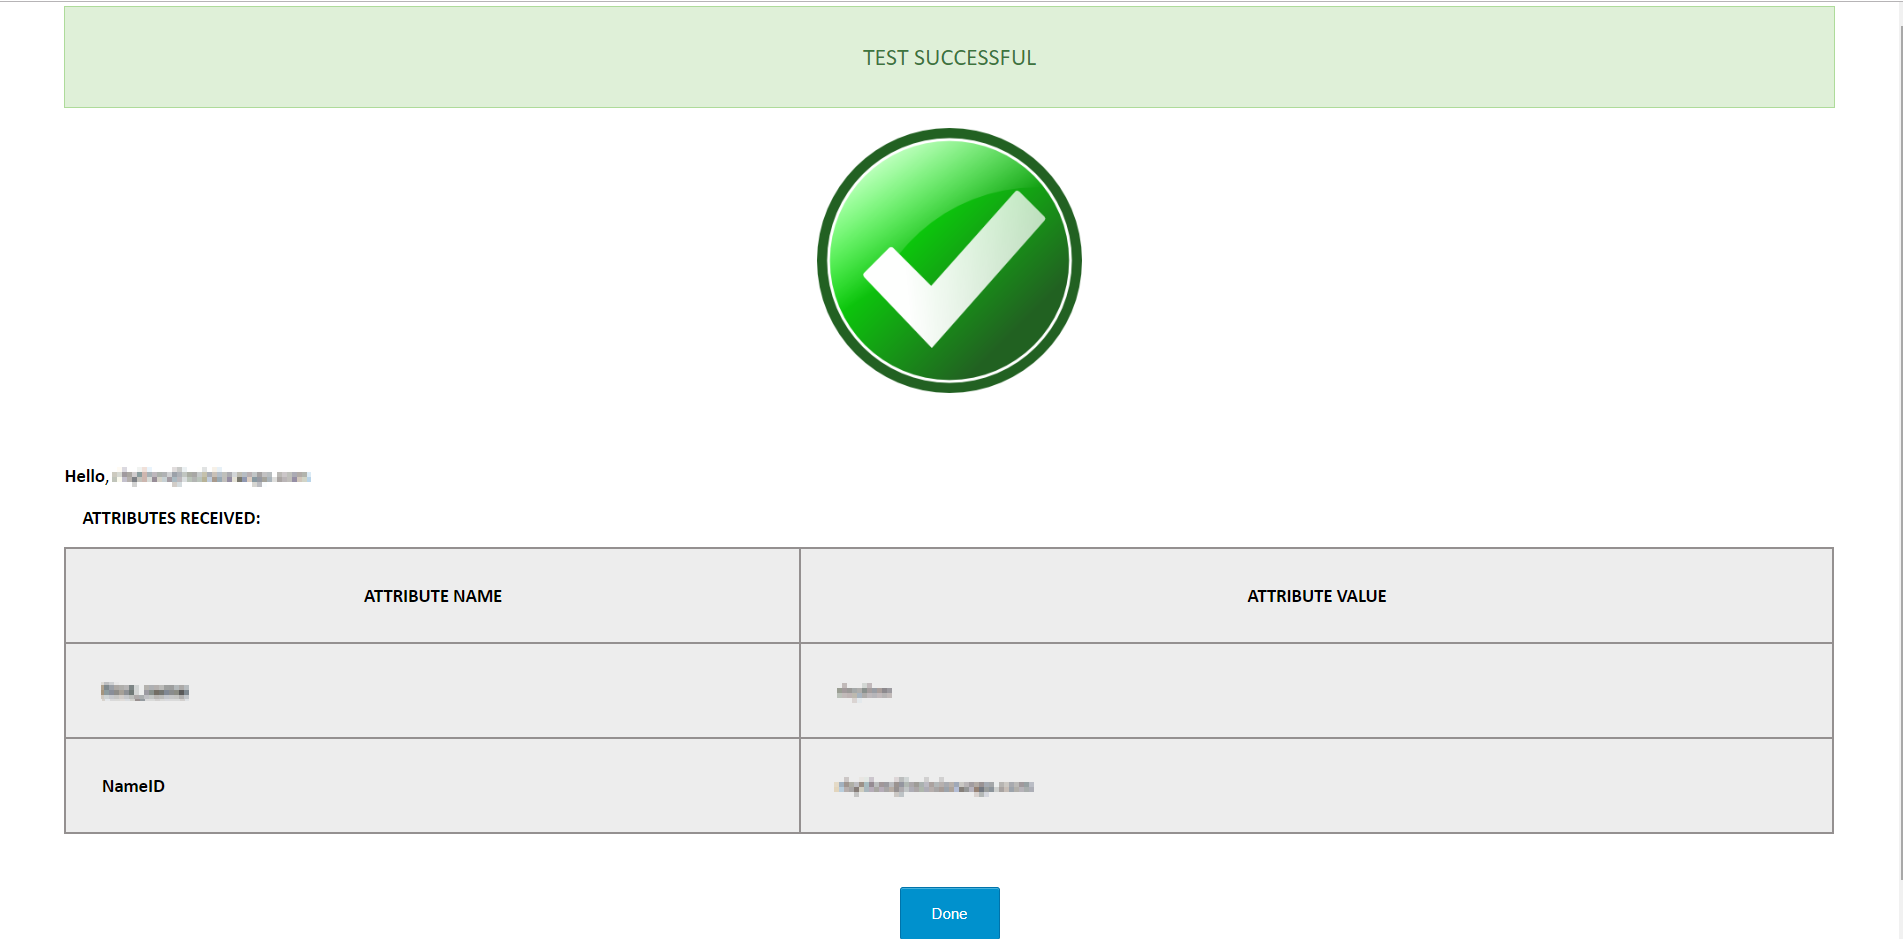
- Once you configure both Identity Provider and Service Provider Metadata, click the Test Configuration button to check if the configurations are made correctly.
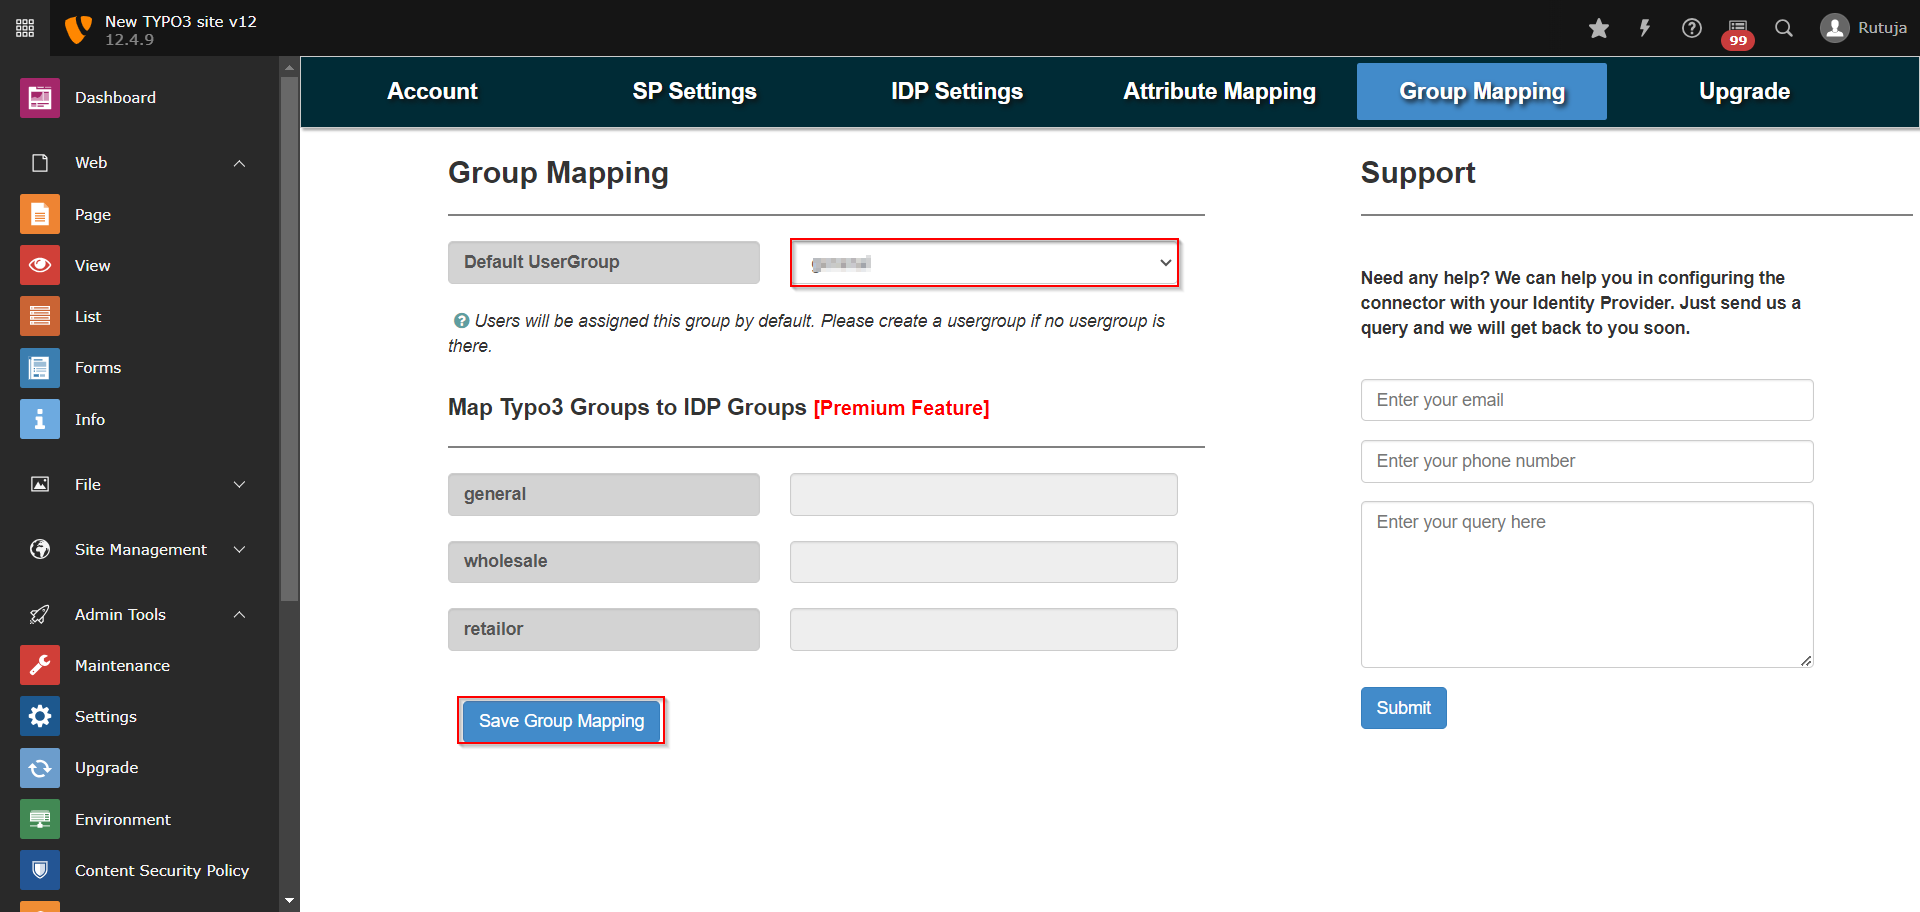
Default Group Mapping
- Navigate to the Group Mapping tab of the plugin, select the default group to be assigned to the new users in Typo3 and save the settings.
- Once you have done all the above steps, you are ready to test the SSO. You can use your Fesaml Page URL in order to initiate the SSO.
- If you are looking for anything which you cannot find, please drop us an email on info@xecurify.com