MCP-first AI foundation for TYPO3. AI Foundation turns your TYPO3 installation into a
fully AI-ready platform. Complete AI-infrastructure for the whole TYPO3 team,
zero setup. Manage every AI provider, MCP servers & tools, brand context,
prompts, users permissions, and budget in one native backend module. You stay
in control, your every TYPO3 team (editors, integrators, developers &
administrator) works with AI on one governed, self-hosted foundation. Use it
standalone — or as the foundation that powers the complete AI Universe.
Open source. Free to build. A commercial license for production.
Configure providers, MCP, brand context, prompts, and permissions once —
connected extensions and AI clients reuse them.
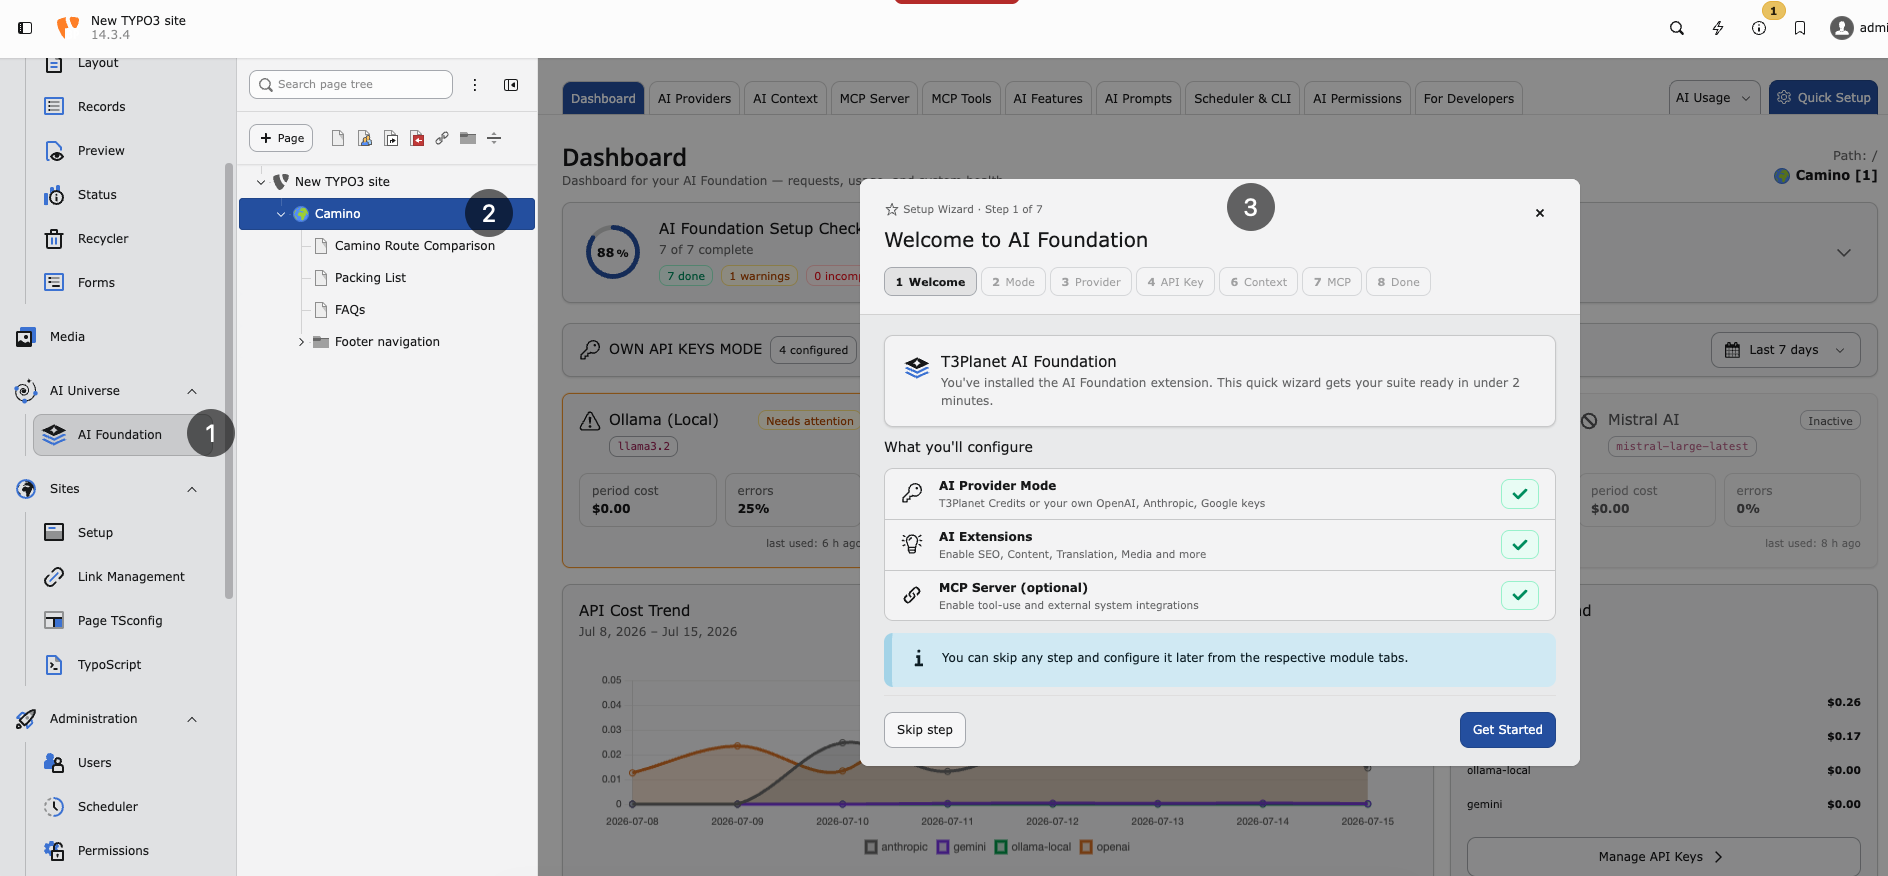
The AI Foundation Dashboard in the TYPO3 backend.
Getting started
Introduction
Learn what AI Foundation is, who it is for, and how the pieces fit together.
Installation
Install via Composer, activate the extension, and complete Quick Setup.
For administrators
Set up providers, backend modules, and MCP through the AI Foundation module.
Configuration
Dashboard, providers, context, prompts, features, usage, and access control.
MCP Server
Expose TYPO3 to Cursor, Claude Desktop, and other MCP clients.
User Guide
Day-to-day guidance for editors, administrators, and stakeholders.
For developers
Build TYPO3 extensions on AI Foundation — shared providers, prompts, features,
and MCP tools without handling API keys in every child extension.
Extension Integration
Call AI Foundation services from your own extension.
Developer Guide
Contracts, custom providers, prompt catalogs, feature cards, and MCP tools.
Architecture
Components, configuration model, and request flow.
Help
Troubleshooting
Known problems, FAQ, and verified runtime fixes.
Support
Contact T3Planet support with the details we need to help.
AI Foundation (EXT:ns_t3af) is T3Planet’s shared AI foundation for TYPO3.
It is the central engine behind all T3Planet AI extensions.
AI Foundation connects TYPO3 to AI models, manages API keys, exposes an MCP
server for AI agents, and logs every request — so your team uses AI in a safe,
consistent way. Editors work through connected extensions such as AI Assistant
or AI Chatbot. Admins configure everything in the AI Foundation backend
module group.
Key capabilities
AI Providers — Connect OpenAI, Claude, Gemini, and other vendors with encrypted API keys
MCP Server — Expose TYPO3 to Cursor, Claude Desktop, and other MCP clients
AI Context — Store brand voice once for on-brand AI output
AI Prompts & Features — Shared prompt templates and per-feature provider assignment
Interactive Supademo walkthroughs help admins and managers learn AI Foundation
setup and daily operation. Follow the order below, then practice in your staging
TYPO3 instance.
Recommended viewing order
What is AI Foundation? — Everyone. Start here for the big picture.
Developed with modern AI tooling by the NITSAN/T3Planet team — following TYPO3 coding standards, reviewed by certified TYPO3 developers, and tested across TYPO3 v12, v13 and v14.
Installation
Quick start
The recommended way to install this extension is via Composer.
Install the license extension first (if it is not already present), then
AI Foundation (EXT:ns_t3af):
Or use Admin Tools > Extensions > Get Extensions, search for
ns_t3af (or T3AF), install and activate it, then flush caches.
Get your free license key
A free license key is required to activate AI Foundation. After you install
EXT:ns_t3af, get your free license key and enter it before you continue
with configuration:
AI Providers — Path:AI Foundation > AI Providers. API keys,
models, and defaults.
Extension settings — Translation APIs, Basic Auth, notifications, and MCP
switches (including enableMcpServer). Prefer
AI Foundation > MCP Server > Advanced for MCP options. These keys
live in AI Foundation settings, not the classic TYPO3
Admin Tools > Settings > Extension Configuration form.
Minimum working setup
One AI provider with a valid key and model
Test connection passes
Provider marked Default
(Optional) DeepL or Google keys for translation APIs
(Optional) MCP enabled if you use AI agents
AI Providers (primary)
Path:AI Foundation > AI Providers
Connect at least one provider, set a model, run Test connection,
and mark exactly one row as Default.
AI Foundation stores translation helpers, Basic Auth, notifications, and MCP
switches in extension settings (including enableMcpServer). Prefer
AI Foundation > MCP Server > Advanced for MCP options.
Where a classic Extension Configuration form is still used for optional
keys, open Admin Tools > Settings > Extension Configuration and
select ns_t3af.
Translation (optional)
deepl_api_key — DeepL translation
google_api_key — Google translation
defaultModelForTranslation — Default translation model
OpenAI usage statistics (optional)
openai_admin_api_key — Organization usage charts (not the chat API key)
Providers represent connections to AI services. Each provider stores an adapter
type, optional endpoint, encrypted credentials, models, and capability flags.
Pick a model that supports what you need. Test connection helps
validate the choice.
Chat — Text generation
Streaming — Live response display in the backend
Embeddings — Search and similarity features
Vision — Image analysis
Tool use — MCP agent workflows
Multiple providers — when and why
Dev and live — Separate rows with different API keys per environment.
Cost saving — Cheap model as global default; premium model assigned in
AI Features for important tasks.
EU hosting — Mistral or Azure in an EU region for data residency
requirements.
Provider fields
Fields below map to the AI Providers drawer and the
tx_nst3af_provider table.
Required
identifier
identifier
Type
string
Required
true
Unique slug for programmatic access (for example openai-prod,
ollama-local). Must be unique.
title
title
Type
string
Required
true
Display name shown in the backend and dropdowns.
adapter_type
adapter_type
Type
string
Required
true
Adapter protocol identifier, for example symfony.openai or
nst3af.openai_compatible.
Connection
api_key
api_key
Type
string
API key for authentication. Stored as sodium ciphertext with an
enc:v1: prefix — raw keys are never kept in the database. Required for
cloud adapters; usually empty for local Ollama.
endpoint_url
endpoint_url
Type
string
Default
Adapter default
Custom API base URL. Required for OpenAI-compatible and Ollama-style
adapters when the default host is wrong for your network.
model_id
model_id
Type
string
Default completion / chat model ID.
embedding_model_id
embedding_model_id
Type
string
Default embedding model ID when embeddings are enabled.
Optional provider-level system message prepended to requests.
is_default
is_default
Type
bool
Default
false
Mark as the global default. Keep exactly one default among enabled rows.
is_enabled
is_enabled
Type
bool
Default
true
Soft on/off switch without deleting the row.
priority
priority
Type
integer
Default
50
Ordering hint (0–100) when multiple providers are listed.
be_groups
be_groups
Type
backend groups
Restrict this provider to selected backend groups. Empty means available to
all groups.
privacy_level
privacy_level
Type
string
Default
standard
Telemetry detail: standard, reduced (no prompt content), or
none.
Governance and status
Optional pricing (pricing_input_per_1m, pricing_output_per_1m,
pricing_currency, cost_center), retention overrides, dashboard analytics
flags, and read-only status fields (last_status, last_status_at,
last_status_message, last_used_at) support monitoring and cost tracking.
Status fields update after Test connection and live requests.
Troubleshooting
Test fails — Check the API key, model ID, endpoint URL, and outbound
HTTPS/firewall rules.
Rate limit — Wait or upgrade the vendor plan.
Vision returns empty — Use a vision-capable model (for example GPT-4o with
vision).
Module works but child extension fails — Check
AI Features for per-task overrides.
AI Context — brand profiles, completeness, and prompt variables.
What to store
Company name — For example Finance Company GmbH
Industry — For example financial services
Audience — For example SME owners in Germany
Brand voice — Professional, clear, trustworthy
Key messages — Digital-first, personal service
SEO keywords — finance, banking, loans
Language style — German formal (Sie) or simple English
Why it matters
Without context, AI output sounds generic. With context, text matches your brand and market. Every editor benefits without retyping instructions.
Setup (3 steps)
Open AI Foundation > AI Context
Fill business identity fields
Save — extensions use it automatically on the next AI request
Edit profile — auto-research and business identity fields.
When to update AI Context
Rebrand or new product line
New target market (for example expand from DE to EN)
Compliance change (formal Sie required everywhere)
After AI Prompts changes still produce off-brand text
Scenario: multi-language site
Set language style to “German formal (Sie) for DE; simple English for EN”. Add brand terms that must stay untranslated. Connected translation features will respect this context.
See also AI Prompts for task-specific instructions.
AI Prompts
Purpose
Central prompt templates for AI Foundation and connected extensions. Same prompt quality for every user and every extension.
Path:AI Foundation > AI Prompts
AI Prompts — prompt categories contributed by connected extensions.
Note
Use AI Prompts only when at least one child extension is installed
and that extension provides prompt-based AI functionality. Examples:
AI Foundation stores the shared prompt templates. The child extension
loads and uses them at runtime. If no prompt-enabled child extension is
installed, this module has little practical effect.
What is a prompt?
The instruction sent to the AI. Examples:
“Write a meta description, max 155 characters”
“Translate to German, formal Sie”
Central prompts mean consistent quality across your team.
Manage prompts
Open AI Prompts
Select feature category
Edit template text
Save and test with one real request
Extensions can sync default prompts from AI Foundation.
Writing good prompts
Be specific — length, format, language
Set tone — formal, friendly, technical
Say what to avoid — no emojis, no hype, no legal claims
Include the page goal — SEO, translation, rewriting, or summary
Example prompt
Write a friendly greeting for [audience] mentioning [topic].
Copied!
Pair prompts with AI Context for brand voice. Context handles who you are; prompts handle what to do.
Reset to default
If results worsen after edits, use Reset to default in the UI. Then change one variable at a time and test again.
When to customize prompts
SEO team has strict meta description rules
Legal requires disclaimers in generated text
German formal (Sie) must appear in every output
Extension default is too generic for your industry
Prompt changes affect all users. Coordinate with AI Permissions before large template changes on production.
AI Features
Purpose
Assign different AI providers per task type. Use a fast cheap model for bulk SEO work and a premium model for important pages.
Path:AI Foundation > AI Features
AI Features — extension cards for per-feature settings and provider overrides.
Note
Use AI Features only when at least one child extension is installed.
This module displays the per-feature settings that child extensions
register. Examples:
If no child extension is connected, the feature list stays empty or
incomplete. Set a global default provider in
AI Providers first, then override providers for
individual features on this page.
Feature types
SEO — Meta data, keywords, schema-related tasks
Pages — Page creation and structure
Content — Text generation and rewriting
Translation — Language conversion
Resolution order
When an AI request runs, AI Foundation picks the provider in this order:
Provider chosen in the UI modal (if the editor selected one)
Small team — Leave feature defaults empty. Use the global default only.
Large team — Cheap model for bulk tasks; premium model for key landing pages.
Multilingual site — Strong German model for Translation; fast model for SEO meta fields.
Example setup
SEO — Fast, cost-effective model (for example Gemini Flash or GPT-4o-mini)
Pages — Premium model (for example Claude Sonnet or GPT-4o)
Content — Balanced model for everyday editing
Translation — Model strong in German and English
Why this matters for cost
Without per-feature settings, every task uses the most expensive default. Routing SEO meta generation to a smaller model can cut monthly spend significantly while keeping premium quality where it counts.
How to configure
Open AI Foundation > AI Features
For each feature row, select a provider (or leave empty for global default)
Save
Test one request per feature type from a connected extension
Use global default for staging. On production, set SEO to a fast model and Pages to premium. Dev team keeps separate provider rows in AI Providers with dev API keys.
AI Usage & Logs
Purpose
Transparency for every AI request on your TYPO3 instance. Use these screens for budget control, debugging, and compliance.
Scheduler & CLI — background tasks and TYPO3 console commands for AI Foundation.
Background jobs and CLI commands. Example:
Flush AI Foundation caches
vendor/bin/typo3 ns_t3af:cache:flush
Copied!
Ensure scheduler cron runs every minute on production.
OpenAI org statistics (optional)
Set openai_admin_api_key in Extension Configuration for organization-level usage charts. This is not the chat API key. See Configuration.
Privacy
Log detail depends on provider privacy settings and group audit limits from
AI Permissions. Configure carefully before enabling full
prompt/response storage.
Weekly admin habit
Open AI Foundation > AI Usage and compare the trend with last week
Scan AI Foundation > AI Logs for repeated failures (same user, same feature)
Escalate persistent errors to Support with log details
When logs show high usage
Check AI Features — bulk tasks may need a cheaper model
AI Permissions — configure backend usergroups and review the cross-group
Permission Matrix.
Only TYPO3 administrators can open and change this module. Runtime
enforcement still applies to every backend user.
Purpose
Role-based access and permissions for AI on TYPO3: a guided wizard over
backend usergroups so junior staff, clients, and freelancers get safe AI
access without seeing admin-only tools.
Configure per group:
Module access — Which AI Foundation tabs and child modules appear
Fine-grained feature permissions — Which features inside those modules
are allowed
Record-level restrictions — Read vs read/write on providers, prompts,
context profiles, logs, and other catalog records
Page-scope and batch limits — Bulk page limits, scheduler batch limits,
and workspace enforcement where enabled
The module writes into normal TYPO3 backend user group ACL fields
(groupMods, custom_options, tables_select, tables_modify) and
merges only AI-managed keys. Unrelated modules and tables already granted to
the group stay intact.
TYPO3 Backend Usergroups
The left sidebar lists backend user groups (same shell pattern as MCP Tools).
Search with Find group…
Each row shows the group name, member count, and how many AI modules are
configured
Select a group to open the guided wizard for that group
Example: a group such as ns_t3af_extended may show 0 members and a
configured module count after you apply permissions.
Guided wizard
After you select a group, the wizard walks through five steps:
Modules — Toggle AI Foundation admin modules and installed child
extensions (for example AI Assistant, AI Search Hub, and other registered
suite modules).
Features — Grant fine-grained feature permissions for the modules you
enabled.
Records — Set record-level read or read/write access for catalog
records those modules manage.
Limits — Set per-group credit limits, daily request caps, bulk/page
batch limits, workspace enforcement, and audit/logging options (shown in
the matrix under Credits, Workspace, and Audit).
Review — Preview the merged be_groups values, then apply.
Use Back / Next in the wizard footer. On Review, confirm
the preview, then apply and flush caches before testing with an editor account.
Permission Matrix
Open the Permission Matrix tab for a cross-group overview. The subtitle
shows how many groups exist and how many are configured (for example
1 groups, 1 configured).
Legend
Use / Read / On — Allowed (green check)
Mgr — Manage / read+write
— — No access
AI Foundation columns
Typical matrix columns for AI Foundation:
Group name and member count
Admin modules: AI Providers, MCP Server,
MCP Tools, AI Features, AI Usage,
AI Prompts, Scheduler & CLI, AI Context,
AI Logs
AI Safety / limits: Credits, Workspace, Audit
Child extension scope tabs appear when those extensions register an access
catalog. Unconfigured groups stay dimmed with a Not configured badge.
What enforcement does
After you apply permissions:
Restricted editors only see AI Foundation tabs they are allowed to use
Dashboard may show an allowed-tabs overview instead of full analytics when
usage/context/MCP tabs are closed
AI Providers create/edit/delete needs write access on the
provider table; otherwise the list stays read-only (Test connection can still
work)
Child extension tabs, cards, and mutating routes follow the same grants
(403 when write is denied)
Administrators always keep full access to configure AI Permissions.
Recommended workflow
Create or choose a backend user group for editors.
Open AI Foundation > AI Permissions.
Select the group and complete Modules → Features → Records → Limits →
Review.
Check the Permission Matrix for that group.
Flush caches.
Log in as a user in that group and confirm hidden tabs and read-only
screens match the matrix.
When to use this module
Safe AI access for junior staff, clients, and freelancers
Editors share one instance across departments
MCP or provider management must stay admin-only
Per-group credit or request caps are required
Child extensions must show only allowed tabs, features, and write actions
Developer extensions can register additional modules, features, and records
through Custom Access Catalogs.
Connect external AI agents to TYPO3 through the Model Context Protocol (MCP). Tools like Cursor, Claude Desktop, and n8n can read pages, inspect schema, and update records (with permissions).
The setting is also available in AI Foundation extension settings under the
MCP Server group. It is not part of the classic TYPO3
Admin Tools > Settings > Extension Configuration form.
Remote OAuth — Production and Cursor. Uses OAuth 2.1 with PKCE.
mcp-remote — Simple HTTP clients. Uses URL token.
Local CLI — DDEV and local development. Uses backend user and workspace.
MCP modes
Set the mode in the MCP Server top bar (stored as mcpMode in the
AI Foundation MCP settings).
Context (AI Generate via AI Agent) — Default for Cursor, Claude Desktop,
and similar clients.
The external AI agent generates content outside TYPO3.
MCP tools apply and save that content into TYPO3 (pages, records, files).
Use this when the model and reasoning run in the client, and TYPO3 is the
CMS tool layer.
Native (AI Generate via TYPO3) — Server-side generation.
TYPO3 runs AI generation on the server through your configured
AI Providers.
MCP tools receive instructions and generate or process content inside TYPO3.
Use this when generation must stay on your instance (provider keys, brand
context, and governance already configured in AI Foundation).
Some dual-mode content tools change their argument requirements and
descriptions based on the active mode. After switching mode, reconnect or
refresh your MCP client so the tool list updates.
Core tools
AI Foundation ships a large TYPO3 Core tool catalog (pages, content, records,
files, workspaces, scheduler, permissions, redirects, cache, and more). Browse
the full list in AI Foundation > MCP Tools.
Starter examples for first checks:
table_schema — Field metadata for any table
pages_get — Read one page
content_list — List content on a page
write_table — Create, update, or delete records
Child extensions can register additional tools — also visible in the MCP Tools tab.
Workspaces
0 — Live workspace
1+ — Draft workspace
MCP edits respect the active workspace. Test writes in workspace 1 before live.
The MCP Tools screen lists every tool an AI agent can call against your TYPO3 instance. Core tools ship with AI Foundation. Child extensions can register additional tools.
MCP Tools — Core catalog, extension cards, and tool statistics.
What you see
Tool catalog — All registered MCP tools with descriptions
Playground — Test a tool call without leaving the backend
Extension cards — Tools contributed by installed T3Planet AI extensions
Core tools
These tools ship with AI Foundation and appear under the TYPO3 Core tab in
AI Foundation > MCP Tools when the MCP Server is enabled.
The Core catalog covers many tools across categories such as Content, Records,
Schema, Files, Workspaces, Search, Cache, and related TYPO3 operations. Open the
MCP Tools module to see the complete, up-to-date list.
Starter examples for first checks:
table_schema — Field metadata for any database table
pages_get — Read a single page record
content_list — List content elements on a page
write_table — Create, update, or delete records (permission-controlled)
Warning: Test write operations in a draft workspace before using live workspace 0.
Extension-registered tools
When AI Assistant, AI Chatbot, AI Search, or other connected extensions are installed, their MCP tools appear automatically in the catalog. Each card shows:
Tool name and description
Required permissions
Link to the extension documentation
Playground workflow
Open AI Foundation > MCP Tools in the TYPO3 backend.
Select a tool from the catalog (start with read-only tools like pages_get).
Fill in required fields (page UID, table name, and so on).
Run the tool and inspect the JSON response before connecting external agents.
Why use the playground
Verify MCP is online before configuring Cursor
Debug permission errors with a known backend user
Show stakeholders what agents can access without installing client software
Security
Tools respect backend user permissions and workspace context
OAuth and URL tokens are configured on the MCP Server screen
Limit which admin users may authorize external agents
Use draft workspaces for write_table tests
When to use MCP Tools vs MCP Server
MCP Server — Enable connectivity, OAuth, and client configuration
MCP Tools — Browse tools, test calls, see extension contributions
Log in as an admin backend user (for example admin).
Site URL
https://<project>.ddev.site/mcp
Copied!
The MCP module derives URLs from your first site configuration. On DDEV this is typically: Replace <project> with your DDEV project name throughout this guide.
Optional tools
Node.js 18+ — MCP Inspector and mcp-remoteClaude Desktop — OAuth remote setup n8n — MCP Client node (self-hosted or cloud) Cursor / VS Code MCP — for CLI or mcp-remote configs
Step 0 — Pre-flight checks (backend module)
Open AI Foundation > MCP Server.
Workspace - Use the WORKSPACE dropdown (top right). - If you see a yellow “create workspace” notice, click Create MCP workspace (requires permission) or pick Live for read-only smoke tests.
Status bar (top card) Verify:
Server Status → Online
OAuth Endpoints → both oauth-authorization-server and oauth-protected-resource show green checks
Server URL → copy your https://…/mcp URL
Endpoint health (Remote MCP Setup tab) Under MCP endpoint status, all three rows should be green:
MCP endpoint (/mcp returns 401 without auth — that is expected and counts as online)
/.well-known/oauth-authorization-server/mcp
/.well-known/oauth-protected-resource/mcp
Quick curl smoke test
# Replace with your site URL
BASE=https://t3af.ddev.site
curl -sS -o /dev/null -w "%{http_code}\n""$BASE/mcp"# Expected: 401
curl -sS "$BASE/.well-known/oauth-authorization-server/mcp" | head -c 200
curl -sS "$BASE/.well-known/oauth-protected-resource/mcp" | head -c 200
# Expected: JSON metadata (HTTP 200)
Copied!
Enable MCP (if offline) Expand Show advanced → ensure Enable MCP Server is checked → Save.
Cursor IDE — two connection methods
Cursor can connect to the TYPO3 MCP server in two ways. Use one method per server entry — do not mix stdio and URL for the same logical connection.
Project stdio (DDEV)
Config file: .cursor/mcp.json in the project root
Transport: stdio via DDEV
Auth: backend user and workspace
Best for: local development in this repository
Global remote URL (HTTP)
Config file: ~/.cursor/mcp.json in the user home directory
Transport: HTTP Streamable at /mcp
Auth: OAuth 2.1 with PKCE (browser)
Best for: any Cursor workspace, including production
Method A — Project stdio via DDEV
Create or edit ``.cursor/mcp.json`` in the project root (same directory as .ddev/). Cursor spawns ddev exec … nst3af:mcp:serve when you open this project.
Important:
`cwd` must be the absolute path to the DDEV project root. Without it, ddev may fail with could not find a project.
Use the full command name `nst3af:mcp:serve` (alias mcp:server works only after TYPO3 caches are warm).
`–no-startup-message` keeps diagnostics off stdout (stdio MCP reserves stdout for JSON-RPC).
Adjust `–user` and `–workspace`` to match your backend user and workspace UID from the MCP module dropdown.
Replace /absolute/path/to/aiuniverse with your checkout path (for example /Users/you/projects/aiuniverse).
Verify in Cursor: Settings → MCP → TYPO3 DDEV shows Connected and
lists Core tools from AI Foundation (for example table_schema, pages_get,
content_list, write_table, plus many others in the Core catalog).
Method B — Global remote URL (OAuth)
For HTTP + OAuth without DDEV stdio, add the server URL to your user-level Cursor config: ~/.cursor/mcp.json. This works from any project; Cursor opens the OAuth flow in the browser on first connect.
Replace the host with your site URL from the MCP module Server URL field. Complete OAuth when Cursor prompts. The backend Active OAuth Tokens table should show a new token with an updated Last Used timestamp after tool calls.
Note
Project .cursor/mcp.json (Method A) and global ~/.cursor/mcp.json (Method B) can coexist with different server names — for example TYPO3 DDEV (stdio) and typo3 (URL).
Terminal verification (stdio / DDEV)
Use these checks before relying on Cursor, or when debugging a broken stdio connection.
1. DDEV and TYPO3 CLI
cd /absolute/path/to/aiuniverse
ddev describe   # site should be running
ddev exec php vendor/bin/typo3 list nst3af
Copied!
Expect nst3af:mcp:cleanup and nst3af:mcp:serve (alias mcp:server). If list nst3af fails, verify with:
ddev exec php vendor/bin/typo3 help nst3af:mcp:serve
Copied!
2. One-shot initialize (pipe test — recommended)
Sends a single JSON-RPC initialize request on stdin and prints the JSON response on stdout. This confirms the server speaks MCP without leaving a process running:
{"jsonrpc":"2.0","id":1,"result":{"protocolVersion":"2025-06-18","capabilities":{"logging":{},"completions":{},"tools":{}},"serverInfo":{"name":"AI Foundation MCP Server","version":"1.0.0"}}}
Copied!
Adjust -u / -w (short for --user / --workspace) to match your config. If you see this JSON, the stdio transport is working; any Cursor issue is likely cwd, command name, or MCP panel cache (restart Cursor).
The process waits on stdin after startup — that is normal. It is not “stuck”; it expects JSON-RPC from an MCP client. Diagnostics go to stderr (use -v or -vv for more detail). Stop with Ctrl+C.
Warning
A manual terminal session and Cursor each spawn their own process. A successful pipe test does not require a terminal server to stay open for Cursor — Cursor starts its own ddev exec … when the project loads.
Open the Inspector UI in the browser (URL printed in the terminal).
Complete OAuth when prompted.
Use the Tools panel to invoke table_schema:
{
  "tableName": "pages"
}
Copied!
Verify:
tools/list returns the Core tool catalog (many tools, not a short fixed set).
table_schema returns JSON with pages field metadata.
Other OAuth-capable clients
In the module: Remote MCP Setup → Other tab.
Generic checklist:
Add a remote MCP server in your client.
Server URL:https://t3af.ddev.site/mcp
Transport: HTTP Streamable (when available).
Auth: OAuth 2.1 + PKCE if supported; otherwise create a Bearer token under the n8n or Manus tabs.
Cursor: see Cursor IDE — two connection methods for project stdio (DDEV) and global URL (OAuth) setup, plus terminal verification.
Method 2 — Local Setup (mcp-remote)
For MCP clients that only speak stdio (no native HTTP). The mcp-remote npm package bridges stdio ↔ your TYPO3 HTTP endpoint.
Token in URL
After creating a token, the server accepts: https://<host>/mcp?token=<64-char-hex>(recommended in UI)https://<host>/mcp/r/<64-char-hex>(legacy path form)
Warning
URL tokens are as sensitive as passwords. Do not commit them to git or share in screenshots.
In the module: click Local Setup (mcp-remote).
Step-by-step
Click Create mcp-remote Token (if none exists).
Copy Token URL (includes ?token=…).
Copy Example mcp-remote configuration or build manually:
``–no-startup-message`` — Suppress stderr banner (recommended for MCP).
``-v`` / ``-vv`` — Verbose stderr diagnostics.
Verify:
MCP client connects without HTTP/OAuth.
Invoke pages_get with uid: 1 (adjust to a page that exists).
Note
Restart the CLI server after PHP code changes. Long-running processes may accumulate memory — restart periodically during heavy testing.
Step 4 — Test Core tools
Use MCP Inspector, Claude, or any connected client. The TYPO3 Core tab
contains many tools — do not assume only four exist. Browse the full catalog in
AI Foundation > MCP Tools, then smoke-test a few representative calls.
Starter checks:
table_schema
Input: { "tableName": "pages" } Expect: JSON with field definitions.
pages_get
Input: { "uid": 1 } Expect: Page record (or error if uid missing).
content_list
Input: { "pid": 1, "limit": 5 } Expect: Array of tt_content rows for that page.
Create (use a test page pid and workspace): Expect: JSON with uid, fields, and ignoredFields. Verify with content_list on the same pid. Use action: delete with the new uid to clean up.
Workspace testing
Select a non-live workspace in the module dropdown before issuing tokens. Repeat content_list / pages_get — draft overlays should differ from live.
See MCP Tools for the full Core catalog and
MCP Server for connection details.
Step 5 — Active OAuth Tokens table
After each test, confirm in Active OAuth Tokens:
Client Name — n8n token, OAuth client name, and similar labels.
Created / Last Used — Updates on successful calls.
Expires — Reasonable future date.
Workspace — Matches dropdown selection.
Token — Preview plus Copy Token.
Action — Revoke removes access.
Header actions:
Refresh — reload table via AJAX
Revoke All — invalidates every token for your backend user (confirm dialog)
Quick test matrix
Use this checklist when regression-testing a release:
Utility and environment helpers: AiUniverseUtilityHelper
HTTP auth helper: HttpAuthUtility
Configuration model
Runtime AI requests resolve through provider rows in
AI Providers. Optional extension settings cover
translation helpers, Basic Auth, notifications, and MCP switches. See
Configuration.
This includes:
provider adapters, encrypted API keys, and model IDs
default provider selection
optional temperature and capability flags on provider rows
optional Basic Auth settings for protected URL fetching
Caching
The extension registers cache nst3af_statistics in ext_localconf.php.
Statistics service stores processed data in this cache to reduce repeated usage API calls.
Constraints
No native frontend plugin and no Fluid frontend output in this package.
Primary role is reusable service infrastructure.
Extension Integration
Use AiServiceInterface when your TYPO3 extension needs AI completions, streaming, or embeddings through AI Foundation. Do not call provider adapters, provider repositories, or vendor SDKs directly from feature code.
Purpose
AI Foundation acts as the shared AI gateway for child extensions such as AI Assistant, AI Search, AI Chatbot, AI Accessibility, and custom agency extensions. The child extension prepares the prompt, context, and feature metadata. AI Foundation resolves the provider, executes the request, and records usage attribution.
Request lifecycle
Your extension builds the prompt and context.
Your service calls AiServiceInterface.
AI Foundation resolves the requested provider or the default provider.
The matching adapter performs the completion, stream, or embedding request.
Request metadata is logged for usage, analytics, and troubleshooting.
Create a custom AI provider when your extension needs to connect AI Foundation to a proprietary gateway, an on-premise model, or a cloud provider that is not covered by an installed Symfony AI bridge.
Provider architecture
AI Foundation discovers provider adapters from the Symfony service container. Each adapter describes its type, display name, default endpoint, supported capabilities, connection test, and runtime platform object.
Built-in bridge packages are auto-registered when available. AI Foundation also provides the built-in Custom / Other OpenAI-compatible adapter under nst3af.openai_compatible. Use a custom adapter only when the provider is not OpenAI-compatible or needs a custom SDK/protocol.
When to create a provider
You use a private or on-premise LLM.
Your vendor has a custom API that is not OpenAI-compatible.
Your company routes AI requests through an internal gateway.
You need capabilities or connection behavior that the built-in adapters do not provide.
Implementation steps
Add a Composer dependency or suggestion on nitsan/ns-t3af.
Provider API keys are stored encrypted on provider records. If your SDK needs the plaintext key, decrypt it through AI Foundation’s credential service and never write the value to logs, exceptions, or frontend output.
Best practices
Use the custom.<vendor> prefix for custom adapter types.
Keep adapter type values stable after release.
Return connection failures through VerifyResult::failure() instead of throwing from testConnection().
Advertise only the capabilities your adapter really supports.
Reuse AI Foundation provider rows instead of adding your own provider configuration table.
Verification
Flush caches.
Open AI Foundation > AI Providers.
Create or edit a provider row and select your adapter.
Save the row.
Run the connection test and confirm the status updates.
Trigger a feature that uses AiServiceInterface with that provider.
Use a custom prompt catalog when your extension needs editable LLM instruction templates in AI Foundation > AI Prompts. Prompt catalogs let your extension ship built-in defaults while allowing editors to create project-specific overrides.
Purpose
AI prompts are feature prompts, not MCP workflow templates. Use them for extension features such as SEO generation, content generation, chat answers, product summaries, or support replies.
AI Foundation provides the backend module and shared storage. Your extension provides the prompt contracts, category metadata, and runtime resolver.
Architecture
PromptContractRegistry
Your extension’s PHP source of truth for built-in prompt types, labels, default text, scopes, and required variables.
PromptCatalogProviderInterface
Connects your prompt contracts to AI Foundation > AI Prompts.
tx_nst3af_ai_prompt
Shared table owned by AI Foundation for editor-created custom prompts.
Runtime resolver
Your feature code decides which text to use: explicit request text, saved custom prompt, or built-in default.
Use custom AI Features when your extension needs settings cards inside AI Foundation > AI Features. These cards are used for extension-specific AI configuration such as feature toggles, defaults, API-related options, and provider choices.
Purpose
AI Features are not prompt templates and not MCP tools. They are configuration surfaces for extensions that use AI Foundation.
AI Foundation renders the card, drawer, AJAX save/load flow, and per-site storage. Your extension provides the card metadata, allowed settings scope, and field schema.
Architecture
Settings schema
Configuration/ExtensionSettings/schema.php points to the field definition file.
Field definitions
Configuration/ExtensionSettings/fields.typoscript defines the fields shown in the drawer.
Card provider
AiFeatureCardProviderInterface returns one or more cards for the AI Features overview.
Scope provider
ExtensionSettingsScopeProviderInterface declares which settings scopes your extension accepts.
Storage
Values are stored by AI Foundation in tx_nst3af_extension_setting for the selected site context.
Implementation steps
Add schema.php and fields.typoscript to your extension.
Read settings through the AI Foundation settings API instead of parsing extension configuration manually. The saved values are merged with schema defaults.
Feature provider overrides allow an extension to offer a dedicated default AI provider for a specific feature while still using AI Foundation’s shared provider registry.
Use this when one feature should use a different model or provider than the global default. Examples include SEO generation, page generation, content generation, and LLM-based translation.
How it works
AI Foundation owns the provider rows. The child extension exposes feature-specific provider fields in AI Foundation > AI Features. At runtime, the feature resolves the provider in this order:
Provider selected in the runtime modal, if the request includes one.
Feature default saved in AI Features.
Global default provider fallback.
Supported implementation hook
Child extensions register provider dropdowns by implementing:
AI Foundation uses the registered service to render provider options in the feature settings drawer.
Known feature fields
AI Assistant uses feature-specific default provider fields such as:
defaultProviderForSeo
defaultProviderForPages
defaultProviderForContent
defaultProviderForTranslation
defaultModel
defaultEmbeddingsModel
Each dropdown lists enabled providers from AI Providers. The Default (inherit global provider) option keeps the feature on the global provider path.
Translation note
defaultModelForTranslation still selects the translation backend, such as DeepL, Google, or an AI-based path. defaultProviderForTranslation applies only to LLM completion paths that use the AI Foundation completion gateway.
Use custom MCP tools when your extension should expose safe TYPO3 operations to MCP clients such as Cursor, Claude Desktop, MCP Inspector, or the AI Foundation backend MCP Tools area.
MCP tools are callable through tools/list and tools/call. They can also appear in AI Foundation > MCP Tools when the extension provides card metadata.
Architecture
Tool handler
A PHP service with an execute() method annotated with #[McpTool].
Tool schema
AI Foundation introspects the handler signature and PHPDoc to publish parameters.
Dependency injection
Tool services must be public and tagged with mcp.tool in your extension.
Invocation context
AI Foundation applies MCP context such as workspace and provider selection before the handler runs.
Backend MCP Tools area
Editors can browse tools, inspect parameters, and test calls through the MCP Tools screen and playground workflow.
Implementation steps
Create a handler class under Classes/Mcp/Tool/.
Implement McpToolHandlerInterface or use the #[AsMcpTool] class attribute.
Add #[McpTool(name: '...', description: '...')] to execute().
Return a JSON string from execute().
Register the class as a public service tagged with mcp.tool.
Flush caches.
Verify the tool with tools/list and tools/call.
Minimal handler
useconstJSON_THROW_ON_ERROR;
useMcp\Capability\Attribute\McpTool;
useNITSAN\NsT3AF\Mcp\Contract\McpToolHandlerInterface;
final readonly classHelloToolimplementsMcpToolHandlerInterface{
#[McpTool(
name: 'myext_hello',
description: 'Returns a greeting for the given name.',
)]
publicfunctionexecute(string $name = 'world'): string{
return json_encode(['message' => 'Hello ' . $name], JSON_THROW_ON_ERROR);
}
}
Map MCP input arguments to typed execute() parameters. Optional parameters need default values. Use PHPDoc @param descriptions so the backend MCP Tools screen can show useful parameter help.
AI Foundation can augment published schemas with global MCP context such as workspace or AI provider selection, depending on the tool type. Your handler should only declare the parameters it actually uses.
Response lifecycle
Return a JSON string. For expected validation problems, return a structured JSON error. For unexpected failures, throw a clear exception and let the MCP layer map the failure for the client.
Client usage
Cursor, Claude Desktop, MCP Inspector, and other MCP clients connect through the MCP Server configuration. After connection, the client discovers your tool through tools/list and calls it with tools/call.
Use:
MCP Server for transport and client connection setup.
MCP Tools for backend tool browsing and playground testing.
Backend MCP Tools card
If your extension should appear as its own group in AI Foundation > MCP Tools, provide extension card metadata through the supported MCP tools card provider path. Tools are grouped by ownership, namespace inference, or configured tool prefix.
Use stable tool names such as myext_action_name. This keeps tools predictable for external clients and easier to find in the backend.
Best practices
Keep tool names stable after release.
Use a unique prefix that matches your extension.
Keep handlers thin and delegate business logic to services.
Avoid calling backend controllers from MCP tools.
Validate parameters before writing data.
Respect TYPO3 workspace and backend-user context.
Return JSON only.
Do not expose secrets in responses or errors.
Debugging
Tool does not appear in ``tools/list``
Confirm the service is registered in the container.
Confirm it is tagged with mcp.tool.
Confirm the service is public.
Confirm execute() has #[McpTool].
Flush TYPO3 caches.
Tool appears under the wrong backend card
Confirm the tool name prefix matches the extension metadata.
Add explicit ownership metadata if namespace inference cannot detect the extension.
Use an AI access catalog provider when your extension needs to expose module access, AI feature permissions, or record-level permissions through AI Foundation.
Runtime enforcement uses the merged catalog from all registered providers. You do not need EXTCONF wiring for new integrations.
When to use this
Implement a provider when your extension:
exposes a backend module that should be controlled per backend user group
defines AI feature areas checked with FeaturePermissionGate
stores records that need tables_select or tables_modify enforcement
Administrators assign the resulting permissions through
Backend Users > Backend usergroups > Access Lists. The optional
AI Foundation > AI Permissions wizard reads the same merged catalogs.
Step 1 — Implement the provider
Implement NITSAN\NsT3AF\Contract\AiAccessCatalogProviderInterface in your extension.
For suite child extensions, use the gate method that matches the module family, such as grantsT3AiTab, grantsT3AaTab, grantsT3CsTab, or grantsT3AaCard.
Verified issues and checks for AI Foundation (EXT:ns_t3af).
Installation
Composer conflicts with another MCP package
AI Foundation includes an MCP server and conflicts with other MCP server
packages such as marekskopal/typo3-mcp-server and hn/typo3-mcp-server.
Remove those packages before installing nitsan/ns-t3af.
Also confirm scheduler and workspaces are available. See
Installation.
Providers
Provider request or Test connection fails
Confirm the provider row exists and is enabled in AI Foundation > AI Providers.
Run Test connection from the provider drawer.
Check the API key, model ID, and endpoint URL (for custom/OpenAI-compatible rows).
Confirm outbound HTTPS to the provider API works from the server.
Review backend logs for entries from AI Foundation request logging.
Unexpected model or provider behavior
Confirm the default provider matches the feature you expect.
Confirm the model ID on the provider row.
Check feature-level provider overrides in AI Foundation > AI Features.
No usage statistics shown
Confirm an OpenAI admin/organization key is set where org usage charts are required.
Clear caches and open AI Foundation > AI Usage / AI Foundation > AI Logs again.
Confirm the dashboard analytics cache is available after extension:setup.
Configuration
HTTP 401 / 403 when fetching a protected URL
If you use the Basic Auth helper in Extension Configuration (ns_t3af):
Enable basicAuthEnabled.
Set basicAuthUsername and basicAuthPassword.
Retry the protected URL fetch.
MCP
MCP client cannot connect
Confirm the MCP server is enabled in Extension Configuration.
Prefer HTTPS on the site base URL.
For Cursor and similar clients, follow MCP Testing.
For stdio setups, keep the working directory and user/workspace flags correct.
MCP writes fail after a successful connect
Confirm the backend user has the required module, table, and workspace rights.
See AI Permissions.
Report an issue
Include TYPO3 version, PHP version, ns_t3af version, exact error text, and
whether MCP is enabled. Submit via Support.
FAQ
Short answers about AI Foundation (EXT:ns_t3af).
General
What is AI Foundation?
The shared AI foundation for T3Planet TYPO3 extensions. It manages providers,
MCP, brand context, prompts, access roles, and usage in one backend module.
See Overview.
Does it include a frontend plugin?
No. AI Foundation is a backend foundation layer. Visitors see AI through
child extensions such as AI Assistant or AI Chatbot.
With Composer (composer require nitsan/ns-t3af) or from the TYPO3 Extension
Repository. See Installation.
Composer reports a conflict with another MCP package.
Remove conflicting MCP server packages first, then install AI Foundation.
See Known Problems.
Providers and MCP
Can I use local models such as Ollama?
Yes. Use the Ollama provider type or a custom OpenAI-compatible endpoint.
See AI Providers.
Test connection fails even with a valid key.
Check the model ID, outbound HTTPS, and provider status. See the provider
checklist in Known Problems.
What is MCP?
Model Context Protocol connects AI clients such as Cursor to your TYPO3
instance. See MCP Server.
Privacy
Where does request data go?
AI Foundation is self-hosted. Prompts and responses go from your server to the
AI provider you configure, using your API keys. T3Planet is not in the AI data
path. License validation only sends the license key and domain.
Still stuck?
Open Support with your TYPO3, PHP, and ns_t3af versions
and the exact error text.
Release Notes
The first official release, delivering essential features, core improvements,
and the initial structure for future enhancements.
Here is the list of features and updates introduced in this release:
14-07-2026 [FEATURE] Introduced AI Foundation as the shared platform for centralised provider, prompt, MCP, and governance management
14-07-2026 [FEATURE] Launched the top-level AI Foundation backend module with a unified interface for setup, configuration, and day-to-day operations
14-07-2026 [FEATURE] Added multi-provider AI runtime with streaming, embeddings, encrypted API key storage, and model discovery
14-07-2026 [FEATURE] Introduced AI Context (Brand Context Profiles) with per-site brand voice, personas, and runtime prompt injection
14-07-2026 [FEATURE] Introduced centralised AI Prompt management across the AI suite
14-07-2026 [FEATURE] Added MCP Server integration with OAuth 2.1, Streamable HTTP transport, multiple connection methods, and a dedicated MCP Tools tab
14-07-2026 [FEATURE] Introduced the AI Permissions wizard with a permission matrix
14-07-2026 [FEATURE] Added a Quick Setup wizard with guided configuration steps and a setup checklist
14-07-2026 [FEATURE] Added AiServiceInterface and a Developers module tab for reusable integration, architecture guidance, and documentation
14-07-2026 [FEATURE] Introduced AI usage logging, analytics dashboards, request telemetry, and administrator alerts for invalid API keys and quota limits
14-07-2026 [TASK] Ensured TYPO3 v12/v13/v14 compatibility with PHP 8.2+
14-07-2026 [RELEASE] Initial stable release v1.0.0
Getting API keys — Provider portals above, then AI Providers
Developer integration — Developer Guide for AiServiceInterface
MCP client setup — Model Context Protocol site plus MCP Server
Support
Need help with AI Foundation (EXT:ns_t3af)? The T3Planet team can assist
with installation and configuration, troubleshooting, AI provider and MCP
integration guidance, and premium feature or licensing questions. Reach out
when you need clear next steps for your TYPO3 project.