Editor's Guide
This chapter explains how to use the Focal Point Editor in the TYPO3 backend.
Accessing the Focal Point Editor
The focal point editor is available for any image that is added to a content element or other record through a file reference.
- Edit a content element that contains an image (e.g., Text & Media)
- Click on the image to expand its settings
- Look for the "Fokus-Punkt bearbeiten" button below the crop options
- Click the button to open the focal point editor modal
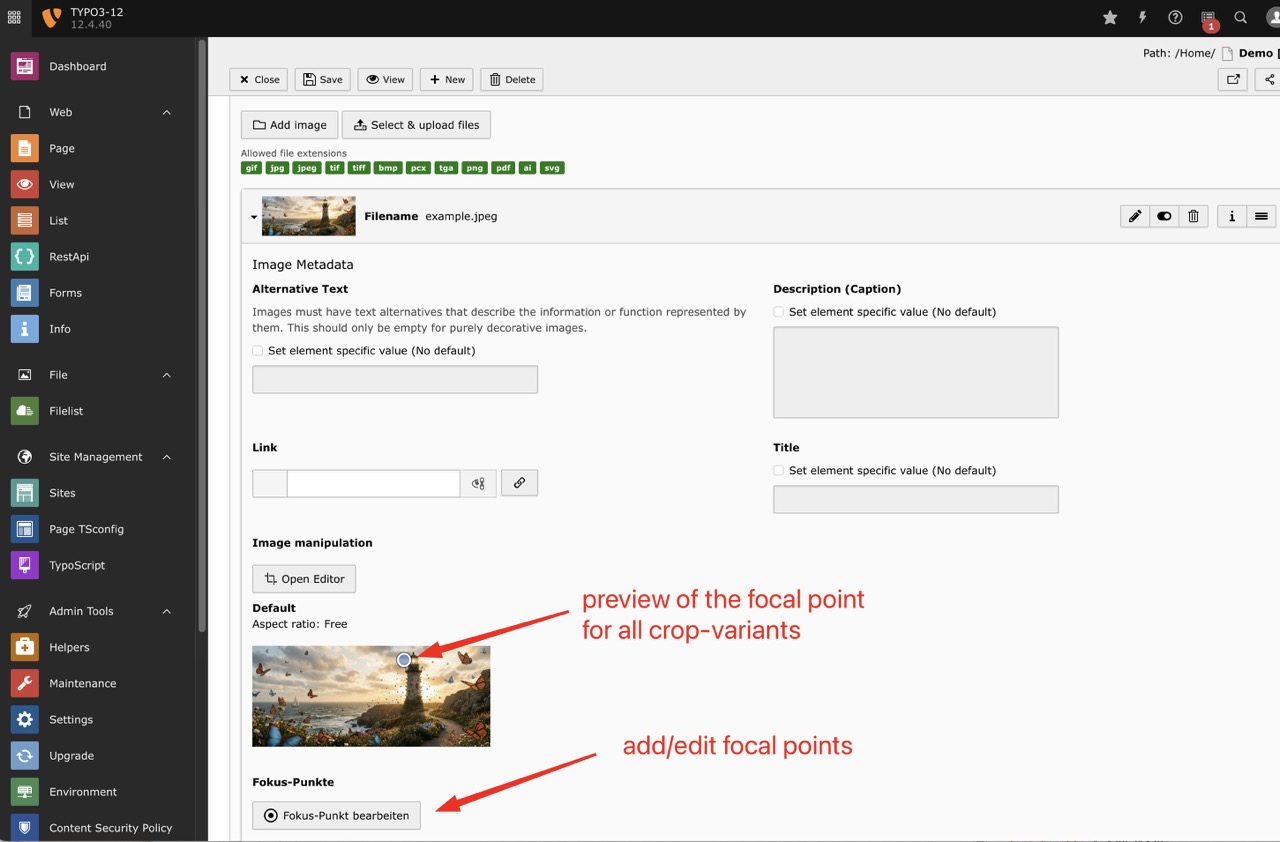
The focal point button appears below the crop variant previews. Existing focal points are shown as indicators on each crop preview.
The Focal Point Modal
The modal window consists of two main areas:
Thumbnail Row
At the top of the modal, you see thumbnails for each available crop variant. These correspond to the crop variants defined in your TYPO3 configuration (e.g., "Default", "Mobile", "Portrait").
- Click a thumbnail to select that crop variant
- Green dot indicator shows which variants have a focal point set
- Blue border indicates the currently selected variant
Editor Area
The main area shows the full image with a semi-transparent overlay indicating the current crop area.
- Click anywhere on the image to set the focal point
- The focal point is shown as a pulsing circle
- The overlay helps you see which part of the image will be visible in the crop
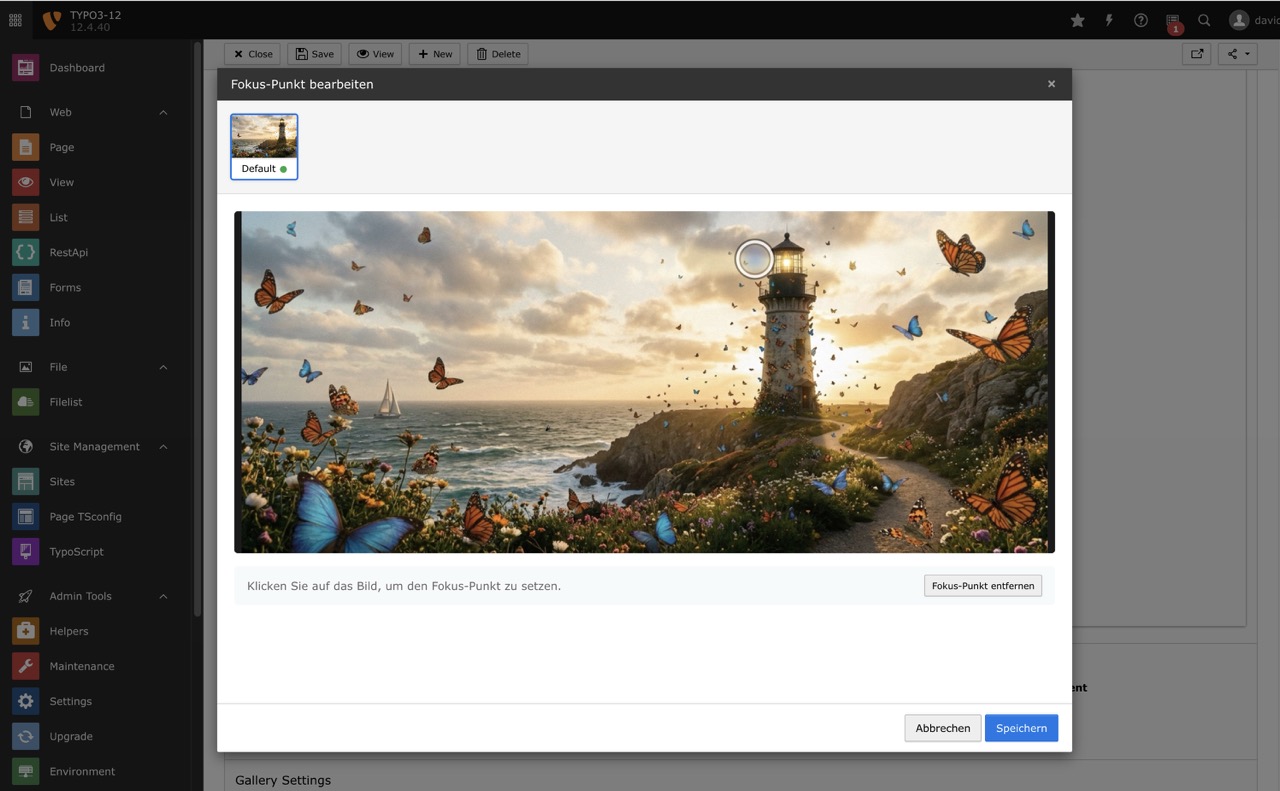
The modal editor with crop variant thumbnails at the top and the main editing area below. Click on the image to set the focal point.
Setting a Focal Point
- Open the focal point editor modal
- Select the crop variant you want to edit (click its thumbnail)
- Click on the image where you want the focal point to be
- The focal point marker appears at your click position
- Repeat for other crop variants if needed
- Click "Speichern" (Save) to save your changes
Tip
You can set different focal points for each crop variant. This is useful when the subject should be positioned differently depending on the aspect ratio.
Removing a Focal Point
To remove a focal point from a crop variant:
- Select the crop variant
- Click the "Fokus-Punkt entfernen" button at the bottom of the editor
- The focal point marker disappears
- Save your changes
Visual Feedback
After saving, the focal point is displayed on the crop preview thumbnails in the file reference form. This gives you immediate visual feedback about where the focal point is positioned relative to each crop.
Best Practices
Choosing the Right Focal Point
- Portraits: Set the focal point on the subject's face, typically between the eyes
- Products: Center the focal point on the main product
- Landscapes: Choose the most important element (e.g., a building, person, or natural feature)
- Text overlays: Consider where text will be placed and avoid setting focal points in those areas
Working with Multiple Variants
- Start with the most restrictive crop (usually the smallest or most square)
- Ensure the focal point works well for that crop
- Then adjust other variants as needed
- Preview your changes in the frontend to verify the result
Troubleshooting
Button not visible
If the "Fokus-Punkt bearbeiten" button is not visible:
- Ensure the extension is properly installed and activated
- Check that the database field
tx_nnfocalpoint_pointsexists insys_file_reference - Clear all TYPO3 caches
Modal doesn't open
If clicking the button doesn't open the modal:
- Check the browser console for JavaScript errors
- Ensure the AJAX routes are properly registered
- Verify that the JavaScript module is loaded
Focal point not saved
If focal points are not being saved:
- Ensure you click "Speichern" in the modal
- Save the parent record (content element) after closing the modal
- Check for any form validation errors