Exporting Data
A flexible feature to export data is available in SAV Library Mvc.
Rights for exporting data
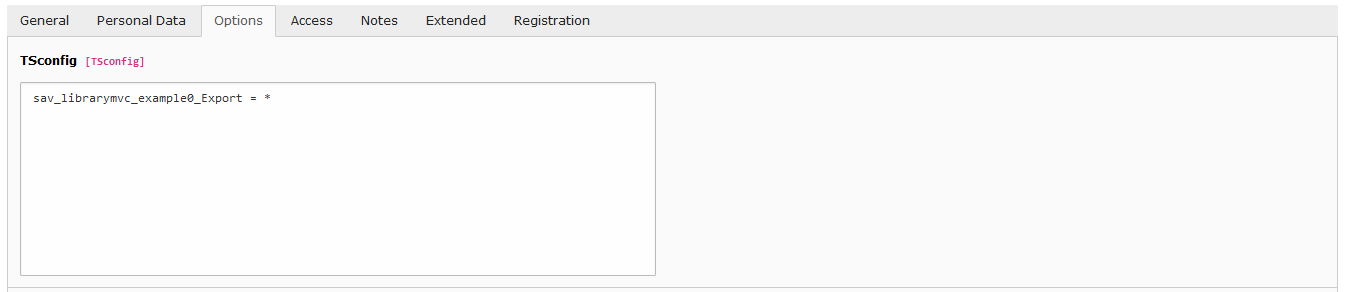
Exporting data is user and extension oriented, therefore rights must be given at the user level for one or several extensions.
For example, to give the rights to a given user to export data from the test extension
sav_librarymvc_example0,
edit the Options folder of this user configuration and add the following line.
sav_librarymvc_example0_Export = *
Once the rights are set, a new icon is shown in the title bar of the
List view.

Configuration
Click on the previous icon to enter in the export form.
Select the configuration and click on the
Load export configuration icon.

Note
Just click on the icon to create a new configuration.
The extension sav_librarymvc_example0
provides several templates to illustrate the export feature.
The templates are in the directory Resources/Private/Templates/Export.
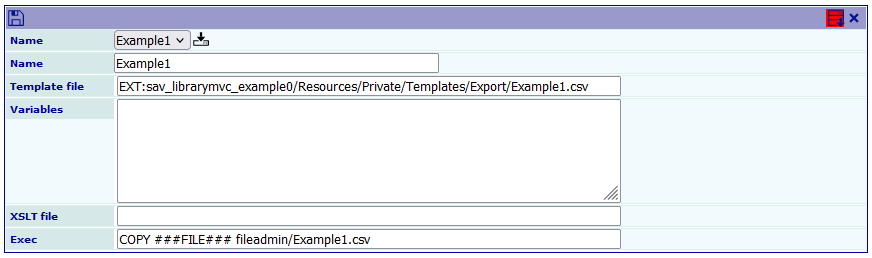
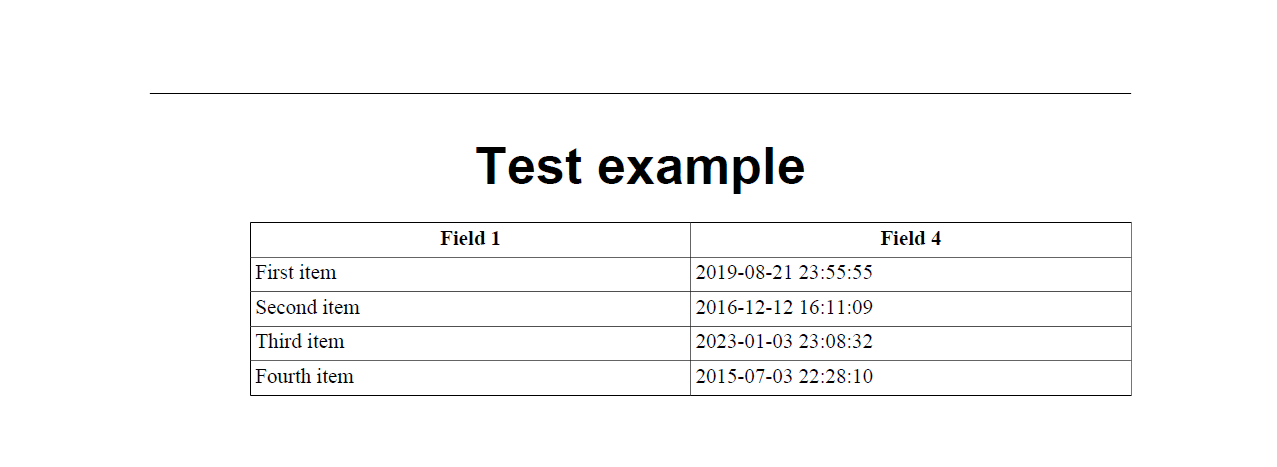
The template Example1.csv exports the fields field1 and the
date provided by field4 in the CSV format. During the
export process, ###FILE### represents the temporary file. The
Exec field is used to copy the tempory file to
fileadmin/Example1.csv.
Writing templates
Templates are parsed by Fluid. They may contain all
conventional Fluid ViewHelpers. Special ViewHelpers
are provided to remove empty lines and to execute queries.
The template Example1.csv is shown below.
<sav:removeEmptyLines>

<sav:query name="items">
SELECT
    field1,
    FROM_UNIXTIME(field4) AS field4
FROM
    tx_savlibrarymvcexample0_domain_model_table1
WHERE
    NOT deleted
    AND NOT hidden
</sav:query>

<f:for each="{items}" as="item">
"{item.field1}";"{item.field4}"
</f:for>

</sav:removeEmptyLines>
Using variables
Variables expressed in Yaml can be passed to templates.
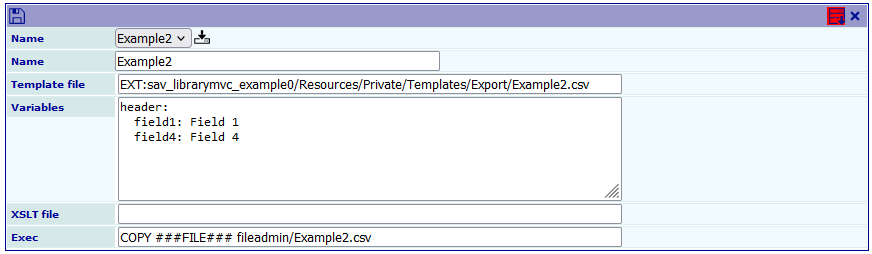
In this example, using the template Example2.csv, the
variable header is defined and used to generate headers for
the columns.
<sav:removeEmptyLines>

<sav:query name="items">
SELECT
    field1,
    FROM_UNIXTIME(field4) AS field4
FROM
    tx_savlibrarymvcexample0_domain_model_table1
WHERE
    NOT deleted
    AND NOT hidden
</sav:query>

"{header.field1}";"{header.field4}"
<f:for each="{items}" as="item">
"{item.field1}";"{item.field4}"
</f:for>

</sav:removeEmptyLines>
More Complex Exec Commands
Important
The use of exec command must be allowed in the Advanced
folder of the Plugin Options of the extension, i.e.
sav_librarymvc_example0
in our example.

Let us illustrate this feature with the generation of a DocBook article containing the same information as the CSV files in the previous examples.
Note
If your are not familiar with DocBook, please read https://www.oasis- open.org/docbook/documentation/reference/html/docbook.html and http://www.sagehill.net/docbookxsl/ . The former is the DocBook definitive guide and the later the DocBook XSL complete guide.
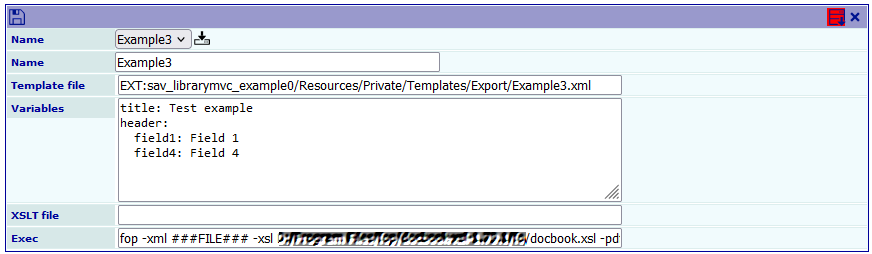
The template Example3.xml is now a XML file containing
DocBook tags. The variables title and header are respectively
used to set the title of the article and the headers for the
DocBook table columns.
The field XSLT file may use to process the XML temporary file
generated by the Fluid template parser.
<?xml version="1.0" encoding="UTF-8"?>
<!DOCTYPE article
  PUBLIC "-//OASIS//DTD DocBook XML V4.5//EN" "https://www.oasis-open.org/docbook/xml/4.5/docbookx.dtd">
<sav:removeEmptyLines>

<sav:query name="items">
SELECT
    field1,
    FROM_UNIXTIME(field4) AS field4
FROM
    tx_savlibrarymvcexample0_domain_model_table1
WHERE
    NOT deleted
    AND NOT hidden
</sav:query>

<article lang="en">
  <title>{title}</title>
  <informaltable>
    <tgroup cols="2" align="left" colsep="1" rowsep="1">
      <thead>
        <row>
          <entry align="center">{header.field1}</entry>
          <entry align="center">{header.field4}</entry>
        </row>
      </thead>
      <tbody>
        <f:for each="{items}" as="item">
        <row>
          <entry>{item.field1}</entry>
          <entry>{item.field4}</entry>
        </row>
        </f:for>
      </tbody>
    </tgroup>
  </informaltable>
</article>
</sav:removeEmptyLines>
The Exec field contains the command to generate the PDF
file using the FOP DocBook processor (https://xmlgraphics.apache.org/fop/). In the following command,
replace Path_to_the_fo_directory_of_the_fop_processor
by the path to the fo directory of the FOP processor. The marker
###SITEPATH### is replaced by the public path.
fop -xml ###FILE### -xsl Path_to_the_fo_directory_of_the_fop_processor/docbook.xsl -pdf ###SITEPATH###/fileadmin/test.pdf
The result is the PDF file test.pdf in the fileadmin directory.