DEPRECATION WARNING
This documentation is not using the current rendering mechanism and is probably outdated. The extension maintainer should switch to the new system. Details on how to use the rendering mechanism can be found here.
EXT: tracking application
| Author: | Rupert Germann |
|---|---|
| Created: | 2004-07-31T12:12:38 |
| Changed by: | CS2 Creative Solutions GmbH CS2 |
| Changed: | 2005-05-25T17:20:46 |
| Email: | Salvatore Vallesi |
EXT: tracking application
Extension Key: cs2_trackingapp
Copyright 2005, Salvatore Vallesi, <Salvatore Vallesi>
This document is published under the Open Content License
available from http://www.opencontent.org/opl.shtml
The content of this document is related to TYPO3
- a GNU/GPL CMS/Framework available from www.typo3.com
Table of Contents
EXT: tracking application 1
Introduction 1
What does it do? 1
Screenshots 2
Users manual 3
Installation 3
Insert the plugin as page content: 4
Manage your customer orders: 5
Configuration 8
Reference 8
Known problems 9
To-Do list 9
Changelog 9
Introduction
((generated))
What does it do?
This frontend plugin makes it possible to offer your customers an order tracking application. By providing a client number and order confirmation number the customer will receive a list of dispatched orders.In addition the extension provides a backend module where an administrator can maintain customer orders and link them with external delivery companys. Further the backend module contains an order archive and an order search.Have a look at the users manual for more detailed screenshots.
Users manual
Installation
Import the extension from online repository and install the extension with the extension manager:
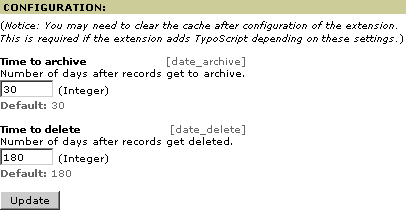
Configuration options:
Here you can setup how your order records in the backend module will be handled. Time to archive: Number of days until an order record will be moved to archive view. Time to delete: Number of days until an order record will be deleted automatically.
This settings are usefull when you dealing with many orders. It will help you to keep your records in a good overview and move old processed orders automatically to archive or delete them.
Insert the plugin as page content:
First you have to create a page where the tracking application searchbox/resultlist should be shown.On that page, put a content element with the type "Insert Plugin" and select the "Tracking Application" plugin:
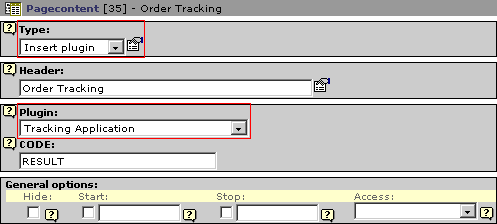
Currently there are 2 different options available for the “CODE:”field:
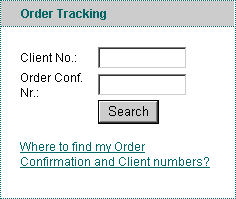
SEARCHBOX
CODE
SEARCHBOX
Description
Displays a quick search box form to search tracking records.
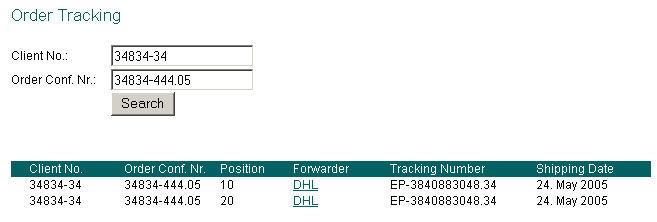
RESULT
CODE
RESULT
Description
Displays a search box and a result list of tracking records in the same content element.
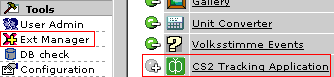
Manage your customer orders:
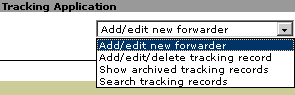
For creating forwarders and tracking records choose the “Tracking Application“ backend module.

This module provides four different submodules forhandling forwarders and tracking records for your customers:
Add/edit new forwarder
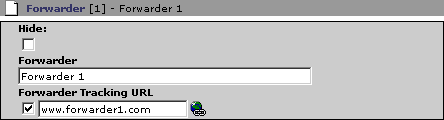
Here you can add your delivery companys:
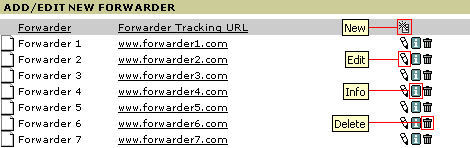
For every delivery company you can define the companys name and a direct link to the online-tracking application.
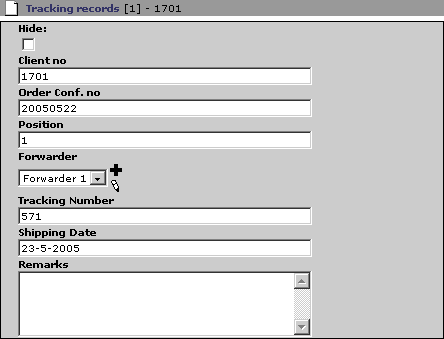
Add/edit/delete tracking record
In this module you have to add your dispatched orders for your customers and link the orders with a delivery company.It is possible to add new orders, edit existing orders or remove orders.

Every tracking record has client no., order conf. no, position, forwarder, tracking number, shipping date and remarks:
Show archived tracking records
This submodule will show you the archived orders. The archive time interval can be configured. The records will stay x days in archive view, depending on your configuration setting „Time to delete“. By default it is set to a time range of 180 days from shipping date.

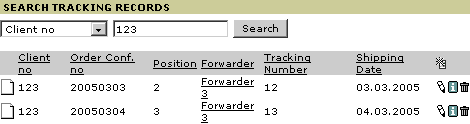
Search tracking records
With this submodule you can search for dispatched orders by providing either a client number or the order confirmation number. You can edit or delete records directly within the search result.
Configuration
((generated))
Reference
plugin.tx_cs2trackingapp_pi1 properties: TS configuration.
templateFile
Property
templateFile
Data type
resource
Description
The HTML-template.(Default template:"pi1/cs2_unitconverter_template.tmpl" in the ext/cs2_trackingapp folder).
Example:
plugin.tx_cs2trackingapp_pi1 {
  templateFile = fileadmin/my_templates/trackingapp.tmpl
}
Default
allowCaching
Property
allowCaching
Data type
boolean
Description
Enable caching
Default
1
pidForResultPage
Property
pidForResultPage
Data type
Int+
Description
Page id for displaying the results. On this page id you must have an extension content element running with code = RESULT
Example:
# pid for result page
plugin.tx_cs2trackingapp_pi1.pidForResultPage = 53
Default
pidForInfoPage
Property
pidForInfoPage
Data type
Int+
Description
Page id for a link to a general information page. Both type of content elements “RESULT“ and “SEARCHBOX“ will show up a link to this page.
Example:
# pid for info page
plugin.tx_cs2trackingapp_pi1.pidForInfoPage = 54
Default
date_stdWrap
Property
date_stdWrap
Data type
-> stdWrap
Description
Here you can set the date formating for the template-marker: ###SHIPPING_DATE_VALUE###
Example:
plugin.tx_cs2trackingapp_pi1 {
    date_stdWrap.strftime= %A %d. of %B %Y
}
This will display the date in RESULT and SEARCHBOXcontent elements like this: “Thuesday 24. of May 2005”.
Default
[tsref:plugin.tx_cs2trackingapp_pi1]
Known problems
- No problems known so far.
To-Do list
- No todo's
 EXT: tracking application - 9