DEPRECATION WARNING
This documentation is not using the current rendering mechanism and is probably outdated. The extension maintainer should switch to the new system. Details on how to use the rendering mechanism can be found here.
EXT: Webinterface for System Installation Suite
| Author: | Kasper Skårhøj |
|---|---|
| Created: | 2002-11-01T00:32:00 |
| Changed by: | Sebastian Krebs |
| Changed: | 2004-10-07T22:42:32 |
| Author: | Sebastian Krebs |
| Email: | s.krebs@creativewebteam.com |
| Info 3: | |
| Info 4: |
EXT: Webinterface for System Installation Suite
Extension Key: cwt_sisuite
Copyright 2000-2002, Sebastian Krebs, <s.krebs@creativewebteam.com>
This document is published under the Open Content License
available from http://www.opencontent.org/opl.shtml
The content of this document is related to TYPO3
- a GNU/GPL CMS/Framework available from www.typo3.com
Table of Contents
EXT: Webinterface for System Installation Suite 1
Introduction 5
What does it do? 5
Screenshots 6
Users manual 8
Make an image of a system 8
Restore a system 11
Manage images 15
FAQ 25
Adminstration 26
FAQ 26
Configuration 27
Install and configure cwt_sisuite 27
Install and configure System Installation Suite 27
FAQ 27
Known problems 28
To-Do list 28
Changelog 28
Illustration Index
Illustration 1 Intropage of an implementation (not included in the extension) 6
Illustration 2 Main menu of an implementation of the extension (download page is not included in the extension. Extension dir_listing has been used for this purpose) 6
Illustration 3 Backend module of the extension. Can be used to administrate the whole SIS environment 6
Illustration 4 Starting view of the backup function 7
Illustration 5 Starting view of the restore function 7
Illustration 6 Starting view of the image management function 7
Illustration 7 Backup step1: Select a system to make an image of 8
Illustration 8 Backup step 1a: Displaying system information of a selected system 8
Illustration 9 Backup step 2: Enter a name for the image or select an old image to update 9
Illustration 10 Backup step 2a: The selected system is occupied. 9
Illustration 11 Backup step 3: Information summary 10
Illustration 12 Backup step 3a: Backup script in progress 10
Illustration 13 Backup step 3b: Backup script done 10
Illustration 14 Restore step1: Select a system and an image 11
Illustration 15 Restore step2: Enter network configuration 11
Illustration 16 Restore step3: Download bootdisk image and create bootdisk 12
Illustration 17 Restore step3a: Information summary 12
Illustration 18 Restore step3b: Preparation in progress 13
Illustration 19 Restore step3c: Preparation done, the client will be rebooted automatically 14
Illustration 20 Image Management: List of all images 15
Illustration 21 Image Management: Enter name and location of a copy of an image 16
Illustration 22 Image Management: Status window of the copy process 16
Illustration 23 Image Management: Enter name and locationfor moving an image 17
Illustration 24 Image Management: Information about moving process (part I) 17
Illustration 25 Image Management: Information about moving process (part II) 18
Illustration 26 Image Management: Security question while deleting images 19
Illustration 27 Image Management: Deleting images will take place in an extra window 19
Illustration 28 Image Management: The user selected to not delete the image(s) 19
Illustration 29 Image Management: Status information about the deleting process 19
Illustration 30 Image Management: Overview of an image during modification 20
Illustration 31 Image Management: Select type of ip assignment for use after autoinstallation 20
Illustration 32 Image Management: Select post installation option for use after autoinstallation and -configuration 21
Illustration 33 Image Management: Change the harddisk configuration by modifying the autoinstallscript.conf file 21
Illustration 34 Image Management: Change bootloader configuration 23
Illustration 35 Image Management: Manpage for autoinstallscript.conf 24
Illustration 36 Image Management: Making changes to an image requires a finalization 24
Illustration 37Image Management: Summary of content to permanently write into the image 25
Illustration 38Image Management: Output of the mkautoinstallscript command 25
Introduction
What does it do?
Managing a network of computer systems can be very time consuming, if you have to reconfigure or reinstall the systems from time to time. In order to keep the time needed very short, a network installation management can be implemented. System Installation Suite is a set of open source tools to do automated network installations for linux. It does only provide shell scripts to create, restore and manage images. This is the point, where the Webinterface for System Installation Suite comes into play. It provides features to backup or restore computer systems with just a few clicks. All images on the server can be managed within this webinterface.
Attention:
This extension does only work in combination with cwt_testserver_bookingsystem and cwt_be_sm .
Screenshots
 Illustration 1 Intropage of an implementation (not included
in the extension)
Illustration 1 Intropage of an implementation (not included
in the extension)
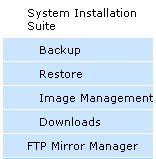 Illustration 2 Main menu of an implementation of the
extension (download page is not included in the extension. Extension
dir_listing has been used for this purpose)
Illustration 2 Main menu of an implementation of the
extension (download page is not included in the extension. Extension
dir_listing has been used for this purpose)
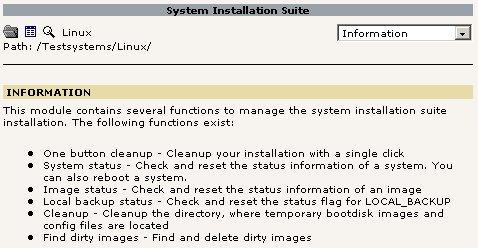 Illustration 3 Backend module of the extension. Can be used
to administrate the whole SIS environment
Illustration 3 Backend module of the extension. Can be used
to administrate the whole SIS environment
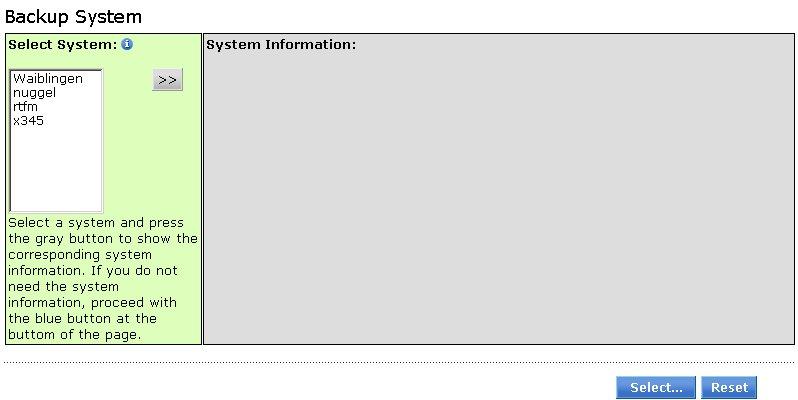 Illustration 4 Starting view of the backup function
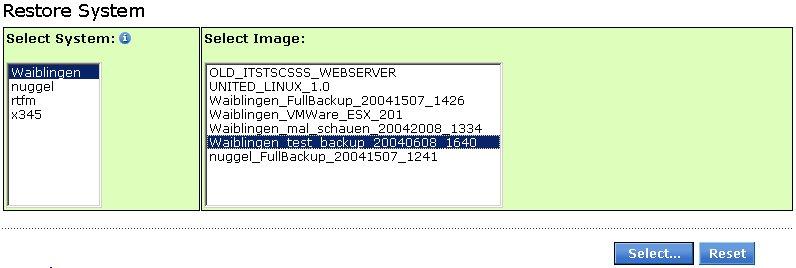 Illustration 5 Starting view of the restore function
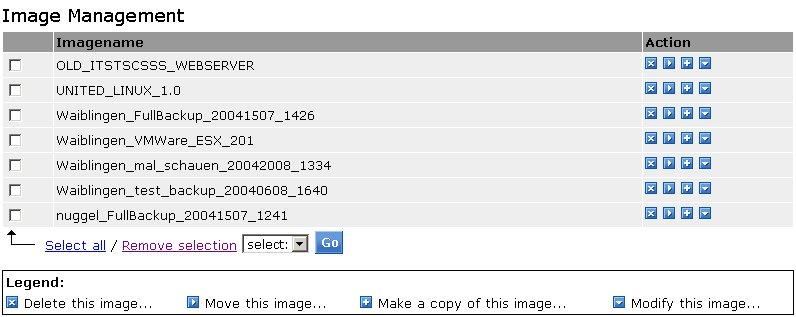 Illustration 6 Starting view of the image management
function
Illustration 6 Starting view of the image management
function
Users manual
The Webinterface for System Installation Suite provides three main features. Creating images, Restoring images and managing images. You can create an image of a running system, restore systems via floppy or network and manage your images.
Make an image of a system
Creating an image of a running system can be done in three steps. The first step is selecting the system to make an image of.
Illustration 7 Backup step1: Select a system to make an
image of
If you have selected a system, you can show its system information by using the grey double arrow button next to the system list. The system information will be displayed in the grey box to the right of the button.
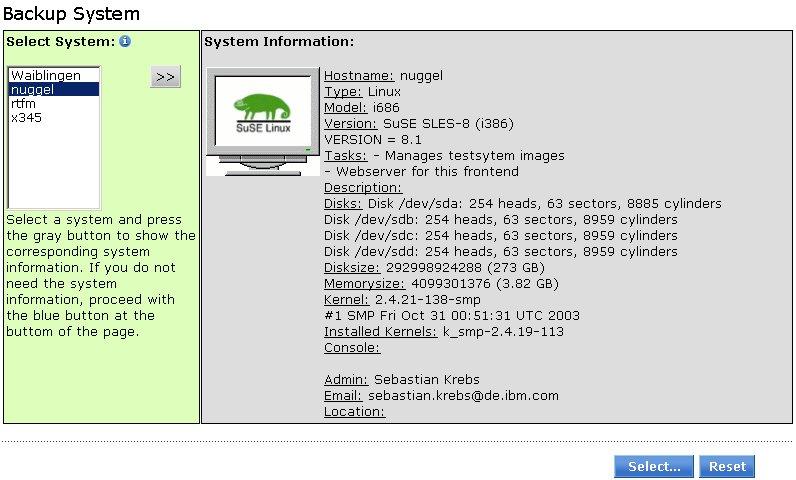 Illustration 8 Backup step 1a: Displaying system information
of a selected system
Illustration 8 Backup step 1a: Displaying system information
of a selected system
Proceed with the selected system by using the button. The next step will give you the possibility to enter a name for your image or to select an old image to update. If you select an old image, all data of the selected image will be updated with the data of the selected system. This option should only be used, if it is an older image of the selected system or if you know what you are doing.
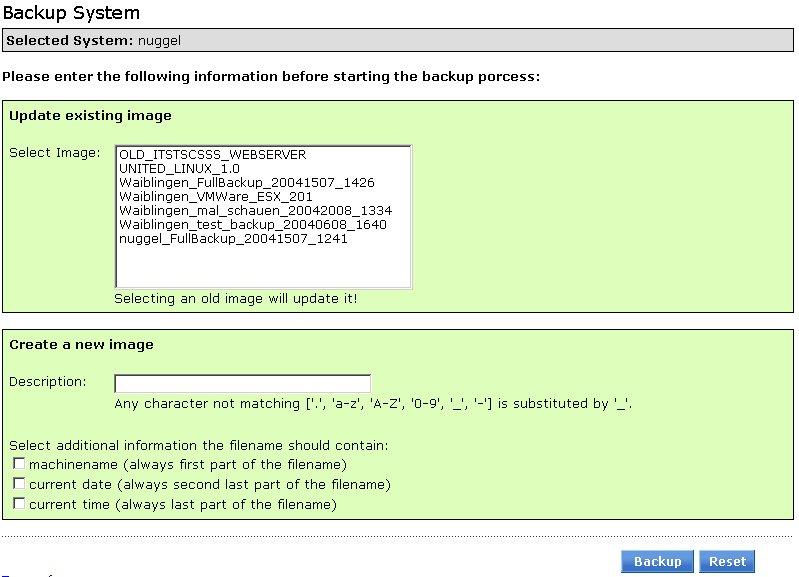 Illustration 9 Backup step 2: Enter a name for the image or
select an old image to update
Illustration 9 Backup step 2: Enter a name for the image or
select an old image to update
The name can consist of characters a-Z, numbers 0-9, the '_' or the '-' symbol. All other characters will be automatically substituted by '_'. You can add the machinename, current date and/or current time by selecting the corresponding chechbox. You can start the backup process by using the backup button at the bottom of the page. The next page will show a summary of the given information and will start the backup script automatically (needs javascript to be activated in your browser).
It is possible, that the selected system is already in a backup process. The system will show you a message and you can not proceed. If the message does not disappear after some time (depending on the average size of your images) you should contact your system administrator.
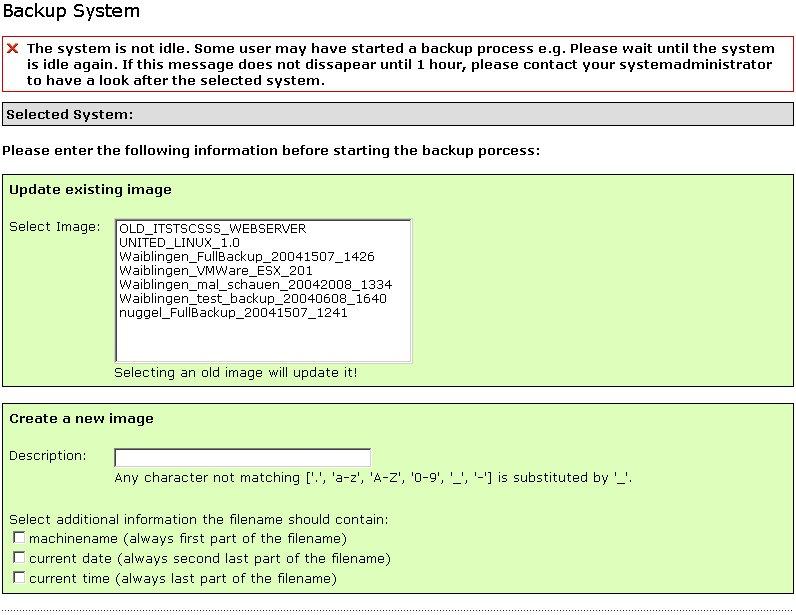 Illustration 10 Backup step 2a: The selected system is
occupied.
Illustration 10 Backup step 2a: The selected system is
occupied.
If the backup script does not start automatically, you can click on the link “Start backup...”.
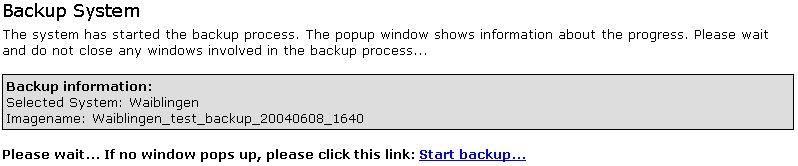 Illustration 11 Backup step 3: Information summary
 Illustration 12 Backup step 3a: Backup script in progress
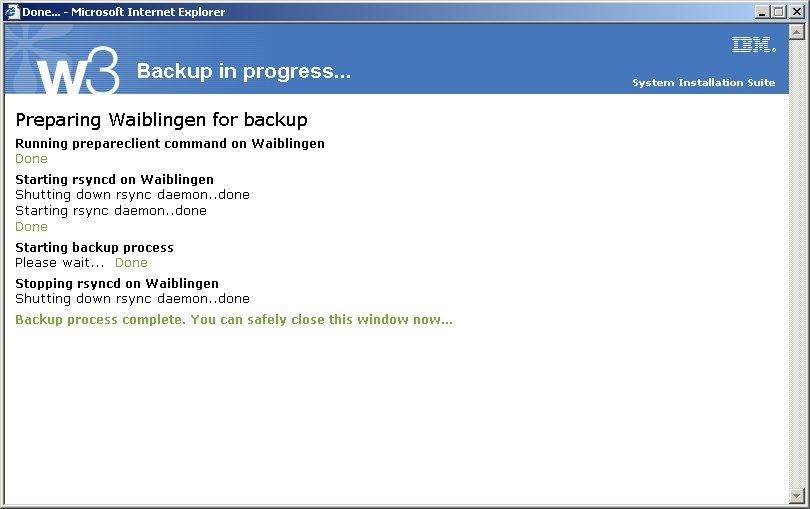 Illustration 13 Backup step 3b: Backup script done
Restore a system
Restoring a system can be done via network or via a floppy. In the first step you have to select a system and an image to install on the system.
Illustration 14 Restore step1: Select a system and an image
After selecting the system and image, some network settings have to be made. In general, the system does collect the information by itself. Like on the screenshot, all fields already have a value then. If the system can not collect some systeminformation, the corresponding field will be empty and has to be filled manually.
Select the type of restore process in thte second step. Network installation will trigger the selected system to install the selected image directly. Restoring with a diskette will create an image of a floppy disk, which you can download and create a floppy disk of.
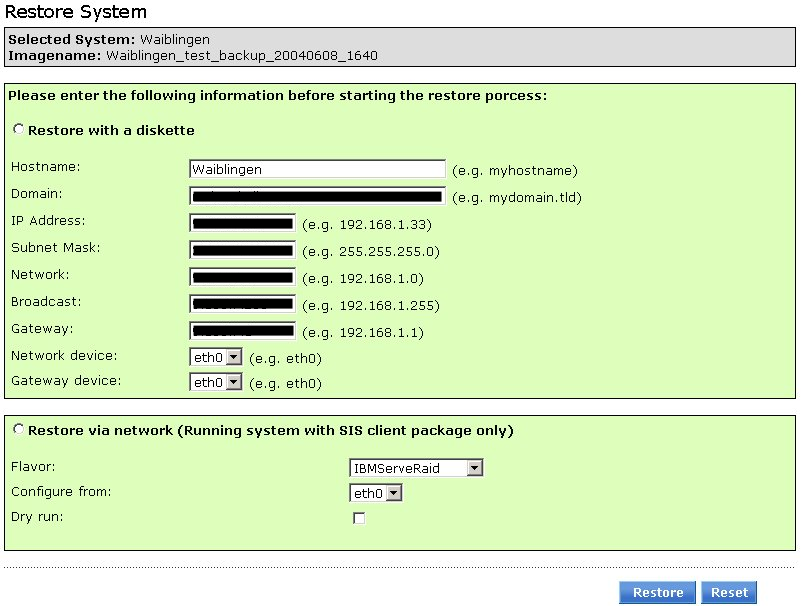 Illustration 15 Restore step2: Enter network configuration
Attention:
Restore via network is only possible, if a system is still running, the ssh daemon is working, the systemimager server can connect to the system by ssh and the systemimager client package is installed on the client system to install to.
If you selected restore with a diskette, the system creates a bootdisk image. All information needed is included in this image. Wether you have linux installed on your workstation or windows, use the corresponding tool to create the disk from this image. A little description is included in the webinterface. There you can also download the tools needed. Refer to the tools' manuals to inform you about how to install those tools.
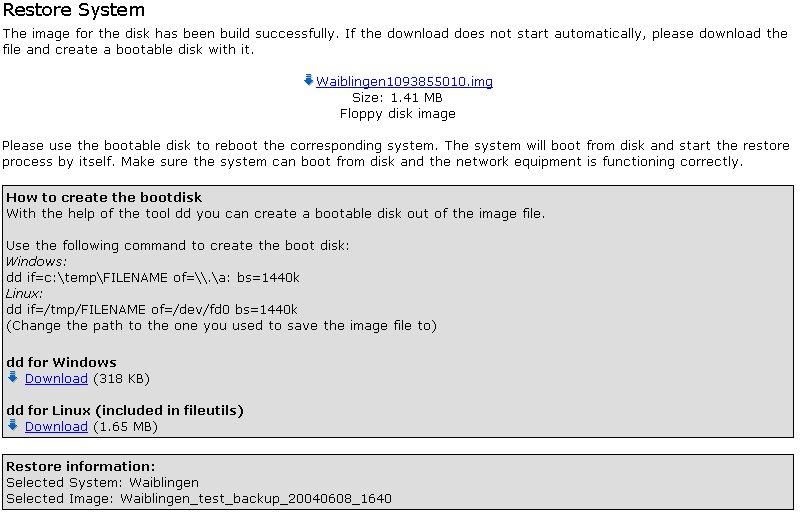 Illustration 16 Restore step3: Download bootdisk image and
create bootdisk
Illustration 16 Restore step3: Download bootdisk image and
create bootdisk
You can now insert the freshly created floppy into the system you want to install. Reboot the system and the selected image will be automatically installed. You should remove the floppy from the drive as soon as the installation process begins to copy the files from the server onto the client.
If you have selected restore via network, the next step will show you an information summary. The restore process will be prepared in a new window.
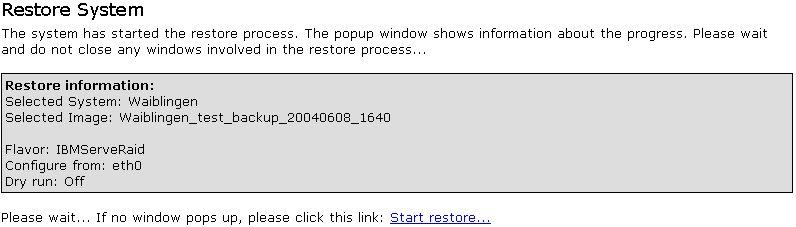 Illustration 17 Restore step3a: Information summary
The webinterface will prepare and reboot the client automatically. After the reboot, the selected image will be installed. The window will only show the status of the preparation, but not the status of the installation. This is not possible with System Installation Suite at the moment.
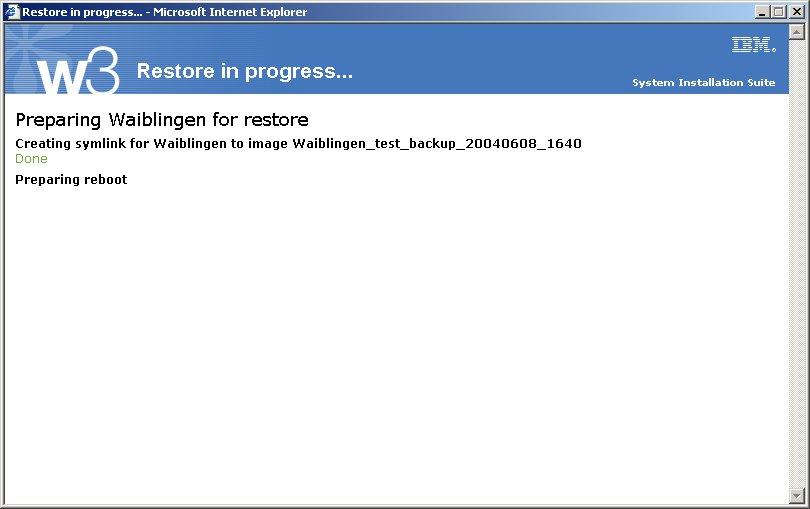 Illustration 18 Restore step3b: Preparation in progress
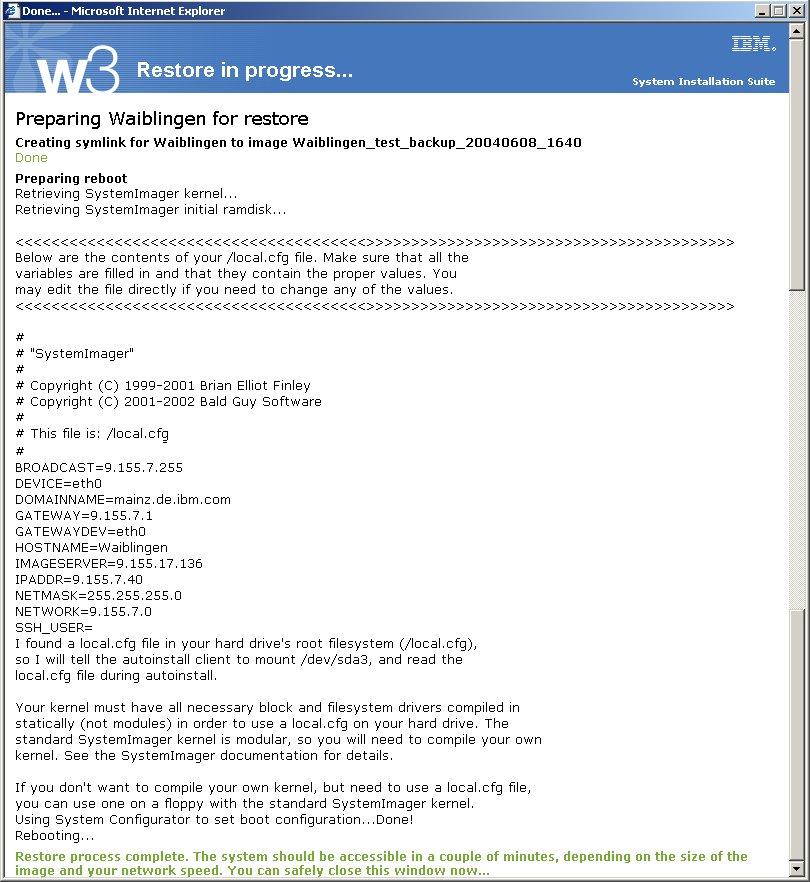 Illustration 19 Restore step3c: Preparation done, the
client will be rebooted automatically
Illustration 19 Restore step3c: Preparation done, the
client will be rebooted automatically
Manage images
The image management function gives you several possibilities to manage the images on the image server. The four main functions are:
- Copy images
- Move images
- Delete images
- Modify images
If you enter the image management, you will see a list of images. All images have a little icon bar at the end of the row. The different actions are explained in the legend below. Some actions can be utilized with more than one image at a single time. You can delete, copy or move multiple images by activating the checkbox in front of the imagename and selecting the desired action in the drop down box below the image list. Pressing the “Go” buton will perfom the action.
Illustration 20 Image Management: List of all images
Copy images
If you selected the copy option, you can enter a new name for an image and the new location of the image. The default location for images is /var/lib/systemimages/images. The default folder will be used, if no folder was given. If no name for the image is given, the original name will be used and the string “copy” with the current date and time will be appended. Entering a new name for a copy is only possible if a single image is copied.
Example:
Original image: John_MyLittleTestImage
Copy of image: John_MyLittleTestImage_copy_20040904_1101
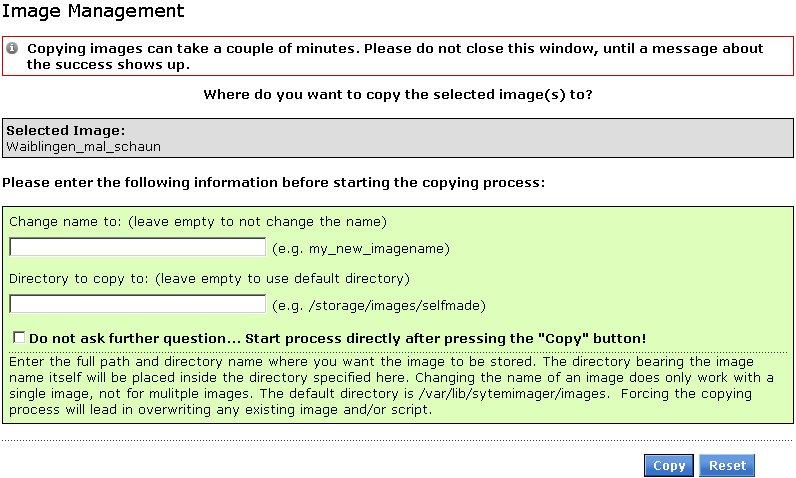 Illustration 21 Image Management: Enter name and location
of a copy of an image
Illustration 21 Image Management: Enter name and location
of a copy of an image
The Copy process will be started in an extra window. It contains information about the status of the copy process and shows possible errors.
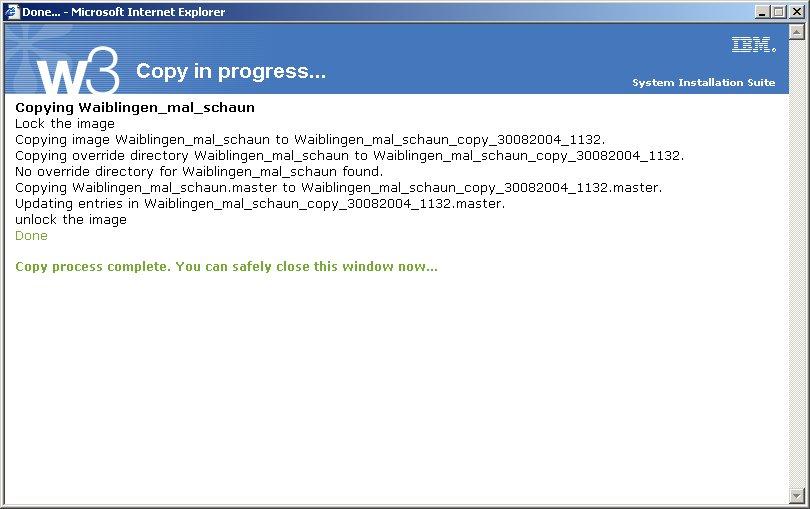 Illustration 22 Image Management: Status window of the copy
process
Illustration 22 Image Management: Status window of the copy
process
Move images
The process of moving images is similar to the process of copying images. You can enter a new name and a new location of an image. If you do not enter a name, the original name will be taken. The default location is /var/lib/systemimager/images. If you do not enter a directory, the image will be moved to the default directory. Entering a new name is only possible while moving a single image.
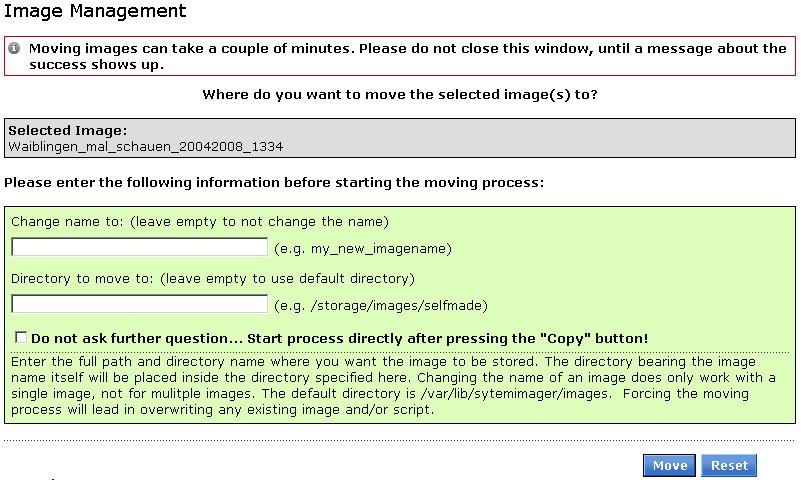 Illustration 23 Image Management: Enter name and
locationfor moving an image
Illustration 23 Image Management: Enter name and
locationfor moving an image
The process of moving an image will be started in an extra window. It contains information about the status of the moving process.
 Illustration 24 Image Management: Information about moving
process (part I)
Illustration 24 Image Management: Information about moving
process (part I)
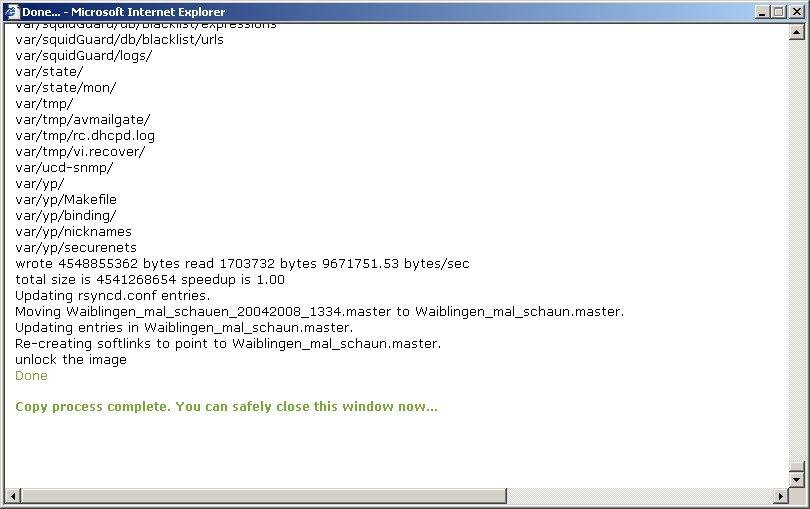 Illustration 25 Image Management: Information about moving
process (part II)
Illustration 25 Image Management: Information about moving
process (part II)
Delete images
If you selected to delete one or multiple images, you will be asked, if you really want to delete the selected image(s). Answering yes will permanently delete those images.
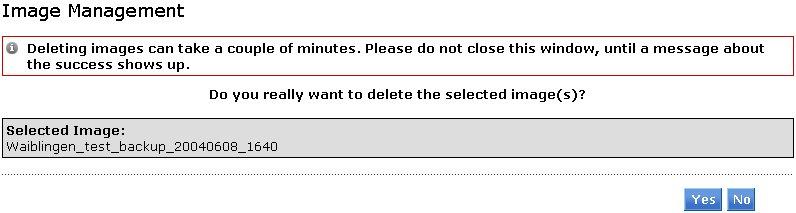 Illustration 26 Image Management: Security question while
deleting images
Illustration 26 Image Management: Security question while
deleting images
The process of deleting the image(s) will be started in an extra window.
 Illustration 27 Image Management: Deleting images will take
place in an extra window
Illustration 27 Image Management: Deleting images will take
place in an extra window
If you answer with no, no image will be deleted and you will see a short information.
 Illustration 28 Image Management: The user selected to not
delete the image(s)
Illustration 28 Image Management: The user selected to not
delete the image(s)
The extra window will contain information about the status of the deleting process.
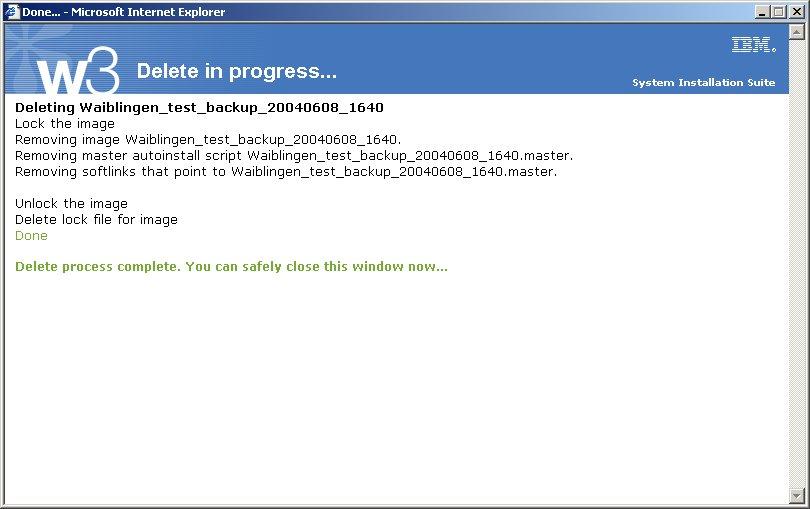 Illustration 29 Image Management: Status information about
the deleting process
Illustration 29 Image Management: Status information about
the deleting process
Modify images
If you need to modify an image, you have to select the modify option from the image list. This will bring up an interface, where you can change several information of an image. You can change the following information:
- IP Assignment
- Post Installation
- Harddisk
- Bootlader
The first screen is an overview of the selected image. You can see the name and location of the image, the current ip assignment and the post installation option.
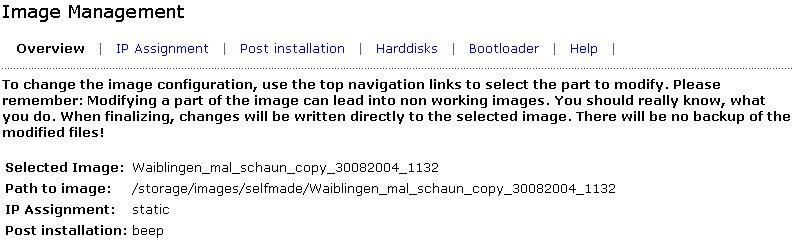 Illustration 30 Image Management: Overview of an image
during modification
Illustration 30 Image Management: Overview of an image
during modification
There are three ip assignment options. They are described as followed:
DHCP: Assign the ip address using a DHCP server.
STATIC: Use network settings used during autinstall process
REPLICANT: Use network settings found in the installed image.
IP assignemnt describes the type of network configuration used after installing an image.
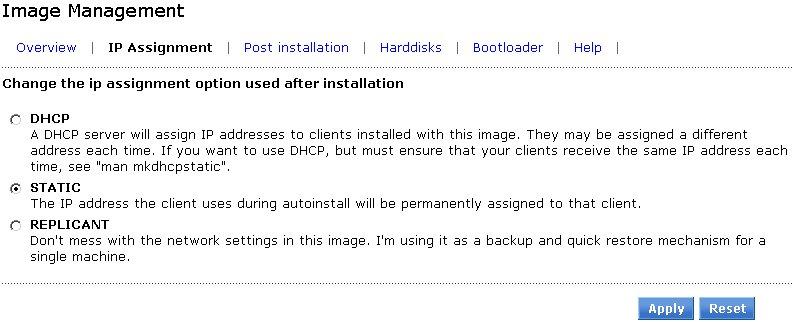 Illustration 31 Image Management: Select type of ip
assignment for use after autoinstallation
Illustration 31 Image Management: Select type of ip
assignment for use after autoinstallation
You can select between three options for the post installation. This option will be used if the installation and configuration of an autoinstall client is finished. The three options are:
BEEP: Just beep until someone reboots the machine
REBOOT: Automatically reboot the machine
SHUTDOWN: Shutdown the machine
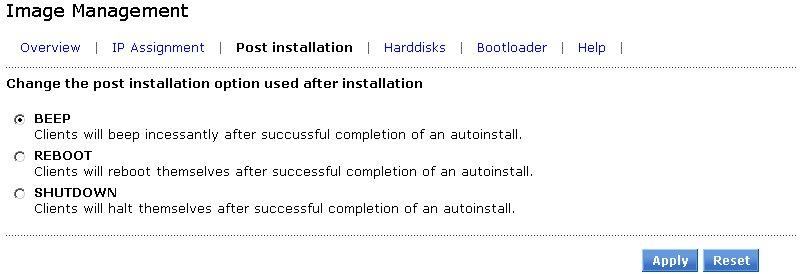 Illustration 32 Image Management: Select post installation
option for use after autoinstallation and -configuration
Illustration 32 Image Management: Select post installation
option for use after autoinstallation and -configuration
The harddisk configuration can also be changed. Selecting the harddisk option will show you the content of the autoinstallscript.conf file of the selected image.
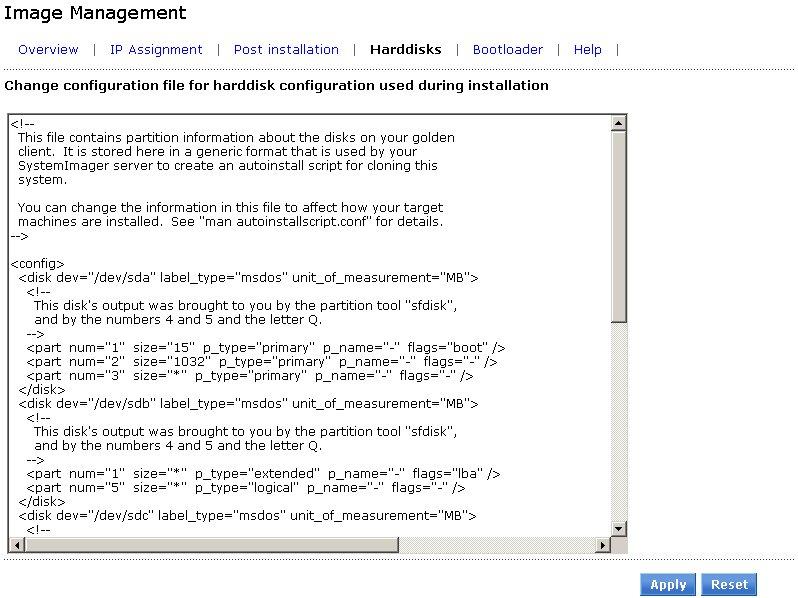 Illustration 33 Image Management: Change the harddisk
configuration by modifying the autoinstallscript.conf file
Illustration 33 Image Management: Change the harddisk
configuration by modifying the autoinstallscript.conf file
The autoinstallscript.conf file consists of the following three sections:
- disk section
- filesystem section
- BOEL section
The disk section :
If you want to add or remove a harddisk, just make the change inside the disk section. The following code shows the configuration for a disk /dev/sdb:
<disk dev="/dev/sdb" label_type="newdisk" unit_of_measurement="MB">
<part num="1" size="31" p_type="primary" p_name="-" flags="-" />
<part num="2" size="518" p_type="primary" p_name="-" flags="-" />
<part num="3" size="*" p_type="extended" p_name="-" flags="lba" />
<part num="5" size="2055" p_type="logical" p_name="-" flags="-" />
<part num="6" size="1027" p_type="logical" p_name="-" flags="-" />
</disk>
You can delete the disk by deleting the complete disk section or you can change the partition information by editing the partition entries. Adding a new disk can be accomplished by adding a copmlete disk information similar to the example. You may have to change the name from e.g. /dev/sdb to /dev/sdc. If you made changes to the disk section, remember to check the filesystem section for correctness.
The filesystem section:
<fsinfo line="10" real_dev="/dev/sda5" mp="/" fs="reiserfs" options="defaults" dump="1" pass="1" />
<fsinfo line="20" real_dev="/dev/sda1" mp="/boot" fs="ext2" options="defaults" dump="1" pass="1" />
<fsinfo line="30" real_dev="/dev/sda2" mp="swap" fs="swap" options="defaults" dump="1" pass="1" />
<fsinfo line="40" real_dev="/dev/sda6" mp="/storage" fs="reiserfs" options="defaults" dump="1" pass="1" />
Each partition on a disk can/must have a filesystem. Partitions without filesystem can not be written to or read from. When editing filesystem information, keep an eye on the numbering. The line parameter describes the linenumber in the fstab file. The real_dev parameter is the number of the partition on the selected disk.
A detailed description of all tags and parameters of the three sections can be found in the manpage for autoinstallscript.conf. If you made changes to the harddisk configuration, you should also check the bootloader configuration. May be you have to change this as well. Go to the bootloader option and make all necessary changes.
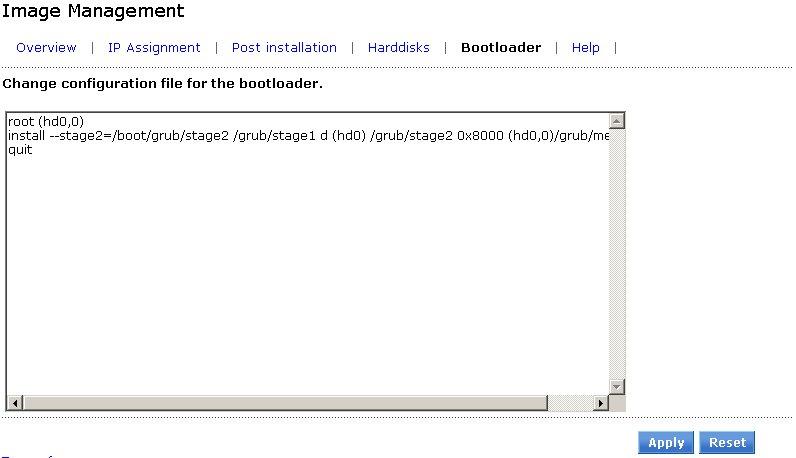 Illustration 34 Image Management: Change bootloader
configuration
Illustration 34 Image Management: Change bootloader
configuration
The help option will show you the manpage for the autoinstallscript.conf file.
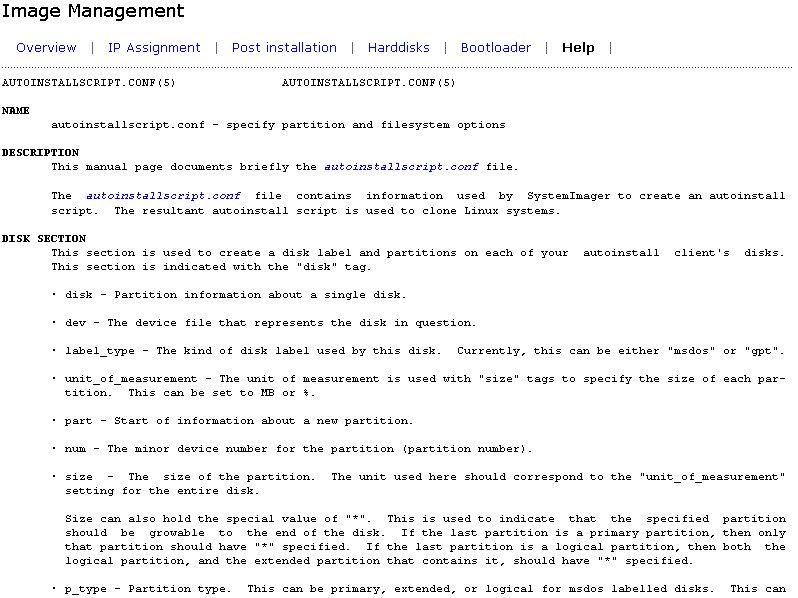 Illustration 35 Image Management: Manpage for
autoinstallscript.conf
Illustration 35 Image Management: Manpage for
autoinstallscript.conf
If you made any changes to the image, they will only be stored temporarily. You have to finalize the image to write the changes permanently into the image. When finalizing the image, no security question will ask you, if you really want to make the changes. You should know, what you have done!!! There will only be a summery of the content to write into the image, to check for correctness. The finalize process will change the corresponding files and run the mkautoinstallscript command to create a fresh installation script.
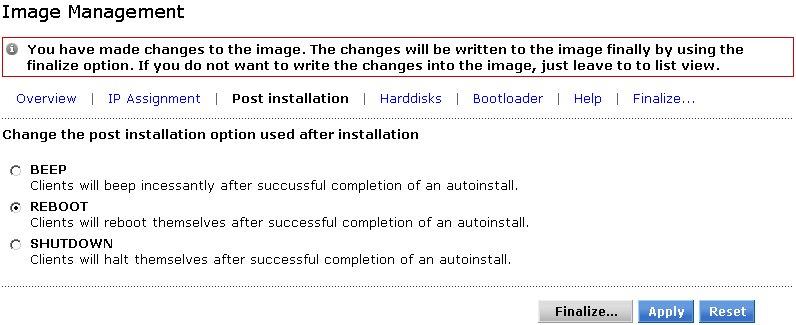 Illustration 36 Image Management: Making changes to an
image requires a finalization
Illustration 36 Image Management: Making changes to an
image requires a finalization
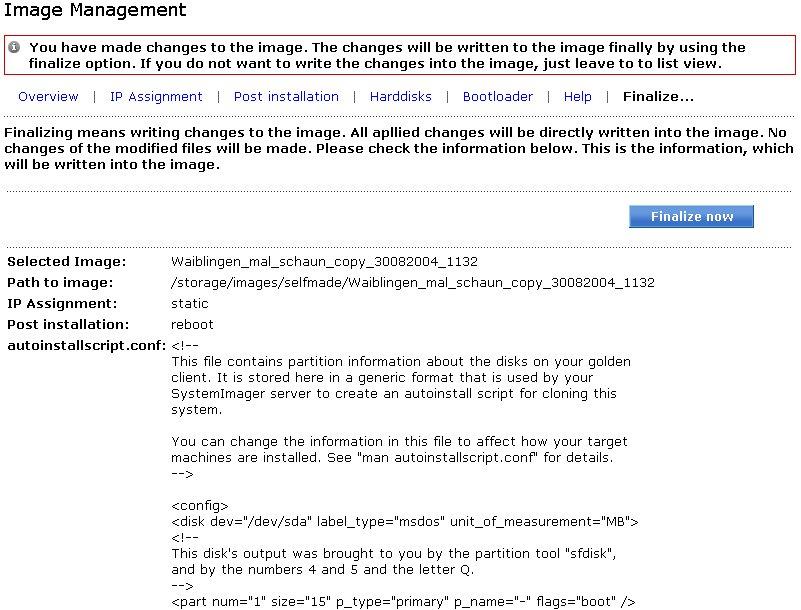 Illustration 37Image Management: Summary of content to
permanently write into the image
Illustration 37Image Management: Summary of content to
permanently write into the image
The last screen shows you the output of the write process. If any error occurred, you can see it here.
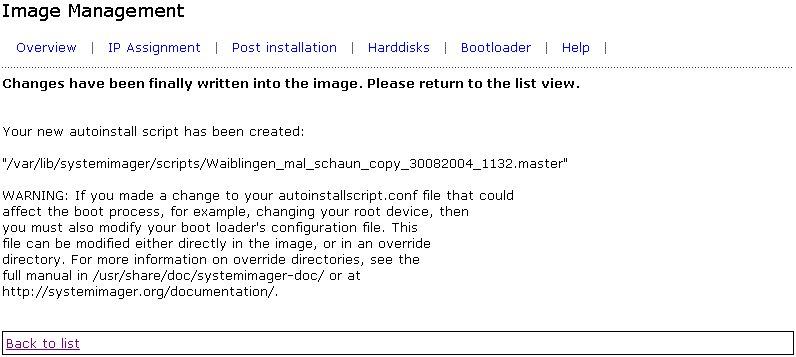 Illustration 38Image Management: Output of the
mkautoinstallscript command
Illustration 38Image Management: Output of the
mkautoinstallscript command
FAQ
- Possible subsections: FAQ
Adminstration
When installing the extension you should keep in mind, that there are functions, which only superuser should use. Deleting and modifying images are functions which can cause unrecoverable damage to images.
To manage access to the pages you should use the Typo3 integrated authentication system. Two user groups are sugessted:
- SIS_superusers
- SIS_defaultusers
The default user group has access to the backup and restore pages. The superuser has access to the image management function.
 |img-36|
The Download page can be added for downloading required software packages. It is not included in the cwt_sisuite extension.
FAQ
- Possible subsections: FAQ
Configuration
Install and configure cwt_sisuite
You can install the cwt_sisuite plugin like any other plugin. There are three different options for the CODE field:
- BACKUP: Show the backup biew
- RESTORE: Show the restore view
- MANAGE: Show the image management view
There is no need to set the starting point.
After installing the extension you should change the template according to your configuration. You should create an extension template in the root page of the cwt_sisuite extension. Use the constant editor of the template module to change all important constants. This should be enough to make the extension work.
cwt_sisuite makes use of the rsh software. You have to configure your clients rsh daemon to grant access to the sis server. Therefor create a user on every machine using the sis client package, which is the same as the user running the webserver on the the sis server. You have to grant access to this user and to root, because sis commands can only be run by the root user!
Install and configure System Installation Suite
The project page of System Installation Suite can be found here: http://www.sisuite.org .
There are two different installation types: server and client. First do a server installation.
You can find all files on the sourceforge.net project homepage ( http://sourceforge.net/project/showfiles.php?group_id=259 ) or you can use the installation script ( http://sisuite.org/install ). A copmlete description of the download and installation process can be found here: http://www.systemimager.org/download/ .
FAQ
Q: Isn't it dangerous to give root access from remote machines?
A: Yes it is. You should know your systems well. This pease of software was meant for internal use. Use it at your own risk. If you have security recommendations according to this topic, just email me!
Q: Why does the modify option in the management view not save my changes into the autoinstallscript.conf file?
A: Check the rights for the file modifyFileContent.sh. It has to have executable rights for the webserver user!
Known problems
The current cwt_sisuite version does not support the use of ssh users. Therefor it is not recommended to use this version for use in the internet. It should only be used in local networks if you are sure, no one is spying on the network traffic or you only have non confidential content.
 EXT: Webinterface for System Installation Suite - 28