DEPRECATION WARNING
This documentation is not using the current rendering mechanism and is probably outdated. The extension maintainer should switch to the new system. Details on how to use the rendering mechanism can be found here.
EXT: Testserver booking system
| Author: | Kasper Skårhøj |
|---|---|
| Created: | 2002-11-01T00:32:00 |
| Changed by: | Sebastian Krebs |
| Changed: | 2004-02-17T09:24:53 |
| Author: | Sebastian Krebs |
| Email: | s.krebs@creativewebteam.info |
| Info 3: | |
| Info 4: |
EXT: Testserver booking system
Extension Key: cwt_testserver_bookingsystem
Copyright 2000-2002, Sebastian Krebs, <s.krebs@creativewebteam.info>
This document is published under the Open Content License
available from http://www.opencontent.org/opl.shtml
The content of this document is related to TYPO3
- a GNU/GPL CMS/Framework available from www.typo3.com
Table of Contents
EXT: Testserver booking system 1
Introduction 1
What does it do? 1
Screenshots 2
Users manual 8
Using the booking system 8
Adminstration 9
Adding new systems 9
Configure a remote system to be dynamically updateable 9
Security issues 9
Setting a system back to status 'free' 9
Installation 10
FAQ 10
Reference 10
Known problems 10
To-Do list 10
Changelog 11
Introduction
What does it do?
The testserver booking system is a simple management software, which makes it possible to collect copmutersystems and query them for hard- and software information. The systems can be set to be bookable by a user. Systems are only viewable and bookable for logged in users. The system can collect information from other systems via a rsh connection. More information about configuring your rsh deamon can be read in the administration section. The testserver booking system will help you to manage the use of several testsystems.
Screenshots
Overview
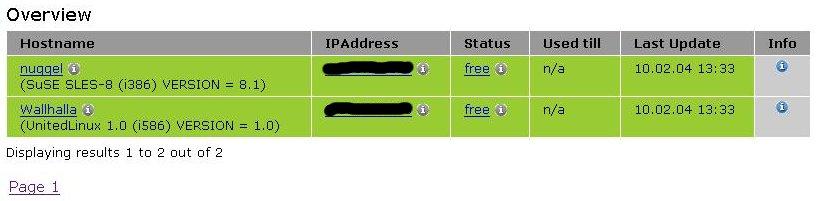 Illustration 1A list of all testsystems, registered in the
booking system. It is possible to open a telnet session, update hard-
and software information, book a system or have a look at the copmlete
list of hard- and software information. The little icons give you a
hint, what you can do with the corresponding link.
Illustration 1A list of all testsystems, registered in the
booking system. It is possible to open a telnet session, update hard-
and software information, book a system or have a look at the copmlete
list of hard- and software information. The little icons give you a
hint, what you can do with the corresponding link.
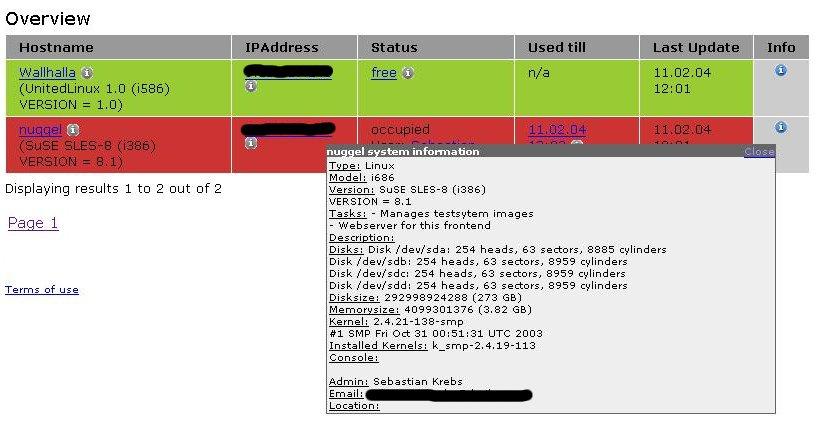 Illustration 2The info icon gives you a complete snapshot
about the hard- and software information. The red line shows the
status 'occupied' for the corresponding testsystem.
Illustration 2The info icon gives you a complete snapshot
about the hard- and software information. The red line shows the
status 'occupied' for the corresponding testsystem.
Book a system
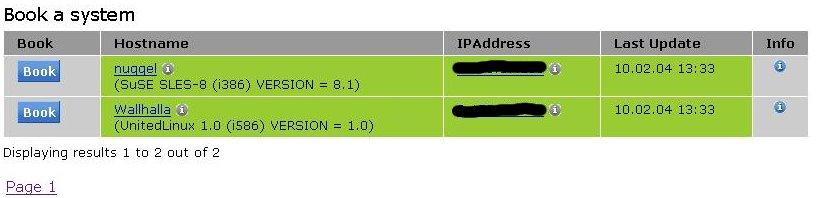 Illustration 3The book a system view only shows free
testsystems. This helps to quick-find a system to use as a
testsystem.
Illustration 3The book a system view only shows free
testsystems. This helps to quick-find a system to use as a
testsystem.
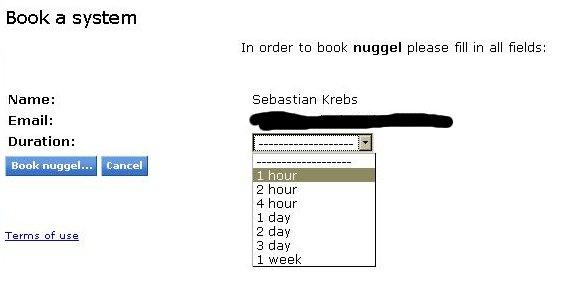 Illustration 4After selecting a system to use, the logged in
user only has to choose a duration he/she wants to book the system
for.
Illustration 4After selecting a system to use, the logged in
user only has to choose a duration he/she wants to book the system
for.
Update systems
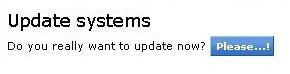 Illustration 5The update systems view makes it possible to
update all systems at once. All systems which can be updated
dynamically will be queried for new hard- and software information.
Illustration 5The update systems view makes it possible to
update all systems at once. All systems which can be updated
dynamically will be queried for new hard- and software information.
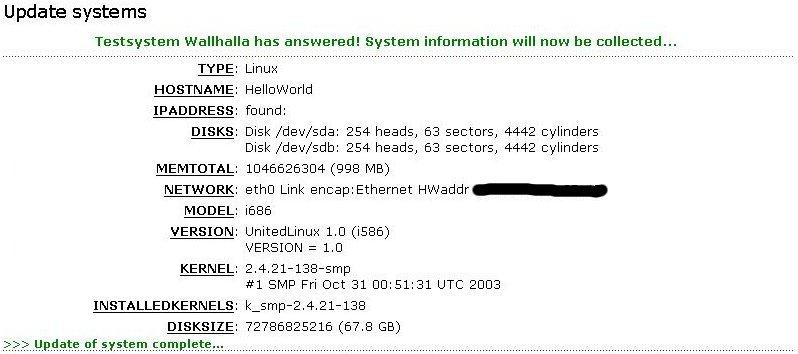 Illustration 6After collecting all information, the results
are displayed. If an error occured during update process, a message
will show up.
Illustration 6After collecting all information, the results
are displayed. If an error occured during update process, a message
will show up.
Users manual
Using the booking system
First of all, a user has to be logged in to use the booking system.
Overview
The booking system has three main views. The “Overview” view
gives you a list with all registered testsystems. At the bottom of the
list, a page browser is placed. Use it to see more than the first 10
systems. The list is sorted by the status of the systems ('free',
'occupied' and 'not bookable') and the hostnames.
The little gray info icons show some quick-help. The blue one at the end shows a snapshot of the system's hard- and software information. A click on the hostname updates its hard- and software information. The ipaddress opens a telnet session. Clicking on the status 'free' will give one the posibillity to book the selected system. If a system is booked, the user can set it back to status 'free' or book it for a longer period of time by clicking on the time 'Used till'.
Book a system
The book a system view only shows bookable systems. Searching
a testsystem to use is made very easy with this view. Only click on
the “book” button at the beginning of a row and book the selected
system. The rest of the functionality is the same like in the
overview.
Update systems
The update systems view gives you the posibillity to update
all dynamically updateable systems in one step. All systems will be
queried for hard- and software information. The results will be shown
and updated in the database. If any error occurs, it will be displayed
as a message for the corresponding system. The update process is only
started if the user gives his ok by pressing the button “Please...”
when asked, if he whises to update the system.
Adminstration
Adding new systems
In order to add new systems to the list of test systems, one has to be logged in in the Typo3 backend. This can be reached by the following URL: http://myserver.domain.tld/typo3 . Enter the username and password.
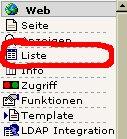 In the Typo3 backend the module “Web” -> “List” has to be
choosen. In the systefolder where all systems are collected, a click
on the “Add a record” button will give you the possibility to add a
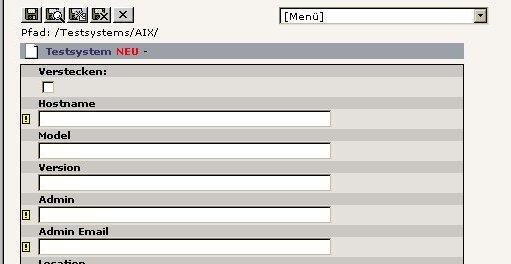
new system. The form for adding a system will be displayed. Fill in
all fields marked with a
In the Typo3 backend the module “Web” -> “List” has to be
choosen. In the systefolder where all systems are collected, a click
on the “Add a record” button will give you the possibility to add a
new system. The form for adding a system will be displayed. Fill in
all fields marked with a  . A system can be queried for hard-
and software information if it is configured correctly. More
information about configuring systems will follow in the next section.
. A system can be queried for hard-
and software information if it is configured correctly. More
information about configuring systems will follow in the next section.
If a system will be managed manually, fill in all fields and enter the date of your last modification of the hard- and software information.
Save the settings by clicking on one of the save buttons at the top or bottom of the form.
Configure a remote system to be dynamically updateable
In order to be queried for hard- and software information, a remote system has to be configured correctly
- The remote system must have a rsh deamon running.
- A user must be created with the same name of the user running the webserver on the management system.
- A file .rhosts must be created in the home directory of this user containing the ipaddress of the management system.
- The user must have the rights to access disk, memory and other information.
- The network settings of the remote system have to be correct:
- Standardgateway
- Routes
If something fails while querying a system, the booking system will show a message containing more information about what might have happened.
Security issues
Always remember that the user running the webserver has the right to access the remote systems. Make sure, no one can use this feature for his own interests.
Setting a system back to status 'free'
In order to set a system back to status 'free' you have to be logged in in the backend of Typo3. The administrator has the right to change the current user of a system. To change the status back to 'free' change the following fields to the corresponding value:
- user => “”
- User Email => “”
- Duration => “”
Save the settings by clicking on one of the save buttons at the top or bottom of the form.
Installation
The extension can be simply installed via the extension manager.
If you want to debug the extension, go to the class and change the global var $debug to 'true'.
Reference
templateFile
Property
templateFile
Data type
file
Description
The file containing the template for this extension
Default
pid.bookingview
Property
pid.bookingview
Data type
int
Description
Page ID containing the booking view
Default
pid.updatedbview
Property
pid.updatedbview
Data type
int
Description
Page ID containing the update systems view.
Default
overview.recordsPerPage
Property
overview.recordsPerPage
Data type
int
Description
Number of records to show per page.
Default
10
overView.orderBy
Property
overView.orderBy
Data type
string
Description
OrderBy clause of the SELECT statement
Default
status, hostname
bookingView.recordsPerPage
Property
bookingView.recordsPerPage
Data type
int
Description
Number of records to show per page.
Default
10
Divider
Property
Divider
Data type
string
Description
A divider content object
Default
<div class="hrule-dots"> </div>
((generated))
Example
plugin.tx_cwttestserverbookingsystem_pi1 {
templateFile = {$plugin.cwt_testserver_bookingsystem.file.templateFile}
pid.bookingview = {$plugin.cwt_testserver_bookingsystem.pid.bookingview}
pid.updatedbview = {$plugin.cwt_testserver_bookingsystem.pid.updatedbview}
overviewView {
recordsPerPage = 10
orderBy = status,hostname
}
bookingView {
recordsPerPage = 10
}
divider = <div class="hrule-dots"> </div>
}
Known problems
- The dynamic systeminformation update process does only function for Linux or AIX based systems.
- No html template file is used. All output is hard coded.
- Multi language support
To-Do list
- Add a template file to make design changes easier.
- Multi language support
Changelog
- 0.0.1: First public release
- 1.0.0: First stable release
 EXT: Testserver booking system - 8