DEPRECATION WARNING
This documentation is not using the current rendering mechanism and is probably outdated. The extension maintainer should switch to the new system. Details on how to use the rendering mechanism can be found here.
Tutorial: Frames with Typo3
| Author: | Kasper Skårhøj |
|---|---|
| Created: | 2002-11-01T00:32:00 |
| Changed by: | Kasper Skårhøj |
| Changed: | 2002-11-30T03:26:09 |
| Email: | kasper@typo3.com |
| Info 2: | |
| Info 3: | |
| Info 4: |
Tutorial: Frames with Typo3
Revised February 2001
Copyright 2000-2002, , <kasper@typo3.com>
This document is published under the Open Content License
available from http://www.opencontent.org/opl.shtml
The content of this document is related to Typo3
- a GNU/GPL CMS/Framework available from www.typo3.com
Table of Contents
Tutorial: Frames with Typo3 1
Setting up a frameset and graphical menu with a background image. 2
Frames 3
Framesets 4
Why this way? 8
The "top"-, "content"- and "menu" PAGE-objects 8
The graphical menu 10
Background image 11
No-frames version 14
Working with both frames and no-frames. 14
Design tips 16
Setting up a frameset and graphical menu with a background image.
This tutorial presumes that you have read through the 2 previous tutorials (GoLive and References). Those tutorials should give you an adequate background for understanding this one.
In this tutorial we'll learn how to implement a design based on frames. We'll also create a graphical menu and finally prepare a no- frames version of the site for older browsers.
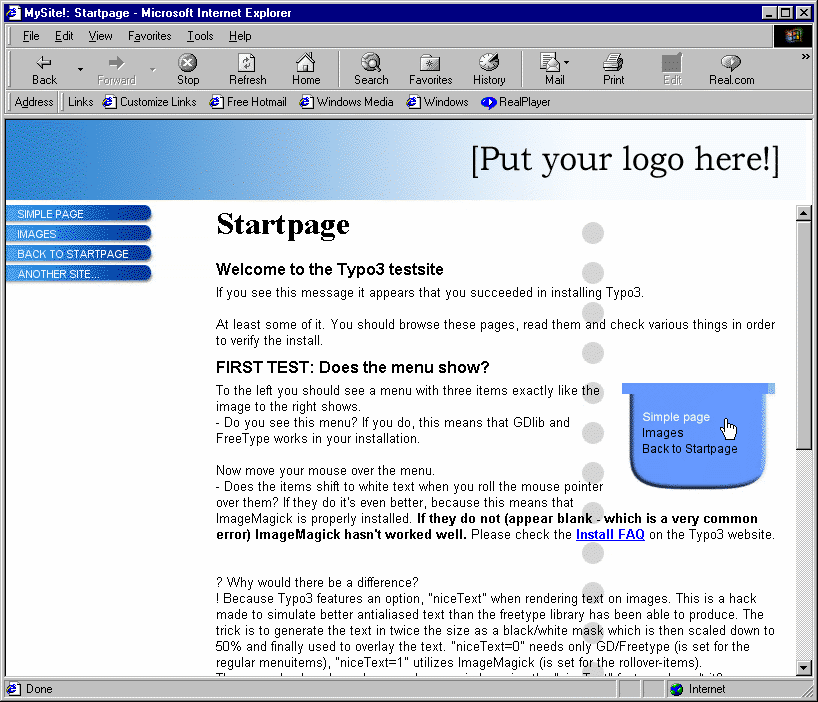
This is an example of what we're trying to achieve:

First of all unzip the files of this tutorial to the directory "fileadmin/frames/" of the site.
Basically you should prepare a template just like you did in the GoLive example. In fact you may make an exact copy of this record.
Anyway, clear the Constants-field and put this into the Setup-field of the duplicate of the "GoLive" template record:
page = PAGE
page.typeNum = 0

page.10 = TEXT
page.10.value = Hello World
Also change the title and make sure that the template is the first template in the record list!
You should see a simple "Hello World" text on the frontend, when you look. If not, please remember to "Clear All Cache" in the menu... :-)
Frames
Take a peek at index.html:
<FRAMESET rows="85,*" framespacing="0" bordercolor="#FFFFFF" frameborder="O" border="0">
        <FRAME name="Top" src="top.html" frameborder="0" noresize marginheight="0" border="0" scrolling="NO">
        <FRAMESET cols="170,*" framespacing="0" bordercolor="#FFFFFF" frameborder="0" border="0" marginheight="0" border="0">
                <FRAME name="Menu" src="menu.html" frameborder="0" noresize marginheight="0" border="0" scrolling="NO">
                <FRAME name="Main" src="content.html" frameborder="0" marginheight="0" border="0" scrolling="AUTO">
        </FRAMESET>
</FRAMESET>
This is the frameset we're going to create.
First, let's consider some facts here: Typo3 uses an "id" to refer to a single page. But when we hit a certain page, we actually need Typo3 to generate five (5) pages; two framesets, a top-page, menu-page and content-page - one in each frame. So how is this done?
The thing is that Typo3 uses not only an id-value but also a type- value. The type-value defines which TypoScript PAGE-object that should handle the rendering of the page! If the type-value is not given, it defaults to zero (0). And every page-definition in Typo must have it's own type-value.
OK, try this (put it into the Setup-field):
page = PAGE
page.typeNum = 0
page.10 = TEXT
page.10.value = Hello World

another_page_object = PAGE
another_page_object.typeNum = 1
another_page_object.10 = TEXT
another_page_object.10.value = Another PAGE object with Type-number 1
... and modify the url to this:

... and hit the frontend and you'll see this:

Try to set the "&type=1" value back to zero. Also try to set it to "2". Or "3".
As you can see, each type-value defines which PAGE-object in the TypoScript template is responsible for rendering the page.
What we're going to do now is to define the 3 pages, "content", "menu" and "top". We will reserve the type-value 0 (zero) for the frameset and in order to stick with the convention of the standard TypoScript templates around (this will make your life easier lateron!), we'll also use "page" as the name of the frame that carries the main- content.
Clear the Setup-field and put this into it:
# Definition of the page-objects
page = PAGE
menu = PAGE
top = PAGE

page.typeNum = 1
menu.typeNum = 2
top.typeNum = 3


# Defining the content-frame
page.10 = TEXT
page.10.value = The page-frame

# Defining the menu-frame
menu.10 = TEXT
menu.10.value = The menu-frame

# Defining the top-frame
top.10 = TEXT
top.10.value = The top-frame
When you hit the frontend, you should be able to verify the existance of the three new PAGE-objects we've created. Try the type-values 1, 2 and 3!
Please take a quick look at the PAGE-object found in the TypoScript reference at this point. Browse through the various properties of the object. You'll be using this in a minute.
Now we're ready to put these three page-objects into a frame each.
Framesets
A frameset is actually a page. So add this to your template:
outer_frameset = PAGE
outer_frameset.typeNum = 0
Looking in the TypoScript reference we see that PAGE-objects has a property, "frameSet", that makes the page a frameset and not an ordinary page. We also learn, that the property "frameSet" is actually the FRAMESET-object (indicated by "->FRAMESET"). Go to that object in the reference.

We're in luck - there's a little example there! We might use that for a test (after a little adaption):
# Defining the outer frameset
outer_frameset.frameSet.rows = 150,*
outer_frameset.frameSet.params = border="0" framespacing="0" frameborder="NO"
outer_frameset.frameSet {
  1 = FRAME
  1.obj = top
  1.params = scrolling="NO" noresize frameborder="NO" marginwidth="0" marginheight="0"
  2 = FRAME
  2.obj = page
  2.params = scrolling="AUTO" noresize frameborder="NO"
}
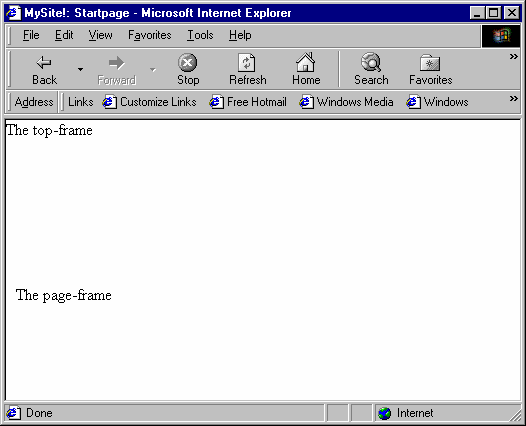
... and this is what we get:
So, looking at the FRAMESET object in the TypoScript reference reveals for us, that the datatype of the array "1,2,3,..." of the ".frameSet"-property is "frameObj". Datatypes... hmm... a few pages back, there's a helpfull list: "frameObj" means you can define these numerical properties of the FRAMESET to be either... FRAMESET or FRAME.

Looking at the example from the TypoScript reference - the example we just tried - we see that the two objects, 1 and 2 was defined to be FRAME-objects. Apparently they are further defined to contain the "top" and "page" PAGE-objects. (See above and in the TypoScript reference under FRAME).
According to the frameset we're going to implement, there's supposed to be a nested frameset, so we need one of these objects to be a frameset and not a frame. This is done like this:
# Defining the outer frameset
outer_frameset.frameSet.rows = 150,*
outer_frameset.frameSet.params = border="0" framespacing="0" frameborder="NO"
outer_frameset.frameSet {
  1 = FRAME
  1.obj = top
  1.params = scrolling="NO" noresize frameborder="NO" marginwidth="0" marginheight="0"
  2 = FRAMESET
  2.cols = 170, *
  2 {
    1 = FRAME
    1.obj = menu
    2 = FRAME
    2.obj = page
  }
}
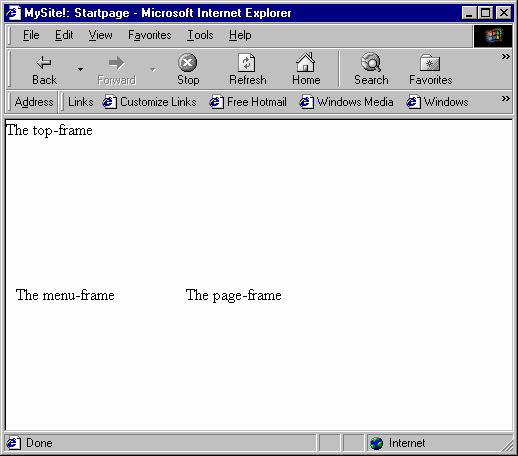
... and we get this:
That's it. The only thing we need now is to add the other parameters of the original HTML-code frameset:
HTML:
<FRAMESET rows="85,*" framespacing="0" bordercolor="#FFFFFF" frameborder="O" border="0">
        <FRAME name="Top" src="top.html" frameborder="0" noresize marginheight="0" border="0" scrolling="NO">
        <FRAMESET cols="170,*" framespacing="0" bordercolor="#FFFFFF" frameborder="0" border="0" marginheight="0" border="0">
                <FRAME name="Menu" src="menu.html" frameborder="0" noresize marginheight="0" border="0" scrolling="NO">
                <FRAME name="Main" src="content.html" frameborder="0" marginheight="0" border="0" scrolling="AUTO">
        </FRAMESET>
</FRAMESET>
TypoScript:
outer_frameset.frameSet.rows = 85,*
outer_frameset.frameSet.params = framespacing="0" bordercolor="#FFFFFF" frameborder="O" border="0"
outer_frameset.frameSet {
  1 = FRAME
  1.obj = top
  1.params = frameborder="0" noresize marginheight="0" border="0" scrolling="NO"
  2 = FRAMESET
  2.params = framespacing="0" bordercolor="#FFFFFF" frameborder="0" border="0" marginheight="0" border="0"
  2.cols = 170, *
  2 {
    1 = FRAME
    1.obj = menu
    1.params = frameborder="0" noresize marginheight="0" border="0" scrolling="NO"
    2 = FRAME
    2.obj = page
    2.params = frameborder="0" marginheight="0" border="0" scrolling="AUTO"
  }
}
Looking in the HTML source-code of the Typo3 frameset, we see this:
<FRAMESET rows="85,*" framespacing="0" bordercolor="#FFFFFF" frameborder="O" border="0">
<FRAME src="index.php?id=1&type=3" name="top" frameborder="0" noresize marginheight="0" border="0" scrolling="NO">
<FRAMESET cols="170, *" framespacing="0" bordercolor="#FFFFFF" frameborder="0" border="0" marginheight="0" border="0">
<FRAME src="index.php?id=1&type=2" name="menu" frameborder="0" noresize marginheight="0" border="0" scrolling="NO">
<FRAME src="index.php?id=1&type=1" name="page" frameborder="0" marginheight="0" border="0" scrolling="AUTO">
</FRAMESET>
</FRAMESET>
<noframes>
<body bgcolor="#FFFFFF">


</body>
</noframes></html>
Notice how Typo3 automatically inserted the correct references to the "different pages" of the same id.
Why this way?
You may ask, why it's done in this way. Why not let a static html- document be the frameset to include the Typo3-pages?
Well, there's one very important reason. Doing framesets this way lets you create links to any given page on your Typo3 site being certain that the frameset will generate nicely around! Said in another way: If you go to this page: "index.php?id=1" or "...id=2" og "id=2384" you will always get the correct page with any frameset rendered around it (as opposed to getting just the content-page in the content-frame!). If you let "index.html" be your frameset, you could never link from outside to a certain page on your site, because "index.html" will always start up with the frontpage and menu.
Well, if you didn't get it, never mind. It's a great advantage, just remember that!
The "top"-, "content"- and "menu" PAGE-objects
Because this matter is discussed in the previous tutorials, I'll just bypass them here and provide you with the TypoScript nescessary to make it work:
# *************************
# Defining the content-frame, "page"
# *************************

# Header code, stylesheet
page.headerData.10 = TEMPLATE
page.headerData.10 {
  template = FILE
  template.file = fileadmin/frames/content.html
  workOnSubpart = HEADER_CODE
}

# Bodytag
page.bodyTag = <BODY bgcolor="#ffffff" background="fileadmin/frames/background.gif"/>

# Page-content
page.10 = TEMPLATE
page.10 {
  template = FILE
  template.file = fileadmin/frames/content.html
  workOnSubpart = DOCUMENT_BODY
  subparts.CONTENT < styles.content.get
  subparts.PAGE_HEADER = TEXT
  subparts.PAGE_HEADER.field = title
}


# *************************
# Defining the top-frame, "top"
# *************************

# Header code, stylesheet
top.headerData.10 = TEMPLATE
top.headerData.10 {
  template = FILE
  template.file = fileadmin/frames/top.html
  workOnSubpart = HEADER_CODE
}

# Bodytag
top.bodyTag = <BODY bgcolor="#ffffff" leftmargin="0" topmargin="0">

# Page-content
top.10 = TEMPLATE
top.10 {
  template = FILE
  template.file = fileadmin/frames/top.html
  workOnSubpart = DOCUMENT_BODY
}

# *************************
# Defining the menu-frame, "menu"
# *************************

# Header code, stylesheet
menu.headerData.10 = TEMPLATE
menu.headerData.10 {
  template = FILE
  template.file = fileadmin/frames/menu.html
  workOnSubpart = HEADER_CODE
}

# Bodytag
menu.bodyTag = <BODY bgcolor="#ffffff">

# Page-content
menu.10 = TEMPLATE
menu.10 {
  template = FILE
  template.file = fileadmin/frames/menu.html
  workOnSubpart = DOCUMENT_BODY
}
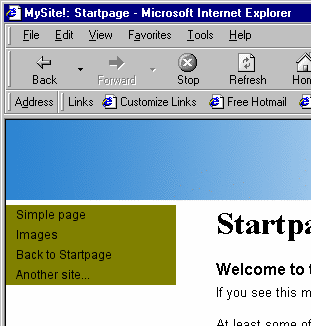
This should look like this:

The graphical menu
This series of tutorials has aimed to do as much as possible without TypoScript, using TypoScript only to setup the most basic things of a site. You don't nescessarily have to include HTML-documents in order to create sites. Everything can be done internally.
Apart from the complex rendering of the page-content there is another kind of element, which demands TypoScript. That is dynamic menus!
The last challenge is the graphical menu. This is done with a cObject (contentObject) called HMENU. This means Hierarchical Menu. When you initialize a HMENU, you can choose the number of levels of your menu. You can also choose if it's being based on HTML-text or gif-images.
In the first tutorial we made a TEXT-based menu. In this case we're going to make it graphical:
First of all, add this (the red stuff) to the TypoScript template record (in the "menu"-section):
# Page-content
menu.10 = TEMPLATE
menu.10 {
  template = FILE
  template.file = fileadmin/frames/menu.html
  workOnSubpart = DOCUMENT_BODY
  subparts.MENU_ITEMS = HMENU
  subparts.MENU_ITEMS {


  }
}
This makes the four dummy-menuitems disappear. We're going to generate them by ourselves!
Looking in the TypoScript reference under "HMENU", you'll see that you need to define a "menuObj" in order to get anything that makes sense out of it.
Modify the template like this (the red lines are changed):
# Page-content
menu.10 = TEMPLATE
menu.10 {
  template = FILE
  template.file = fileadmin/frames/menu.html
  workOnSubpart = DOCUMENT_BODY
  subparts.MENU_ITEMS = HMENU
  subparts.MENU_ITEMS.1 = GMENU
  subparts.MENU_ITEMS.1.NO {
    XY = 200,20
    backColor = olive
    10 = TEXT
    10.text.field = title
    10.offset = 10,13
  }
}
... and you'll see this:
This is what has happend:
The first "menuObj" of HMENU is defined as a "GMENU" (look it up in the reference now!). The GMENU-object has a handfull of properties that denotes various states of a menu-item. Examples are "NO", "RO", "ACT"...
"NO" means "normal" while "RO" means "RollOver". We shall see the effect of that lateron. But for now we define the default ("NO") look of the menuitems by setting up the GIFBUILDER-object (look it up!) for "NO".
The GIFBUILDER-object is very common in Typo3. It's also quite powerfull, so you might want to study it. But anyways, the key to doing anything with a GIFBUILDER-object is to define the size of the resulting gif-file (or PNG-file, if the PNG-option is set in order to produce PNG-file whereever Typo3 normally produces GIF-files).
The size is set to 200x20 pixels and the background color is set to "olive" (HTML-name).
The next is a GIFBUILDER-OBJECT, "TEXT" positioned at position 10 in the GIFBUILDER-OBJECT array. The "TEXT"-object has a .text-property, which has stdWrap-propeties, which in turn lets us "import" the title- field of the current menu-item! Also we see the offsetof the text, so that it doesn't render outside the visible area of the image.
Background image
We don't like the olive colored background and want to put the original giffile behind instead. This is done very easily by setting another GIFBUILDER-OBJECT, "IMAGE" before the "TEXT"-object at position 10.
Add these lines:
subparts.MENU_ITEMS = HMENU
subparts.MENU_ITEMS.1 = GMENU
subparts.MENU_ITEMS.1.NO {
  XY = 200,20
  backColor = olive
  5 = IMAGE
  5.file = fileadmin/frames/menuback.gif
  10 = TEXT
  10.text.field = title
  10.offset = 10,13
}

Almost good enough. But actually we would like the gif-file to have the exact same dimensions as the giffile, we just put in the background.
We could correct the value of "XY = " directly, but another option is to let Typo3 obtain the value from the current "IMAGE" object! So modify your template like this:
subparts.MENU_ITEMS = HMENU
subparts.MENU_ITEMS.1 = GMENU
subparts.MENU_ITEMS.1.NO {
  XY = [5.w],[5.h]
  backColor = olive
  5 = IMAGE
  5.file = fileadmin/frames/menuback.gif
  10 = TEXT
  10.text.field = title
  10.offset = 10,13
}
Thus Typo3 inserts the width and height of the GIFBUILDER-OBJECT 5 (the image) as the dimensions!
Finally, we would like to change the color and size of the text, use another fontface, set the pagetitles with uppercase and change the offset a little.
Also it's important to set the target of the GMENU. It's set to the name of the PAGE-object (which is always the name of the frame!) to which we want to links to open new pages.
subparts.MENU_ITEMS = HMENU
subparts.MENU_ITEMS.1 = GMENU
subparts.MENU_ITEMS.1.target = page
subparts.MENU_ITEMS.1.NO {
  XY = [5.w],[5.h]
  5 = IMAGE
  5.file = fileadmin/frames/menuback.gif
  10 = TEXT
  10.text.field = title
  10.text.case = upper
  10.offset = 12,12
  10.fontColor = white
  10.fontFile = t3lib/fonts/verdana.ttf
  10.fontSize = 11
}
... and this is what you get:
No-frames version
If you would like the site to be viewed by old noframes-browser, you can easily do this (or if could be browsers for visually impaired or alike).
Try to add this to the bottom of your template-record:
# *************************
# Defining how the site should look with NO frames
# *************************

noframes = PAGE
noframes.typeNum = 0

# Header code, stylesheet
noframes.headerData.10 = TEMPLATE
noframes.headerData.10 {
  template = FILE
  template.file = fileadmin/frames/content.html
  workOnSubpart = HEADER_CODE
}

# Bodytag
noframes.bodyTag = <BODY bgcolor="#ffffff" background="fileadmin/frames/background.gif"/>
noframes.bodyTagMargins = 0

# Page-content
noframes.10 = TEMPLATE
noframes.10 {
  template = FILE
  template.file = fileadmin/frames/noframes.html
  workOnSubpart = DOCUMENT_BODY
  marks.TOP < top.10
  marks.CONTENT < page.10
  marks.MENU < menu.10
  marks.MENU.subparts.MENU_ITEMS.1.target = _top
}
See how it looks... The whole site looks like before, but is now set up in a table instead of frames! What happend?
This is what happend. Notice the blue lines in the code above:
First of all, a new PAGE-object is defined ("noframes") and it certainly takes the position of being the default type-number! That's why the whole site is now generated in this manner! As you can see much of the setup for this "noframes" PAGE-object resembles that of the other pages. But the header-content comes from "fileadmin/frames/content.html". In this case I just figured that the stylesheet from this page would be good enough.
Later you see how "bodyTagMargins" is set to zero in order to eliminate whitespace borders on the top-left corner of the page.
And finally three markers ###TOP###, ###CONTENT### and ###MENU### in the template is substituted with the content of... the original page- objects. Done by copying the TEMPLATE-cObjects "top.10", "page.10" and "menu.10" from above. (See the TypoScript manual for syntax of TypoScript here!)
But one thing is missing. Now that we're not working with frames the target of the menu has to be changed around. Before we set the target to "page" for the links to open content in the content-frame. Now we need the target to be "_top". Or nothing. This is done by substituting the original value with a new one in this line:
marks.MENU.subparts.MENU_ITEMS.1.target = _top
Notice how the exact "location" of the property "target" of the menu is reached based on the location from the menu PAGE-object!!
Working with both frames and no-frames.
As it is now, the site is without frames. We want to combine it!
This is done by introducing a variable, "noframes", which can be set from the URL of the site. We would like this scenario:
index.php?id=xxx to go to the frames-version
index.php?id=xxx&noframes=1 to go to the noframes-version
This can be done by conditions in TypoScript. (See the reference for the complete list of conditions.)
If you put this before the no-frames setup, it'll make your dreams come true:
[globalString= noframes=1]

# *************************
# Defining how the site should look with NO frames
# *************************
........


  marks.TOP < top.10
  marks.CONTENT < page.10
  marks.MENU < menu.10
  marks.MENU.subparts.MENU_ITEMS.1.target = _top
}

[global]
(Technically you should add the [global]-condition in the bottom, because it resets the TypoScript parser to include anything after this no matter what. Because you inserted the "noframes"-definition in the end of the template-record, it makes no difference in this case, though.)
"index.php?id=1&noframes=1" should work now. But one thing is still missing. When you click the menu, you'll see that the site reverts to the frames-based version. That's because the variable "noframes" should be registeret with Typo3 as a "linkVar" which means that it's passed on with all Typo3-generated links.
So add this:
noframes.config.linkVars = noframes
When looking at the links from the menu, you'll notice that the variable "&noframes=1" is included as a parameter in the link to the page. Thus the framesversion will work all the way through.
Design tips
You can easily substitute the documents in this tutorial with your own. You should also have gain enough experience to create variations of this template and operate very freely with the mix of HTML- templates and TypoScript.
One thing to keep in mind when you're designing your HTML-documents for later implementation with Typo3 is that all your external mediafiles - images, sound, stylesheets and so on - should be put into a folder "underneath" the folder in which you html-file is. And this folder should be named "fileadmin" in order for Typo3 to be able to reach it.
Example:
If you're creating a new site in the folder "new_site" on your local harddrive, put index.html into this folder, but create another folder, "fileadmin" and inside of this yet another folder "images" (or something else) into which you put all your images.
That makes the filestructure look like this, eg:
new_site/index.html
new_site/fileadmin/newsite_resources/test.jpg
new_site/fileadmin/newsite_resources/test2.jpg
When you move on to Typo3 implementation, you make a copy of "new_site/index.html" to "new_site/fileadmin/newsite_resources/index.html" and copy the whole folder "newsite_resources/" to the existing "fileadmin/" folder on the Typo3 webserver.
When you use the file "index.html" as an HTML-template (like shown in this tutorial) all references to external files will thus be intact. This is the case because the file "index.html" in included by the index.php-script, which is positioned in the root of the site. Therefore the references to the folder "fileadmin/newsite_resources/" are correct.
 Tutorial: Frames with Typo3 - 16