DEPRECATION WARNING
This documentation is not using the current rendering mechanism and is probably outdated. The extension maintainer should switch to the new system. Details on how to use the rendering mechanism can be found here.
Installation
Download or import the Grid Elements extension
First you should download the extension either as a T3X file, that you can import with the Extension Manager, or directly from the TER by using the repository import features of the Extension Manager.
Install the Grid Elements extension
After download and/or import have been completed, you have to install Grid Elements with the Extension Manager to make use of it. There are no dependencies, so you should be able to do so without problems. The only extension, that will have conflicts, is TemplaVoila, since it uses some of the hooks used by Grid Elements as well. You can still install Grid Elements by ignoring the warning of the Extension Manager though, so advanced users might have both extension active while migrating from one to the other. But TemplaVoila features will be disabled then.
When the Extension Manager is asking you for permission to add and/or modify some of the database tables, you should give your OK, so the necessary fields will be available.
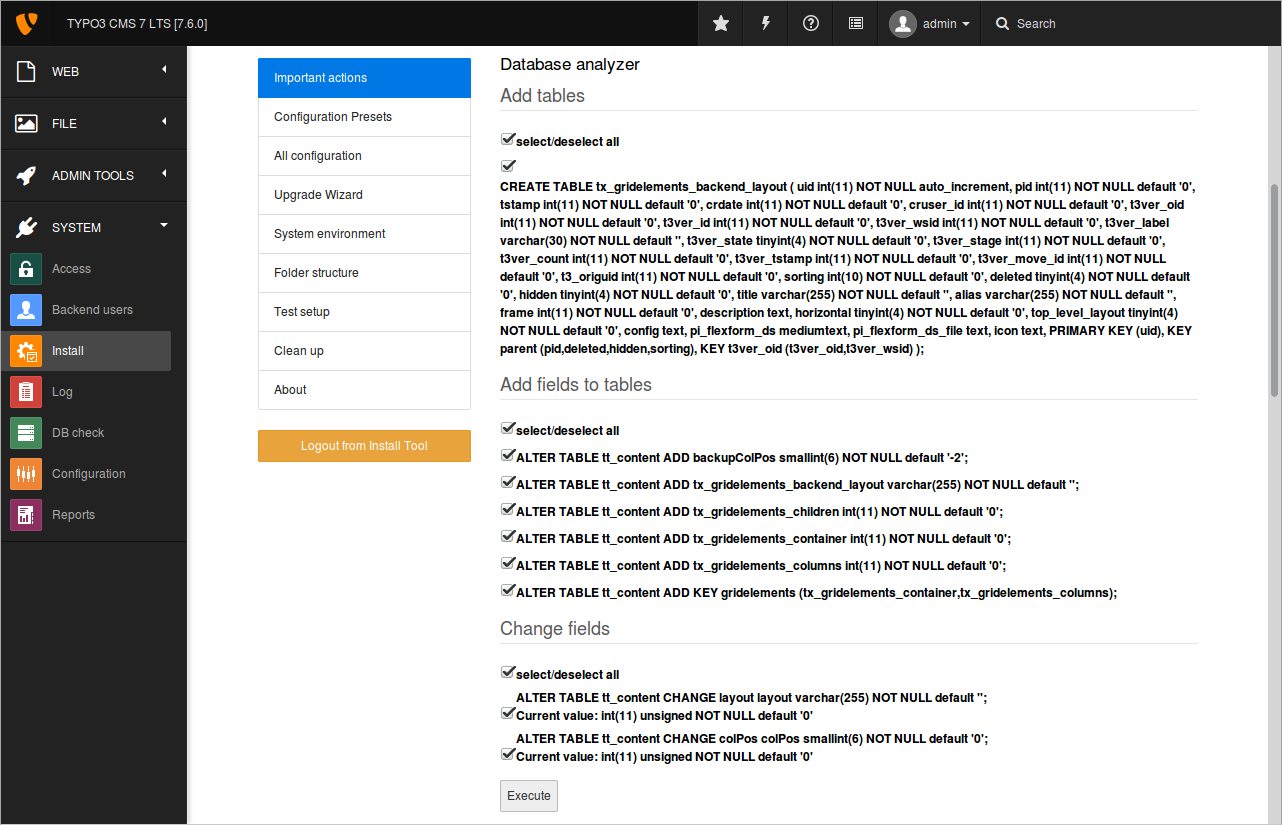
Important Note : The colPos field of the tt_content table will be changed from unsigned int(3) to smallint(6) to enable the usage of negative values. This should never be reverted by any upgrade script later on! Otherwise any child element will be moved from it’s parent container to the default page column. Some people ran into problems during automatic upgrades done by their providers. So be sure to make a backup of your content before upgrading!
Include static template(s)
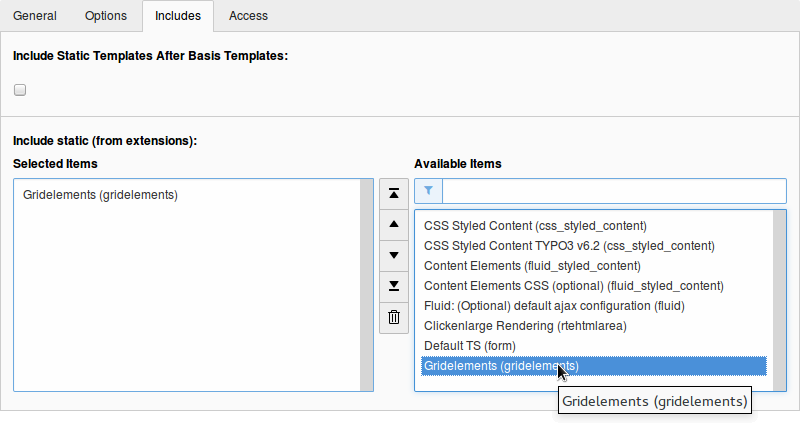
In most of the cases you want a working frontend output as well. So you should go to the Template module, edit your main TypoScript template record and include the static template there. This will be providing the basic TypoScript setup for the Grid Elements frontend plugin. You will find it in the select box at the Include static (from extensions) section of the Includes tab. Currently there is only one static template gridelements(gridelements) available. There might be more in future releases.
Create some CE backend layouts
To make use of any backend layout within content elements you have to create some CE backend layout records first. The process is similar to the one you might already know from the page backend layouts provided by the TYPO3 core. Switch to the list module and select the page, that you want to use as the container for your backend layouts
- If you are using a so called General Record Storage Page , i.e. for tt_news , you must place your backend layouts there as well. And since you can define a storage page for your backend layout records by TSconfig , you should select the page you have defined there, if any.
- Click on the Create new record button and select CE backend layout in the Grid Elements section.
- Give your element a title and description, upload an icon to be used in the layout selector box later on and select one of the available colors if you want to use a colored frame for your grid.
- If you want the children of the Grid container to appear side by side (i.e. to create a tab container or a twitter bootstrap row), you can activate the checkbox.
- Now you can either manually enter the TypoScript setup for your layout, or have it created with the Grid Wizard. Go to the appropriate chapters to find out how to do so.
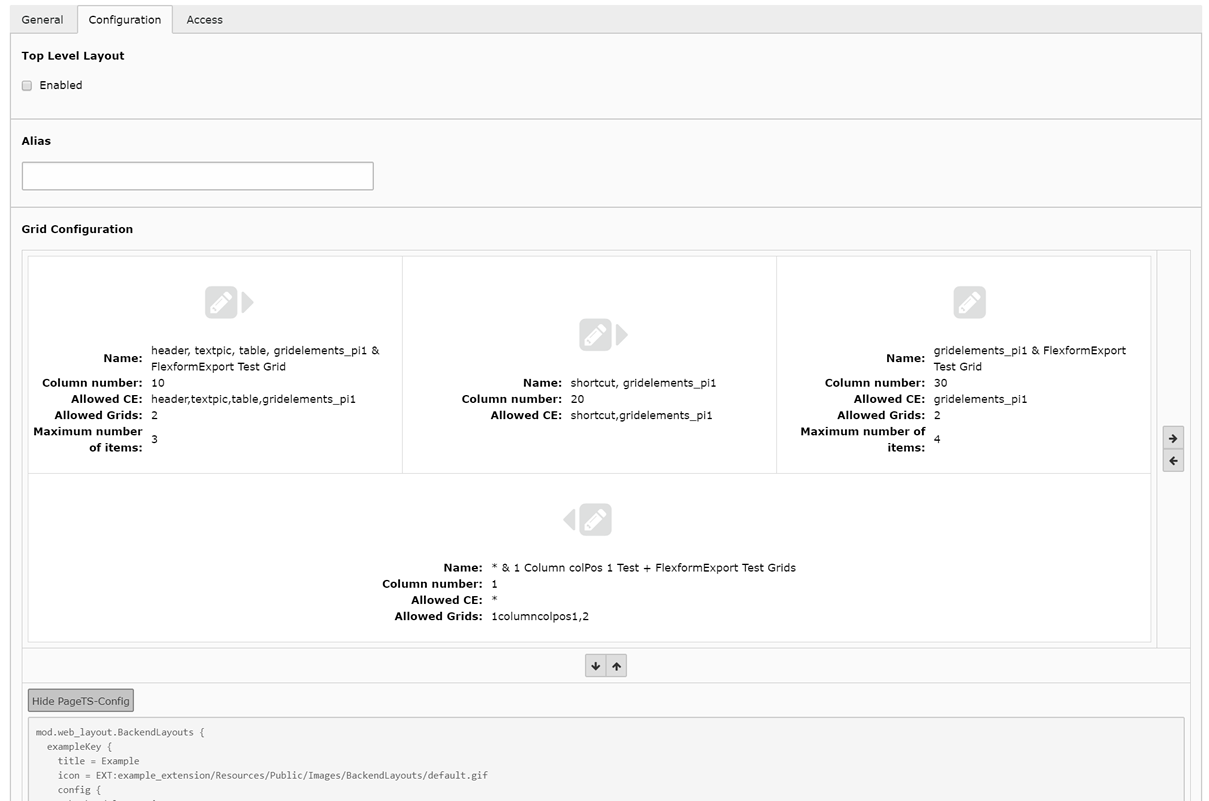
- If necessary you can fill in a flexform datastructure to provide additional settings within your grid element. Values of these flexforms will be available within the data set of the Grid Element during frontend output later on. Go to the Flexform chapter to find out how to do that.
Now save the record and create some more layouts if you like. If you want to use file based configuration for your CE backend layouts instead you can still use the wizard to generate the necessary configuration.
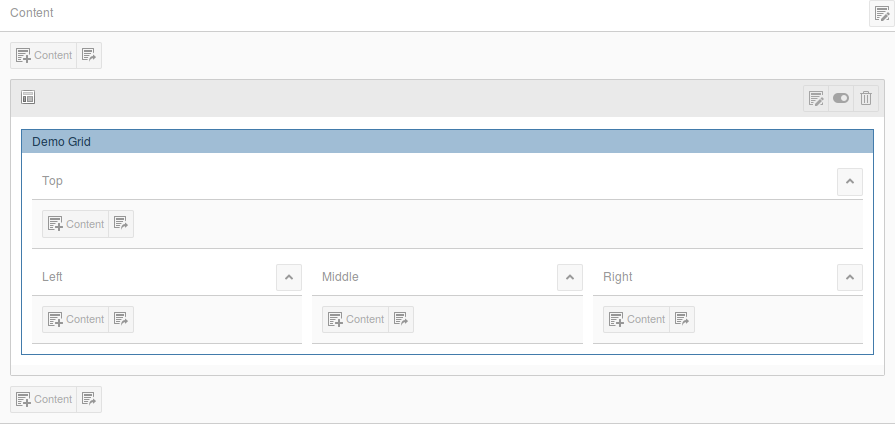
Create new Grid Elements
Now that you have some CE backend layouts available, you can easily use them to create new grid elements. There is a feature called New Content Element Wizard Overlay . So go to the page module now and activate it by clicking on the Create new record button on top of the module. Now you can drag any kind of content element from this wizard into any of the visible and active columns of the current page. Select one of the available Grid Elements and while you drag it, some highlighted drop zones will appear to let you drop it into the desired column. After a few seconds the spinner symbol will disappear and show your newly created grid element. Drag in as many elements as necessary for the desired page layout.
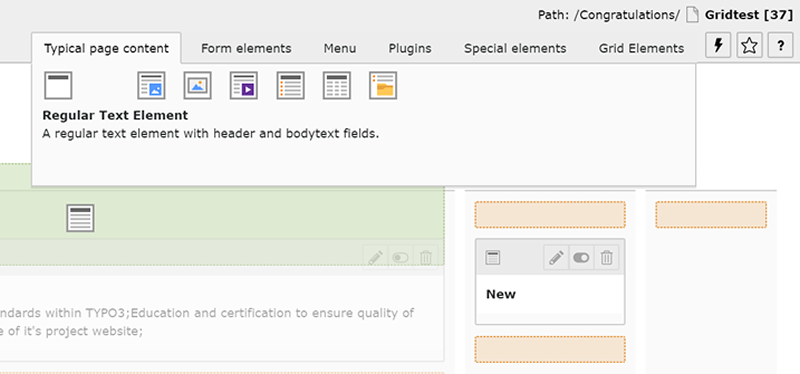
Note: Of course you can drag elements into the columns of a Grid Element as well, as soon as you got at least one of them on your page. So nesting can be done with the drag in wizard within just a few seconds as well.
Change existing elements into Grid Elements
If you want to change existing elements into Grid Elements you can do so in the content editing form. Just edit the desired content element and change the type to Grid Element . The editing form will change and show you the appropriate fields. Go to the Grid Layout section of the General tab and select one of the backend layouts you have created before. Now save the record and close, and you should see the new Grid Element in your page module.

Fill your grid with content elements
Now that you have created all the necessary grids you can fill them with content elements. You can either use the same drag in wizard as you have been using while creating the grids, or you can use the “ Create new record on top of this column ” button to add new content elements without dragging. Of course you can copy and/or move existing elements into the columns of your newly created grids and even creating references to elements in the clipboard is possible.
Include your own TypoScript
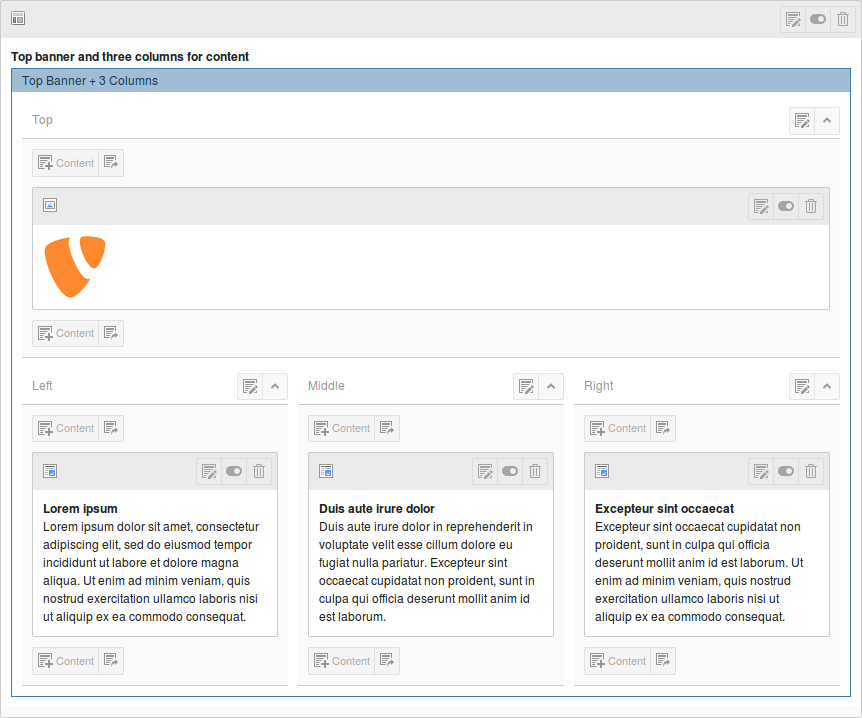
The default template of the plugin will just provide the most basic functionality. It will create the content of any column within a grid container as a serialized chain of child elements. So each of the children will be put into a div container, that will again be put into a div container of the column it has been taken from, that will finally be put into a div container of the parent Grid Element. If you want to provide more sophisticated stuff, go to the TypoScript section of this manual and see what is possible.