DEPRECATION WARNING
This documentation is not using the current rendering mechanism and is probably outdated. The extension maintainer should switch to the new system. Details on how to use the rendering mechanism can be found here.
EXT: Image tooltips
| Author: | Alexander Stehlik |
|---|---|
| Created: | 2012-09-20T15:45:40 |
| Changed by: | Alexander Stehlik |
| Changed: | 2013-11-06T22:37:04 |
| Classification: | imagetooltips |
| Keywords: | forEditors, forAdmins, forBeginners, forIntermediates |
| Author: | Alexander Stehlik |
| Email: | alexander.stehlik.deleteme@gmail.com |
| Language: | en |

 EXT: Image tooltips
Extension Key: imagetooltips
Language: en
Version: 0.1.0
Keywords: forEditors, forAdmins, forBeginners, forIntermediates
Copyright 2017, Alexander Stehlik, <alexander.stehlik.deleteme@gmail.com>
This document is published under the Open Content License
available from http://www.opencontent.org/opl.shtml
The content of this document is related to TYPO3
- a GNU/GPL CMS/Framework available from www.typo3.org
Table of Contents
`EXT: Image tooltips 1 <#__RefHeading__5708_1738894311>`_
`Introduction 3 <#__RefHeading__5710_1738894311>`_
`Users manual 4 <#__RefHeading__467_413120346>`_
`Configuration 6 <#__RefHeading__31515_818911409>`_
`Known problems 7 <#__RefHeading__31525_818911409>`_
`To-Do list 8 <#__RefHeading__477_413120346>`_
`ChangeLog 9 <#__RefHeading__31623_818911409>`_
Introduction
What does it do?
This extension gives content editors the possibility to add tooltips to content images.
By default it comes with an implementation for the jQuery TOOLS tooltips but since it basically only renders a container with the tooltip text after the image you could also use your own code or a different library.
It comes with some example configuration and example CSS styles.
Screenshots
This is how the extension might look in the Frontend. The tooltip styles you see here are delivered with the extension:
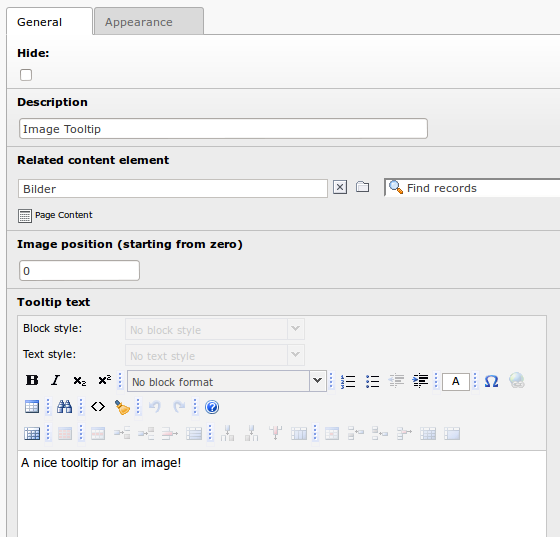
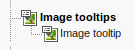
 These are screenshots of the Backend form for editing tooltips:
 Users manual
------------
Users manual
------------
To use the extension you need to install it in the extension manager.
Tooltip rendering
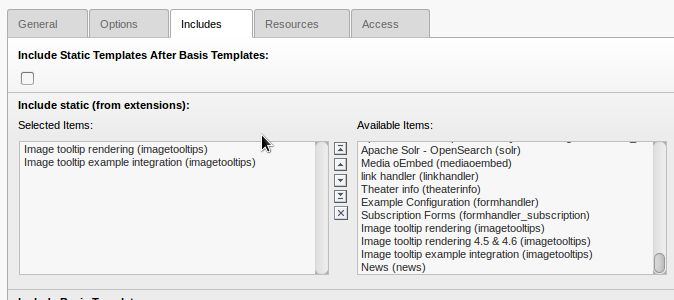
To enable the rendering of the tooltip containers you need to add the static templates of the extension to your template.
Depending on which version of css_styled_content you are using you need to use “Image tooltip rendering” for TYPO3 4.7+ or “Image tooltip rendering 4.5 & 4.6” for TYPO3 version 4.5 or 4.6.
If you want to use the example configuration & styles you can also add the “Image tooltip example integration” template:
 Manual integration
^^^^^^^^^^^^^^^^^^
Manual integration
^^^^^^^^^^^^^^^^^^
If you are not using the example configuration you need to fulfill these perquisites for the tooltips to work:
You need to add the jQuery and jQuery TOOLS libraries to your page
You need to add the JavaScript file in the extension folder to your page or copy the code from this file in a JavaScript file you are including:Resources/Public/JavaScript/TooltipInitialization.js
You need to add CSS styles for the tooltips to your page. You can use the styles provided in the extension folder as a basis: Resources/Public/Css/Example.css
Using the t3jquery extension
If you do not want to include all required JavaScript libraries manually you can use the t3jquery extension .
Hints!Do NOTinclude the example configuration but include the CSS styles to your page (or use your own):
page.includeCSS.tx-imagetooltips = EXT:imagetooltips/Resources/Public/Css/Example.css
You still need to include the “Image tooltip rendering” template though!
You also need to activate the required jQuery libraries in the t3jquery Backend Module:
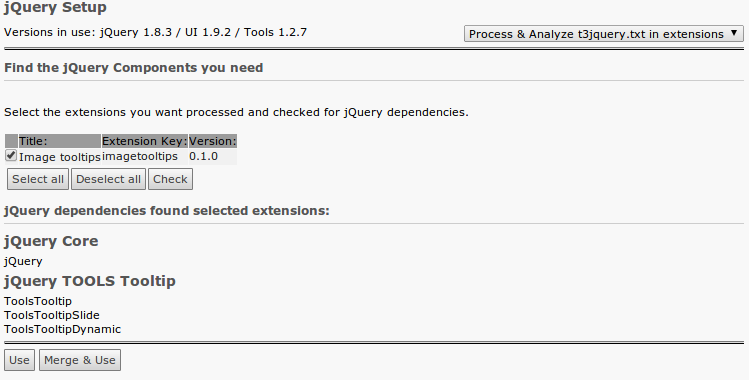 Use the ”Process & Analyze t3jquery.txt in extensions“ tool. There you
need to select the imagetooltipsextension, press “Check” and then
press “Merge and Use”.
Use the ”Process & Analyze t3jquery.txt in extensions“ tool. There you
need to select the imagetooltipsextension, press “Check” and then
press “Merge and Use”.
Finally you need to enable the usage of t3jquery with a constant:
plugin.imagetooltips.t3jquery.enable = 1
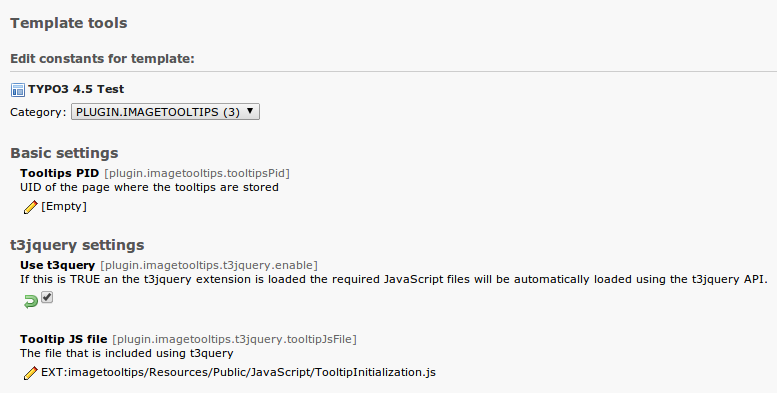
Of course you can also use the constant editor to do this:
 Adding tooltips
^^^^^^^^^^^^^^^
Adding tooltips
^^^^^^^^^^^^^^^
You can create tooltips in the Backend by adding a new record. The most convenient way is to add the tooltip record in the page where you want it to be displayed.
 Here is a short explanation of the fields that are available in the
tooltip records:
Here is a short explanation of the fields that are available in the
tooltip records:
Hide
Field
Hide
Description
With this checkbox you can disable a tooltip
Description
Field
Description
Description
This is only used internally and let's you describe your tooltip to make it easier for you to recognize it later
Image position
Field
Image position
Description
An image content element can have multiple images. In this field you specify for which image the tooltip will be displayed. The numbers are starting from zero for the first image, 1 for the second and so on.
Tooltip text
Field
Tooltip text
Description
The text that will be shown as tooltip for the specified image
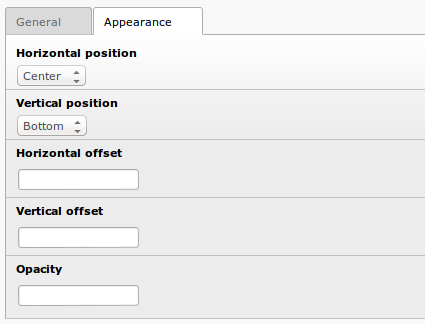
Horizontal position
Field
Horizontal position
Description
Horizontal position of the Tooltip relative to the related content element.
Vertical position
Field
Vertical position
Description
Vertical position of the Tooltip relative to the related content element
Horizontal offset
Field
Horizontal offset
Description
Offset of Tooltips in horizontal direction in pixels, seen from the position chosen above (may be negative, default zero).
Vertical offset
Field
Vertical offset
Description
Offset of Tooltips in vertical direction in pixels, seen from the position chosen above (may be negative, default zero).
Opacity
Field
Opacity
Description
Opacity of Tooltip in % (0 .. 100 allowed, default 100)
Configuration
The Extension can be configured with various TypoScript constants within the plugin.imagetooltipsnamespace:
tooltipsPid
Property
tooltipsPid
Data type
int
Description
When you want to store your imagetooltips in a central folder and not in the page where the tooltip should be displayed you can set this contant to the UID of the page where the tooltips are stored.
Default
0
appearance.positionX
Property
appearance.positionX
Data type
string
Description
Default horizontal position of the tooltips relative to their related content element. Possible values are:
left, centerand right.This default value can be overwritten for each individual tooltip in the tooltip properties.
Default
center
appearance.positionY
Property
appearance.positionY
Data type
Description
Default vertical position of the tooltips relative to their related content element. Possible values are:top, centerand bottomThis default value can be overwritten for each individual tooltip in the tooltip properties.
Default
top
appearance.offsetX
Property
appearance.offsetX
Data type
int
Description
Default horizontal offset of the tooltips. The value can be positive or negative.
This default value can be overwritten for each individual tooltip in the tooltip properties.
Default
0
appearance.offsetY
Property
appearance.offsetY
Data type
Description
Default vertical offset of the tooltips. The value can be positive or negative.
This default value can be overwritten for each individual tooltip in the tooltip properties.
Default
0
appearance.opacity
Property
appearance.opacity
Data type
Description
Default opacity of the tooltips. The value must be between 0 and 100.
This default value can be overwritten for each individual tooltip in the tooltip properties.
Default
100
t3jquery.enable
Property
t3jquery.enable
Data type
boolean
Description
If t3jquery is installed and you set this to 1 (TRUE) the required JavaScript libraries will be loaded using the t3jquery API.
Default
0
t3jquery.tooltipJsFile
Property
t3jquery.tooltipJsFile
Data type
string
Description
The JavaScript file that should be included using t3jquery. If you want to use your own JavaScript file to initialize the tooltips simply put the path to your file in here.
Default
Known problems
Please be aware that this is a very young and notheavily tested extension. The there might be problems not yet detected. Testing and reporting problems is highly appreciated.
To-Do list
You and find the roadmap in the forge project of this extension .
ChangeLog
You and find the change log in the forge project of this extension .