Contentelements
After installing Mask and including the static TypoScript template, you can start using Mask. Open the Backend-module Mask. Create your first contentelement by clicking the new-icon. On the following page you have two mandatory fields:
- Title: enter the title for this contentelement. It is seen by the editor on creating a new content element.
- Element-key (unique, lowercase): your element needs an elementkey. This key is used internally and is not seen by the editor. It must be uniqe in the whole installation and in lowercase letters. The key is used in the database and as filename for the HTML-template and the preview-image.
Then there are two further fields:
- Short Title: The Short Title is visible if you edit an element and open the selectbox for the content-type. If this field is empty, the title is used.
- Description: It would be good to add a description for the editors. It appears at the wizard for creating new content next to the title and the preview-image.
Now you can fill your element with different fields. Look at the page Fieldtypes for more information.
When ready, save your element. On first save, a HTML examplefile is generated and saved in the folder for your templates. See page Installation for more details. On a default installation you find it here: fileadmin/templates/content. Now you can edit the content of the file with your HTML- and Fluid-Tags. It will never be overwritten, even if you change the element in Mask. If you need some fluid example code for newly added fields, click the HTML icon in the Mask module.
You can set a bootstrap icon as preview image for your content elements. You can overwrite this, by placing a preview image in your preview image folder(Usually it is in: fileadmin/templates/preview.) Ideally this should be a screenshot of your element or a nice icon. The image will be shown in 1:1 size. So you should save the image with a maximum width of 150 pixel. Height doesn’t matter. The image also won’t be overwritten on editing the element.
That is all you have to know - now you can use your new element in the page-module.
Manage Backend-Preview
In the extensionmanager you find the setting Folder for Backend Preview Templates. If you want to change the look of the contentelements in the TYPO3 backend page-module, create the folder and a .html file with the key from the element as filename. It is the same logic as in content folder. So you can also copy your HTML from the content folder as basis. Then modify it for your needs.
Examplecode:
Name: {data.tx_mask_name}<br />
E-Mail: {data.tx_mask_email}<br />
Tel.: {data.tx_mask_telephone}<br />
Fax: {data.tx_mask_fax}<br />
Position: {data.tx_mask_position}
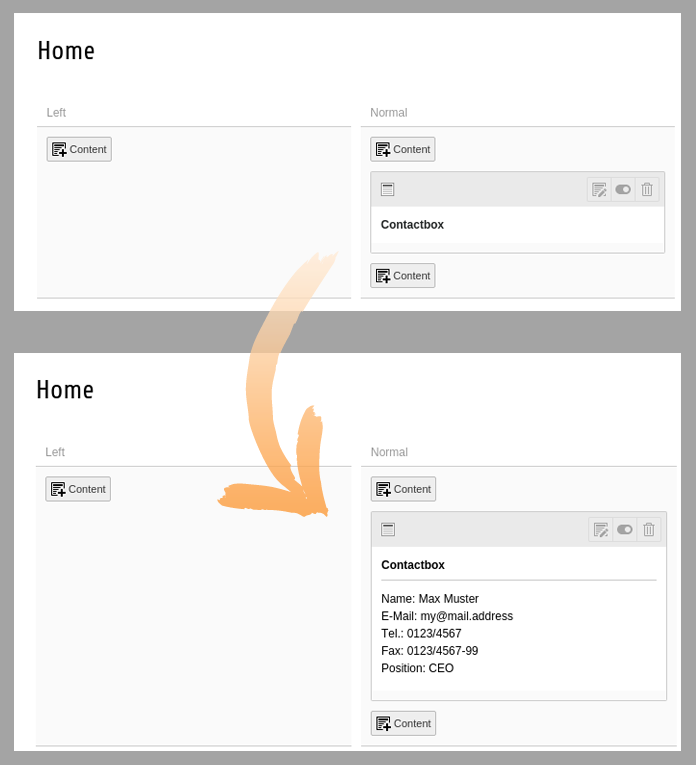
Default output and fitted preview
Use fontawesome icons as previewimage for a contentelement
If you quickly need a preview icon for your contentelement and don’t want to make a graphic, just choose a fontawesome iconcode and choose a colour:
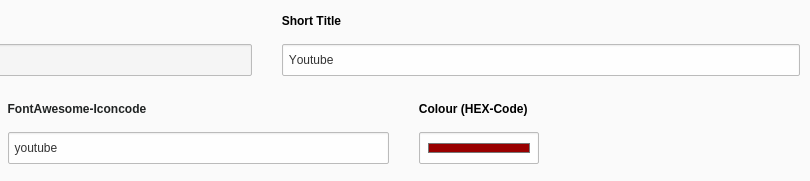
Put the code into the mask wizard
Here you find an overview about all possible icons and their codes: https://fortawesome.github.io/Font-Awesome/icons/
Use a png file as previewimage for a contentelement
You can use a 32x32 pixel sized png graphic file as preview image for a content element. It is shown in the new contentelement wizard. Simply name the file with the key from the contentelement (e.g.: mykey.png or contact.png) and upload it to the specified folder in the extension manager settings of mask.