DEPRECATION WARNING
This documentation is not using the current rendering mechanism and is probably outdated. The extension maintainer should switch to the new system. Details on how to use the rendering mechanism can be found here.
EXT: rgnewsimg
| Author: | Kasper Skårhøj |
|---|---|
| Created: | 2002-11-01T00:32:00 |
| Changed: | 2008-04-13T12:52:18 |
| Author: | Georg Ringer (just2b) |
| Email: | http://www.ringer.it |
| Info 3: | |
| Info 4: |
EXT: rgnewsimg
Extension Key: rgnewsimg
Copyright 2000-2002, Georg Ringer (just2b), <http://www.ringer.it>
This document is published under the Open Content License
available from http://www.opencontent.org/opl.shtml
The content of this document is related to TYPO3
- a GNU/GPL CMS/Framework available from www.typo3.com
Table of Contents
EXT: rgnewsimg 1
Introduction 1
What does it do? 1
Demo 1
Screenshots 2
Users manual 5
Install the Extension 5
Use the Extension 5
Administration 5
Modify the selection 5
Configuration 5
Templates 5
TypoScript 6
Reference 6
You like the extension? 7
Known problems 7
To-Do list 7
Changelog 7
Introduction
What does it do?
This extension allows to apply different design sets to the images of a single tt_news record. So you can split the images in 1 big image, 3 smaller images and display the remaining images as very small thumbnails.
Furthermore It is possible to switch the whole template including the whole TS you can apply to tt_news.
Please take a look at the demo & screenshots to get an impression of the extension!
Demo
Please take a look at the online demo at my website to get the best impression of this extension!
- in English: http://www.rggooglemap.com/en/dev/rgnewsimg.html
- in German: http://www.rggooglemap.com/dev/rgnewsimg.html
Screenshots
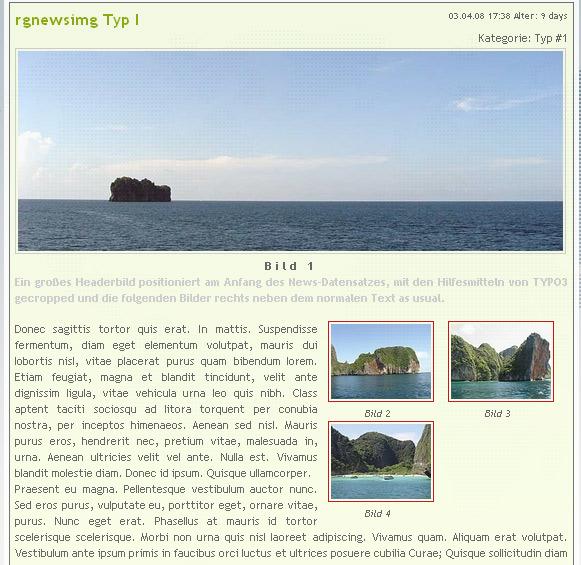
Image 1: A big headerimage and the usual small images
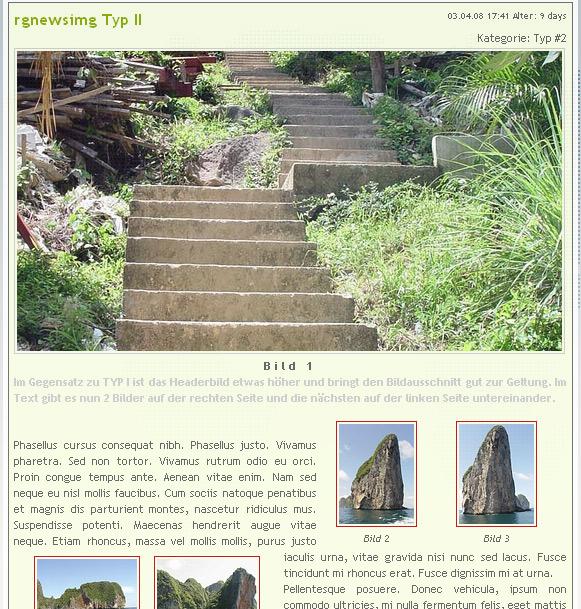
Image 2: A larger headerimage and 2 images at the right side and the rest at the left side.
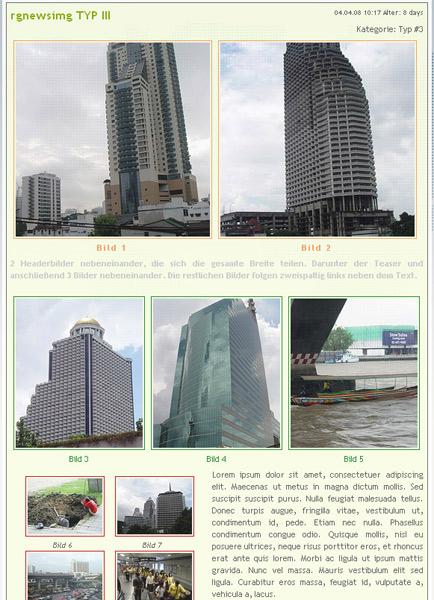
Image 3: 2 header images followed by 3 images in a row and the rest is at the left side next to the text
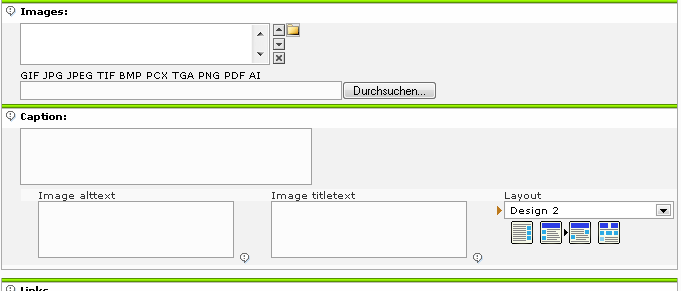
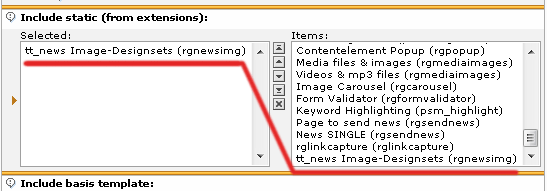
Image 4: Backend to choose the layout
Users manual
Install the Extension
Install the extension with the Extension Manager
Include the static TS (from extension) in the template record (your root TS or make an ext. template just for the page where you want the extension be displayed). **The steps for the real beginners are** :
Select your root/first page.
Click in the menu on the left side “Template” and choose “Edit whole record”.
Scroll down until you see the the same thing as in the screenshot shown.
Search for the “tt_news Image-Designsets” entry on the right side, click on it to get it on the left side.
Press “Save” and you are done.
Modify your news-templates. Basically you need new markers like ###NEWS_IMAGE_1###, ###NEWS_IMAGE_2###. For further information take a look at the chapter Configuration.
Use the Extension
After the installation you can just switch the Designsets in the news record and enjoy the results.
Administration
Modify the selection
It is very easy to modify the selection inside a tt_news record using the Page TsConfig!
Add a new item
The ID in this example is 10 and the text would be “New Designset”. If you want to add an image too, you need to create the entry in an ext_tables.php file because it is not possible with TsConfig.
TCEFORM.tt_news.tx_rgnewsimg_design.addItems.10 = New Designset
Remove an existimg item
This would remove the designsets 2 & 3
TCEFORM.tt_news.tx_rgnewsimg_design.removeItems = 2,3
Configuration
Templates
If you want to use this extension you need to set some additional markers in the single view subpart of tt_news. The markers are called ###NEWS_IMAGE_1###, ###NEWS_IMAGE_2###, ###NEWS_IMAGE_3### and so on. You need one marker for every image set.
Non-used markers won't be displayed in the frontend (just up to ###NEWS_IMAGE_10###).
TypoScript
There are already 3 demo design sets included with the extension. You can see all 3 at my website http://www.rggooglemap.com/dev/rgnewsimg.html
Get the design sets in TS
Do get the chosen design set with TS you need to use the included condition which needs to be included first (which is already done in the static TS.
# TS Code
includeLibs.rgnewsimg = EXT:rgnewsimg/condition.php
[userFunc = user_rgnewsimg(1)]
...
[global]
The '1' stands for the selected design set with the key 1. You can also set one condition for more designsets by using this syntax:
# TS Code
[userFunc = user_rgnewsimg(4,5,6)]
Override the TS of a design set
To override the settings of the given sets you just need to use a code like this (which would override the settings of the design set #2.
# TS Code
[userFunc = user_rgnewsimg(2)]
plugin.tt_news {
        rgnewsimg = 1
        rgnewsimg {
                split = 1,2,4

                image1 {
                        file {
                                width = 200c
                                height = 200c
                        }
                }
                image3WithCaption.wrap = <div class="news-set2-img3">|</div>
                image3AllWrap.wrap = <div class="news-set2-img3all">|</div>
        }

}
[global]
Styling with CSS
For more information
Please take a look at the ext/rgnewsimg/static/setup.txt if you want to know what all is set by default.
Reference
rgnewsimg
Property
rgnewsimg
Data type
boolean
Description
De-/Activate rgnewsimg
Default
rgnewsimg.split
Property
rgnewsimg.split
Data type
string
Description
According to this property the images will be splitted.
Examples:
# 1 image followed by 10
split = 1,10
# 2 images followed by 3 followed by 4
split = 2,3,4
Default
rgnewsimg.imageXAllWrap
Property
rgnewsimg.imageXAllWrap
Data type
stdWrap
Description
StdWrap for the complete image set. The X stands for the number of the imageset, e.g. image2AllWrap will be a stdWrap for the 2 nd image set.
Default
wrap = <div class="news-set1-img1all">|</div>
rgnewsimg.imageXWithCaption
Property
rgnewsimg.imageXWithCaption
Data type
stdWrap
Description
StdWrap for a single image including its caption.
Default
wrap = <div class="news-set1-img1">|</div>
rgnewsimg.imageX
Property
rgnewsimg.imageX
Data type
imgResource
Description
Modify all images of the image set X by using this property. Take a look at the TsRef how to do it.
Examples:
image2 {
       file {
               width = 100
               height = 100
       }
       imageLinkWrap = 1
       imageLinkWrap {
               enable = 1
               bodyTag = <body bgColor="#ffffff">
               wrap = <a href="javascript:close();"> | </a>
               width = 500m
               height = 500
               JSwindow = 1
               JSwindow.newWindow = 1
               JSwindow.expand = 17,20
       }

}
Default
[tsref:plugin.tt_news]
You like the extension?
I really had much work with this extension so if you like this extension, you can do one or more of the following things:
- Write me a mail or create a posting at http://www.rggooglemap.com/en//dev/rgnewsimg.html .
- Please rate the extension in the Repository: http://typo3.org/extensions/ search for rgnewsimg, click on the title and then at “Ratings” (You need to be registered and logged in at typo3.org)
- Donate something, so that I can write those kind of extensions for you. More information is here: German: http://www.rggooglemap.com/menu/spende.html and English: http://www.rggooglemap.com/en/2/donate.html . Thanks!
One of those things is the least you can do for getting all those great extensions completely for free!
Known problems
- Cropping can produce images with a bad quality. Check therefor this patch, it works e.g. on my website! http://bugs.typo3.org/view.php?id=4186
- Nothing that I know. Did I miss something?
To-Do list
Nothing planned. Did I miss something?
 EXT: rgnewsimg - 7