DEPRECATION WARNING
This documentation is not using the current rendering mechanism and is probably outdated. The extension maintainer should switch to the new system. Details on how to use the rendering mechanism can be found here.
| Created: | 2007-09-12T15:42:55 |
|---|---|
| Changed: | 2012-10-12T09:15:34.400000000 |
| Info 1: | |
| Info 2: | |
| Info 3: | |
| Info 4: |
EXT: Glossary extended
Extension Key: sg_glossary
Version >= 1.0.650
Copyright 2004-2012, Stefan Geith, <typo3devYYYY@geithware.de> e.g. typo3dev2012@geithware.de
This document is published under the Open Content License
available from http://www.opencontent.org/opl.shtml
The content of this document is related to TYPO3
- a GNU/GPL CMS/Framework available from www.typo3.com
Table of Contents
EXT: Glossary extended 1
Introduction 1
What does it do? 1
Screenshots 2
Tutorial 3
Hints on Updates from previous Versions 3
Basic Installation 3
Displaying Entries in Popup-Windows 5
Usage of Custom-Tag <LEX> 6
Enable FE-Editing 6
Configuration 8
Reference 8
To-Do list 9
Changelog 9
Introduction
What does it do?
sg_glossary is a frontend plugin that implements a glossary with these features:
- each entry can contain a list of images with imagecaptions
- each entry can contain a list of related entries, which is displayed as a list of links.
- the description of an entry can be shown within the main-window or as a popup-window
- includes custom tags like <LEX>searchentry</LEX> that will open the description in a popup-window
- popup-windows will close automatically when they loose focus (not, if FE-user with edit-permissions is logged in)
- you can define FE-users, who will be able to edit, add, hide, unhide and delete new entries in the Frontend
- if a FE-user with any edit-permission is logged in, edit-buttons and extra edit-info is displayed
- the frontend-editor includes an image-browser for uploading, selecting and deleting of images
Tutorial
NOTE:
This plugin is based on the library sg_zfelib.
Please be sure to have the latest Version ( sg_zfelib 1.1 or above) of the library-plugin !
If you are an experienced user, you can find many configuration- options for this plugin in the documentation of the library sg_zfelib.
This manual should also help you to install my other plugins, that are also based on sg_zfelib.
Hints on Updates from previous Versions
If you update from Version below 1.0.650:
If you use the feature to edit sg_glossayrs-entries in the FE, you
must now enable the Option enableCrFeuser in the
ExtensionMangers Setup page for sg_glossary.
Basic Installation
 Import extensions from online repository and install them:
sg_zfelib and sg_glossary
Import extensions from online repository and install them:
sg_zfelib and sg_glossary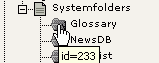 Create a SystemFolder and name it Glossary
Add some entries of type Glossary to this folder:
 e.g. these:
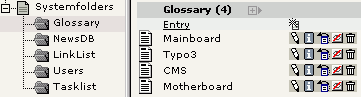
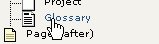
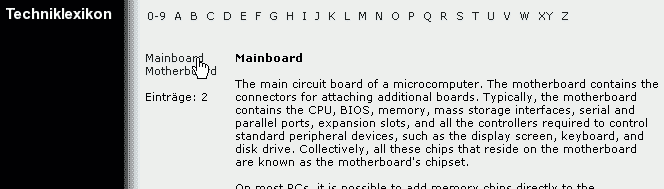
Create a page in your Pagetree, where you want to display the glossary – in my example, I named it ' Techniklexikon ':

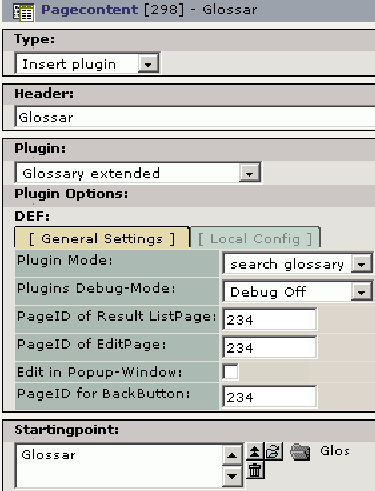 On this page, create a pagecontent of type ' Insert plugin
', select ' Glossary extended ', select as Startingpoint the
systempage ' Glossary ' where you entered your glossary-
entries;Select PluginMode 'search glossary' (that will display the
Alphabetical Selector);For PageIDs always enter the ID of this page;
uncheck 'Edit in Popup-Window':Create another pagecontent with same
Settings but select PluginMode 'list+show glossary'.
On this page, create a pagecontent of type ' Insert plugin
', select ' Glossary extended ', select as Startingpoint the
systempage ' Glossary ' where you entered your glossary-
entries;Select PluginMode 'search glossary' (that will display the
Alphabetical Selector);For PageIDs always enter the ID of this page;
uncheck 'Edit in Popup-Window':Create another pagecontent with same
Settings but select PluginMode 'list+show glossary'.View result:
Displaying Entries in Popup-Windows
- First you have to create a folder, where you can create pages that open in a popup-window.For this, I create a ' Not in Menu' -Page and name it ' Popup-Folder' .Within this folder I create a ' Not in Menu' -Page and name it 'Glossary-Popup' .On this page place the ' Glossary extended '-Plugin, enter ' view/edit glossary ' as Plugin-Mode, and select the systemfolder ' Glossary ' for the Startingpoint .:
- Set a Template for the folder 'Popup-Folder', that is suitable for popup-windows.I have set a Template, that only shows the content – no menu etc.:
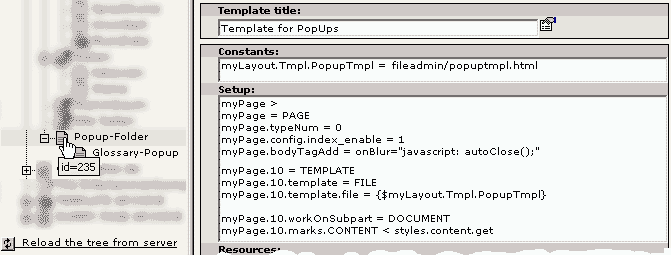 The template-file ' popuptmpl.html' could e.g. look like
this:
The template-file ' popuptmpl.html' could e.g. look like
this:
<!-- ###DOCUMENT### -->
         <div align="center">
                 <table width="100%" border="0" cellspacing="0" cellpadding="20">
                         <tr>
                                 <td>
                                         <!--TYPO3SEARCH_begin-->
                                         ###CONTENT###
                                         <!--TYPO3SEARCH_end-->
                                 </td>
                         </tr>
                 </table>
         </div>
 <!-- ###DOCUMENT### -->
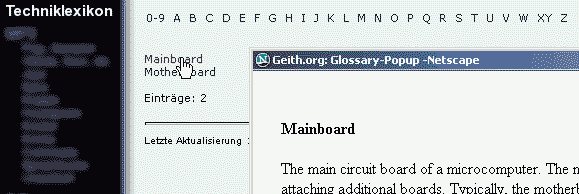
- Now change the settings of your Glossary-Page and set 'Page-ID of EditPage' to this Popup-Page (e.g. 236) and check 'Edit in Popup- Window'; change PluginMode 'list+show glossary' to 'list glossary'
- View the result:
Usage of Custom-Tag <LEX>
- On any page, you can use <LEX> keyword </LEX> and <LEX word= *keyword* > alternative_text </LEX> to include a link to a popup-window, that displays the entry 'keyword' .plugin.tx_sgglossary_pi1.PIDitemDisplay must be set to the ID of the Page-ID, where the glossary-entry is displayed.
- If you want this custom-tag to work in tt_news also, add this to the setup-section of your root- template:plugin.tt_news.general_stdWrap.parseFunc < tt_content.text.20.parseFunc
- If you want to use the <LEX> Tags with RTE, add the following
TSconfig:
# Glossar-Tags zulassenRTE.default.proc.allowTags := addToList(LEX)RTE.default.proc.allowTagsOutside := addToList(LEX)RTE.default.proc.entryHTMLparser\_db.allowTags < RTE.default.proc.allowTags# Glossar-Tags einfuegenRTE.default {userElements {10 = Spezial Funktionen10 {1 = Glossar1.description = Verweis auf Glossar1.mode = wrap1.content = <LEX>\|</LEX>}}}
Automatic creation of Links to glossary
With the additional plugin "sg_glossary_parser" you can automatically add links on every word on your website, that has an entry in the glossary.
See comments in in "EXT:sg_glossary_parser/static_parser/setup.txt" for configuration options.
Enable FE-Editing
Add the following to the setup-section of your root-template:
plugin.tx_sgglossary_pi1 {
       edit = 1
       allow {
             admin.user = glossadmin,17
             admin.group = 0
             addEntry.user = 0
             addEntry.group = glosseditors,23
             uploadImage.user = 0
             uploadImage.group = glosseditors
             unhideAll.user = 0
             unhideAll.group = 0
             unhideOwn.user = 0
             unhideOwn.group = glosseditors
             editAll.user = 0
             editAll.group = 0
             editOwn.user = 0
             editOwn.group = glosseditors,23
             deleteEntry.user = 0
             deleteEntry.group = 0
             deleteOwn.user = 0
             deleteOwn.group = glosseditors
             deleteImage.user = 0
             deleteImage.group = 0
      }
     }
This means:- The user with name ' glossadmin ' and the user with the user-id 17 are administrators for glossary-entries;they may upload/delete images and add/edit/hide/unhide/delete any glossary- entries.- All users of the group ' glosseditors ' may add/edit/hide/unhide/delete only their own glossary-entries and mayupload images.- All users of the group with group-id 23 only may add and edit entries, but not hide/unhide/delete.
Clear all cache, login to your site as user ' glossadmin ' and view the glossary-page:
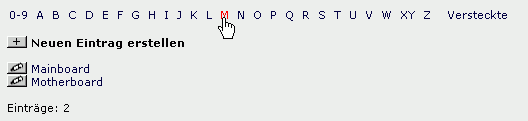 So this user may add (+) and edit (stencil) entries.
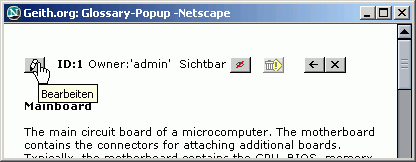 A click on a glossary-entry shows this:
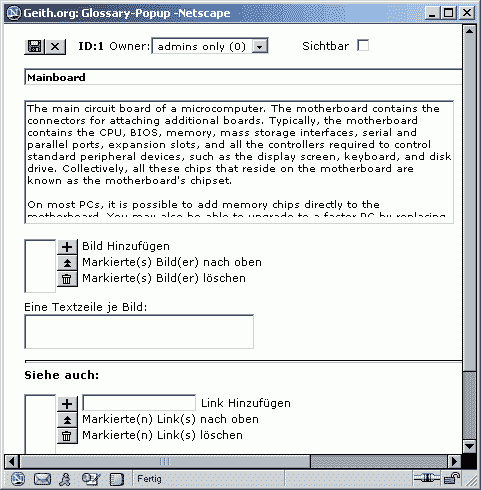
A click on the stencil shows this:
Configuration
((generated))
Templates
All template-files contain parts, that are only displayed, when a FE- user with edit-permissions is logged in.These parts a wrapped in <!--###EDITORONLY###-->, e.g.
<!-- ###EDITORONLY### --> Click here to ###ADD_BUTTON### new item <!-- ###EDITMODEONLY### -->
All template-files contain parts, that are only displayed, when a FE- Admin-user is logged in.These parts a wrapped in <!--###ADMINONLY###-->, e.g.
<!-- ###ADMINONLY### --> Click here to ###ADD_BUTTON### new item <!-- ###ADMINONLY### -->
Reference
See Documentation of sg_zfelib of configuration.
((generated))
Example:
plugin.tx_sgglossary_pi1 {
        allowCaching = 1

        templateList = typo3conf/ext/sg_glossary/pi1/glossary_list.tmpl
        templateSingle = typo3conf/ext/sg_glossary/pi1/glossary_single.tmpl

        tx_sgglossary_entries.search {
                word.type = 1

                abc.label = ABC
                abc {
                        index = 0-9,A=aä,B,C,D,E,F,G,H,I,J,K,L,M,N,O=oö,P,Q,R,S,T,U=uü,V,W,XY,Z
                        indexWrapFirst = |
                        indexWrapOther =   |
                        indexWrapHidden =     |
                        indexWrapAllItem = |
                        indexHasAllItem = 1
                        getAllLabel = All
                        getHiddenLabel = Hidden
                        fieldAbc = word
                }

                submit.label = Suchen !
                submit.imagemode = 1
                reset.label = Reset
                reset.imagemode = 1
                clear.label = Clear
                listmode.label = Listmode
        }

        edit = 0
        allow {
                admin.user = 0
                admin.group = 0
                seeAllHidden.user = 0
                seeAllHidden.group = 0
                addEntry.user = 0
                addEntry.group = 0
                uploadImage.user = 0
                uploadImage.group = 0
                unhideAll.user = 0
                unhideAll.group = 0
                unhideOwn.user = 0
                unhideOwn.group = 0
                editAll.user = 0
                editAll.group = 0
                editOwn.user = 0
                editOwn.group = 0
                deleteEntry.user = 0
                deleteEntry.group = 0
                deleteOwn.user = 0
                deleteOwn.group = 0
                deleteImage.user = 0
                deleteImage.group = 0
        }
}
To-Do list
Enhance manual
Changelog
- 1.0.750 Compatible with TYPO3 4.7.x
- 1.0.400 New Field abstract; can be enabled by ExtManager
- 1.0.0 Stable release
- 0.13.0 Some minor bugfixes
- 0.12.8 Bugfix: now also installable as a global extension
- 0.12.7 Experimental: RTE (BE only) for fields 'description' and 'imagecaption'.
- 0.12.6 Little Speedup of ListMode
- 0.12.5 Bugfix: urlencode for -Tags
- 0.12.4 Bugfix in tx_sgaddress_LinkClass: now works with sg_search;
- 0.12.3 Fixed Bug: sg_search didnt search sg_glossary;
- 0.12.2 All-In-One-Modes for Plugins implemented.
- 0.12.1 Fixed Bug: Missing subpart ###NOLIST_PART###
0.12.0 Changed class-names for tag-processing to match namespace.
0.11.0 Initial Beta-Version; documentation still has to be completed
- 0.9.0. Completely rewritten with use of sg_zfelib
- 0.7.0. Changed mysql-field cruser_id to crfeuser_id IF YOU UPDATE from <=0.6.0 and have used FE-Editing to enter glossary- entires: BEFORE UPDATING: using phpMyAdmin change in table 'tx_sgglossary_entires' the name offield 'cruser_id' to 'crfeuser_id'. AND UPDATE sg_zfeeditlib to version >= 0.7.0
 - 10
- 10