fluid_styled_content handles the rendering of TYPO3's default content elements
and comes bundled as part of the Core. These content elements are rendered using
the Fluid templating engine.
These content elements can be used as-is and can also be modified depending on your
requirements. You are not bound to using only these content elements. It is possible
to add new content elements to the existing set. This document details how to use,
adapt, enhance and create new content elements.
Optionally fluid_styled_content offers basic CSS that takes care of
positioning content according to fields chosen in the backend.
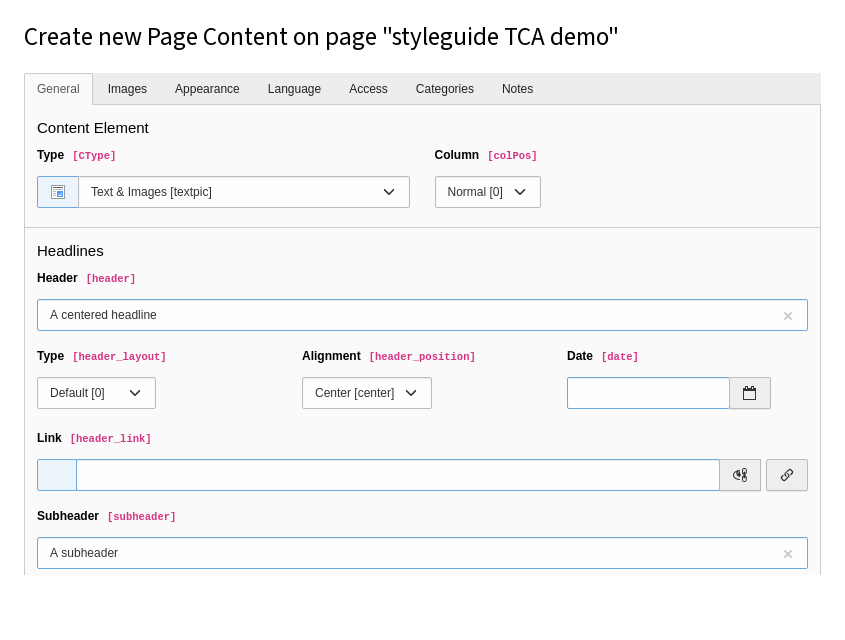
For example, if you create a content element of type
Text with Images with a centered headline, a subheader, some text
and an image with the position in text, right:
The output of the HTML is rendered by the Fluid template
typo3/sysext/fluid_styled_content/Resources/Private/Templates/Textpic.html
which in turn includes several partials.
<divid="c1"class="frame frame-default frame-type-textpic frame-layout-0"><header><h2class="ce-headline-center">
A centered headline
</h2><h3class="ce-headline-center">
A subheader
</h3></header><divclass="ce-textpic ce-right ce-intext"><divclass="ce-gallery"data-ce-columns="1"data-ce-images="1"><divclass="ce-row"><divclass="ce-column"><figureclass="image"><imgclass="image-embed-item"src="/fileadmin/user_upload/TYPO3.png"width="280"height="280"loading="lazy"alt=""></figure></div></div></div><divclass="ce-bodytext"><p>Lorem ipsum dolor sit...</p></div></div></div>
Copied!
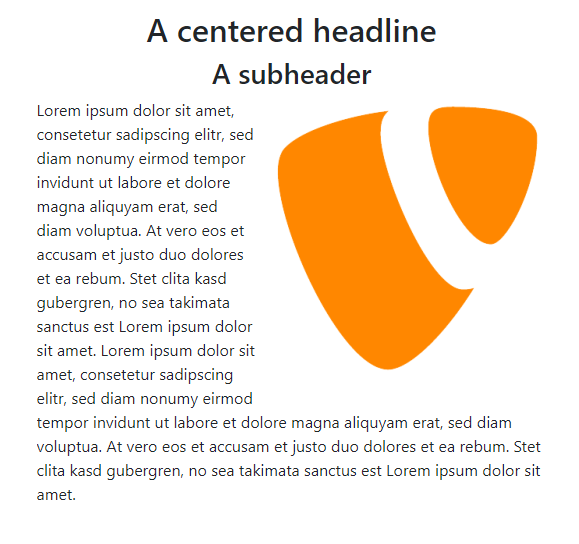
If the default CSS provided by this extension was also included, the output
could look like the following in the browser:
A little bit of history
In early years, TYPO3's content elements were rendered by the Typoscript set called
content (default). This was mainly based on font-tags for styling and tables for
positioning which was needed to achieve the visual constructions in old versions of web
browsers.
Some time later the extension css_styled_content was introduced, which focused on
reducing the amount of TypoScript and providing XHTML/HTML5 markup which could be styled
by Cascading Style Sheets (CSS), a style sheet language used for describing the look and
formatting of a document written in a markup language. Still this extension was heavily
based on TypoScript and did allow custom modifications up to some point.
Since the introduction of the Fluid templating engine, more websites are using this for
page templating. Newer TYPO3 CMS packages (extensions) are also using Fluid as their base
templating engine. The content elements which were provided with TYPO3 CMS by default were
still using TypoScript and some PHP code.
Since TYPO3 7.5 the default content elements are provided by the extension
fluid_styled_content and thus use Fluid as template engine. The main benefit being that
hardly any knowledge of TypoScript is now needed to make changes. Integrators can easily
exchange the base content element Fluid templates with their own. With Fluid, more complex
functionality that exceed the simple output of values has to be implemented with
ViewHelpers. Every ViewHelper has its own PHP class. Several basic ViewHelpers are
provided by Fluid. When using your own Fluid templates, developers can add extra
functionality with their own ViewHelpers.
Site sets have been introduced and are the recommended method to include
TypoScript. If you do not want to use site sets, you can still use
TypoScript includes to include the
default TypoScript.
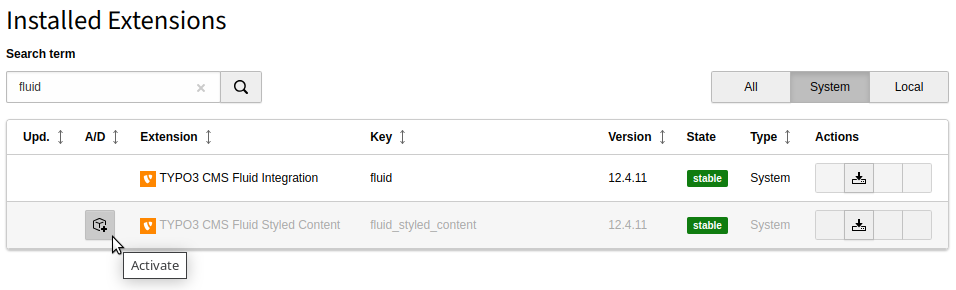
To use the default rendering definitions provided by fluid_styled_content, you
should add one of the two site sets provided by this extension
to your site configuration
or depend on it in your site package's site set.
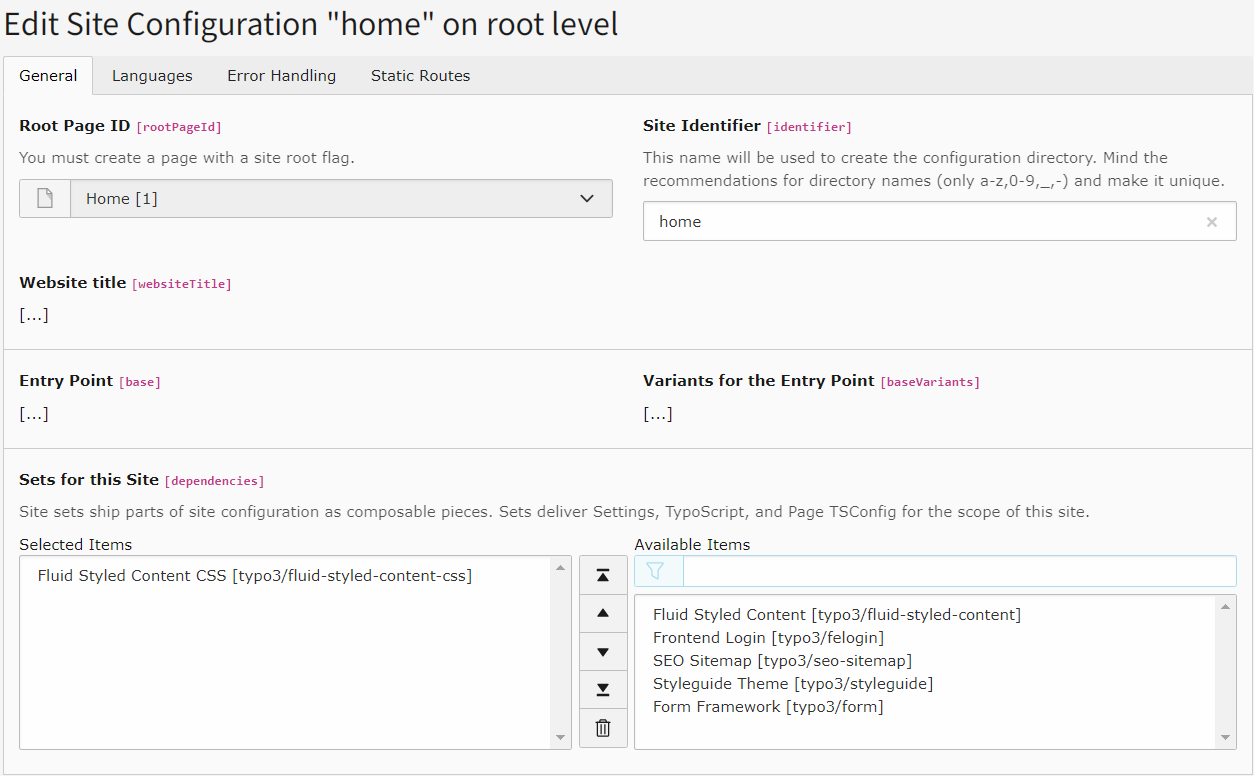
Add the site set to your site configuration
This is the recommended way to include the "Fluid Styled Content" site set into
basic TYPO3 sites without a custom site package. See also
site sets.
Add the site set of Fluid Styled Content
When saving, the GUI then automatically updates your site configuration:
config/sites/my-site/config.yaml (diff)
base: https://example.ddev.site
+ dependencies:+ - typo3/fluid-styled-content-css
languages:
-
title: English
Copied!
Add the site set to your custom site package
If your installation has a custom site package,
it is recommended to depend on the "Fluid Styled Content CSS" site set with your
site package's site set:
To use the default rendering definitions provided by fluid_styled_content, you
have to add the extension's TypoScript set to your root TypoScript record.
When you are using a site package you can add the following lines to your site
packages constants.typoscript and setup.typoscript:
# Import the default setup of EXT:fluid_styled_content@import 'EXT:fluid_styled_content/Configuration/TypoScript/setup.typoscript'# Import the default CSS of EXT:fluid_styled_content@import 'EXT:fluid_styled_content/Configuration/TypoScript/Styling/setup.typoscript'
Copied!
This is the recommended way as the import of TypoScript can be kept under
version control this way.
Alternative: Include the TypoScript set in the root TypoScript record
It is also still possible to include the TypoScript set directly into
a TypoScript record. However there are draw backs:
The import is then stored in the database and not the file system and cannot be
kept under version control.
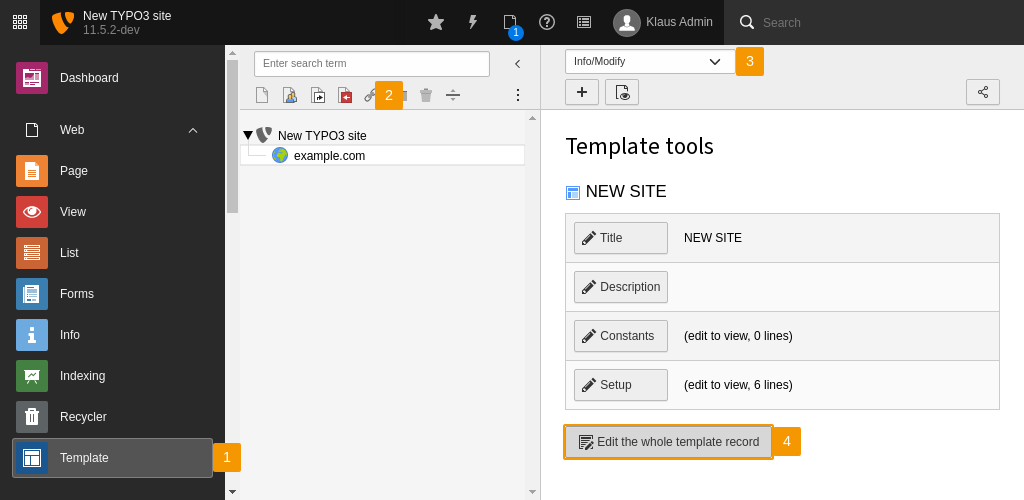
Edit the whole TypoScript record
Go to the module Web > TypoScript.
In the page tree, select the page which contains the root TypoScript
record of your website.
Select Edit TypoScript Record in the dropdown at the top of the
Web > TypoScript module.
Click the Edit the whole TypoScript record. This will
open all the settings of the root TypoScript record:
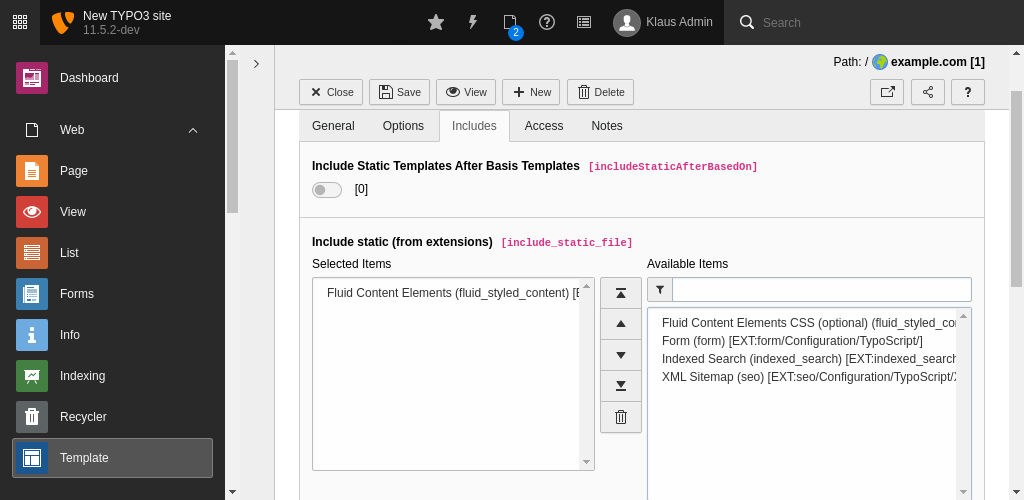
Include the Fluid Content Elements TypoScript file
Go to the tab Includes and select
Fluid Content Elements in the
Available items under Include TypoScript sets.
The selection will move to the Selected items.
TYPO3 is now using the rendering definitions of fluid_styled_content for
the default set of content elements. This is essentially unstyled HTML5 markup.
You can additionally select Fluid Content Elements CSS (optional).
This TypoScript set adds some CSS styling to make sure all
the parts of a content elements have some styling, this will include alignment and positioning.
This set of styles will not add any colors, make any changes to typography or anything else related to
your website's visual style. This TypoScript set is optional, as it is common for integrators to
override the basic styling.
Save the TypoScript record by using the save button at the top of the module.
For the backend, fields can be shown or hidden, depending on the fields you are using or
the fields an editor is allowed to use. Configuration like this is done using
Page TSconfig or User TSconfig.
Some settings in these content elements like image positions or space settings
require certain CSS styles. If you want to use the default CSS styles provided
by TYPO3, include Site set "Fluid Styled Content CSS" in addition to this
site set.
If you depend on this site set directly instead of Site set "Fluid Styled Content CSS"
you should provide the missing CSS yourself or disable all tt_content fields
via page TSconfig that lose their function due to missing CSS.
Settings provided by site set "Fluid Styled Content"
Can be `lazy` (browsers could choose to load images later), `eager` (load images right away) or `auto` (browser will determine whether the image should be lazy loaded or not)
styles.content.image.imageDecoding
styles.content.image.imageDecoding
Type
string
Label
Default settings for an image decoding hint to the browser
Can be `sync` (synchronously for atomic presentation with other content), `async` (asynchronously to avoid delaying presentation of other content), `auto` (no preference in decoding mode) or an empty value to omit the usage of the decoding attribute (same as `auto`)
styles.content.textmedia.maxW
styles.content.textmedia.maxW
Type
int
Default
600
Label
Max Image/Media Width
Category
Fluid Styled Content > Content Elements
This indicates that maximum number of pixels (width) a block of media elements inserted as content is allowed to consume
styles.content.textmedia.maxWInText
styles.content.textmedia.maxWInText
Type
int
Default
300
Label
Max Image/Media Width (Text)
Category
Fluid Styled Content > Content Elements
Same as above, but this is the maximum width when text is wrapped around an block of media elements. Default is 50% of the normal Max Media Item Width
styles.content.textmedia.columnSpacing
styles.content.textmedia.columnSpacing
Type
int
Default
10
Label
Advanced, Column space
Category
Fluid Styled Content > Content Elements
Horizontal distance between media elements in a block in content elements of type "Media & Images". If you change this manually in your CSS, you need to adjust this setting accordingly
styles.content.textmedia.rowSpacing
styles.content.textmedia.rowSpacing
Type
int
Default
10
Label
Advanced, Row space
Category
Fluid Styled Content > Content Elements
Vertical distance after each media elements row in content elements of type "Text & Media". If you change this manually in your CSS, you need to adjust this setting accordingly
styles.content.textmedia.textMargin
styles.content.textmedia.textMargin
Type
int
Default
10
Label
Advanced, Margin to text
Category
Fluid Styled Content > Content Elements
Horizontal distance between an imageblock and text in content elements of type "Text & Images"
styles.content.textmedia.borderColor
styles.content.textmedia.borderColor
Type
color
Default
"#000000"
Label
Media element border, color
Category
Fluid Styled Content > Content Elements
Bordercolor of media elements in content elements when "Border"-option for an element is set
styles.content.textmedia.borderWidth
styles.content.textmedia.borderWidth
Type
int
Default
2
Label
Media element border, thickness
Category
Fluid Styled Content > Content Elements
Thickness of border around media elements in content elements when "Border"-option for element is set
styles.content.textmedia.borderPadding
styles.content.textmedia.borderPadding
Type
int
Default
0
Label
Media element border, padding
Category
Fluid Styled Content > Content Elements
Padding left and right to the media element, around the border
styles.content.textmedia.linkWrap.width
styles.content.textmedia.linkWrap.width
Type
string
Default
"800m"
Label
Click-enlarge Media Width
Category
Fluid Styled Content > Content Elements
This specifies the width of the enlarged media element when click-enlarge is enabled
styles.content.textmedia.linkWrap.height
styles.content.textmedia.linkWrap.height
Type
string
Default
"600m"
Label
Click-enlarge Media Height
Category
Fluid Styled Content > Content Elements
This specifies the height of the enlarged media element when click-enlarge is enabled
styles.content.textmedia.linkWrap.newWindow
styles.content.textmedia.linkWrap.newWindow
Type
bool
Default
false
Label
Advanced, New window
Category
Fluid Styled Content > Content Elements
If set, every click-enlarged media element will open in it's own popup window and not the current popup window (which may have a wrong size for the media element to fit in)
styles.content.textmedia.linkWrap.lightboxEnabled
styles.content.textmedia.linkWrap.lightboxEnabled
Type
bool
Default
false
Label
Lightbox click-enlarge rendering
Category
Fluid Styled Content > Content Elements
Whether media elements with click-enlarge checked should be rendered lightbox-compliant
Which `rel=""` attribute to use for lightbox links (only applicable if lightbox rendering is enabled)
styles.content.links.extTarget
styles.content.links.extTarget
Type
string
Default
"_blank"
Label
Target for external links
Category
Fluid Styled Content > Content Elements
styles.content.links.keep
styles.content.links.keep
Type
string
Default
"path"
Label
Parts to keep when building links
Category
Fluid Styled Content > Content Elements
Comma separated list of the link parts to show when building the link-text: scheme,path,query.
Example:
- ` ` (empty) => `www.example.com`
- `scheme,path` => `http://www.example.com`
The styles provided by this site set enable the display of settings in content
elements, including frame styles like .frame-space-before-large, styles
for headlines like .ce-headline-center and styles for images like
.ce-intext.ce-left.
If you do not depend on this site set you should provide the according CSS yourself
or disable all fields in the TCA table that lose their function due to missing
CSS styles.
Settings editor
New in version 13.3
The new backend module Site Management > Settings provides an
overview of sites which offer configurable settings and makes them editable.
You can find the available site settings in module
Site Management > Settings
You can change individual settings here. If the site settings are writable
you can hit the Save button and the settings will be written
directly to the site settings.
If the settings are not writable you can click the YAML export
button to export the settings. These can then be added by a developer with
sufficient rights.
The available settings are also described in detail in Site sets.
Constant Editor
Changed in version 13.1
Site sets have been introduced. The
settings of the site set
superseded using TypoScript constants. Using TypoScript constants is
still possible for compatibility reasons.
Tip
If Site sets are used, the constant editor might be disabled. You can then edit
the settings in the Settings editor.
Include the Fluid Content Elements TypoScript file
The Constant Editor can be found in the
Site Management > TypoScript module.
Select the page in the page tree which contains the root Typoscript record
of your website.
Select Constant Editor in the dropdown at the top of the
Site Management > TypoScript module.
In the dropdown list select the category CONTENT.
This will give you a list with all the constants of this extension.
All constants are described and can be edited by clicking the pencil in
front of the current value or by editing the available field.
Do not forget to save the new values. The new values will be stored in the
"Constants" field of the root template of your website.
Note
If you use the Constant Editor the configuration gets written
to the database and cannot be kept under version control. You can cut all
values from the constants field of the root TypoScript record and move them
to a file in your site package extension. This way you can keep the values
under version control.
The TypoScript of the site set includes files located
in the directory EXT:fluid_styled_content/Configuration/TypoScript/.
Structure of the TypoScript files
In this folder there are two files:
constants.typoscript - This file is only used when for compatibility
reasons the TypoScript is included via import or TypoScript module in the
outdated fashion.
setup.typoscript - This file will first include some other files
which are located in the Setup/ folder in the same directory. More
about these files later.
In the folder ContentElement/ there are files which are included by the file
setup.typoscript as mentioned above. These files contain the rendering definitions of all
content elements that are provided by the TYPO3 Core. These are:
Bullets.typoscript - Configuration for content element "Bullet List"
Div.typoscript - Configuration for content element "Divider"
Header.typoscript - Configuration for content element "Header Only"
Html.typoscript - Configuration for content element "Plain HTML"
Image.typoscript - Configuration for content element "Image"
List.typoscript - Configuration for content element "General Plugin"
MenuAbstract.typoscript - Configuration for content element "Menu of subpages of selected pages including abstracts"
MenuCategorizedContent.typoscript - Configuration for content element "Content elements for selected categories"
MenuCategorizedPages.typoscript - Configuration for content element "Pages for selected categories"
MenuPages.typoscript - Configuration for content element "Menu of selected pages"
MenuRecentlyUpdated.typoscript - Configuration for content element "Recently updated pages"
MenuRelatedPages.typoscript - Configuration for content element "Related pages (based on keywords)"
MenuSection.typoscript - Configuration for content element "Section index (page content marked for section menus)"
MenuSectionPages.typoscript - Configuration for content element "Menu of subpages of selected pages including sections"
MenuSitemap.typoscript - Configuration for content element "Sitemap"
MenuSitemapPages.typoscript - Configuration for content element "Sitemaps of selected pages"
MenuSubpages.typoscript - Configuration for content element "Menu of subpages of selected pages"
Shortcut.typoscript - Configuration for content element "Insert records"
Table.typoscript - Configuration for content element "Table"
Text.typoscript - Configuration for content element "Regular Text Element"
Textmedia.typoscript - Configuration for content element "Text and Media"
Textpic.typoscript - Configuration for content element "Text and Images"
Uploads.typoscript - Configuration for content element "File Links"
Since we move away from TypoScript as much as possible, these rendering
definitions only declare the following:
Can FLUIDTEMPLATE be used immediately or
do we need data processing first?
A processor is sometimes used to do some data manipulation before all the data is sent
to the Fluid template.
Assigning the Fluid template file for each type of content element separately.
In the folder Helper/ there are files which are included by the file
setup.typoscript as mentioned above. These are:
ContentElement.typoscript - Default configuration for content
elements using FLUIDTEMPLATE
ParseFunc.typoscript - Creates persistent ParseFunc setup for non-HTML content
Overriding the Fluid templates
At TypoScript we have described the way content elements are rendered.
By default these settings are done in the setup.typoscript file which can be found in the
EXT:fluid_styled_content/Configuration/TypoScript/ folder.
Using the site settings
New in version 13.1
You can now use site settings to
override the template paths.
In order to override the templates used in fluid_styled_content you need a
custom site package.
A content element is using a templateName, which is defined in setup.typoscript. You
can override this value, but the template from the extension fluid_styled_content will
not be loaded as its name is still the default value.
This chapter describes the default set of content elements provided by TYPO3's
Core. It will show you a description and screenshots of the backend fields.
General fields
These are fields which are used by (almost) every content element.
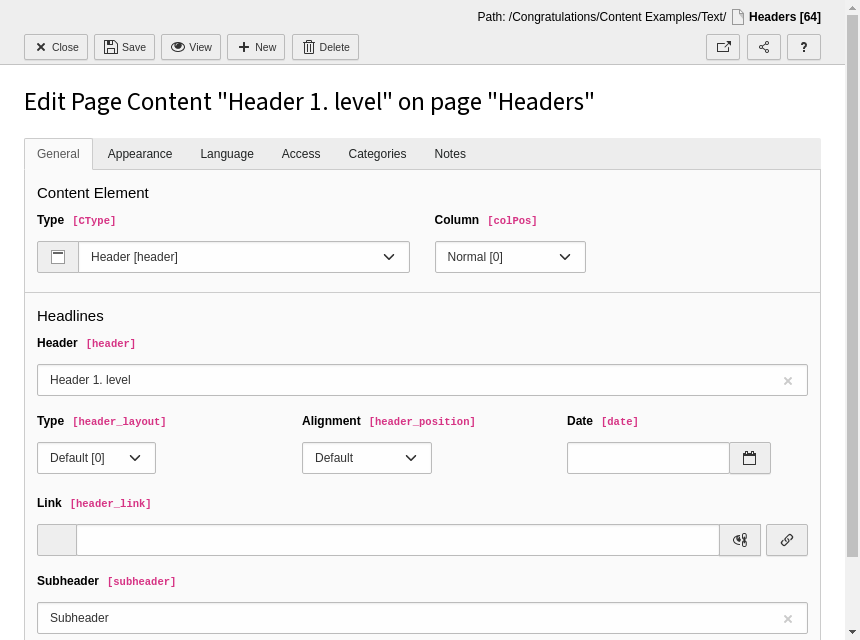
Header
Almost every content element can contain a header, which consists of the following parts:
Header
The text of the header
Type
The type of heading (heading 1, heading 2, heading 3 ... or if the header is hidden).
When not choosing an option, the default heading will be used, which can be configured
at Constant Editor.
Date
Have the possibility to group the header with a date
Link
Link wrapping the header text. This can be a TYPO3 CMS page, an external page, an email
address or a link to a file.
The header fields can be found in the General tab of a content element.
The content element "Header" in the backend
Show in Section Menus
Using this option will only be visible when using menu's based on sections. This will be
described in the chapter Menus.
This field can be found in the Appearance tab.
The field "Show In Section Menu's"
A Section Menu, which is in turn a content element itself
produces an output including the headlines of all content elements
with the flag Show in Section Menus set.
Append with Link to Top of Page
The field "Append with link to top of page"
When checked, this will render a link below the content element to bring the visitor the
top of the page. This will be very convenient for your visitors when having long pages.
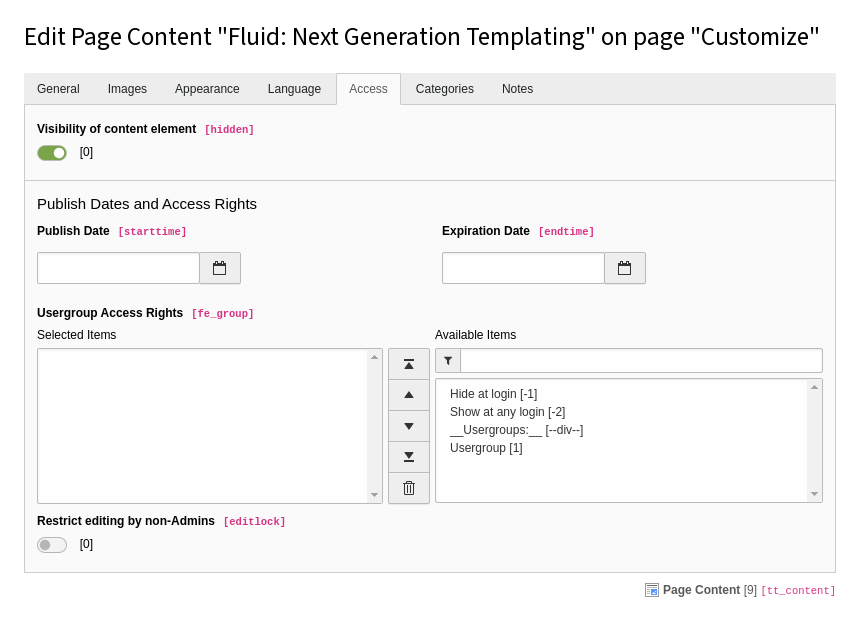
Access
The Access tab with all its fields
These fields define if and when a visitor has access to this content element. The access
fields all reside in the Access tab:
Visibility of content element
By checking this option the content element will not be visible to any visitor.
Publish Date
The date on which the content has to be published, which means making visible at a
certain date.
Expiration Date
The date on which the content will be expired, which means the content will be hidden
on a certain date
Usergroup Access Rights
Here you can select whether the content element only is available to a certain
frontend user group, if it has to be visible only when the visitor is logged in or if
it has to be hidden at a login.
The content element "Header" will render a header, which can be linked. There is the
possibility to add a subheader and a date. The fields used for this content elements are
the same as Header, but with a field for the subheader.
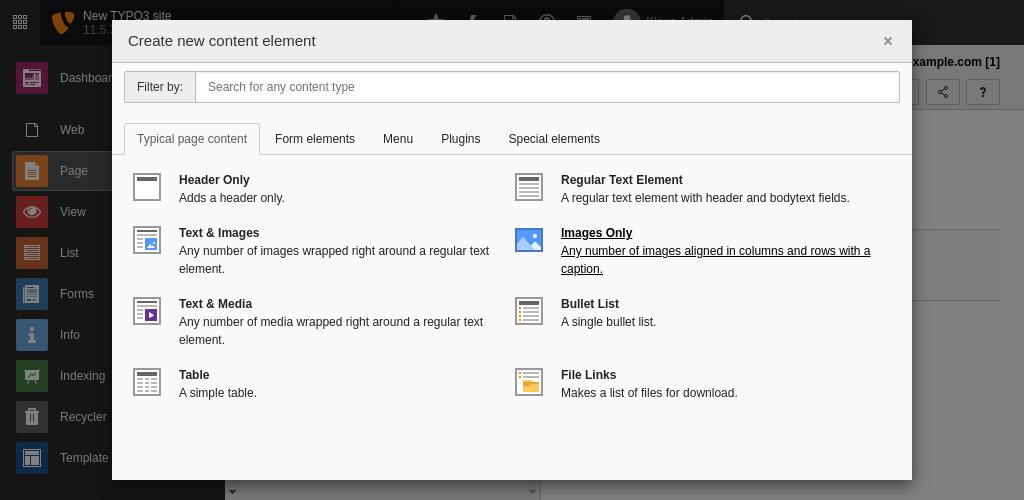
Text & Images
Typical page content: Text, Images and Media
This content element allows you to combine text and images. Additionally there
is also a content element for Text & Media where you can use videos
or Audio. There are also separate content elements for Text
or Images individually. These offer no advantage over the content element
Text & Images except that some fields are missing and the backend form
is less cluttered.
The text can be entered in the rich text editor of the General
tab.
The content element rich text editor in the content element Text
The media elements can be added in the Images tab. In this tab
there is also the option to turn the enlarge on click behaviour on for images.
TextImages in the content element Text & Images
Multiple images and movies are combined as a gallery, which can be configured
using the Gallery Settings. In some installations there are
specific settings for width or height for each element, if a border
should be shown around each element, the position of the gallery in relation
to the text and the amount of columns which should be used for the gallery.
The maximum width of the gallery can be different when the gallery is on
top or bottom of the text, or inside the text. This can be set using the
Constant Editor.
Bullet list
Typical page content: Bullet List
With this content element you can provide unordered and ordered bullet lists, but also a
definition list, in the frontend.
The most important fields of the content element
The type of list can be defined with the field Type of bullets.
The content is added in the field Bullet List, where each new line
is a new bullet.
Bullet 1
Bullet 2
Bullet 3
Copied!
For definition lists you use one line for a single definition which starts with the term,
followed by the description, separated by a vertical bar "|".
Term 1|Description 1
Term 2|Description 2
Term 3|Description 3
Copied!
Table
Typical page content: Table List
The Table content element can be used to display tabular data.
Hint
In the database the data is saved as comma separated values (CSV), a
plain text format for storing table data (numbers and text). This format
can be used to import data from external sources.
The content element Table in the backend
By default the Field delimiter is a vertical bar "|", the
Text enclosure set to none.
A Table caption can be provided as a heading for the table.
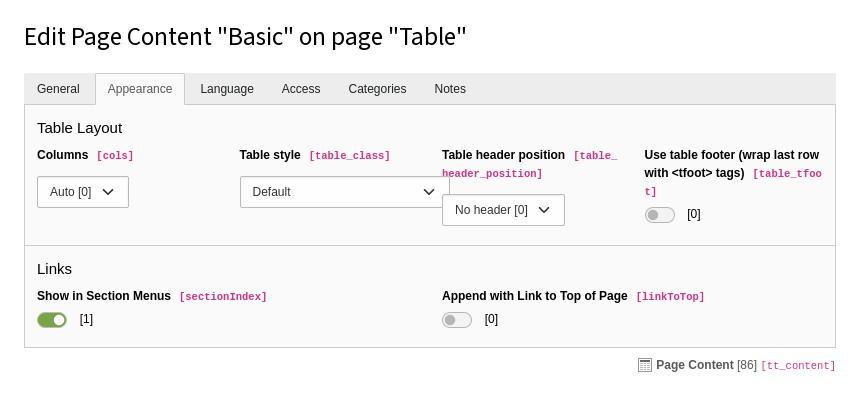
The content element Table in the backend, tab Appearance
Also some appearance options are available for the table. These can be found in the
Appearance tab:
Columns
The maximum amount of columns. Even when more columns are defined in the
Table content field, the table will only show the maximum amount of columns.
Table class
Some predefined classes to style the table output.
Table header position
The first row or the first column can be used as a table header.
Use table footer
The last row will be used to group the table's footer area (which may be a summary, an
addition of column values, or some call to action based on the preceding content).
File links
Typical page content: File Links
This content element gives you the opportunity to offer downloadable files to the visitors
of your website.
The content element Uploads in the backend
You can add or select single files but also use a file collection. A file collection can
be one of the following:
A static selection of files
A folder within a storage, holding the files
A file selection by category
When combining both methods, single files and file collections, all files from these
methods will be presented to the website visitor.
At the bottom of the tab General you will find several options how
the files will be presented:
Display file/icon/thumbnail
In this dropdown you can select if you only want to show the file name, the file name
and a corresponding icon, based on the file extension, or the file name with a
thumbnail, if it is possible for TYPO3 CMS to generate a thumbnail from the file.
Display file size information
Will show the file size calculated from the amount of bytes and presented as a human
readable string with the proper unit (B, KB, MB ...).
Display description
Will display the description of each file, if available.
Menus
Menu content elements
In websites, menus are often created outside the content element scope, because they have
to reappear within every page. These could be the main menu, a sub menu, a bread crumb or
a language menu. However, there are situations where you would like to create a menu
specifically on one page. The following content elements will give you some options to render
a menu. These available content elements are:
Menu of selected pages
The menu consists of links to the selected pages in the TYPO3 CMS backend.
Menu of subpages of selected pages
The menu consists of links to the subpages of the selected pages in the TYPO3 CMS
backend.
Menu of subpages of selected pages including abstracts
The same as above, but showing the abstract of these pages as well, when not empty.
Menu of subpages of selected pages including sections
This will render a menu of the subpages of the selected pages. Below each subpage an
extra menu will be showing the titles of content elements which belong to that certain
subpage, which have the option "Show in Section Menus" in the Appearance tab enabled.
This makes it possible for the website visitor to jump to the selected content element,
within that page, immediately.
Sitemap
Render a full sitemap of the website, starting at the root page.
Sitemaps of selected pages
Render one or more sitemaps at once. The starting point of each site map will be a
single selected page.
Section index (page content marked for section menus)
Menu of content elements within the selected page, which have the option "Show in
Section Menus" in the Appearance tab enabled. This makes it possible for the website
visitor to jump to the selected content element, within that page, immediately.
Recently updated pages
Shows a list of pages which are updated in the last 7 days. Updated only means a
change in the page properties, not the content on the page.
Related pages (based on keywords)
Shows a list of the selected page and all other pages, which have one or more keywords,
entered in the page properties, in common.
Pages for selected categories
Displays a menu of all pages which have been assigned one or more of the selected
categories.
Content elements for selected categories
Displays a menu of all content elements which have been assigned one or more of the
selected categories.
The availability of links in each type of menu will depend on access rights. If a website
visitor has no access to a certain part (with a frontend login), the link will not be
shown.
The most important fields of the content element
In case no pages are selected, the menu will be rendered from the
current page where the menu is put on.
Styling of the current page in a menu
New in version 12.0
All menu content elements related to page navigation reflect the "current"
state of a page now.
If the current page is displayed within a menu the aria attribute
aria-current="page" is added to the a-tag of a menu-item.
For styling with CSS the attribute of the link can be used:
EXT:site_package/Public/Css/menu.css
[aria-current="page"] {
   /* Special style for the current page link */
}
[aria-current="page"]:hover {
   /* Special style for the current page link when hovered */
}
[aria-current="page"]::before {
   /* Special virtual element for additions like chevrons, etc. */
}
Copied!
The default styling of contains no style for the current page.
Insert Records
Insert records page content
Ever have content on one page that you want to reference on another page? But you don't want to have to
maintain both and keep them both in sync? And you don't want to show the whole content from one
page on another. Using insert records you can add one content element from a page or all
the content elements from a page. You can also add content elements from several pages.
The content element Insert Records
Just select the content elements you want to display and if necessary, put them in the
right order.
In the frontend the referenced content elements will show up the same as the original one
(if the styling is not different for that page)
Note
This is the only content element still using a small amount of TypoScript in the rendering
process. This is done because you can add different rendering for records from
different tables. Take a look at
tt_content.shortcut.20.
Insert plugin
Plugin content elements
Extensions often provide plugins to render frontend output. They are essentially the
same as content elements. When an extension depends on a plugin, select the
plugin in this content element. The fields might change depending on the plugin.
For example, the system extension indexed_search provides the Indexed Search
plugin which does not offer any additional fields:
The plugin Indexed Search
Divider
Divider page content
Nothing more than a horizontal rule.
HTML
Plain HTML page content
The content element Plain HTML in the backend
Insert HTML directly using this content element.
Adding Your Own Content Elements
Attention
This page has been merged into TYPO3 Explained
since Core version 8.7.
Sitemap
Reference to the headline
Copy and freely share the link
This link target has no permanent anchor assigned.The link below can be used, but is prone to change if the page gets moved.