Attention
TYPO3 v7 has reached its end-of-life November 30th, 2018 and is not maintained by the community anymore. Looking for a stable version? Use the version switch on the top left.
There is no further ELTS support. It is recommended that you upgrade your project and use a supported version of TYPO3.
Working with languages
TYPO3 CMS comes with the built-in ability to handle web sites in multiple languages.
Defining a new language
The default language is never explicitely defined. It will be whatever you choose it to be. Additional languages are first created in the backend and can then be used to translate pages and content elements.
The Introduction Package's default language is English and the Danish and German languages are already defined. Adding a new language is as easy as creating a new record for that, but it can strictly be done only on the root page.
Use the WEB > List view and place yourself on the "New TYPO3 Site" page. Scroll down a bit, until you see the list of "Website Languages".

Click on the "New record" icon and define your new language.
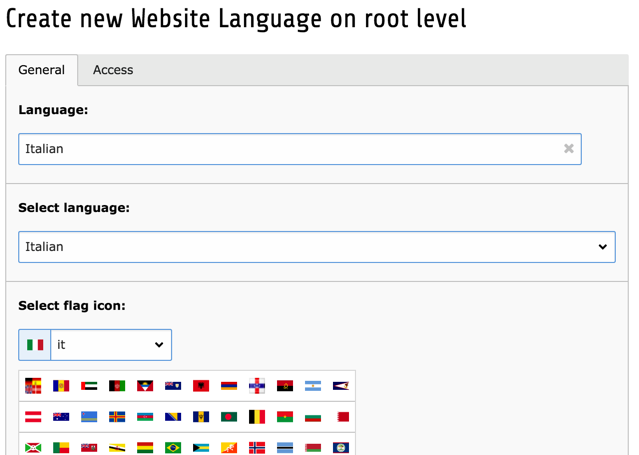
Give your new language a title, relate it to an official language and choose a flag for it. Save and close, you're done.
Working with translations
Move to the WEB > Pages module and to the "Congratulations" home page. Using the menu in the docheader, switch to the "Languages" view.
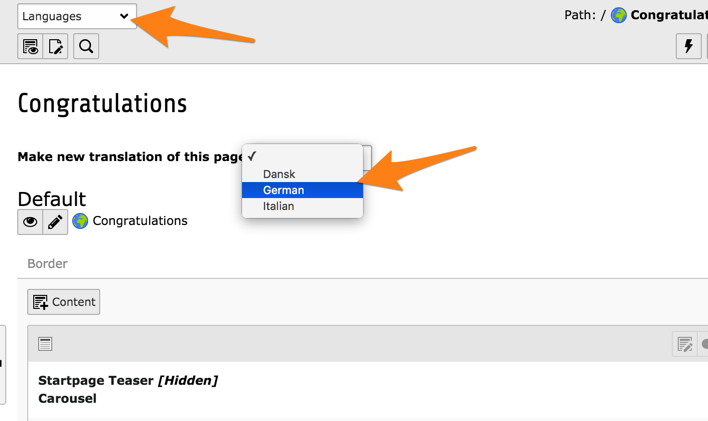
Use the menu entitled "Make new translation of this page" to create a new translation. Choose the language from the dropdown, let's say German in this case. You will be presented with an input form for the page translation (so-called "Alternative Page Language"):
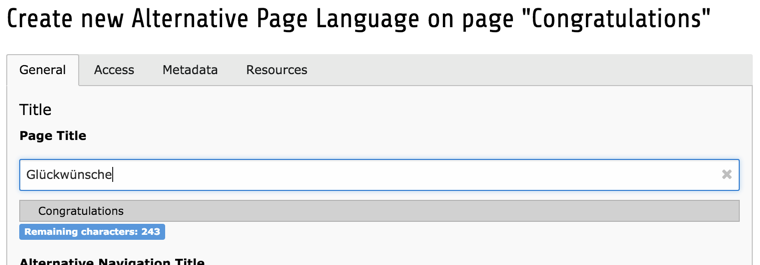
Just enter the translation in the "Page Title" field and save changes. Back in the Page module, we can now see the default language and the German version side by side.
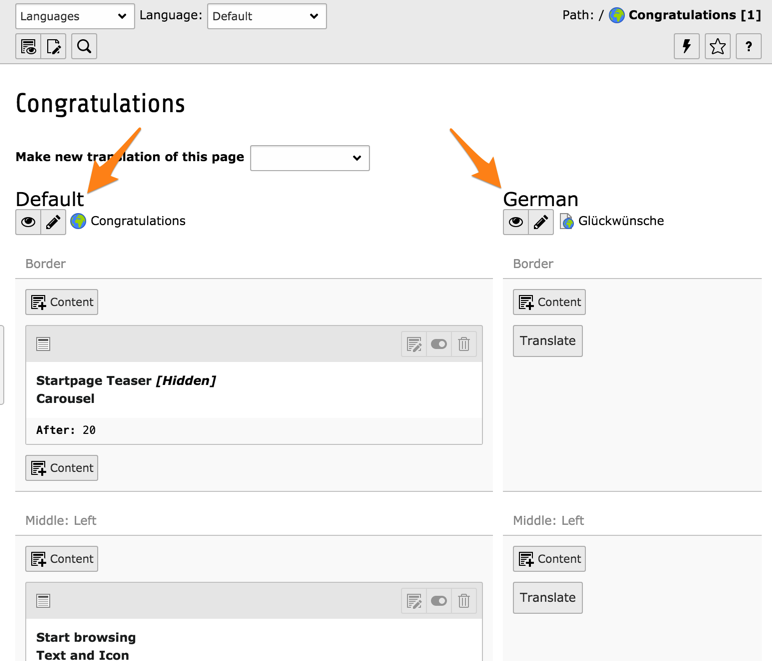
The Page module makes it possible to easily copy content elements in the new language by hitting the "Translate" button. Do so now for the "Border" content area and you should see the following:
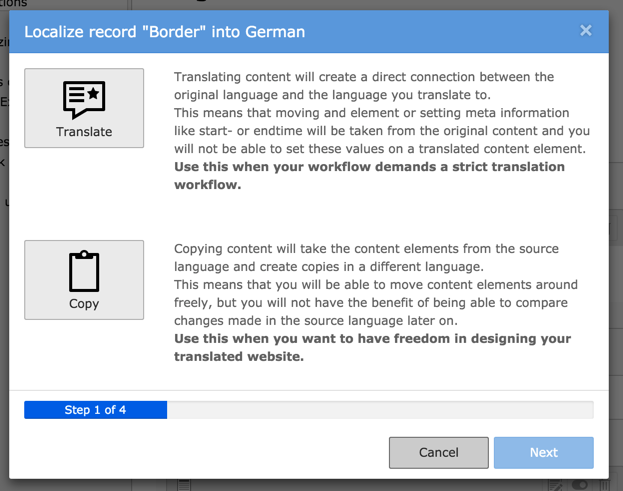
The translations can either be linked together or unrelated. As explained by the wizard the strict mode should be used when every content in the default language is meant to be translated so that every translation is strictly related to an element in the default language. The "copy" mode will also create a copy but it will be unrelated to its original source. This should be preferred when web site translations will diverge from the default language.
For this example, click on the large "Translate" icon and then on the "Next" button. Step 2 of the wizard will pass by automatically since we are translating in a single language. Step 3 provides a summary of the elements that will be translated. Hit the "Start processing" button to get started. You should see the following result:
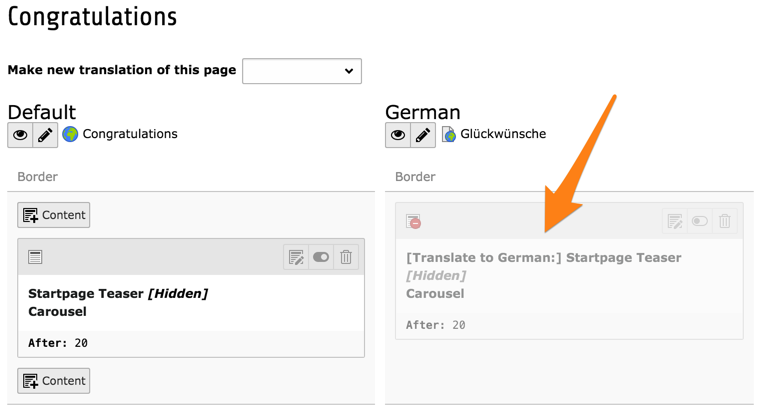
You can observe how the new element's content has been prepended with [Translate to German:]. Also note that it is hidden by default, so that incomplete translations don't turn up on the web site.
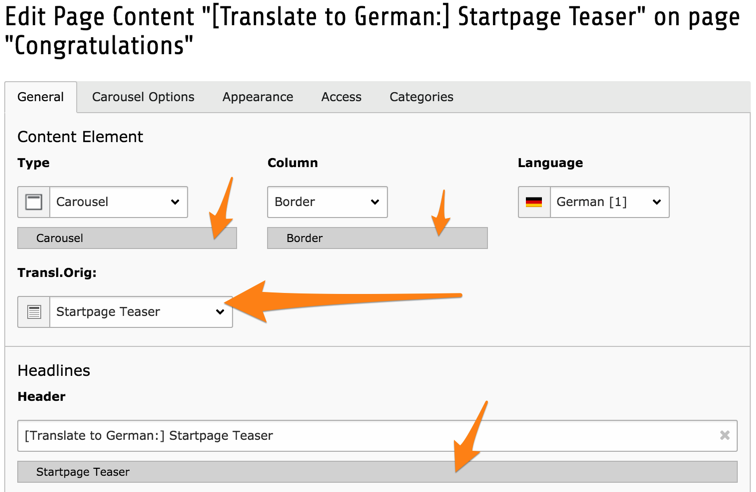
You can see how the new content element is related to the one in the default language (in the field "Transl.Orig"). Under most fields is also an indication of the content in the default language.
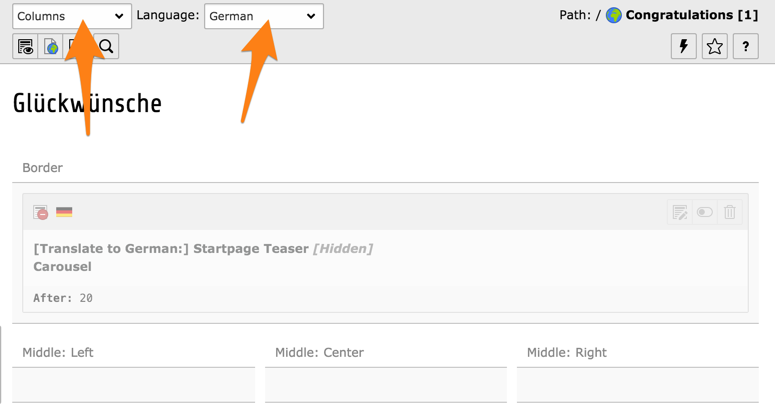
The Page module may now seem cluttered, with one column per existing translation. It is possible to view a single language at a time and with the original layout, by switching back to the "Columns" mode and choosing a specific language in the docheader.
Tip
Detailed information about setting up a multilingual web site is found in the Frontend Localization Guide.
