Frontend login
You can configure content or pages to only be visible to frontend users who have logged in.
Frontend users
The concept of the TYPO3 backend and frontend is explained in the Getting Started Tutorial.
You can use the concept of frontend users (website visitors) to create member-only content and restrict access to pages and content elements by requiring a log in.
Frontend users are always part of frontend groups. Access is granted to groups, never directly to users. Users and groups are defined like any other record, and stored in a suitable page in the backend.
Create a user group and user
-
Create a new folder in the page tree, and name it "Frontend users".

- Navigate to the Content > Records module, and select your new folder.
-
Click the + Create new record icon at the top left of the Docheader. The "New record" wizard displays.

- Click Website Usergroup to create a new frontend group.
-
Name it "Private Area".

- Save and close the record.
- Use the "New record" wizard again, but this time create a Website User.
-
Type a username, a password and click the "Private Area" group to select it.

You can add further information on the Personal Data tab if required.
- Save and close the record.
Assign access rights
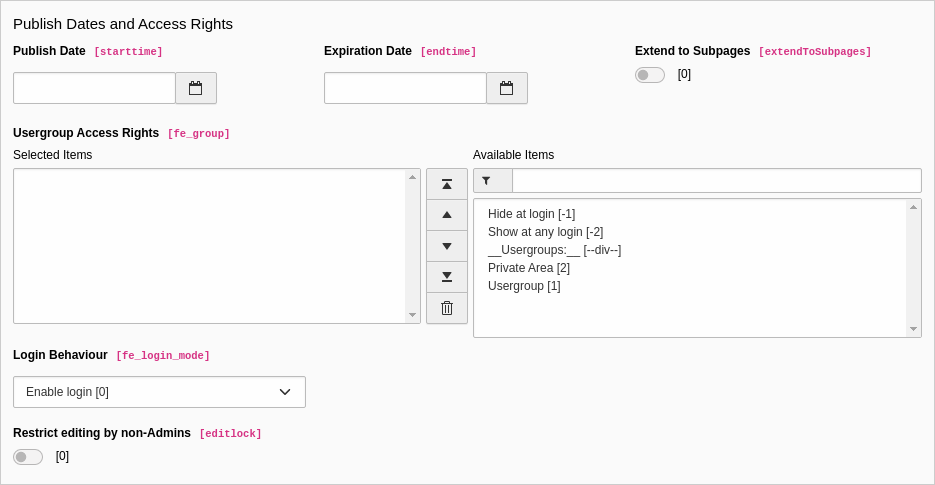
Now that we have at least one group, and a user assigned to that group, we can assign access restrictions. This is done on the Access tab of the page properties or content element properties.
Note
Two default groups appear in the list of groups. They are always available and cannot be edited or removed.
- The "Hide at login" group means that the element is only visible when the user is not authenticated.
- The "Show at any login" group is used for elements that require authentication to access, but are okay for all groups to see.
- Navigate to the Content > Layout module, and create a new page called "Members only".
- Add a text content element to the Members Only page, with text similar to "You need to authenticate to access the members area".
- On the Access tab, select the "Hide at login" group for it.
- Save and close the record.
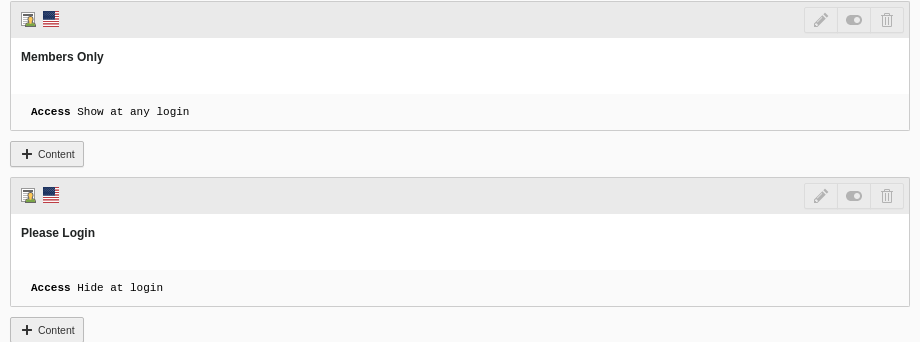
- Add another text content element to the page, with text similar to "Welcome to the members area".
- On the Access tab, select the "Private area" group for it.
- Save and close the record.
You should have something like this:
Try setting the access for an entire page to "Private area". When you save the page, notice how the icon in the page tree changes. This is a visual reminder that the page is not public. If you try to access a restricted page in the frontend, the TYPO3 error message "Page Not Found" will display.
Add a login form
The next step is to place a login box somewhere on the site so that visitors can log in to view the restricted content.
- On the "Members only" page, click the + Content button between the two existing content elements.
- In the new content element wizard, go to the Form elements tab and select "Login Form".
- Give it a header (for example, Log in).
- Go to the Plugin tab. There are several options for the Login Form, but the only one which is absolutely necessary is the "User Storage Page".
-
Use the Browse for records icon to browse the page tree and select the "Web site users" folder.

- Save and close the record.
-
View the page. You should have something like this:

-
Enter the user name and the password you defined earlier for the frontend user, and you should see the following:

This is just a quick overview of the login form provided by TYPO3 CMS. It has a rich set of features that are described in the Frontend Login manual.