TYPO3 - Getting Started Tutorial

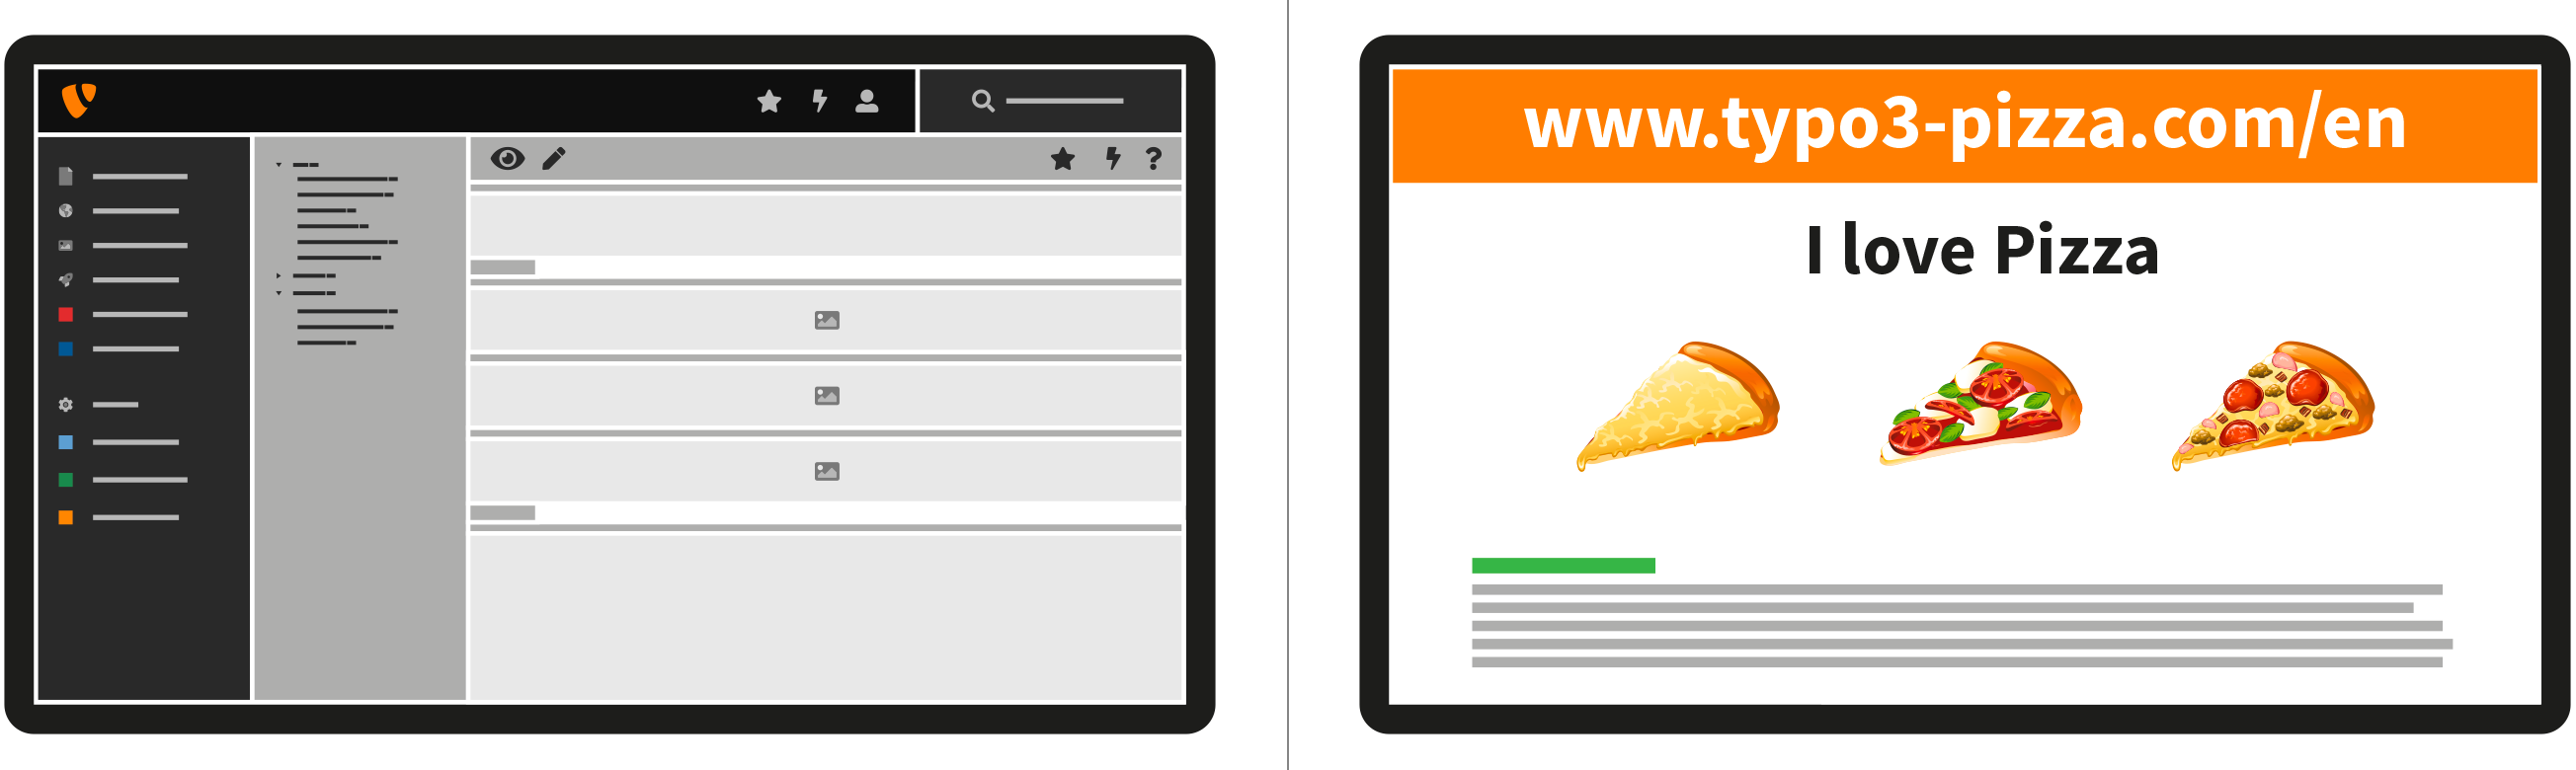
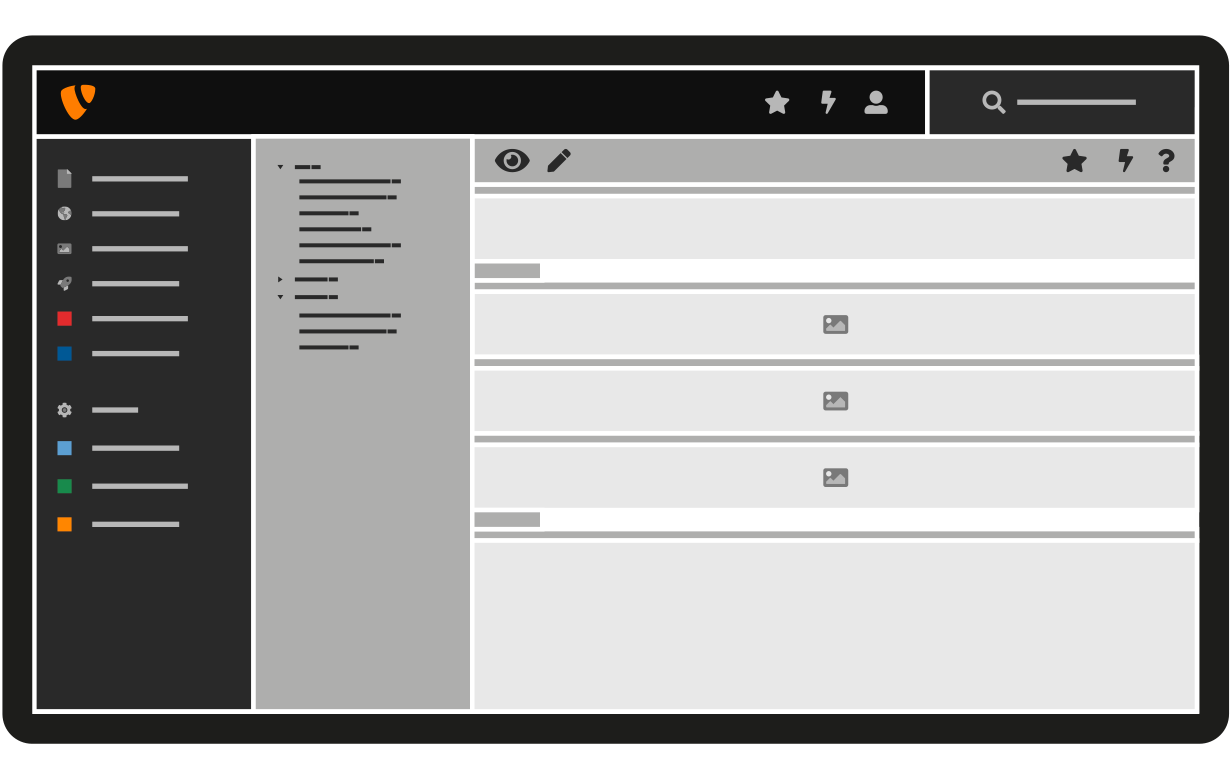
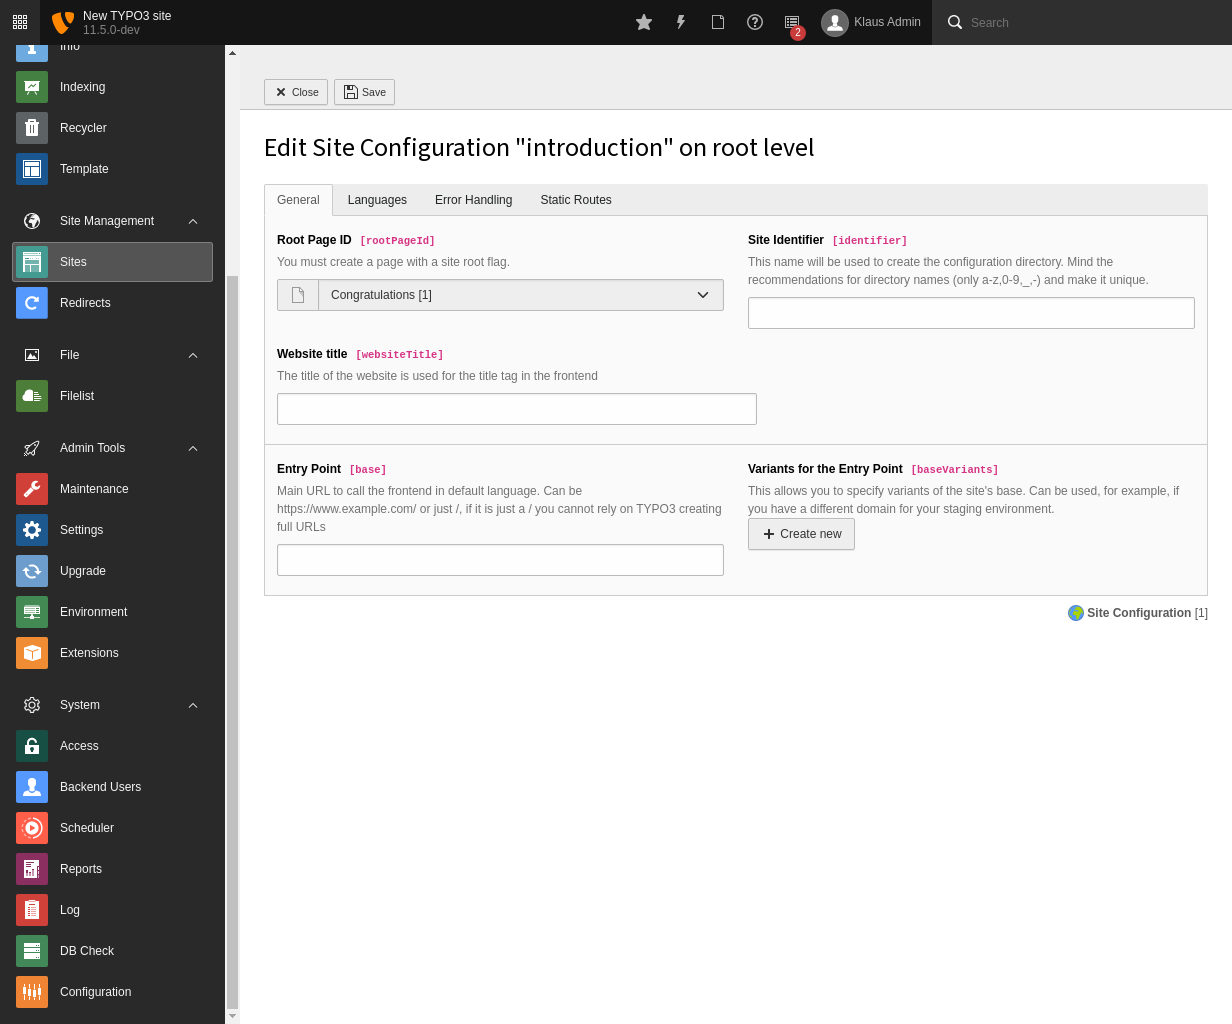
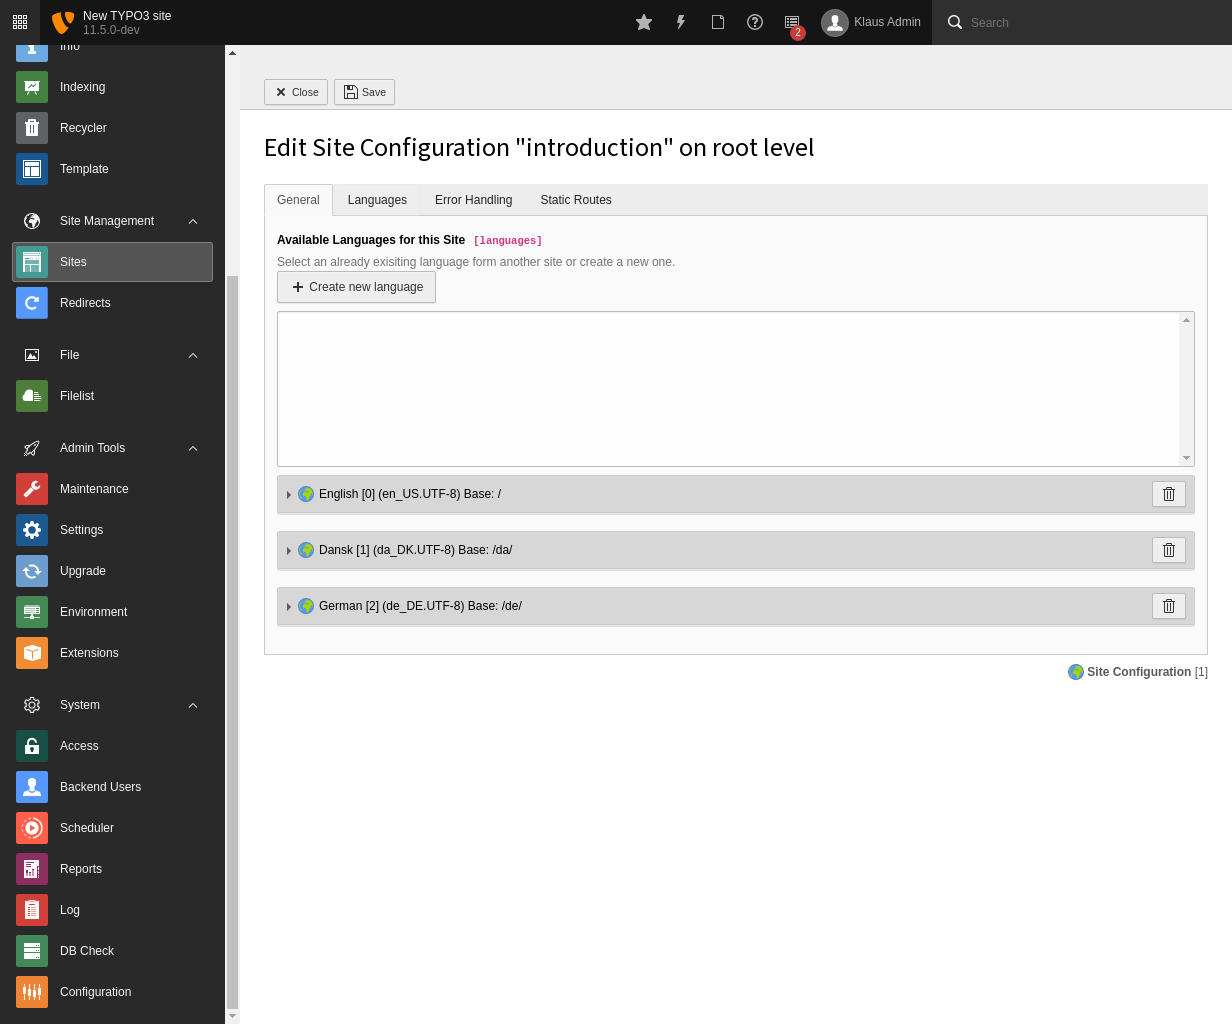
Welcome to Getting Started, this guide features an introduction to TYPO3 that highlights some of its core concepts including the backend administrative interface.

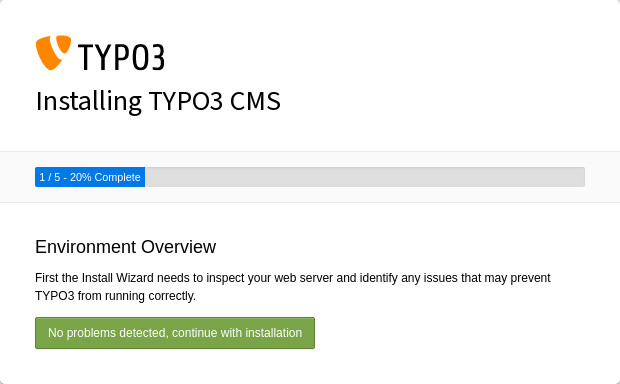
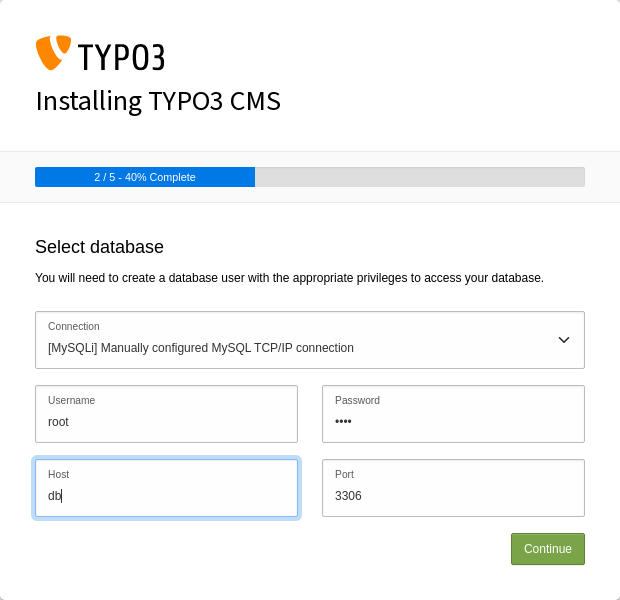
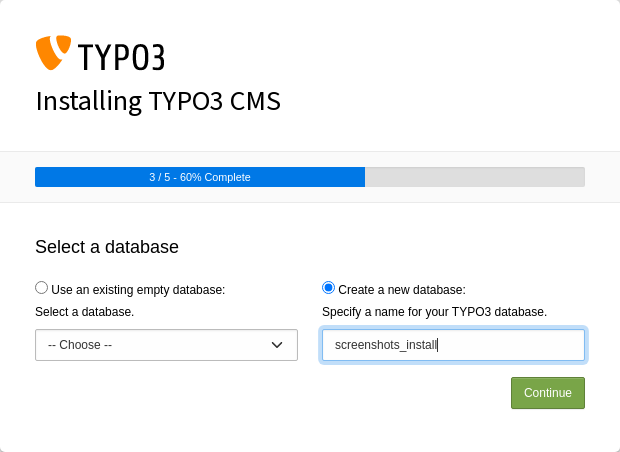
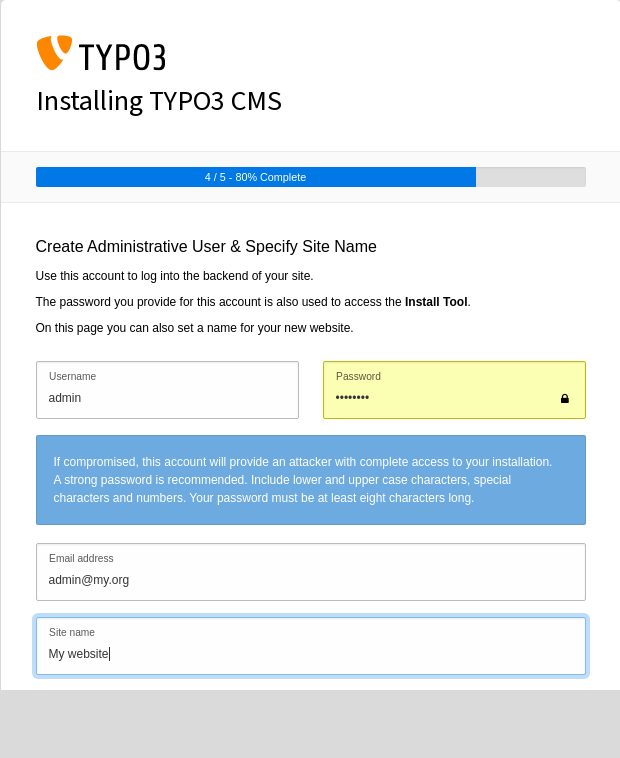
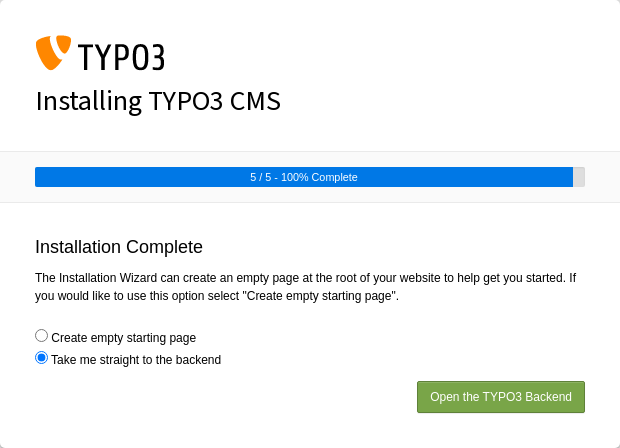
This guide also contains information on how to configure the host operating system and features a detailed installation guide that explains how TYPO3 is installed.


Concepts

Written for new users, this chapter introduces some of TYPO3's core concepts including the backend, TYPO3's administration interface.

System requirements

System requirements for the host operating system, including it's web server and database and how they should be configured prior to installation.

Installation

The installation chapter provides detailed instructions about how to install TYPO3, it also contains information about how to deploy TYPO3 to a production environment.

Site management

Learn how to manage settings for the complete website.

TypoScript introduction

TypoScript is the basic configuration language used to configure the frontend output of a page in TYPO3.

Setup

Setup aims to guide you through the next steps post installation. Such as adding domains, setting up additional users and configuring languages.

Troubleshooting

Troubleshoot common issues that can occur during installation. The troubleshooting chapter covers both TYPO3 CMS and the host environment including the web server, database and PHP.

Managing backend users

Learn how to create users and configure their backend privileges.

Permissions management

Learn how to effectively structure and manage backend user groups and permissions.

Working with extensions

Discover how third-party extensions are installed and managed using Composer.

The "Introduction Package"

The "Introduction Package" is a great place to start if you are looking to test drive TYPO3 and see a prebuilt site that contains a range of example page templates and content.

Next steps

Next steps provides an overview of tasks that can be carried out once TYPO3 is installed, such as creating templates and adding content.


Version

11.5

Language

en

Author

TYPO3 contributors

License

This document is published under the Open Publication License.

Rendered

Mon, 21 Apr 2025 09:15:12 +0000

TYPO3 Concepts

The backend & frontend

TYPO3 is separated into two parts, the backend and the frontend.

The backend is the administrative side of the CMS, it is only accessible to users who have been granted access. The frontend is what the visitor will see when browsing the site.

Backend

The backend's main role is to enable users to create and publish content for their site.

The backend is also used to configure a TYPO3 installation. Domains, languages and other information that determine how a site behaves are managed via the backend. Tasks such as adding backend users and managing third-party extensions also take place in the backend.

Accessing The Backend

The backend can be accessed via example.org/typo3.

By default, users see the CMS's Overview Dashboard when they log in to the backend.

Backend Modules

The backend contains a range of modules that are grouped by task. User access rights determine what modules are visible to users when they log into the backend.

  • The Web group contains a set of modules that handle the creation and management of both pages and content.
  • Site Management handles the setup of a site. From this module it is possible to specify the site name, assign domains and select languages.
  • Filelist provides a convenient way to view and manage files, including documents, images and videos.
  • Admin Tools features a collection of administrative modules so that you can perform various maintenance and upgrade tasks. This module also contains the Extension manager, where you can enable and disable any third-party extensions.
  • The System group contains modules that allow administrators to manage access to the backend, view error logs and provide information specific to that installation.

Extensions

Developed by the community, extensions provide a range of solutions that help extend TYPO3. Extensions come in many forms - from small extensions that carry out specific tasks to larger extensions that provide an entire suite of functionality such as the TYPO3 Blog Extension.

Frontend

The frontend combines the content created in the backend along with the installation's HTML templates to generate web pages.

To achieve this, TYPO3 uses the Fluid templating engine that acts as the glue between user generated content and design templates.

A typical Fluid template will contain HTML that defines the structure of the page and Fluid tags that perform various tasks.

For example a simple web page that features a navigation menu, a block of text and a company logo will contain three Fluid tags.

  • A tag to insert the content element that contains the block of text.
  • Another that generates the main navigation menu.
  • A third tag to insert the company logo.

Site assets, such as HTML, CSS and JavaScript, are stored in a site package.

System Requirements

TYPO3 requires a web server running PHP and access to a database.

Composer is also required for local development.

If you want TYPO3 to automatically carry out image processing – for example scaling or cropping – you will need GraphicsMagick (version 1.3 or newer) or ImageMagick (version 6 or newer) installed on the server. (GraphicsMagick should be preferred.)

For up-to-date information about TYPO3's system requirements visit get.typo3.org.

PHP

Configure

The following settings need to be set in the installations php.ini

php.ini
; memory_limit >= 256MB
memory_limit=256M

; max_execution_time >= 240 seconds
max_execution_time=240

; max_input_vars >= 1500
max_input_vars=1500
Copied!

The following settings control the maximum upload file size (and should be adapted if necessary):

php.ini
; To allow uploads of a maximum of 10 MB
post_max_size = 10M
upload_max_filesize = 10M
Copied!

Required Extensions

  • pdo
  • json
  • pcre >= 8.38
  • session
  • xml
  • filter
  • SPL
  • standard

Depending on the use case, the following extensions may also be required:

  • fileinfo (used to detect file extensions of uploaded files)
  • gd (GDlib/Freetype is required for building images with text (GIFBUILDER) and is also be used to scale images)
  • zip (TYPO3 uses zip to extract language archives as well as extracting and archiving extensions)
  • zlib (TYPO3 uses zlib for output compression)
  • openssl (OpenSSL is required for sending SMTP mails over an encrypted channel endpoint)
  • intl (when using unicode-based filesystems)
  • mbstring (optional, but a huge performance boost compared to the polyfill which is used otherwise)

Required Database Extensions

  • pdo_mysql (recommended)
  • OR mysqli

The InnoDB engine is required for MySQL and MariaDB instances.

  • pdo_pgsql
  • postgresql
  • pdo_sqlsrv
  • sqlsrv
  • sqlite

Web Server

During the initial installation, TYPO3's default .htaccess file is copied to the installation root folder.

Virtual Host Record

  • AllowOverride needs to include "Indexes" and "FileInfo" in the Virtual Host record.

Apache Modules

The following Apache modules are required:

mod_alias:
Block access to vcs directories
mod_authz_core:
Block access to specific files and directories
mod_deflate:
Used for compression and performance.
mod_expires:
Adds HTTP headers for browser caching and performance.
mod_filter:
Used with mod_deflate.
mod_headers:
Used in combination with mod_deflate.
mod_rewrite:
Enable human readable urls.
mod_setenvif:
Also used with mod_deflate.

NGINX does not support static configuration files that are stored in a projects root like Apache and IIS would. Instead, NGINX requires a configuration file to be created within the applications own configuration directory.

Example NGINX configuration file:

# Compressing resource files will save bandwidth and so improve loading speed especially for users
# with slower internet connections. TYPO3 can compress the .js and .css files for you.
# *) Set $GLOBALS['TYPO3_CONF_VARS']['BE']['compressionLevel'] = 9 for the Backend
# *) Set $GLOBALS['TYPO3_CONF_VARS']['FE']['compressionLevel'] = 9 together with the TypoScript properties
#    config.compressJs and config.compressCss for GZIP compression of Frontend JS and CSS files.
location ~ \.js\.gzip$ {
    add_header Content-Encoding gzip;
    gzip off;
    types { text/javascript gzip; }
}
location ~ \.css\.gzip$ {
    add_header Content-Encoding gzip;
    gzip off;
    types { text/css gzip; }
}

# TYPO3 - Rule for versioned static files, configured through:
# - $GLOBALS['TYPO3_CONF_VARS']['BE']['versionNumberInFilename']
# - $GLOBALS['TYPO3_CONF_VARS']['FE']['versionNumberInFilename']
if (!-e $request_filename) {
    rewrite ^/(.+)\.(\d+)\.(php|js|css|png|jpg|gif|gzip)$ /$1.$3 last;
}

# TYPO3 - Block access to composer files
location ~* composer\.(?:json|lock) {
    deny all;
}

# TYPO3 - Block access to flexform files
location ~* flexform[^.]*\.xml {
    deny all;
}

# TYPO3 - Block access to language files
location ~* locallang[^.]*\.(?:xml|xlf)$ {
    deny all;
}

# TYPO3 - Block access to static typoscript files
location ~* ext_conf_template\.txt|ext_typoscript_constants\.txt|ext_typoscript_setup\.txt {
    deny all;
}

# TYPO3 - Block access to miscellaneous protected files
location ~* /.*\.(?:bak|co?nf|cfg|ya?ml|ts|typoscript|tsconfig|dist|fla|in[ci]|log|sh|sql|sqlite)$ {
    deny all;
}

# TYPO3 - Block access to recycler and temporary directories
location ~ _(?:recycler|temp)_/ {
    deny all;
}

# TYPO3 - Block access to configuration files stored in fileadmin
location ~ fileadmin/(?:templates)/.*\.(?:txt|ts|typoscript)$ {
    deny all;
}

# TYPO3 - Block access to libraries, source and temporary compiled data
location ~ ^(?:vendor|typo3_src|typo3temp/var) {
    deny all;
}

# TYPO3 - Block access to protected extension directories
location ~ (?:typo3conf/ext|typo3/sysext|typo3/ext)/[^/]+/(?:Configuration|Resources/Private|Tests?|Documentation|docs?)/ {
    deny all;
}

location / {
    try_files $uri $uri/ /index.php$is_args$args;
}

location = /typo3 {
    rewrite ^ /typo3/;
}

location /typo3/ {
    absolute_redirect off;
    try_files $uri /typo3/index.php$is_args$args;
}

location ~ [^/]\.php(/|$) {
    fastcgi_split_path_info ^(.+?\.php)(/.*)$;
    if (!-f $document_root$fastcgi_script_name) {
        return 404;
    }
    fastcgi_buffer_size 32k;
    fastcgi_buffers 8 16k;
    fastcgi_connect_timeout 240s;
    fastcgi_read_timeout 240s;
    fastcgi_send_timeout 240s;

    # this is the PHP-FPM upstream - see also: https://www.nginx.com/resources/wiki/start/topics/examples/phpfcgi/#connecting-nginx-to-php-fpm
    fastcgi_pass         php-fpm:9000;
    fastcgi_index        index.php;
    include              fastcgi.conf;
}
Copied!
  • During the initial installation of TYPO3, the default IIS web config file is copied to the installation root folder.
  • Default IIS web config file with rewrite rules can be found in EXT:install/Resources/Private/FolderStructureTemplateFiles/root-web-config
  • The URL Rewrite plugin is required.

Database

Required Database Privileges

The database user requires the following privileges on the TYPO3 database:

  • SELECT, INSERT, UPDATE, DELETE
  • CREATE, DROP, INDEX, ALTER, CREATE TEMPORARY TABLES, LOCK TABLES

It is recommended to also grant the following privileges:

  • CREATE VIEW, SHOW VIEW
  • EXECUTE, CREATE ROUTINE, ALTER ROUTINE

Composer

Composer is only required for local installations - see https://getcomposer.org for further information. It is recommended to always use the latest available Composer version. TYPO3 11.5 LTS requires at least Composer version 2.1.0.

Installation

The Installation Guide covers everything needed to install TYPO3. Including a preinstallation checklist and a detailed walk through that details every step of the installation process.

The deployment guide highlights some of solutions available that can help automate the process of deploying TYPO3 to a remote server.

This chapter contains information on how to configure and optimize the infrastructure running TYPO3.

Every release of TYPO3 is electronically signed by the TYPO3 release team. In addition, every TYPO3 package also contains a unique file hash that can be used to ensure file integrity when downloading the release. This guide details how these signatures can be checked and how file hashes can be compared.

This is a step-by-step guide detailing how to install TYPO3 using DDEV, Docker and Composer.

Looking to install TYPO3 the classic way? Whilst this method of installation is no longer recommended, the Legacy Installation Guide demonstrates how TYPO3 can be installed without using Composer.

Installing TYPO3

Welcome to the TYPO3 installation guide. This guide covers each of the steps required to install TYPO3 using Composer.

For more information on how to deploy TYPO3 to a live environment, visit the deploying TYPO3 chapter.

Pre-installation Checklist

  • Command line (CLI) access with the ability to create directories and symbolic links.
  • Access to Composer via the CLI (for local development)
  • Access to the web server's root directory
  • Database with appropriate credentials

Execute Composer Create-Project

Execute this Composer command in the web server's root directory.

composer create-project typo3/cms-base-distribution example-project-directory "^11"
Copied!
composer create-project "typo3/cms-base-distribution:^11" example-project-directory
Copied!
# Create a directory for your project
mkdir example-project-directory

# Go into that directory
cd example-project-directory

# Tell DDEV to create a new project of type "typo3"
# 'docroot' MUST be 'public'
ddev config  --project-type=typo3 --docroot=public

# Start the ddev instance
ddev start

# Fetch a basic TYPO3 installation composer.json
ddev composer create "typo3/cms-base-distribution:^11" --no-install -y

# And do the installation
ddev composer install
Copied!

This command pulls down the latest release of TYPO3 and places it in the example-project-directory.

After this command has finished running, example-project-directory will contain the following structure:

.
├── .gitignore
├── composer.json
├── composer.lock
├── LICENSE
├── public
├── README.md
├── var
└── vendor
Copied!

Verify Installation

Create an empty file called FIRST_INSTALL in the /public directory:

touch example-project-directory/public/FIRST_INSTALL
Copied!
echo $null >> public/FIRST_INSTALL
Copied!
ddev exec touch public/FIRST_INSTALL
Copied!
.
├── .gitignore
├── composer.json
├── composer.lock
├── LICENSE
├── public
    ├── FIRST_INSTALL
├── README.md
├── var
└── vendor
Copied!

Access TYPO3 via a web browser

After you have configured your web server to point at the public directory of your project, TYPO3 can be accessed via a web browser. When accessing a new site for the first time, TYPO3 automatically redirects all requests to /typo3/install.php to complete the installation process.

Scan Environment

TYPO3 will now scan the host environment. During the scan TYPO3 will check the host system for the following:

  • Minimum required version of PHP is installed.
  • Required PHP extensions are loaded.
  • php.ini is configured.
  • TYPO3 is able to create and delete files and directories within the installation's root directory.

If no issues are detected, the installation process can continue.

In the event that certain criteria are not met, TYPO3 will display a list of issues it has detected accompanied by a resolution for each issue.

Once changes have been made, TYPO3 can re-scan the host environment by reloading the page https://example.org/typo3/install.php.

Install Tool in 1-2-3 mode, first step.

Select A Database

Select a database connection driver and enter the credentials for the database.

Install Tool in 1-2-3 mode, second step.

TYPO3 can either connect to an existing empty database or create a new one.

The list of databases available is dependent on which database drivers are installed on the host.

For example, if an instance of TYPO3 is intended to be used with a MySQL database then the PHP extension 'pdo_mysql' is required. Once it's installed, 'MySQL Database' will be available as an option.(Review)

Install Tool in 1-2-3 mode, third step.

Create Administrative User & Set Site Name

An administrator account needs to be created to gain access to TYPO3's backend.

An email address for this user can also be specified and a name can be given.

Install Tool in 1-2-3 mode, forth step.

Initialise

TYPO3 offers two options for initialisation: creating an empty starting page or it can go directly to the backend administrative interface. Beginners should select the first option and allow TYPO3 to create an empty starting page. This will also generate a site configuration file.

Install Tool in 1-2-3 mode, fifth step.

Next Steps

Now that installation is complete, TYPO3 can be configured.

Using DDEV

We also provide a step-by-step tutorial on how to Install TYPO3 using DDEV. The tutorial also includes a video.

Installing TYPO3 with DDEV

This is a step-by-step guide detailing how to install TYPO3 using DDEV, Docker and Composer.

DDEV is used for local development only.

Pre-Installation Checklist

  1. Install Docker - Visit docker.com to download and install the recommended version of Docker for your operating system.
  2. Install DDEV - Follow the DDEV installation guide to install DDEV.

DDEV and Docker need to be installed on your local machine before TYPO3 can be installed. If you need help installing DDEV, support can be found on the DDEV Discord server.

Create the Installation Directory

Create an empty directory to install TYPO3 in and then change into that directory:

mkdir t3example
cd t3example
Copied!

Create a new DDEV Project

The ddev config command will prompt for information about your project. TYPO3 is in the list of preconfigured projects.

ddev config

# Give the following answers when prompted:

Project name (t3example):

Docroot Location (current directory): public

Project Type [php, typo3, ...] (php): typo3
Copied!
Docroot Location
Is the folder containing files that have to be reached by the webserver. It contains the vital entry point index.php. The folder is commonly called public.
Project Type
Should always be "typo3"

Alternatively you can skip the prompt by supplying all of the required parameters in a single command:

ddev config  --project-type=typo3 --docroot=public
Copied!

Start the project

ddev start
Copied!

The webserver is now running but TYPO3 is not installed.

Install TYPO3

ddev composer create "typo3/cms-base-distribution:^11"
Copied!

As we just created the project and have no, answer yes when prompted if it is ok to overwrite files in this directory.

You now have a Composer-based TYPO3 installation.

Run the Installation Setup Tool

Via the Console

ddev typo3cms install:setup
Copied!

When prompted enter a username and password for you main admin user (they will also be a system maintainer).

Enter a name for the site that will be displayed in the backend.

You can set up a basic site site displaying "Hello World" or have an empty installation by selecting no.

Via the GUI:

Create a file called FIRST_INSTALL in your webroot

ddev exec touch public/FIRST_INSTALL
Copied!

Open the installer

ddev launch typo3/install.php
Copied!

Go to the TYPO3 backend:

ddev launch typo3
Copied!

And login with the credentials you just provided.

Managing the Database

Upon calling ddev config DDEV automatically created a database for you. DDEV also created a file called public/typo3conf/AdditionalConfiguration.php in which it stored the database credentials for you.

During the installation setup process TYPO3 created all the tables it needed. If you want to have a look at the database, you can run the following command:

ddev launch -p
Copied!

Sending E-Mail

DDEV creates public/typo3conf/AdditionalConfiguration.php to fake sending mails. You can see what mails have been sent here:

ddev launch -m
Copied!

Stopping a DDEV Instance

If you want to stop all projects from running you can call:

ddev poweroff
Copied!

The projects will stay configured and databases will be persisted.

Deleting a DDEV Instance

If you want to delete the project you just created you can remove it by calling the following command in your new projects root folder:

ddev delete --omit-snapshot
Copied!

This will remove all containers from the project and delete the database.

Afterwards you can safely delete the project's root folder.

Tuning TYPO3

This chapter contains information on how to configure and optimize the infrastructure running TYPO3.

OPcache

It is recommended that OPcache be enabled on the web server running TYPO3. OPcache's default settings will provide significant performance improvements; however there are some changes you can make to help further improve stability and performance. In addition enabling certain features in OPcache can lead to performance degradation.

Enabling OPcache

php.ini
opcache.enable=1
opcache.revalidate_freq=30
opcache.revalidate_path=0
Copied!

Tuning OPcache

Below is list a of OPcache features with information on how they can impact TYPO3's performance.

opcache.save_comments

opcache.save_comments
Default

1

Recommended

1

Setting this to 0 may improve performance but some parts of TYPO3 (including Extbase) rely on information stored in phpDoc comments to function correctly.

opcache.use_cwd

opcache.use_cwd
Default

1

Recommended

1

Setting the value to 0 may cause problems in certain applications because files that have the same name may get mixed up due to the complete path of the file not being stored as a key. TYPO3 works with absolute paths so this would return no improvements to performance.

opcache.validate_timestamps

opcache.validate_timestamps
Default

1

Recommended

1

While setting this to 0 may speed up performance, you must make sure to flush opcache whenever changes are made to the PHP scripts or they will not be updated in OPcache. This can be achieved by using a proper deployment pipeline. Additionally, some files can be added to the blacklist, see opcache.blacklist_filename for more information.

opcache.revalidate_freq

opcache.revalidate_freq
Default

2

Recommended

30

Setting this to a high value can improve performance but shares the same issue when setting validate_timestamps to 0.

opcache.revalidate_path

opcache.revalidate_path
Default

1

Recommended

Setting this value to 0 should be safe with TYPO3. This may be a problem if relative path names are used to load scripts and if the same file exists several times in the include path.

opcache.max_accelerated_files

opcache.max_accelerated_files
Default

10000

Recommended

10000

The default setting should be enough for TYPO3, but this depends on the number of additional scripts that need to be loaded by the system.

For more information on OPcache visit the Official PHP documentation.

Deploying TYPO3

This guide outlines the steps required to manually deploy TYPO3 and ensure the installation is secure and ready to be used in a production context. This guide also highlights a number of automation tools that can help automate the deployment process.

There are several different ways to deploy TYPO3. One of the more simple options is to manually copy its files and database from a local machine to the live server, adjusting the configuration where necessary.

General Deployment Steps

  • Build the local environment (installing everything necessary for the website)
  • Run composer install --no-dev to install without development dependencies
  • Copy files to the production server
  • Copy the database to the production server
  • Clearing the caches

Production Settings

To ensure a secure installation of TYPO3 on a production server, the following settings need to be set:

  • Admin Tools > Settings > Configuration Presets The "Live" preset has to be chosen to make sure no debug output is displayed.
  • HTTPS should be used on production servers and $GLOBALS['TYPO3_CONF_VARS']['BE']['lockSSL'] should be set to true.
  • Enforce HSTS (Strict-Transport-Security header) in the web servers configuration.
  • The TYPO3_CONTEXT environment variable should be set to a main context of Production (can be verified on the top right in the TYPO3 backend Application Information). It should be used to select the appropriate base variant for the target system in the Site Configuration.
  • Configure the TYPO3 logging framework to log messages of high severity including and above WARNING or ERROR and continue to rotate log files stored in var/log.
  • Verify the file permissions are correct on the live system.

Deployment Automation

A typical setup for deploying web applications consists of three different parts:

  • The local environment (for development)
  • The build environment (for reproducible builds). This can be a controlled local environment or a remote continuous integration server (for example Gitlab CI or Github Actions)
  • The live (production) environment

To get an application from the local environment to the production system, the usage of a deployment tool and/or a continuous integration solution is recommended. This ensures that only version-controlled code is deployed and that builds are reproducible. Ideally setting a new release live will be an atomical operation and lead to no downtime. If there are errors in any of the deployment or test stages, most deployment tools will initiate an automatic "rollback" preventing that an erroneous build is released.

One widely employed strategy is the "symlink-switching" approach:

In that strategy, the webserver serves files from a virtual path releases/current/public which consists of a symlink releases/current pointing to the latest deployment ("release"). That symlink is switched after a new release has been successfully prepared. The latest deployment contains symlinks to folders that should be common among all releases (commonly called "shared folders").

Usually the database is shared between releases and upgrade wizards and schema upgrades are run automatically before or shortly after the new release has been set live.

This is an exemplatory directory structure of a "symlink-switching" TYPO3 installation:

├── shared/
│    ├── fileadmin/
│    └── var/
│        ├── var/charset/
│        ├── var/lock/
│        ├── var/log/
│        └── var/session/
├── releases/
│    ├── current -> ./release1 (symlink to current release)
│    └── release1/
│        ├── public/ (webserver root, via releases/current/public)
│        │   ├── typo3conf/
│        │   ├── fileadmin -> ../../../shared/fileadmin/ (symlink)
│        │   └── index.php
│        ├── var/
│        |   ├── var/build/
│        |   ├── var/cache/
│        |   ├── var/charset -> ../../../shared/var/charset/ (symlink)
│        |   ├── var/labels/
│        |   ├── var/lock -> ../../../shared/var/lock/ (symlink)
│        |   ├── var/log -> ../../../shared/var/log/ (symlink)
│        |   └── var/session -> ../../../shared/var/session/ (symlink)
│        ├── vendor/
│        ├── composer.json
│        └── composer.lock
Copied!

The files in shared are shared between different releases of a web site. The releases directory contains the TYPO3 code that will change between the release of each version.

When using a deployment tool this kind of directory structure is usually created automatically.

The following section contains examples for various deployment tools and how they can be configured to use TYPO3:

TYPO3 Surf is a deployment tool written in PHP.

<?php
/** @var \TYPO3\Surf\Domain\Model\Deployment $deployment */

$node = new \TYPO3\Surf\Domain\Model\Node('my.node.com');
$node
    ->setHostname($node->getName())
    ->setOption('username', 'myuser')
    ->setOption('phpBinaryPathAndFilename', '/usr/local/bin/php_cli');

$application = new \TYPO3\Surf\Application\TYPO3\CMS();
$application
    ->setDeploymentPath('/httpdocs')
    ->setOption('baseUrl', 'https://my.node.com/')
    ->setOption('webDirectory', 'public')
    ->setOption('symlinkDataFolders', ['fileadmin'])
    ->setOption('repositoryUrl', 'file://' . dirname(__DIR__))
    ->setOption('keepReleases', 3)
    ->setOption('composerCommandPath', 'composer')
    ->setOption('rsyncExcludes', [
        '.ddev',
        '.git',
        $application->getOption('webDirectory') . '/fileadmin',
        'packages/**.sass'
    ])
    ->setOption(TYPO3\Surf\Task\TYPO3\CMS\FlushCachesTask::class . '[arguments]', [])
    ->addSymlink($application->getOption('webDirectory') . '/typo3conf/LocalConfiguration.php', '../../../../shared/Configuration/LocalConfiguration.php')
    ->addNode($node);

    $deployment
        ->addApplication($application)
        ->onInitialize(
            function () use ($deployment, $application) {
                $deployment->getWorkflow()
                    ->beforeTask(\TYPO3\Surf\Task\TYPO3\CMS\SetUpExtensionsTask::class, \TYPO3\Surf\Task\TYPO3\CMS\CompareDatabaseTask::class, $application)
                    ->beforeStage('transfer', \TYPO3\Surf\Task\Php\WebOpcacheResetCreateScriptTask::class, $application)
                    ->afterStage('switch', \TYPO3\Surf\Task\Php\WebOpcacheResetExecuteTask::class, $application)
                    // CreatePackageStatesTask is done by post-autoload-dump script and can be removed
                    // https://github.com/TYPO3/TYPO3.CMS.BaseDistribution/blob/9.x/composer.json#L38
                    ->removeTask(\TYPO3\Surf\Task\TYPO3\CMS\CreatePackageStatesTask::class, $application)
                    ->removeTask(\TYPO3\Surf\Task\TYPO3\CMS\CopyConfigurationTask::class, $application);
            }
        );
Copied!

Deployer is an alternative deployment tool written in PHP. An full description about how to get deployer running for TYPO3 can be found at https://t3terminal.com/blog/typo3-deploy/

<?php

namespace Deployer;

require_once(__DIR__ . '/vendor/sourcebroker/deployer-loader/autoload.php');
new \SourceBroker\DeployerExtendedTypo3\Loader();

set('repository', 'git@github.com:sourcebrokergit/t3base10.git');
set('bin/php', '/home/www/example-project-directory/.bin/php');
set('web_path', 'public/');

host('live')
    ->hostname('production.example.org')
    ->user('deploy')
    ->set('branch', 'master')
    ->set('public_urls', ['https://production.example.org'])
    ->set('deploy_path', '/home/www/example-project-directory/live');
Copied!

Yet another deployment tool for PHP applications written in PHP: https://www.magephp.com

magephp:
 log_dir: ./.mage/logs
 composer:
   path: composer
 exclude:
   - ./.ddev
   - ./.git
   - ./.mage
   - ./public/fileadmin
   - ./public/typo3temp
   - ./var
   - ./.mage.yml
   - ./composer.json
   - ./composer.lock
   - ./LICENSE
   - ./README.md
 environments:
   main:
     user: ssh-user
     from: ./
     host_path: /srv/vhosts/target-path/site/mage
     releases: 3
     hosts:
       - production.example.org
     pre-deploy:
       - exec: { cmd: "composer install --no-dev --no-progress --optimize-autoloader"}
     on-deploy:
       - fs/link: { from: "../../../../shared/public/fileadmin", to: "public/fileadmin" }
       - fs/link: { from: "../../../../shared/public/typo3temp", to: "public/typo3temp" }
       - fs/link: { from: "../../../shared/var", to: "var" }
     on-release:
     post-release:
       - exec: { cmd: './bin/typo3 backend:lock', timeout: 9000  }
       - exec: { cmd: './bin/typo3cms database:updateschema *.add,*.change', timeout: 9000  }
       - exec: { cmd: './bin/typo3cms cache:flush', timeout: 9000  }
       - exec: { cmd: './bin/typo3 upgrade:run', timeout: 9000  }
       - exec: { cmd: './bin/typo3 backend:unlock', timeout: 9000  }
     post-deploy:
Copied!

Legacy Installation

Installing on a Unix Server

  1. Download TYPO3's source package from https://get.typo3.org/:

    /var/www/site/$ wget --content-disposition https://get.typo3.org/11

    Ensure that the package is one level above the web server's document root.

  2. Unpack the typo3_src-11.5.x.tar.gz:

    /var/www/site/$ tar xzf typo3_src-11.5.x.tar.gz

    Note that the x in the extracted folder will be replaced with the latest bugfix version of TYPO3.

  3. Create the following symlinks in the document root:

    cd public
    ln -s ../typo3_src-11.5.x typo3_src
    ln -s typo3_src/index.php index.php
    ln -s typo3_src/typo3 typo3
    
    Copied!
  4. This will then create the following structure:

    ├── typo3_src-11.5.x/
    ├── public/
    ├── ── typo3_src -> ../typo3_src-11.5.x/
    ├── ── typo3 -> typo3_src/typo3/
    ├── ── index.php -> typo3_src/index.php
    Copied!

Installing on a Windows Server

  1. Download TYPO3's source package from https://get.typo3.org/ and extract the .zip file on the web server.

    Ensure that the package is one level above the web server's document root.

  2. Use the shell to create the following symlinks in the document root:

    cd public
    mklink /d typo3_src ..\typo3_src-11.5.x
    mklink /d typo3 typo3_src\typo3
    mklink index.php typo3_src\index.php
    Copied!
  3. This will then create the following structure:

    ├── typo3_src-11.5.x/
    ├── public/
    ├── ── typo3_src -> ../typo3_src-11.5.x/
    ├── ── typo3 -> typo3_src/typo3/
    ├── ── index.php -> typo3_src/index.php
    Copied!

Completing The Installation

After the source package has been extracted and the symlinks created, continue from the Access TYPO3 via a web browser section of the instructions for installing TYPO3 using Composer to complete the installation.

TYPO3 Release Integrity

TYPO3 Release Packages (the downloadable tarballs and zip files) as well as Git tags are signed using PGP signatures during the automated release process. SHA2-256, SHA1 and MD5 hashes are also generated for these files.

Release contents

Every release of TYPO3 is made available with the following files:

TYPO3 CMS 11.5.1 release as an example
typo3_src-11.5.1.tar.gz
typo3_src-11.5.1.tar.gz.sig
typo3_src-11.5.1.zip
typo3_src-11.5.1.zip.sig
Copied!
  • *.tar.gz and *.zip files are the actual release packages, containing the source code of TYPO3 CMS
  • *.sig files contain the corresponding signatures for each release package file

Checking file hashes

File hashes are used to check that a downloaded file was transferred and stored correctly on the local system. TYPO3 uses cryptographic hash methods including MD5 and SHA2-256.

The file hashes for each version are published on get.typo3.org and can be found on the corresponding release page, for example https://get.typo3.org/version/11#package-checksums contains:

TYPO3 v11.5.1 Checksums
SHA256:
205d1879e05c75093a2c427f7f7cacb297ca841e491450b3577987e259ff6c5b typo3_src-11.5.1.tar.gz
e07b303405d182f4450fda4a7a7acdbe5080c22123d52f74ef5f2fbf78233a49 typo3_src-11.5.1.zip

SHA1:
aa88171cfb5aa9935b2a989f51e68b6d8eb6e5f0 typo3_src-11.5.1.tar.gz
3dbe9322015e1d5266d78c6c3ff40846f8a6492f typo3_src-11.5.1.zip

MD5:
cda2a4494f6673e9251c265c9ef1c345 typo3_src-11.5.1.tar.gz
252583501d30bb5679305b58ed6e6f94 typo3_src-11.5.1.zip
Copied!

To verify file hashes, the hashes need to be generated locally for the packages downloaded and then compared to the published hashes on get.typo3.org. To generate the hashes locally, one of the following command-line tools md5sum, sha1sum or shasum needs to be used.

The following commands generate hashes for the .tar.gz and .zip packages:

~$ shasum -a 256 typo3_src-*.tar.gz typo3_src-*.zip
205d1879e05c75093a2c427f7f7cacb297ca841e491450b3577987e259ff6c5b typo3_src-11.5.1.tar.gz
e07b303405d182f4450fda4a7a7acdbe5080c22123d52f74ef5f2fbf78233a49 typo3_src-11.5.1.zip
Copied!
~$ sha1sum -c typo3_src-*.tar.gz typo3_src-*.zip
aa88171cfb5aa9935b2a989f51e68b6d8eb6e5f0 typo3_src-11.5.1.tar.gz
3dbe9322015e1d5266d78c6c3ff40846f8a6492f typo3_src-11.5.1.zip
Copied!
~$ md5sum typo3_src-*.tar.gz typo3_src-*.zip
cda2a4494f6673e9251c265c9ef1c345 typo3_src-11.5.1.tar.gz
252583501d30bb5679305b58ed6e6f94 typo3_src-11.5.1.zip
Copied!

These hashes must match the hashes published on get.typo3.org to ensure package integrity.

Checking file signatures

TYPO3 uses Pretty Good Privacy to sign release packages and Git release tags. To validate these signatures The GNU Privacy Guard is recommend, however any OpenPGP compliant tool can also be used.

The release packages are using a detached binary signature. This means that the file typo3_src-11.5.1.tar.gz has an additional signature file typo3_src-11.5.1.tar.gz.sig which is the detached signature.

gpg --verify typo3_src-11.5.1.tar.gz.sig typo3_src-11.5.1.tar.gz
Copied!
gpg: Signature made Tue Oct 12 12:20:19 2021 UTC
gpg:                using RSA key E7ED29A70309A0D1AE34DA733304BBDBFA9613D1
gpg: Can't check signature: No public key
Copied!

The warning means that the public key E7ED29A70309A0D1AE34DA733304BBDBFA9613D1 is not yet available on the local system and cannot be used to validate the signature. The public key can be obtained by any key server - a popular one is pgpkeys.mit.edu.

wget -qO- https://get.typo3.org/KEYS | gpg --import
Copied!
gpg: requesting key 59BC94C4 from hkp server pgpkeys.mit.edu
gpg: key 59BC94C4: public key "TYPO3 Release Team (RELEASE) <typo3cms@typo3.org>" imported
gpg: key FA9613D1: public key "Benjamin Mack <benni@typo3.org>" imported
gpg: key 16490937: public key "Oliver Hader <oliver@typo3.org>" imported
gpg: no ultimately trusted keys found
gpg: Total number processed: 3
gpg:               imported: 3  (RSA: 3)
Copied!

Once the public key has been imported, the previous command on verifying the signature of the typo3_src-11.5.1.tar.gz file can be repeated.

gpg --verify typo3_src-11.5.1.tar.gz.sig typo3_src-11.5.1.tar.gz
Copied!
gpg: Signature made Tue Oct 12 12:20:19 2021 UTC
gpg:                using RSA key E7ED29A70309A0D1AE34DA733304BBDBFA9613D1
gpg: Good signature from "Benjamin Mack <benni@typo3.org>" [unknown]
gpg: WARNING: This key is not certified with a trusted signature!
gpg:          There is no indication that the signature belongs to the owner.
Primary key fingerprint: E7ED 29A7 0309 A0D1 AE34  DA73 3304 BBDB FA96 13D1
Copied!

The new warning is expected since everybody could have created the public key and uploaded it to the key server. The important point here is to validate the key fingerprint E7ED 29A7 0309 A0D1 AE34 DA73 3304 BBDB FA96 13D1 which is in this case the correct one for TYPO3 CMS release packages (see below for a list of currently used keys or access the https://get.typo3.org/KEYS file directly).

gpg --fingerprint E7ED29A70309A0D1AE34DA733304BBDBFA9613D1
Copied!
pub   rsa4096 2010-06-22 [SC]
      E7ED 29A7 0309 A0D1 AE34  DA73 3304 BBDB FA96 13D1
uid                  [ unknown] Benjamin Mack <benni@typo3.org>
sub   rsa4096 2010-06-22 [E]
Copied!

Checking tag signature

Checking signatures on Git tags works similar to verifying the results using the gpg tool, but with using the git tag --verify command directly.

git tag --verify v11.5.1
Copied!
object dcba2a7ce93eaef0ad025dc21fdeb85636d7b4f4
type commit
tag v11.5.1
tagger Benni Mack <benni@typo3.org> 1634041135 +0200

Release of TYPO3 11.5.1
gpg: Signature made Tue Oct 12 14:18:55 2021 CEST
gpg: using RSA key E7ED29A70309A0D1AE34DA733304BBDBFA9613D1
gpg: Good signature from "Benjamin Mack <benni@typo3.org>"
Copied!

The git show command on the name of the tag reveals more details.

git show v11.5.1
Copied!
tag v11.5.1
Tagger: Benni Mack <benni@typo3.org>
Date:   Tue Oct 12 14:17:52 2021 +0200

Release of TYPO3 11.5.1
-----BEGIN PGP SIGNATURE-----
...
-----END PGP SIGNATURE-----
Copied!

Public keys

You can download the used public keys from get.typo3.org.keys


A minimal page created by pure TypoScript

TypoScript is the basic configuration language used to configure the frontend output of a page in TYPO3.

You can find detailed information about TypoScript and its syntax in the reference "TYPO3 Explained".

The semantics of TypoScript settings are listed in the TypoScript Reference.

"Hello world" example in TypoScript

To start, in the TYPO3 backend, create a standard page named Minimal example just under (inside) the page tree TYPO3 logo container. Add a basic site configuration for this page.

Create a new TypoScript template record on this page. Give the TypoScript template a title, and make it a root level template, but do not include any static templates.

In the TypoScript template Setup field, add the following three lines:

"Setup" field in the TypoScript record
# Create the frontend output of the page
page = PAGE
page {
    # Show a text with value "Hello world."
    10 = TEXT
    10.value = Hello, world.
}
Copied!
  1. Is a comment. See the Syntax of comments in TypoScript: Comments.
  2. Assigns a top level object of type PAGE to a variable called page.
  3. The page gets more options in this block. See the Blocks in the TypoScript syntax.
  4. Another comment.
  5. Assigns a content object (also called "cObject") of type TEXT to index number 10 of page. It has the path page.10 if you want to change it later.
  6. Assigns the value Hello, world. to the value property of the TEXT cObject stored in path page.10.

Clear all caches via the following console command or the button in the backend:

ddev typo3 cache:flush
Copied!

You can now preview the result.

Resulting web page

Here is the resulting web page HTML source for both the TypoScript-only and the Fluid-based implementations. Notice how TYPO3 has added default markup around the single line of content:

Example frontend output
<!DOCTYPE html>
<html lang="en">
<head>
    <meta charset="utf-8">
    <!--
       This website is powered by TYPO3 - inspiring people to share!
       TYPO3 is a free open source Content Management Framework initially
       created by Kasper Skaarhoj and licensed under GNU/GPL.
       TYPO3 is copyright 1998-2018 of Kasper Skaarhoj. Extensions are
       copyright of their respective owners.
       Information and contribution at https://typo3.org/
    -->
    <title>Example site - Start page</title>
    <meta name="generator" content="TYPO3 CMS">
</head>
<body>
Hello, world.
</body>
</html>
Copied!

Debug the TypoScript in the backend module "Active TypoScript"

Open the backend module Web > Template > TypoScript Object Browser. You can find the variable page that you just defined. The other variables have been created by TypoScript loaded globally by the TYPO3 Core and system extensions. They are some of the Reserved top-level objects.

Play around with TypoScript

You can now try out a couple of TypoScript commands to familiarize yourself with TypoScript.

Here are some examples:

Wrap "Hello, world." in p-tags

"Setup" field in the TypoScript record
page = PAGE
page {
    10 = TEXT
    10 {
        value = Hello, world.
        stdWrap.wrap = <p>|</p>
    }
}
Copied!
  1. As we now have several options for TEXT object with path page.10, we switch to the block syntax here.
  2. Assign the text to the value property of the TEXT object.
  3. We use the stdWrap property of the TEXT object to configure the stdWrap function.

    In this function we use the option wrap wrap. It surrounds the current content of the TEXT object as set in line 5 with the value defined here. The pipe | character is replaced by the text that corresponds to the value property.

Display the title of the current page on top

"Setup" field in the TypoScript record
page = PAGE
page {
    5 = TEXT
    5 {
        stdWrap.field = title
        stdWrap.wrap = <h1>|</h1>
    }
    10 = TEXT
    10 {
        value = Hello, world.
        stdWrap.wrap = <p>|</p>
    }
}
Copied!
  1. We assign a second content object (also called "cObject") of type TEXT to index number 5 of page. As the index is smaller than the index 10 of the TEXT object containing the text "Hello World", it is displayed before the other object.
  2. Uses the block syntax to apply properties to the TEXT object.
  3. Uses the stdWrap property field to fetch the field title from the database record of the current page.
  4. Uses the stdWrap property wrap to wrap the current string fetched in line 5 in <h1> tags.

Site Management

Create a new site configuration

Before creating a site configuration, you should have created the root page of your site in the page tree.

The site configuration is stored in a file called config/sites/my_site/config.yaml. For your convenience, you can edit this file using the backend module: Site Management > Sites.

Available root pages should be listed in this module. Click the button Add new site configuration next to the relevant page to create a site configuration for it.

In the next step, you can enter some basic information about the site.

The site identifier can be arbitrary, so we use "example_site" here. The entry point should be a URL pointing to the web root. In this example, it is a local URL generated by DDEV.

In the next two tabs, you can define error handling, such as a custom 404 page, and static routes, for example, to a robots.txt file.

You can read more about Site Handling in the reference "TYPO3 Explained".

After saving, a new file should be created in your project:

config/sites/example_site/config.yaml
base: 'https://example-typo3131.ddev.site'
languages:
  -
    title: English
    enabled: true
    locale: en_US
    hreflang: ''
    base: /en/
    websiteTitle: ''
    navigationTitle: English
    flag: en-us-gb
    languageId: 0
rootPageId: 7
websiteTitle: 'My example page'
Copied!

Setup

Once TYPO3 is installed, the default Site record needs to be configured before content and templates can be added.

Create additional backend users that will have access to TYPO3's backend interface.

Setup additional backend languages in TYPO3 allowing users to select an alternative language to use in the backend.

Creating A Site Record

A single installation of TYPO3 can host multiple websites each with its own content, appearance and domain.

The Site Management Module handles the routing and management for every site in an installation of TYPO3 and stores this information inside individual configuration files.

During installation, TYPO3 automatically creates a basic site record.

However, some additional information is required once TYPO3 is installed.

  • A unique internal and external name needs to be set for the site record.
  • A domain needs to be set for the site.

Site name, title and entry point

Site Management > Sites > Edit Site Record > General

Site Management: Edit Site

  • Root Page ID* Points to the root page of the page tree for this site
  • Site Identifier Used internally, make this unique and only use alphanumeric characters (will also be the directory name of this site configuration)
  • Website Title Visible in the front end title tag
  • Entry Point Here we attach the fully qualified domain of our web site - https://example.org/
  • Variant for the entry point Used to configure for example the local web site domain (in development context)

Languages

Configure the first/default language

Site Management > Languages

Site Management: Edit Languages

TYPO3 adds a "default" language to the site configuration during installation.

If the default language is not English US, it can be changed here.

Adding Backend Users

To create additional backend user records, navigate to System > Backend Users.

Here a list of all current backend users will be displayed.

Backend User Listing

With create new record a new backend user can be created.

A username and password need to be set. Additional information can also be provided such as the user's name and email address.

Enabling the "Admin" toggle grants the user full access to the backend.

Fill out fields for the new backend user

This user record has to be "Enabled" before it can be used to log in to the backend.

Activate editor in list

Activate editor

Changing the backend language

By default, TYPO3's backend is set to English with no additional languages available.

Install an additional language pack

An additional language pack can be installed as an administrator in the backend:

  1. Go to Admin Tools > Maintenance > Manage Languages Packs

    Manage language packs

    Open the backend language administration module

  2. Select Add Language and activate the new language:

    Add a language

    Add the desired language

  3. The selected language is now available:

    A language has been added

Set the language as backend language for yourself

One of the available backend languages can be selected in your user account. Go to Toolbar (top right) > User Avatar > User Settings and select the new language from the field Language:

Changing the current user's interface language

Save the settings and reload the browser content.

Change the backend language of another user

As an administrator you can change the backend language of another user.

  1. Go to System > Backend Users

    Backend User Listing

  2. Select the user
  3. Change the language

    Select the new language from the field User Interface Language.

    Change interface language for a backend user

Troubleshooting

TYPO3

Resetting Passwords

Backend Administrator Password

When the password for a backend user needs to be reset, log into the backend as a different user and use the System > Backend Users tool to reset the password. Note that only backend users with administrative rights can access the Backend Users tool to make this change.

If an alternative administrator account is not available or it doesn't have the appropriate access, open the Install Tool directly using the following address to create a new administrative user:

https://example.com/typo3/install.php
Copied!

The Install Tool requires the "Installation Password" that would have been set when TYPO3 was installed.

The install tool login

Enter the install tool password

Once logged in to the Admin Tool go to Maintenance > Create Administrative User and select Create Administrator. Here you can create a new administrative user.

Button to create an administrator

Create a new administrative user

Form to create an administrator

Fill in the fields for the new administrative user

Use this new administrator account to log into the TYPO3 backend. In the module Backend Users you can change the passwords of existing users, including administrators.

Install Tool Password

Write access to typo3conf/LocalConfiguration.php is required to reset the Install Tool password.

Before editing this file, visit:

https://example.com/typo3/install.php

Copied!

Enter the new password in the dialog box. As the new password is not correct, the following response will be returned:

"Given password does not match the install tool login password. Calculated hash:
$argon2i$v=xyz"
Copied!

Copy this hash including the $argon2i part and any trailing dots.

Then edit typo3conf/LocalConfiguration.php and replace the following array entry with the new hashed password:

'BE' => [
   'installToolPassword' => '$argon2i$v=xyz',
],
Copied!

Debug Settings

During troubleshooting, in the "Settings > Configuration Presets" section of the Install Tool, under "Debug settings", the "Debug" preset can be changed to show errors in the frontend.

Configuration Presets Card

Choose a configuration preset

Debug Presets

Choose the debug preset

The following TypoScript setting can also be added to the root template for the site to show additional debugging information. This is particularly useful when debugging Fluid errors:

config.contentObjectExceptionHandler = 0
Copied!

Additionally, the following logs should be checked for additional information:

  • Webserver log files for general problems (e.g. /var/log/apache2 or /var/log/httpd on Linux based systems)
  • TYPO3 Administration log in SYSTEM > Log via TYPO3's backend.
  • TYPO3 logs written by the Logging Framework located in var/log or typo3temp/var/log depending on the installation setup.

Caching

Cached Files in typo3temp/

TYPO3 generates temporary "cached" files and PHP scripts in <var-path>/cache/ (either typo3temp/var/cache or var/cache depending on the installation). You can remove the entire <var-path>/cache directory at any time; the directory structure and all the caches will be re-written the next time a visitor accesses the site.

A shortcut to remove these caches can be found in the Install Tool, under Important Actions. This might be useful in the event of your cache files becoming damaged and your system not running correctly. The Install Tool won't load any of these caches or any extensions, so it should be safe to use regardless of the corrupt state of the caches.

Amongst other caches, under <var-path>/cache/code/core/ you will find:

-rw-rw----   1 www-data   www-data   61555  2014-03-26 16:28   ext_localconf_8b0519db6112697cceedb50296df89b0ce04ff70.php
-rw-rw----   1 www-data   www-data   81995  2014-03-26 16:28   ext_tables_c3638687920118a92ab652cbf23a9ca69d4a6469.php
Copied!

These files contain all ext\_tables.php and ext\_localconf.php files of the installed extensions concatenated in their loading order. Therefore including one of these files would be the same as including potentially hundreds of PHP files and should improve performance.

Possible Problems With the Cached Files

Changing the absolute path to TYPO3

If you change the path of the TYPO3 installation, you might receive errors like "Failed opening ..." or "Unable to access ...". The problem is that absolute file paths are hard-coded inside the cached files.

Fix: Clean the cache using the Install Tool: Go to "Important Actions" and use the "Clear all caches" function. Then hit the page again.

Changing Image Processing Settings

When you change the settings for Image Processing (in normal mode), you must take into account that old images may still be in the typo3temp/ folder and that they prevent new files from being generated! This is especially important to know if you are trying to set up image processing for the first time.

The problem is solved by clearing the files in the typo3temp/ folder. Also make sure you clear the database table "cache_pages".

System Modules

The following system modules can help when trying to troubleshoot issues with TYPO3. Administrative rights are required.

Log

The TYPO3 CMS backend logs a number of actions performed by backend users: login, cache clearing, database entries (creation, update, deletion), settings changes, file actions and errors. A number of filters are available to help filter this data.

DB Check

The Database (DB) Check module provides four functions related to the database and its content.

Record Statistics
Shows a count of the various records in the database, broken down by type for pages and content elements.
Relations
Checks if certain relations are empty or broken, typically used to check if files are being referenced.
Search
A tool to search through the whole database. It offers an advanced mode which is similar to a visual query builder.
Check and update global reference index
TYPO3 CMS keeps a record of relations between all records. This may get out of sync when certain operations are performed without the strict context of the backend. It is therefore useful to update this index regularly.

Configuration

The Configuration module can be used to view the various configuration arrays used by the CMS.

Reports

The Reports module contains information and diagnostic data about your TYPO3 CMS installation. It is recommended that you regularly check the "Status Report" as it will inform you about configuration errors, security issues, etc.

PHP

Missing PHP Modules

The "System Environment" section of the Install Tool provides detailed information about any missing PHP modules and any other settings that may not be configured correctly.

For example, the PHP extensions openssl and fileinfo must be enabled. This can be achieved by adding (or uncommenting) the following lines in the [PHP] section of your php.ini file:

extension=fileinfo.so
extension=openssl.so
Copied!

On a Windows-based server, these are the extension files:

extension=php_fileinfo.dll
extension=php_openssl.dll

Copied!

PHP Caches, Extension Classes etc.

There are some situations which can cause what appear to be illogical problems after an upgrade:

  • If extensions override classes in which functions have changed. Solution: Try disabling all extensions and then enable them one by one until the error recurs.
  • If a PHP cache somehow fails to re-cache scripts: in particular, if a change happened to a parent class overridden by a child class which was not updated. Solution: Remove ALL cached PHP files (for PHP-Accelerator, remove /tmp/phpa_*) and restart Apache.

Opcode cache messages

No PHP opcode cache loaded

You do not have an opcode cache system installed or activated. If you want better performance for your website, then you should use one. The best choice is OPcache.

This opcode cache is marked as malfunctioning by the TYPO3 CMS Team.

This will be shown if an opcode cache system is found and activated, which is known to have "too many" errors and won't be supported by TYPO3 CMS (no bugfixes, security fixes or anything else). In current TYPO3 versions only OPcache is supported

This opcode cache may work correctly but has medium performance.

This will be shown if an opcode cache system is found and activated, which has some nitpicks. For example we cannot clear the cache for one file (which we changed) but only can reset the complete cache itself. This will happen with:

  • OPcache before 7.0.2 (Shouldn't be out in the wild.)
  • APC before 3.1.1 and some mysterious configuration combinations.
  • XCache
  • ZendOptimizerPlus

This opcode cache should work correctly and has good performance.

Well it seems that all is ok and working. Maybe you can tweak something more but this is out of our knowledge of your user scenario.

Web Server

Apache

Some settings may require adjustment for TYPO3 to operate correctly This will vary depending on the host operating system and the version of Apache that is installed.

Enable mod_rewrite

If mod_rewrite is not enabled, the URL handling will not work properly (specifically the mapping of the URLs TYPO3 uses internally for "speaking URLs") and you might receive 404 (page not found) errors.

For example, the modules can be enabled by editing your http.conf file, locating the required modules and removing the preceding hash symbol:

#LoadModule expires_module modules/mod_expires.so
#LoadModule rewrite_module modules/mod_rewrite.so

Copied!

After making any changes to the Apache configuration, the service must be restarted.

Adjust ThreadStackSize on Windows

If you are running TYPO3 on Windows, the extension manager might not render.

This problem is caused by the value of ThreadStackSize, which on Windows systems by default is set too low. To fix this, add the following lines at the end of your httpd.conf file:

<IfModule mpm_winnt_module>
  ThreadStackSize 8388608
</IfModule>
Copied!

Database

MySQL

Character Set

TYPO3 uses UTF-8 encoding, you will need to ensure that your instance of MySQL also uses UTF-8. When installing TYPO3 for the first time, you can select UTF-8 encoding when you create the database for the first time. For an existing database, you will have to set each table and column to use UTF-8.

Working With Extensions

Information on how to find, install and manage extensions using Composer.

Information on how to install local extensions including sitepackages and custom extensions using Composer.

This guide contains information on how to manage extensions using the TYPO3 backend and the TYPO3 Extension Repository (TER) without Composer. This method of managing extensions is now deprecated.

Managing Extensions

Both system extensions and third-party extensions are managed using Composer. Composer handles the installation of the extension and also installs any dependencies that may be required. Composer is also used to uninstall extensions.

Installing extensions

Find the Composer package name for an extension

Visit the Extension Repository, and search for the extension.

On the extension page , under "Composer support", will be the Composer command required to install that extension.

For example, the news extension has the package name georgringer/news.

Typically the package name will be vendor + slash + extension key. However, if the extension key contains an underscore, it is replaced with a dash in the package name. For example: Extension Builder:

  • extension key: extension_builder
  • vendor: friendsoftypo3
  • Composer package name: friendsoftypo3/extension-builder

Use composer require to install the extension

composer require <packagename>
Copied!

To install the news extension:

composer require georgringer/news
Copied!

This will add the extension requirement to the installations composer.json and install the extension.

Whilst the extension is installed and activated automatically, it still needs to be set up before it can be used:

Setup the extension

./vendor/bin/typo3 extension:setup
Copied!

The extension setup command takes care of executing additional installation procedures, such as database migrations and clearing caches if necessary. The extension setup command is not specific to a single extension but instead looks at the overall state and executes all necessary steps.

Uninstalling extensions

The composer command remove uninstalls an extension.

composer remove georgringer/news
Copied!

The updated composer.lock file needs to be committed to the version control system.

Installing local extensions

Local extensions including sitepackages and custom extensions also need to be installed using Composer.

Custom extensions should be placed in a dedicated, local directory: documentroot/packages.

Once this directory exists, update the installations composer.json and add this directory as a new repository:

{
    "repositories": [
        {
            "type": "path",
            "url": "./packages/*/"
        },
    ],
}
Copied!

Then run composer require to the install the local extension my-local-extension with vendor vendor:

composer require vendor/my-local-extension:@dev
Copied!

By executing this command, Composer locates vendor/my-local-extension and then symlinks it to typo3conf/ext/my-local-extension once composer install is executed. The setup from above defines that the extension is to be placed by composer into the folder :file:packages/my-local-extension if it has not been already there.

Additional information

Find out the extension key for an extension

For any installed extension, the extension key can be found by looking at the file system into the directory public/typo3conf/ext/. The directory name of the extension is the same as the extension key.

Before installing an extension, the extension key can be found on its' page in the TYPO3 Extension Repository (TER).

The extension key is listed on the top. For the extension news, the extension key is news.

Managing Extensions - Legacy Guide

Installing an Extension using the Extension Manager

In the backend:

  1. Go to "ADMIN TOOLS" > "Extensions"
  2. In the Docheader, select "Get Extensions"
  3. Click "Update now"

    The button is on the top right.

  4. Enter the name of the extension in the search field
  5. Click on "Go"
  6. Click on the Action icon on the left for the extension:

    "Import and Install"

    Now the extension is installed, but not activated. To activate:

  7. Choose "Installed Extensions" in the Docheader
  8. Click on the icon with a "+" sign for your extension in the "A/D" column.

Uninstall an Extension Without Composer

If you installed TYPO3 via composer you should uninstall Extensions via composer.

Check Dependencies

First find out, which other extensions and functions of your TYPO3 installation are dependent on the extension you want to uninstall. You can find out about the dependencies by checking the Extension Repository. Look for the extension you want to uninstall and the others you have installed. Read in each extensions manual the sections 'Dependencies' and 'Reverse dependencies'.

Check whether any referrals have been made to the extension in any setup, config or other TypoScript files. Check if you included a plugin from the extension in your web site. Think of the results of removing them and finally do it.

If you are working locally or on a test server you might as well try to uninstall the extension. The Extension Manager warns you about dependencies that are written in an extensions ext_emconf.php constraints section. Note however that you depend on the extensions developers faithfully noting all dependencies in this config file.

If you get an exception and can't even access the Extension Manager anymore because of it, you can uninstall / install extensions manually with PackageStates.php as a last resort, see Uninstalling an Extension Manually

Uninstall / Deactivate Extension via TYPO3 Backend

Select "Deactivate" in Extension Manager

Log into the TYPO3 Backend and open the Extension Manager ('Ext Manager'). From the menu choose 'Install extensions'. You get an overview about installed extensions.

On the left side you see an icon, which shows the status of each extension, and what you can do:

  • Extension Install Icon with plus sign: The extension is not installed. (Click once to install)
  • Extension Uninstall Icon with minus sign: The extension is installed and running. (Click once to uninstall)

Next to the extension you want to uninstall click on Extension UnInstall Icon. After some seconds the icon changes to the grey Extension Install Icon.

Remove an Extension via the TYPO3 Backend

After successfully uninstalling an extension via the Extension Manager you can permanently remove the extension by clicking on the waste-basket symbol "Remove" beside the extensions entry in the Extension Manager.

Uninstalling an Extension Manually

At times an extension causes a problem and the TYPO3 Backend can not be opened anymore due to it. In such a case the extension can be uninstalled manually. This is not common practise but a last resort.

Since LTS8 this can be done by removing the extensions configuration from the file PackageStates.php

  1. Open the file typo3conf/PackageStates.php
  2. Search for your ext_key in the array.

    'ext_key' => [
          'packagePath' => 'typo3conf/ext/ext_key/',
      ],
    ...
    Copied!
  3. Remove the entry.

Removing an Extension Manually

Removing an extension manually is not common practice and should only be done as a last resort. You should only remove an extension that you uninstalled successfully. Make a backup first. Then you can permanently remove an extension by removing its folder at typo3conf/ext/[extensionname]. The corresponding database tables can be removed in the Install Tool -> Important Actions -> Database analyzer -> Compare current database with specification.

Additional Information

The following is independent of whether you install with Composer or without.

Find out the Extension Key for an Extension

Again, go to the Extension Repository, and search for the extension.

The extension key is listed on the top. For the extension news, the extension key is news.

You can also see the extension key in your file system in the directory public/typo3conf/ext/. The directory name of the extension is the same as the extension key.

Backend User Management

We saw earlier that TYPO3 CMS enforces a strict separation of so-called "frontend" and "backend". The same is true for users: there are "frontend users", who are web site visitors, and "backend users", who are editors and administrators.

Working with frontend users is discussed in the Editors Guide. We will now look at backend users and how to set up groups and permissions.

Backend Privileges

The following chapters cover modules that will only be available for backend users with specific access privileges.

In addition to configuring access rights for backend users or groups as described in Setting up User Permissions, there are "superuser" rights which can be activated for each user.

If a backend user has been created for editing in the backend, he or she should usually not get access to admin or system modules.

You should only give a backend user as much access as is needed. This makes the job easier by automatically deactivating modules and GUI elements the user does not have access to. It also makes it impossible for a user to damage the system by accidentally doing things he or she should not have been able to do in the first place.

Before TYPO3 version 9 there was only admin and non admin. Now we have the additional access privilege "system maintainer".

Admin

  • admin user privilege can be added by clicking the "admin" checkbox when creating or changing a backend user
  • admins have access to the SYSTEM module (including Access, Backend User, Log etc. modules)

System Maintainers

The first backend admin created during installation will automatically be a system maintainer as well. To give other users system privileges, you can add them in the ADMIN TOOLS > Settings > Manage System Maintainers configuration. Alternatively the website can be set into "Development" mode in the Install Tool. This will give all admin users system maintainer access.

System Maintainers are the only users who are able to see and access the Install Tool and the Extension Manager. These users are persisted within the LocalConfiguration.php as $GLOBALS['TYPO3_CONF_VARS']['SYS']['systemMaintainers'] .

Backend Users

You can manage backend users using the SYSTEM > Backend users module.

The Backend Users module

This module makes it possible to search and filter users. They can also be edited, deleted and disabled.

Default Editors in the Introduction Package

The Introduction Package will create two default editors and groups for you: "simple_editor" and "advanced_editor".

Simulate User

"simple_editor"

The simplest way to check out another user (when one is an administrator) is to use the "simulate user" feature:

The last action icon lets us simulate another user

And here is what "simple_editor" sees when accessing the TYPO3 CMS backend:

The backend view for the "simple\_editor"

As you can see, this user only has access to the "Page" module. Furthermore its view of the page tree is also limited to the branch starting with the "Content examples" page.

To switch back to the admin account, click on the user's name in the top bar and click the "Exit" button (note that this button normally reads "Logout").

Exiting the backend user simulation

"advanced_editor"

Now try doing the same with the "advanced_editor". You should see the following after switching user:

The backend view for the "advanced\_editor"

The "advanced_editor" is allowed to use more modules than "simple_editor" but doesn't have any access to the page tree. This is probably a bug of the Introduction Package, but it makes for a good exercise for changing user rights in the next chapters.

Groups

While it is possible to change permissions on a per user basis, it is strongly recommended you use Groups instead. Just as for users, there are "Backend user groups" and "Frontend user groups".

This chapter provides a quick overview of backend user groups. In the next chapter we will look at changing user permissions using groups.

Backend groups can also be viewed using SYSTEM > Backend users module:

Viewing groups in the Backend Users module

We can see two groups that correspond to our users ("simple" and "advanced").

To find out what group each user is a member of, select the "information" action icon. A pop-up will open with detailed information about the group. Scroll down until you find the "References to this item:" section. This shows the list of backend users who are part of this group.

Checking out which users are part of the group

Setting up User Permissions

We will look into managing user permissions by editing the "Advanced editors" user group.

Choosing the settings menu

General

On the "General" tab you can edit the group's title and write a short description. As mentioned before, permissions from sub-groups will be inherited by the current group.

Content of the "General" tab when editing a backend user group

Access Lists

The "Access Lists" tab is where most permissions are defined. All fields are detailed below.

Modules

The first field is used to define which modules members of the group should have access to. This will directly influence what appears in the module menu for backend users.

Choosing modules for the backend user group

Tables

The second field allows you to select the tables that the members of the groups are allowed to see ("Tables (listing)"). And the next field is the same but for the tables that can be modified ("Tables (modify)").

1

Page Types

These fields can restrict which page types are available to members of the group. Explanations about the various page types are found in the Editors Guide:.

1

Allowed Excludefields

When defining table fields in TYPO3, it is possible to mark them as "excluded". Such fields will never be visible to backend users (except administrators, of course) unless they are explicitly given access to them. This field is about granting such access. It displays a list of all tables and their excluded fields.

The list of excluded fields in its default state (all tables collapsed)

Click on a table name to expand the list of its fields and make a selection of fields by checking some boxes.

The same list with one table expanded

Explicitly Allow or Deny Field Values

For some fields, it is possible to set fine-grained permissions on the actual values allowed for those fields. This is in particular the case for the "Page content: Type" field, which defines the type of content element that can then be defined by the members of the group.

As with the list of excluded fields, this fields first appears with groups collapsed. You need to expand one group to start making changes.

Setting permissions for values of the content type field

Limit to Languages

In a multilingual web site, it is also possible to restrict users to a specific language or set of languages. This can be achieved using the last field of the "Access Lists" tab.

Setting permissions for languages

Mounts and Workspaces

The next tab contains very important fields which define which parts of the page tree and the file system the members of the group may exert their rights over.

We will cover only mounts here. Detailed information about workspaces can be found in the related extension manual.

DB Mounts

DB mounts (database mounts) are used to restrict a user's access to only some parts of the page tree. Each mount corresponds to a page in the tree. The user will have access only to those pages and their sub- pages.

Choosing DB mounts for the group

See also Pages permissions.

In order to inherit these settings in assigned users, activate the checkbox "Mount from groups" for the "DB Mounts" in the be_users record of this user. This record can be found in the "List" module on the root page and in the "Backend User" module.

File Mounts

File mounts are similar to DB mounts but instead are used for manage access to files. The main difference is that file mount records must be defined by the administrator first. These are located in the root node:

List of all available file mounts

They can then be selected when editing a backend user group:

Selecting allowed file mounts

In order to inherit these settings in assigned users, activate the checkbox "Mount from groups" for the "File Mounts" in the be_users record of this user. This record can be found in the "List" module on the root page and in the "Backend User" module.

Fileoperation Permissions

Giving access to File mounts is not the whole story. Specific operations on files and directories must be allowed. This is what the next field does. Choose either "Directory" or "Files" and start checking boxes.

Giving specific file operation permissions

Category mounts

It is possible to limit the categories that a user can attach to a database record by choosing the allowed categories in the field Category mount. If no category is selected in the category mount, all categories are available.

The category mounts only affect which categories can be attached to records. In the list module all categories can be seen if the user has access to the folder where the sys_category records are stored.

Page Permissions

DB mounts are not the whole story about access to pages. Users and groups also need to have rights to perform operations on the pages like viewing, editing or deleting.

This is managed using the SYSTEM > Access module:

The Access module with ownerships and permissions

Every page has an owner, who is a user, and also a group membership. Rights can be assigned to the owner, to the group or to everyone. This will be familiar to Unix users.

To change a permission, simply click on the related icon and it will switch state. To change the owner or the group of a given page, click on the owner's or group's name and a small form appears.

Changing a page's owner

It is also possible to change owner, group and permissions recursively, even for the whole page tree. Let's place ourselves on the home page by clicking on the "Congratulations" page in the page tree. Now click again on the "Congratulations" page in the Access module. You should see the following:

Preparing for recursively changing the group on the whole page tree

By choosing "All users" as group and then "Set recursively 3 levels" in the "Depth" dropdown, we will assign all the pages in the page tree to the "All users" group.

Actually this makes a lot of sense, since the "All users" group is a sub-group of both "Simple editors" and "Advanced editors". This way both groups will have the same permissions on the page tree. However since they have different DB mounts, they will not have access to the same set of pages.

The group has changed for all pages

Setting up a User

To explore the last details of setting up a backend user - and as an exercise - this chapter will guide you through the process of creating a new user. To make it more interesting, we will also create a new user group.

Step 1: Create a New Group

Let's create a new user group using the Access module.

Creating a new backend group from the Access module

Start by entering the name ("Resource editors"), optionally a description and choose "All users" as sub-group.

Entering the general information about the new group

Let's keep things simple for the further permissions. Try to do the following:

  • for Modules, just choose "Web > Page" and "Web > View"
  • for Tables (listing) and Tables (modify), choose "Page" and "Page content"
  • for Page types, select "Standard"

and save.

Move to the "Mounts and workspaces" tab and select the "Resources" page as DB mount. To achieve that easily start typing "Res" in the wizard at the right-hand side of the field. It will display suggestions, from which you can select the "Resources" page.

Defining DB mounts using the suggest wizard

Let's ignore all the rest. Use the "Save and close" action to get back to the group list.

Step 2: Create the User

Similarly to what we have done before, let's create a new user using the Access module.

Creating a new backend user from the Access module

Enter the username, password, group membership:

Setting the base information for the new user

Now switch to the "Mounts and workspaces" tab to ensure that the "Mount from Groups" settings are set:

Checking the "Mount from groups" setting

This makes it so that the DB and File mounts are taken from the group(s) the user belongs to and are not defined at user-level.

Save and close the record. We will check the result of our work by using the simulate user feature we saw earlier.

Let's simulate our new user!

You should see the following:

The backend as seen by Resource McEditor

Permissions Management

Introduction

TYPO3 is known for its flexibility and the ability to be expanded. It's packed with lots of built-in features and can be easily customized to fit your needs. That's why it is equipped with an advanced way to manage who gets access to different parts of the system. This solution works well for both small and large projects, allowing for detailed setting of permissions for various user roles, each with different levels of access.

The access options in the TYPO3 backend are split into different areas. They can be configured at the levels of users and groups. Access can be set up for specific modules and pages, database mounts, file storage, content elements, and also individual fields within content elements.

A well-thought out initial setup is particularly important for permissions management. Skipping this step can introduce complex issues as your project expands. As time passes, managing access levels can turn into a challenging and time-consuming task. In extreme situations, you might find yourself needing to overhaul your permissions setup entirely. Moreover, improper permission setup could lead to a risky workaround: granting administrative privileges to users who shouldn't have them, even though it may seem like a quick fix at the time. This approach compromises security and deviates from best practice.

We also recognize that each project is unique and may require a distinct setup for permissions. Therefore, please consider this document as a compilation of recommended practices and guidelines that could be beneficial in managing permissions within the TYPO3 backend. However, remember that these recommendations are adaptable and can be tailored to suit your specific requirements.

What access options can be set within TYPO3?

Access options in TYPO3 are categorized into several distinct groups. For a more detailed exploration, refer to the Access Control Options documentation page. However, here's a quick overview to give you an idea of what to consider when configuring permissions in the backend.

Access lists

Modules - A list of submodules accessible to a user

Dashboard widgets - A selection of dashboard widgets that a user can be permitted to use on the dashboard

Tables for listing - A list of tables that a user is permitted to view in the backend

Tables for editing - A list of tables that a user is permitted to edit in the backend

Page types -A list of page types that a user is allowed to use within the pages tree

Excludefields - A list of default-excluded fields (columns) within tables, requiring explicit access permission

Explicitly allow/deny field values - A list of options within select fields whose access is restricted and must be explicitly granted

Languages - Restricts access to content in selected languages only

Mounts

Database Mounts - Specifies which parts of the pages tree are accessible to the user.

File Mounts - Specify accessible folders within storage for users

Category Mounts - Specify which sections of the system's categories tree are accessible to the user

Page permissions
Grant access to individual pages based on user and group IDs.
User TSConfig
A TypoScript-defined, flexible, and hierarchical configuration for "soft" permissions and backend customization for users or groups

Visualizing this overview of Access Control Options will help in developing the naming convention for backend groups later on.

General recommendations

Recommendations outlined in this chapter, although not directly focused on setting permissions in TYPO3, are closely related due to the various security aspects described. It is advisable to thoroughly review these recommendations before proceeding to the next chapter, where guidance on establishing top-level backend groups corresponding to different roles, such as editors, proofreaders, and others, is explained.

Create user-specific accounts

When creating backend users, avoid usage of generic usernames like editor, webmaster, proofreader, etc. Instead use their real names, such as johndoe, john.doe, or even their email address, john.doe@mail.com. This approach guarantees that the identity of the user logging into the TYPO3 backend is always known, as well as who is responsible for specific changes in content or configuration.

In the context of GDPR, it is recommended to use properly named accounts to easily distinguish individuals. Assigning top-level groups to these accounts makes identifying user roles straightforward.

Bad username setup

Bad username setup

Good username setup

Good username setup

How to ensure safety

When configuring TYPO3 permissions, begin by granting users only necessary access, adding more as needed for security. Avoid giving admin rights unless absolutely necessary, and use specialized accounts for routine tasks like content management.

For temporary TYPO3 backend access, like for a temp worker or student, use the feature to set an expiration date on accounts. This prevents security risks from inactive accounts. Regularly review and remove unnecessary accounts.

Secure each user account with a strong password and follow secure password guidelines for new or updated accounts. Promote cybersecurity by informing users about security policies. Additionally, enable Multi-factor authentication (MFA) for an extra security layer.

Set permissions via groups, not user records

Permissions, like module visibility, language options, and database or file access, can be configured via backend user records. While direct configuration on user records may seem convenient, especially for small projects, it can lead to long-term issues, such as difficulty tracking permission origins when spread across users and groups. Centralizing permissions in backend groups simplifies their management and maintenance.

User record without permissions

Avoid setting permissions directly through the backend user record

When permissions are assigned to individual users and groups, updating them requires editing each account. Setting permissions at the group level simplifies updates, as changes automatically apply to all group members.

File mounts and files management

When planning for permissions and file access, consider how many separate entry points (File Mounts) within file storage you will need. At a minimum, you should create separate folders for each site you manage and then configure them as distinct file mounts, which equate to separate backend groups. These groups can later be assigned to users, granting them access to such folders.

There are cases where some folders and the files within them have to be shared across multiple sites. For this purpose, create separate file mounts and dedicated groups for them. Then, combine these groups within a role group, ensuring that each user associated with such a role group will have access to the specified folders and files in the storage.

Storagefileadmin/Website B Filesfileadmin/website_b/Shared Filesfileadmin/shared/Website A Filesfileadmin/website_a/File Mountfileadmin/website_a/File Mountfileadmin/shared/File Mountfileadmin/website_a/FM_website_bBackend GroupFM_sharedBackend GroupFM_website_aBackend GroupR_website_b_editorBackend Group (Role)R_website_a_editorBackend Group (Role)Jane DoeUser - editor role on Website BJohn DoeUser - editor role on Website A
Sample backend groups hierarchy

This diagram demonstrates the potential structure of folders within storage. Create dedicated file mounts for folders, and then use those file mounts within backend user groups. This arrangement enables two users with editor roles to access distinct sets of folders: one can access files from Website A and Shared folders, while the other accesses Website B and Shared folders.

Often more complex configuration will be required, with a more nested folder structure for each site. However, the setup remains similar - create separate file mounts where needed and a backend group that will utilize this file mount. Then, assign such groups to role groups.

Setting up backend user groups

Backend user groups can be categorized into three main types. Those used to grant permissions to pages and define mounts for databases, categories, or files we can refer to as System Groups. The ones responsible for granting access to modules, various content elements, record types, and specific fields within forms can be termed Access Control List (ACL) Groups. Finally, we have Role Groups, which aggregate groups from both the System and ACL Groups to provide a permissions set representing a specific role.

This classification should not be seen as a TYPO3 standard, but rather as a guideline that will assist in configuring groups later on. Read more to discover the details.

System groups

System groups have the lowest level of permissions without which other groups like Access Control List (ACL) and Role groups will not work. They enable access to individual pages based on user and group IDs, allow definition of accessible sections of pages and categories tree for users, and determine access to files and folders within storages (via File Mounts). System groups are likely to be the ones you modify the least often.

Access Control List (ACL) groups

Access Control List (ACL) groups are the largest set of groups, used to set detailed permissions for elements like modules, dashboard widgets, tables for listing and editing, and specific fields in backend forms.

Ensure ACL groups grant essential permissions for specific elements management. For example, users managing custom record types (e.g., Article, Product) should list, create, and access records, possibly via a custom backend module or the List module. It's crucial to equip such a group with access to:

  • Listing and modifying the table of a records
  • Editing fields within the record that align with this group's purpose
  • Accessing the core List module or custom module for records management
  • If there are relations from this record, for example, to files, it should also permit uploading, selecting, and processing these files

Therefore, a group can be seen as an independent unit that provides complete access to a specific part of the system and can be integrated later with other units (groups).

Role groups as an aggregation of specific role permissions

Backend role groups in TYPO3 are designed to correspond to the specific roles users fulfill, such as editor, proofreader, etc. These groups accumulate permissions exclusively through the inheritance from subgroups. This hierarchical setup ensures that role groups can effectively grant users the precise set of permissions needed to perform their designated roles, such as editing.

By utilizing this structure, TYPO3 allows for a clear and organized approach to managing access rights, ensuring users have the permissions they need, nothing more, nothing less.

Implementing naming conventions for easy group management

TYPO3 currently lacks the feature to categorize backend user groups by context or purpose, sorting them alphabetically instead. While helpful for quick searches, this becomes cumbersome with many groups, when it is required to identify them by their purpose or scope.

The situation could worsen with multiple administrators managing group and user permissions. Without naming conventions for groups that all administrators adhere to, it may become challenging to identify the responsibilities of each group.

As detailed in the Access Control Options in TYPO3 chapter, these options can be categorized into types like access lists, mounts, page permissions, etc. This categorization can also aid in organizing backend user groups. Let’s explore how implementing prefixes in group names can help streamline their organization.

Role Group

ROLE_ or R_

Examples: R_editor, R_editor_advanced, R_proofreader

A group representing a specific role, such as editor or proofreader, will inherit permissions from multiple other groups (aggregates them) to compile the necessary permissions set.

Page Group

PAGE_GROUP_ or PG_

Examples: PG_website_a, PG_website_a_blog, PG_website_b, PG_website_b_gallery

Grants permissions to all pages in the pages tree for a given site or only

selected branches of pages in the tree.

Those groups will be assigned directly to the pages (see Page Permissions for more details) following the TSConfig or the Access Module configuration.

Database Mount

DATABASE_MOUNT_ or DBM_

Examples: DBM_website_a, DBM_website_a_blog, DBM_website_b, DBM_website_b_gallery

Specifies which portion (either the entirety or a segment) of the pages tree will be displayed to the user.

This setting is closely linked to page access permissions — without sufficient permissions to list the pages, a user will not be able to view the mounted page tree.

File Mount

FILE_MOUNT_ or FM_
Examples: FM_website_a, FM_website_a_blog, FM_website_b, FM_website_b_gallery, FM_shared

Grants access to the selected folders (File Mounts) within file storage.

Category Mount

CATEGORY_MOUNT_ or CM_

Examples: CM_website_a, CM_website_b

Provides access to system categories, or more precisely, to the entire categories tree or a portion of it.

Access Control Lists

ACCESS_CONTROL or ACL_

Examples: ACL_content_elements, ACL_news, ACL_news_extended, ACL_module_reports

These groups are the largest, defining granular access to content elements, plugins, modules, fields and more.

File Operations

FILE_OPERATION_ or FO_

Examples: FO_all, FO_read_write

Defines the range of allowed operations for files and folders, such as read, write, delete, etc.

Limit to languages

LANGUAGE_ or L_

Examples: L_all, L_english_german, L_en_pl_de

Specifies the languages available for managing content. Keep in mind that you would have to have access to the source language when creating the translation.

This method guarantees dedicated group prefixes for Pages access, Database Mounts, File Mounts, File Operations, Category Mounts, and module, table, widget, and language access. These examples are customizable to fit specific needs. Ensure each group name is straightforward and indicative of its permissions.

Prefixed group names

Prefixing group names makes them more organized and easier to search within forms

Describe the naming conventions in the TCA

For those managing backend groups, if you've adopted naming conventions, consider adding a field description in the TCA for be_groups, be_users, and related tables, detailing these conventions instead of referencing separate documentation. This ensures immediate visibility of the naming rules for anyone modifying group inheritance or assignments.

Add description to a form field through TCA
$GLOBALS['TCA']['be_users']['columns']['usergroup']['description'] =
 'Prefixes: R_ - Role, PG_ - Page Group, DBM_ - Database Mount, FM_ - File Mount,' .
 'FO_ - File Operations, CM_ - Category Mount, ACL_ - Access Control';
Copied!

This code demonstrates the assignment of a static description for the usergroup field in the backend user form. However, you should place it in a translation file and retrieve it from there for better flexibility and localization support.

Use the Notes field to describe the purpose of the group

Another good practice for managing backend groups is to clearly describe the purpose or scope of each group. This can be done using the Description field located within the Notes tab of the backend group form.

TCA field description

Describe the scope or purpose of the group

Introduction Package

If you are using TYPO3 for the first time you may want to see a working example of the CMS before you start work on your own project.

The Official Introduction Package showcases many of TYPO3's capabilities and gives you the ability to try them first hand. The Introduction Package utilizes the bootstrap_package extension to generate multiple responsive HTML templates that you can select and try out.

It also features examples of the different kinds page content that you typically see on a website, such as paragraphs of text, images, tables and navigation menus.

Installing The Introduction Package

To install the Introduction Package run the following command:

composer require typo3/cms-introduction
Copied!
composer require typo3/cms-introduction
Copied!
ddev composer require typo3/cms-introduction
Copied!

New in version 11.5

The extension can be set up afterwards by running the following command:

vendor/bin/typo3 extension:setup
Copied!
typo3/sysext/core/bin/typo3 extension:setup
Copied!

First steps with the Introduction Package

The "Introduction Package" creates a number of pre-built pages within the page tree. The top level page is named "Congratulations".

  1. Click on "Congratulations" in the page tree.
  2. View the page in the frontend:

    Click on the "View webpage" icon (with an eye) to view the page in the frontend.

TYPO3 Introduction Package Home Page

Next Steps and Further Reading

Once TYPO3 is installed, it is now possible to start the process of developing the site's visual appearance and creating pages and content inside the CMS.

Building The Sites Structure And Adding Content

Using the Page tree - start to define the structure of your site by creating pages.

Pages can exist in various forms and can also be nested inside one and other.

Once the page structure exists content can now be added to the pages.

Developing The Sites Visual Appearance

There are two main topics that cover templating in TYPO3, Fluid and Site packages.

Fluid Templating

Fluid is TYPO3’s templating engine. Fluid acts as the link between a project's static HTML templates and the content that is created in TYPO3’s backend.

Site Packages

Site packages are a type of extension that act as a storage point for a projects frontend assets and any configuration files that extend or change the behaviour of a TYPO3 installation.

Before the development of a sites visual appearance or "theme" can start, a Site package needs to be created in order to store frontend assets such as Fluid/HTML,CSS,Javascript files. Once they are located within a Site package they can then be loaded by TYPO3 to render the frontend.

Keep Security In Mind

Security is taken very seriously by the developers of TYPO3. The TYPO3 Security Team manage all security incidents. They review them and consider their impact. Security advisories are regularly published.

More information about security can be found in the Security guidelines.

Sitemap

About This Tutorial

This document was created to introduce new users to TYPO3, its core features and provide an overview on how to configure and administer the CMS.

Upon completing this tutorial, you should have a better understanding about how the CMS is installed, how the backend is administered and how you begin creating templates.

French Translation

A French translation has been created by Jonathan Iroulin.

We are currently working on optimizing the rendering. Due to this, there was an issue with rendering the translation. The translated version still exists in a separate branch fr and only needs to be reactivated once the issues with rendering have been solved and the French branch has been reviewed for TYPO3 v9.

Status of This Manual

The current version was updated to reflect TYPO3 CMS 11.5.

Credits

This manual was originally written by Kasper Skårhøj and adapted to TYPO3 CMS 4.5 LTS by Philipp Gampe, Martin Holtz, Susanne Moog and François Suter. It was revised and updated to version 6.2 LTS by Guido Haase, to version 7 LTS by Francois Suter and to version 9.5 LTS by Sybille Peters. Tom Warwick made several language improvements on the 9.5 branch for better readability.

Since TYPO3 documentation can now be edited by the TYPO3 community collaboratively, a number of other people have made changes and improved this tutorial. You can see the list of contributors on GitHub.

Create Default Users

Create simple_editor

Creating a new user and group is handled extensively in Setting up a User.

Here, you will create 2 new users, using the already existing groups (created by the "Introduction Package").

  1. Enter the "Backend users" module
  2. Click on the +: "Create new record"

    Create a new editor

    Create a new backend user

  3. Fill out some fields.

    • Username: simple_editor
    • Password: choose some password
    • Group: Select "Simple editors" in the "Available Items"
    • Name: Simple Editor
    Fill out fields for the new backend user
  4. Press save (top)
  5. Activate the backend user

    Activate editor

You have created a user with the already existing group "Simple editors".

Create "advanced_editor"

Now, create another user "advanced_editor". Use the group "Advanced Editors".

Change DB Mount for Group "Simple Editors"

The group "Simple Editors" should have the page "Content Examples" set as "DB Mounts" under "Mounts and Workspaces".

  1. Select "Backend user groups" in the top
  2. Click on the group "Simple editors" (or the edit pencil)
  3. Select the tab "Mounts and Workspaces"
  4. Check

    If you see the page "Congratulations" in DB Mounts, you should continue, if you see "Content Examples", you are done and can abort by selecting "Close" in the top.

  5. Click on "Congratulation" and the garbage pail to remove this.
  6. Click on the file icon "Browse for records"
  7. Select the page "Content Examples"
  8. Click Save
Change DB Mount

Change DB Mount

What did we just do?

We changed the DB mount from "Congratulations" (which was the start page) to "Content Examples". The editor should only see and edit the pages starting with "Content Examples". You will see the result in the next step.

Next

Continue with Simulate User