Solr
First you need to install Solr itself. There are several ways to do so:
Using Hosted-solr.com
If you want to start simple and just create a solr core with a click. You can use hosted-solr.com. For a small fee you get your own solr core in seconds, configured to be used with EXT:solr.
Docker
You can use our official docker image to start and maintain solr server with a small effort.
To pull the TYPO3 Solr image from docker hub, simply type the following in command line:
docker pull typo3solr/ext-solr:<EXT:Solr_Version>
Tip
To find out available image versions refer to https://hub.docker.com/r/typo3solr/ext-solr/tags
Persistent Data
Our docker image is based on official Apache Solr image.
Important
Our and official Apache Solr image exports a volume /var/solr for persistent data.
This volume will be mounted to persist the index and other resources from Apache Solr server. Following paths inside the exported volume are relevant for backups.
Path |
Contents |
|---|---|
data/data/<language> |
the index data of corresponding core |
data/configsets/ext_solr_<EXT:Solr_Version>/conf/_schema_analysis_(stopwords|synonyms)_<language>.json |
the managed stop words and synonyms of corresponding core |
Tip
To be save for other scenarios(e.g. SVC of modified Solr Schemas and managed resources), simply backup the whole "data/" folder.
Start container with anonymous volume
To run the container with anonymous volume, simply type the following in command line:
docker run --name=typo3s-solr-server -d -p 8983:8983 typo3solr/ext-solr
This will create a docker anonymous volume and store the data inside of it. To find out the path of used anonymous volume, simply type the following in command line:
docker inspect -f '{{ .Mounts }}' typo3s-solr-server
Start container with volume on hosts path
There are few steps required to be able to run the container with volume on hosts path.
Following commands will create the named volume "typo3s-solr-server-data" on hosts path and start the container with this volume.
mkdir .solrdata
docker volume create --name typo3s-solr-server-data --opt type=none --opt device=$PWD/.solrdata --opt o=bind
docker run --name=typo3s-solr-server --mount source=typo3s-solr-server-data,target=/var/solr -d -p 8983:8983 typo3solr/ext-solr
Important
The folder for solr data MUST exist on the host machine.
Important
The data is owned by containers solr UNIX-User/Group with id 8983, and MUST NOT be changed(re-owned) to different UNIX-Users.
Tip
Following is equivalent docker-compose.yaml definition with ".solrdata" folder next to docker-compose.yaml file.
version: '3.6'
services:
  solr:
    container_name: typo3s-solr-server
    image: typo3solr/ext-solr:<EXT:Solr_Version>
    ports:
      - 8983:8983
    volumes:
      - typo3s-solr-server-data:/var/solr

volumes:
  typo3s-solr-server-data:
    driver: local
    driver_opts:
      type: none
      device: $PWD/.solrdata
      o: bind
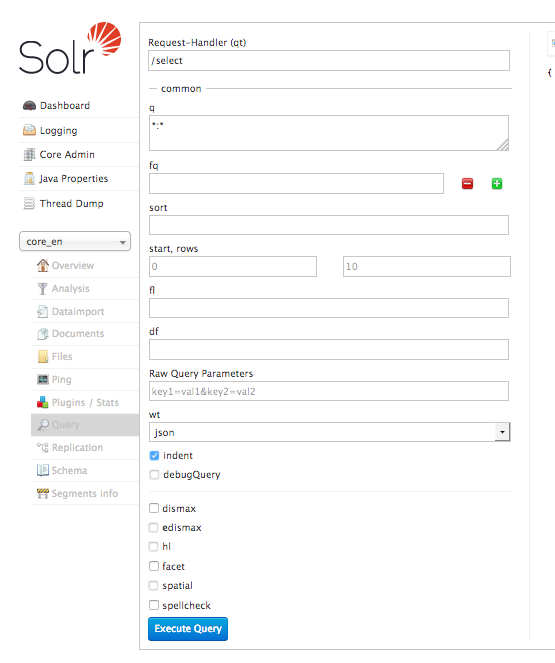
Check if Solr is up and running
To check whether Solr is up and running head over to:
http://<ip>:8983/solr/#/core_en/query.
You should see the web interface of Solr to run queries:
Important: The image ships a default cores for all languages. The data of the cores is stored on an exported volume. When you want to update the container, you can just start a new container using the data volume of the old container. But at the same time this has the limitation, that you should only use this image with the default cores! If you want to create custom cores with a different configuration please read the section "Advanced Docker Usage"
Please note: The steps above show how to build the image from the Dockerfile. You can also download and use our compiled images from dockerhub:
Advanced Docker Usage
Our image has the intension to create running cores out of the box. This implies, that the schema is inside the container. The intension in our integration was to stay as close as possible to the official Apache Solr docker images. Sometimes it might make sence that you use the official image directly instead of our image. An example could be when you want to have the solrconfig, schema and data outside of the container.
The following example shows how you can run our configuration with the official Apache Solr docker container by mounting the configuration and data from a volume (When using Docker on macOS make sure you've added the volume folder to "Preferences -> File Sharing").
mkdir -p ~/mysolr
cp -r Resources/Private/Solr/* ~/mysolr/.
mkdir ~/mysolr/data
sudo chown -R 8983:8983 ~/mysolr
docker run -d -p 8983:8983 -v ~/mysolr:/var/solr/data solr:8.5
Shipped install script (Not recommended)
With the extension we ship and install script that can be used for a development context or as inspiration for own deployments. It creates a solr server with a core for all languages. This script is located in "Resources/Private/Install" an it installs a configured solr server that is usable with EXT:solr.
By default this script is not executable and you need to add the execute permissions to your user to run it.
The example below shows how to install a solr server to /home/developer
chmod u+x ./Resources/Private/Install/install-solr.sh
./Resources/Private/Install/install-solr.sh -d /home/developer
After running the script you are able to open a solr server with over the loopback address. Which means, when you want to access it from outside, you need to create an ssh tunnel.
Other Setup
Beside the install script and Docker there are various possibilities to setup solr. All of these possibilities are not officially supported, but the simplify the setup i want to mention them shortly here and summarize the needed steps.
Known Installers
All of these installers can be used to setup a plain, reboot save solr server:
Use the installer shipped with solr itself (bin/install_solr_service.sh):
Allows to install solr on many distributions including init scripts (At the time of development ubuntu 16.04 was not supported and therefore it was no option for us to use it).
Use chef / ansible / whatever dev ops tool:
Allows you to setup a solr server with your DevOps tool.
e.g. https://galaxy.ansible.com/geerlingguy/solr/ (ansible) or https://supermarket.chef.io/cookbooks/solr (chef)
Deployment of EXT:solr configuration into Apache Solr
Since EXT:solr 6.0.0 the configuration and all jar files are shipped in one "configSet". The goal of this approach is to make the deployment much easier.
All you need to do is, you need to copy the configSet directory into your prepared solr installation and replace the solr.xml file. In the installer we do it like this:
cp -r ${EXTENSION_ROOTPATH}/Resources/Private/Solr/configsets ${SOLR_INSTALL_DIR}/server/solr
cp ${EXTENSION_ROOTPATH}/Resources/Private/Solr/solr.xml ${SOLR_INSTALL_DIR}/server/solr/solr.xml
After this, you can decide if you want to create the default cores by copying the default core.properties files or if you want to create a core with the solr rest api.
Copy the default cores:
cp -r ${EXTENSION_ROOTPATH}/Resources/Private/Solr/cores ${SOLR_INSTALL_DIR}/server/solr
Create a core with the rest api:
curl "http://localhost:8983/solr/admin/cores?action=CREATE&name=core_de&configSet=ext_solr_8_0_0&schema=german/schema.xml&dataDir=../../data/german"
After installing the solr server and deploying all schemata, the TYPO3 reports module helps you to verify if your setup fits to the requirements of EXT:solr
You now have a fully working, pre configured Solr running to start with
No you can continue with installing the extension Install EXT:solr.