Using the backend modules
The extension provides two backend modules. The "Data Import" is the main one, displaying all configurations and allowing to start imports manually. The second one, "Log", displays a list of all log entries generated during External Import runs.
Synchronizable tables
The first function of the "Data Import" BE module – called "Tables with synchronization" – displays a list of all synchronizable tables. The various features are summarized in the picture below.
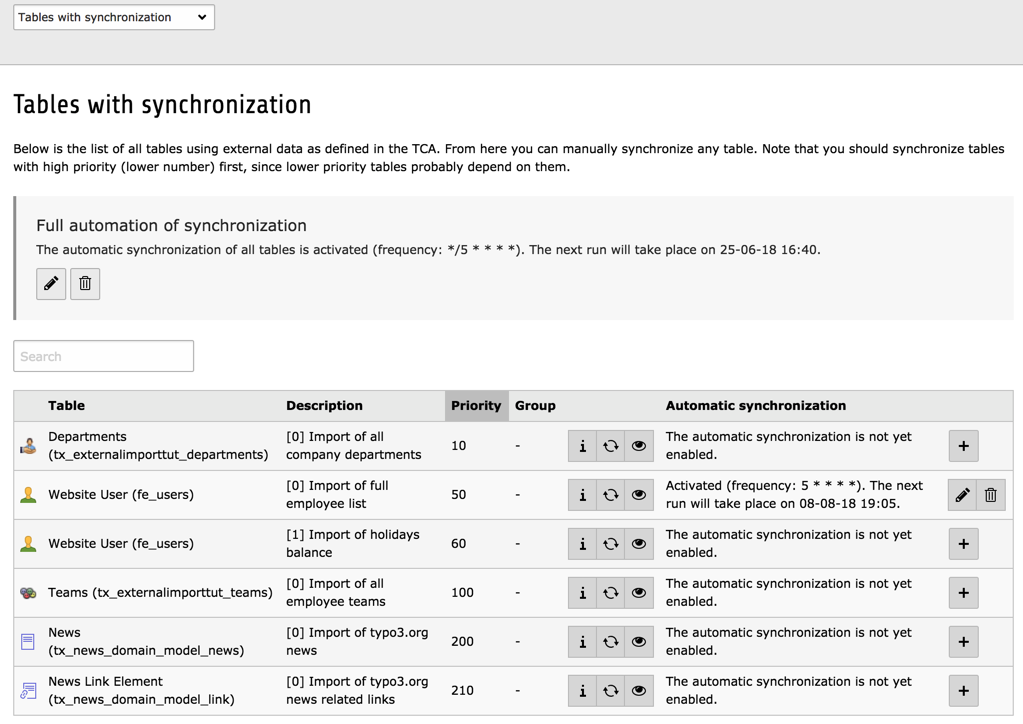
Overview of the synchronizable tables view with all available functions
Note
Icons may vary depending on user rights. Users without the proper rights or without write access to a given table will not see the synchronize and preview buttons, nor the actions related to the Scheduler.
Viewing configuration details
Clicking on the information icon leads to a screen showing all the information about that particular configuration. The view consists of three tabs: the first one displays the general configuration, the second one displays the configuration for each column (including the additional fields) and the third one displays the list of steps that the process will go through, including any custom steps.
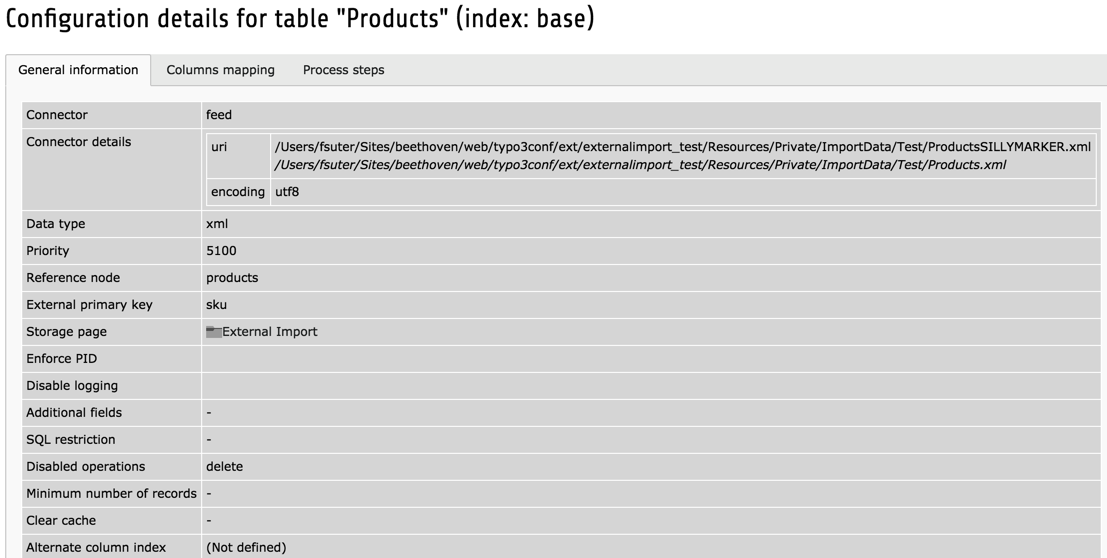
Viewing the details of the TCA properties for External Import
If the configuration contains errors, they will be displayed in this detailed view.
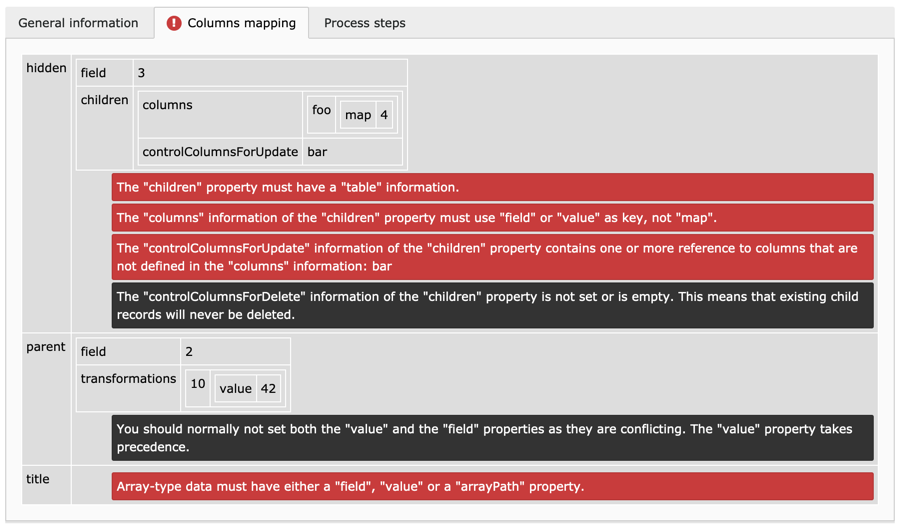
Viewing errors in the External Import configuration
Note
The configuration validator also runs right before an import. The import will abort if any critical error is found in the configuration. Notices do not block the import process.
Triggering a synchronization
Clicking on the synchronize data button will immediately start the synchronization of the corresponding table. This may take quite some time if the data to import is large. If you move away from the BE module during that time, the process will abort. At the end of the process, flash messages will appear with the results:

Flash messages show the results of the synchronization
Running in preview mode
Clicking on the preview button leads to the preview feature. For running a preview your first need to select a specific step from the process. The synchronization will run up to that step and stop. Preview data gets displayed if available (this depends on the step).
Most importantly nothing permanent happens in preview mode. For example, data is not stored into the database.
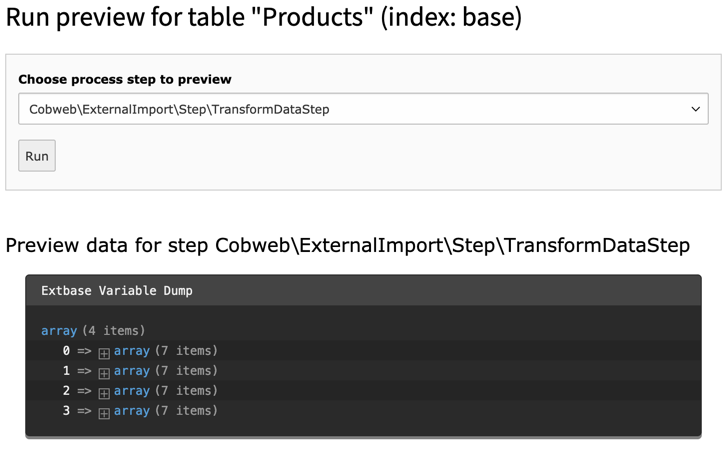
The synchronization is run up to the Transform Data step and preview data is dumped to the screen
Setting up the automatic schedule
The automatic scheduling facility relies on the Scheduler to run. On top of the normal Scheduler setup, there are some points you must pay particular attention to in the case of external import.
As can be seen in the above screenshot, the information whether the automatic synchronization is enabled or not is displayed for each table. It is possible to add or change that schedule, by clicking on the respective icons. This leads to an input form where you can choose a frequency, a task group and a start date (date of first execution; leave empty for immediate activation). The frequency can be entered as a number of seconds or using the same syntax as for cron jobs.
Note
If a Scheduler task exists but has been disabled, it cannot be enabled again from the External Import backend module. It is considered that an administrator had a good reason to disable that task and it is up to that person to enable it again.
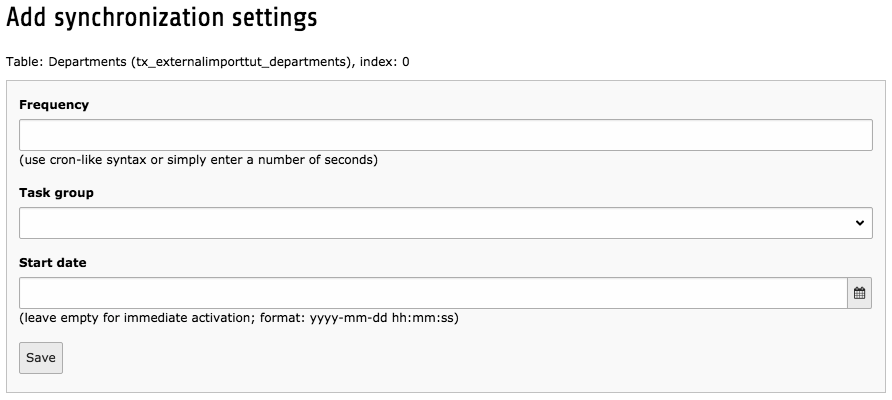
Input form for setting automated synchronization parameters
Clicking on the trash can icon cancels the automatic synchronization (a confirmation window will appear first).
At the top of the screen, before the list, it is possible to define a schedule for all tables. This means that all imports will be executed one after the other, in the order of priority.

Setting automated synchronization for all tables
The same input form appears as for individual automation settings.
Note
Of course, it is perfectly possible to define automation tasks from within the Scheduler's BE module. External Import offers this as a convenience and also for non-admin users.
Non-synchronizable tables
The second function of the "Data Import" BE module – called "Tables without synchronization" – displays a list of non-synchronizable tables. This view is purely informative as no action can be taken for these tables. Only the detailed configuration information can be accessed.
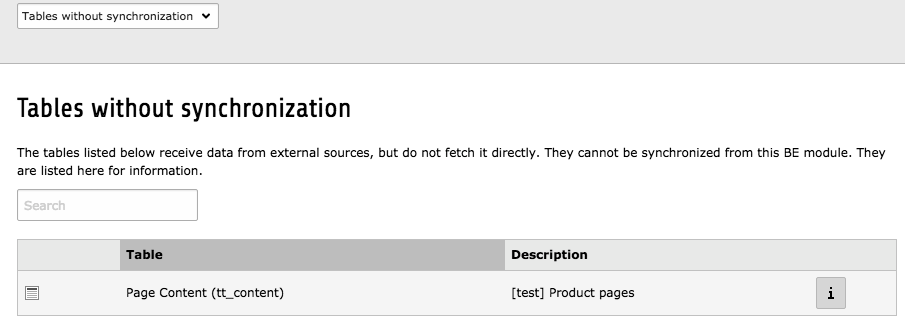
Overview for non-synchronizable tables, with just the information icon
Logs
As its name implies, the "Log" module displays a list of all log entries generated during External Import runs. The list is sortable and searchable. Each entry has a context, which gives an idea on how the run took place, either triggered manually (via the backend module), run via the Scheduler or the command line, or called using the API. Any other status will appear as "Other".
There is also a duration associated with each log entry. This is actually the duration of the whole import run and will be the same for all log entries related to the same run.
There is not much more to it for now. It may gain new features in the future.
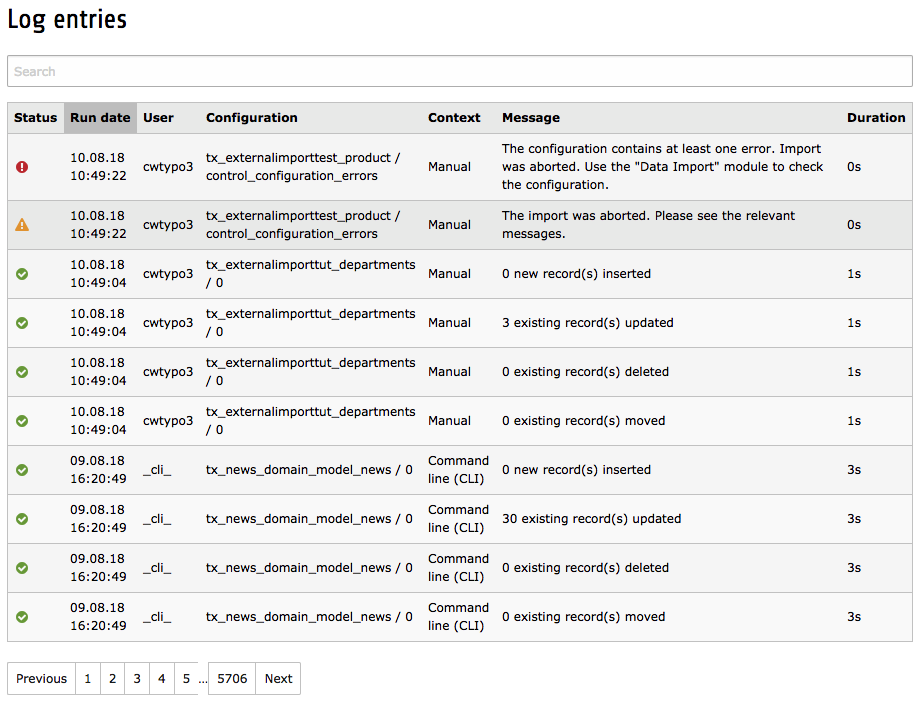
List of import log entries
Note
Runs made in preview mode are not logged.