Create a photo contest form
In this tutorial, you will learn how to create a photo contest with the form framework.
Let's define what we need:
- contact information from our visitors: name and email address
- a photo upload for our visitors
- an email to us with the participation
- terms and conditions for our contest
- a thank you page after submitting the form
Let's get started:
-
Create a new form
Go to the
Formsmodule and create a new form by clicking on "Create new form".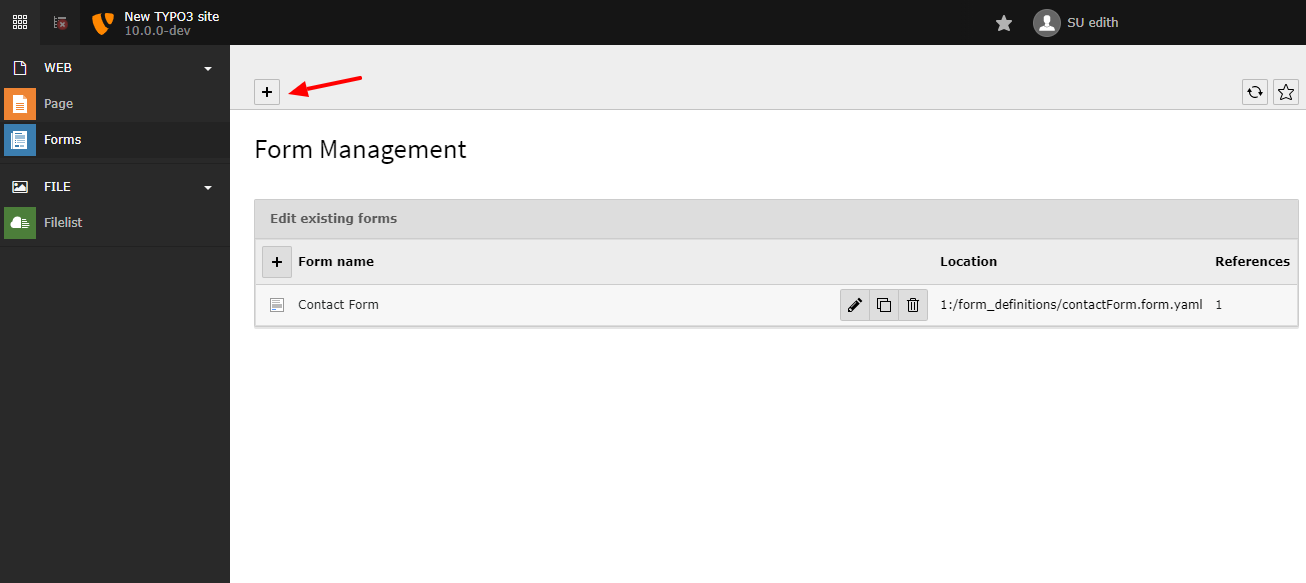
The form module with one form - click the button to create a new one.
-
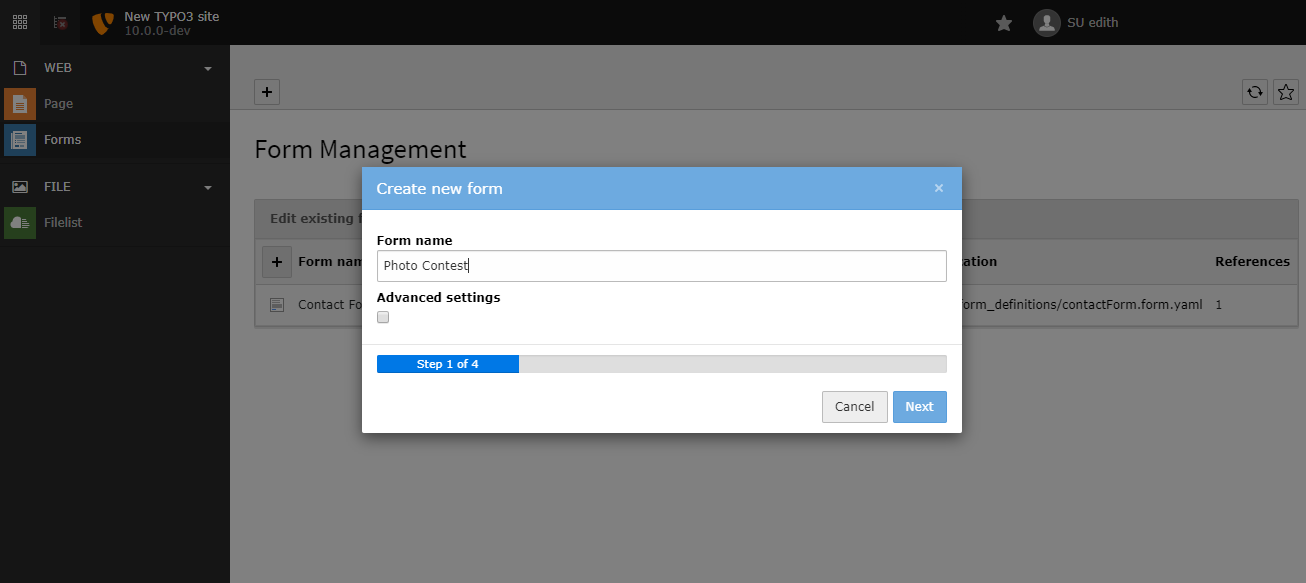
Choose a name
Choose a name for your form - something you will recognize later on - and click "Next"
-
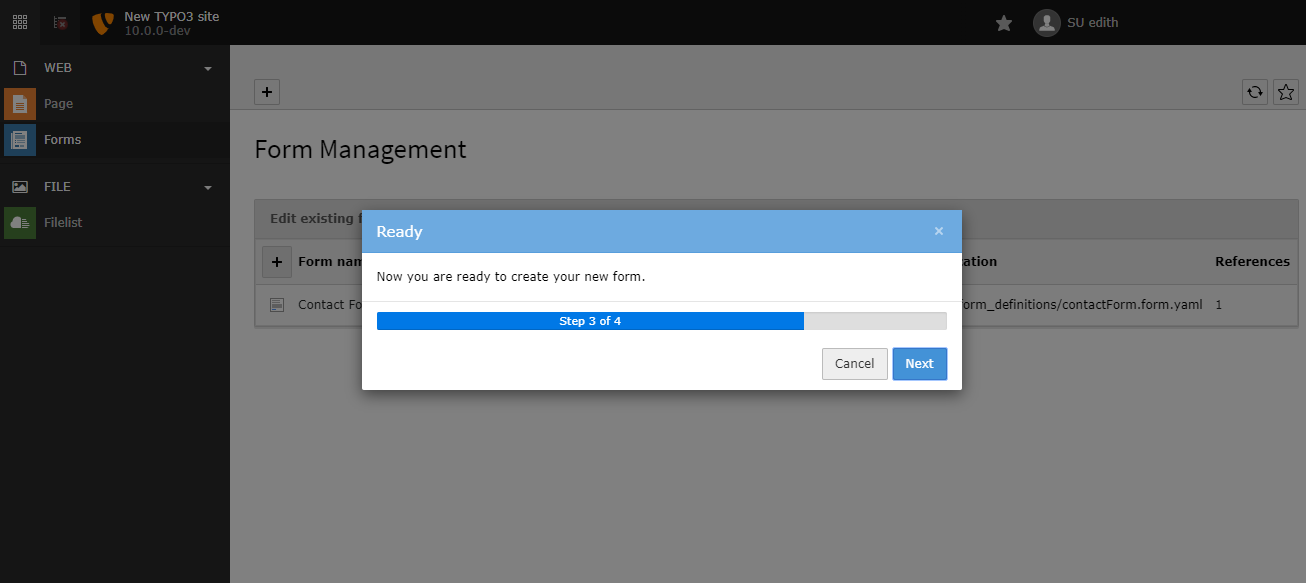
Click "Next"
As we are creating a basic form, step 2 will be automatically done and we directly see step 3. Click "Next" again.
-
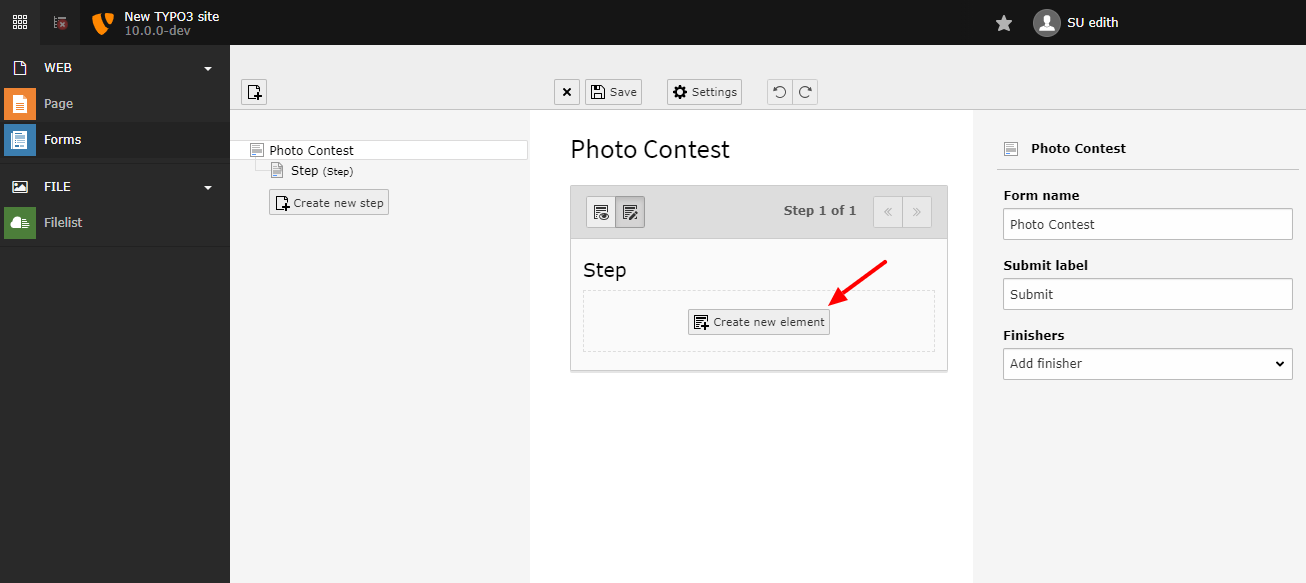
Create new element
You will now see the form editor view for your new form. Click on "Create new element" to add a field to your form. The first field we want to create is the "Name". Choose "Text" from "Basic Elements" to create a simple text field for the first name.
-
Set options for "Name"
After selecting the "Text" type, we get new options in the inspector panel:
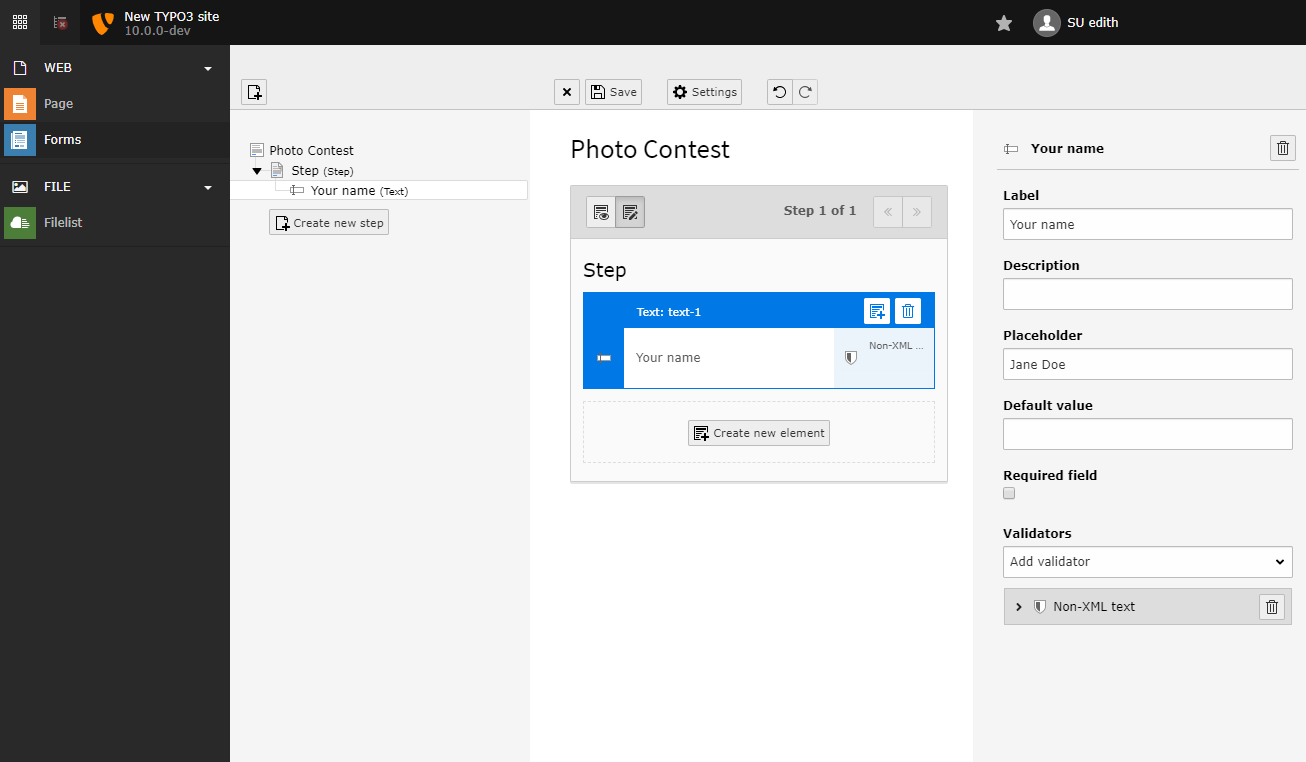
Fields for a simple text field.
- Label: Enter a label for your field - in this case "Name".
- Placeholder: Enter an example value for the field - this will be used as placeholder in the frontend.
- Add a validator "Non-XML text" to only allow simple text input.
-
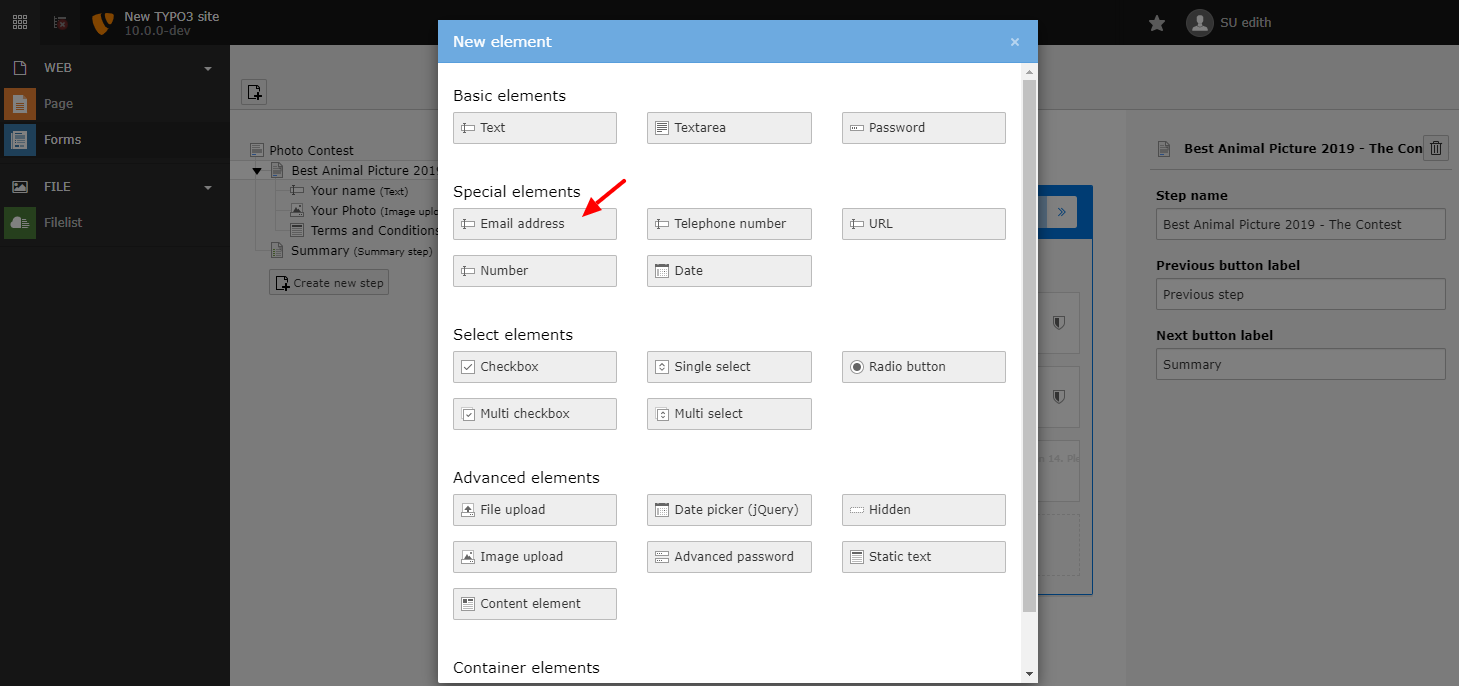
Create image upload field
Similar to the previous field, add an image upload field. Choose type
Image Upload.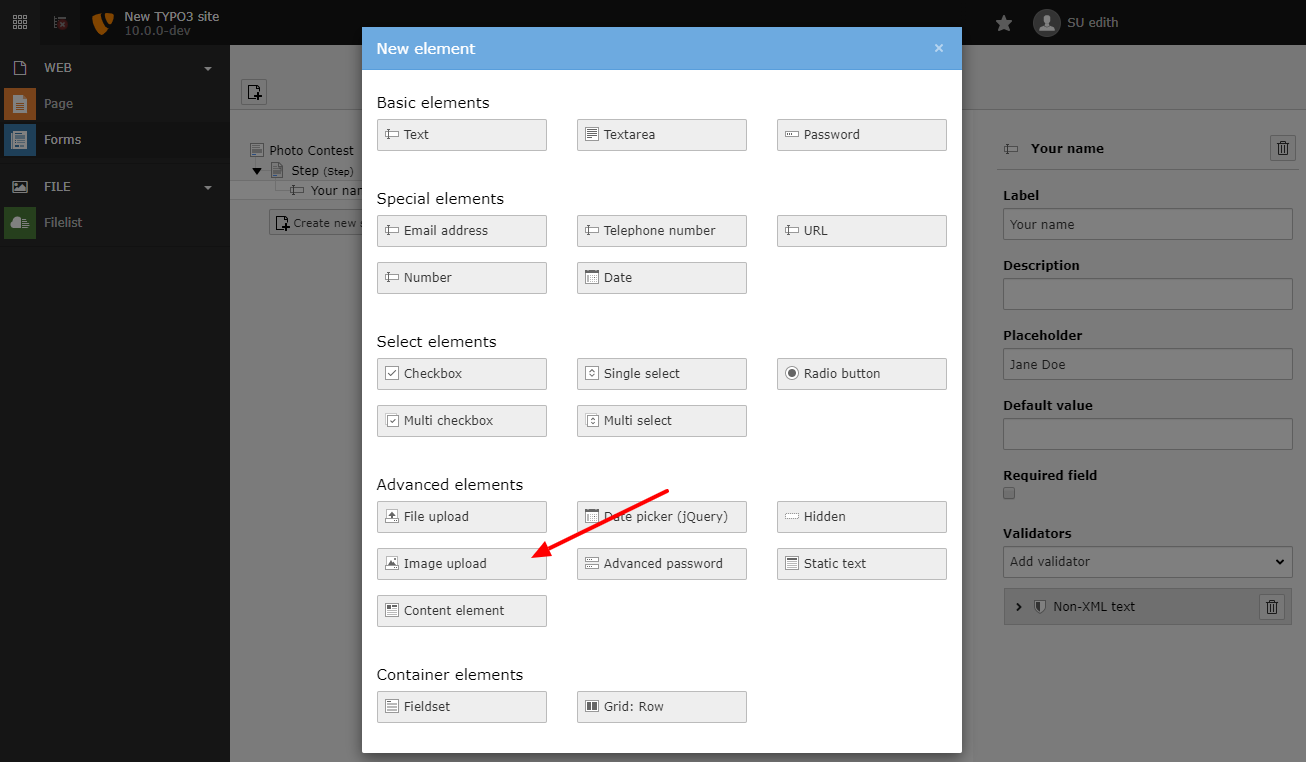
-
Configure image upload field
Set options for the image upload - for example choose specific image formats or enter a max file size.
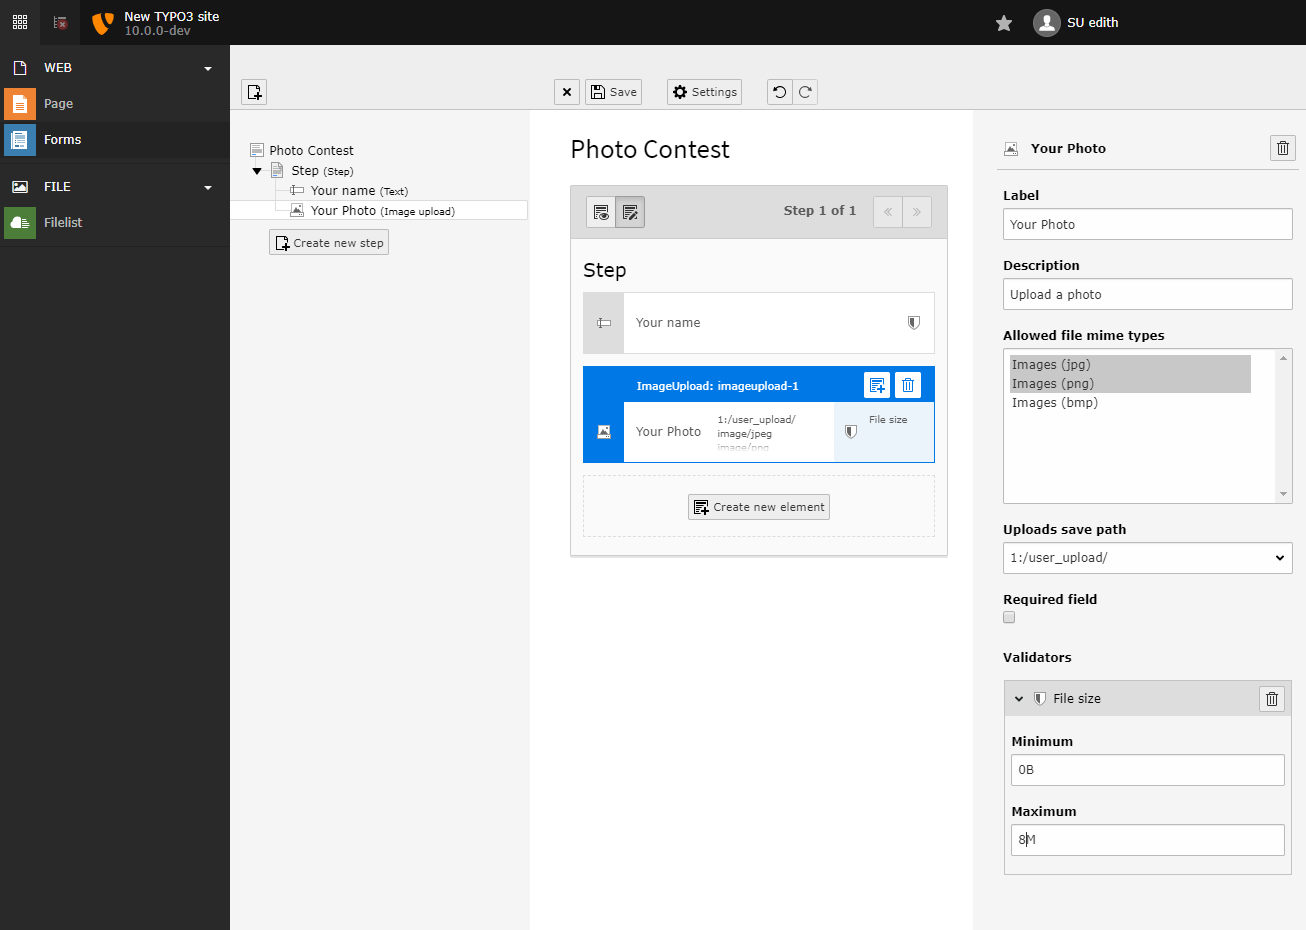
The options of the image upload.
-
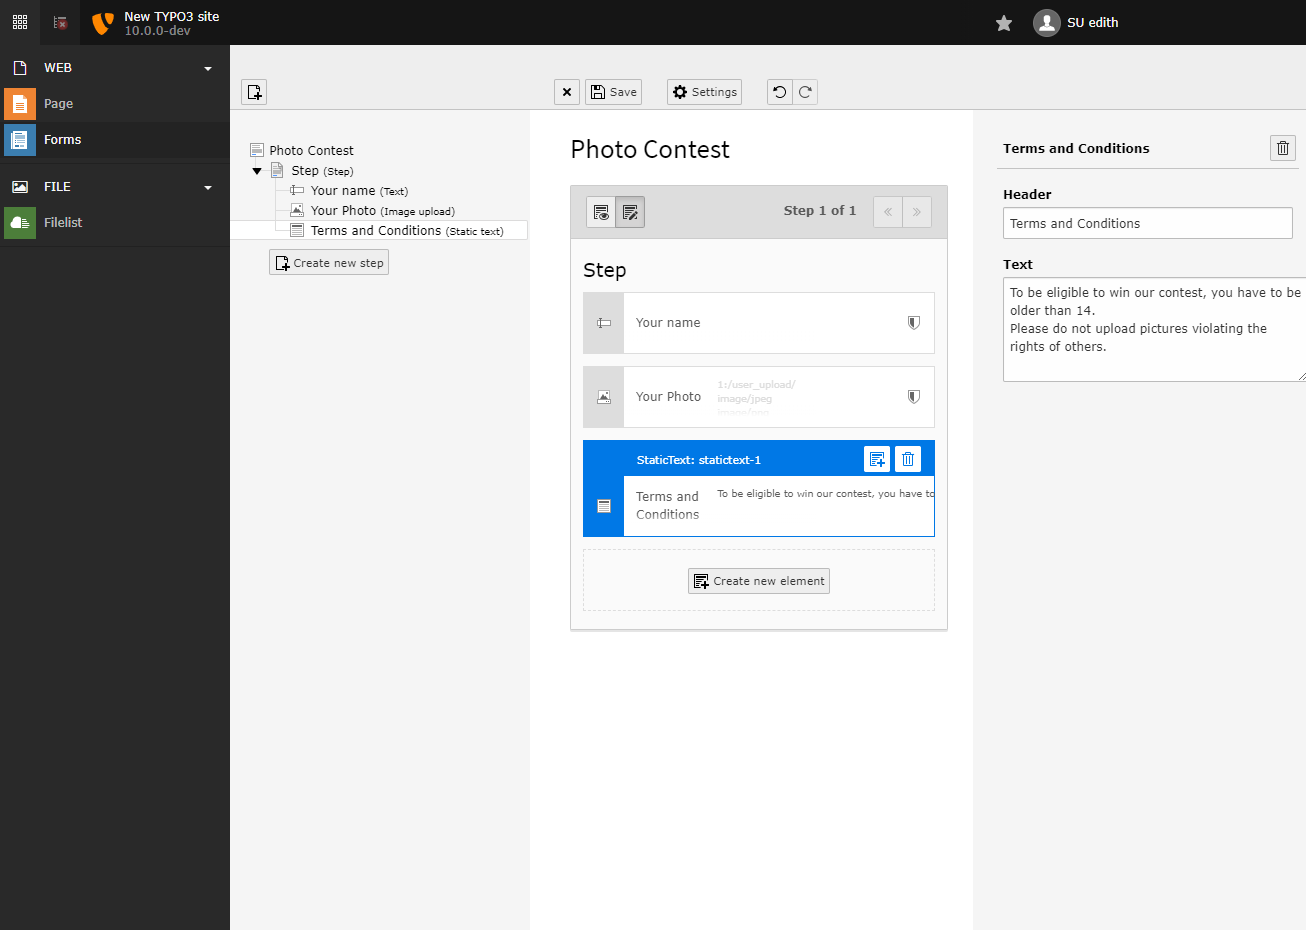
Create "Terms and Conditions"
To display terms and conditions for our contest, we want to add a simple static text to the form. Choose "Static Text" from the available element types.
Choose "Static Text".
-
Enter "Terms and Conditions"
Fill the text box with the terms and conditions for your contest.
Set options for static text.
-
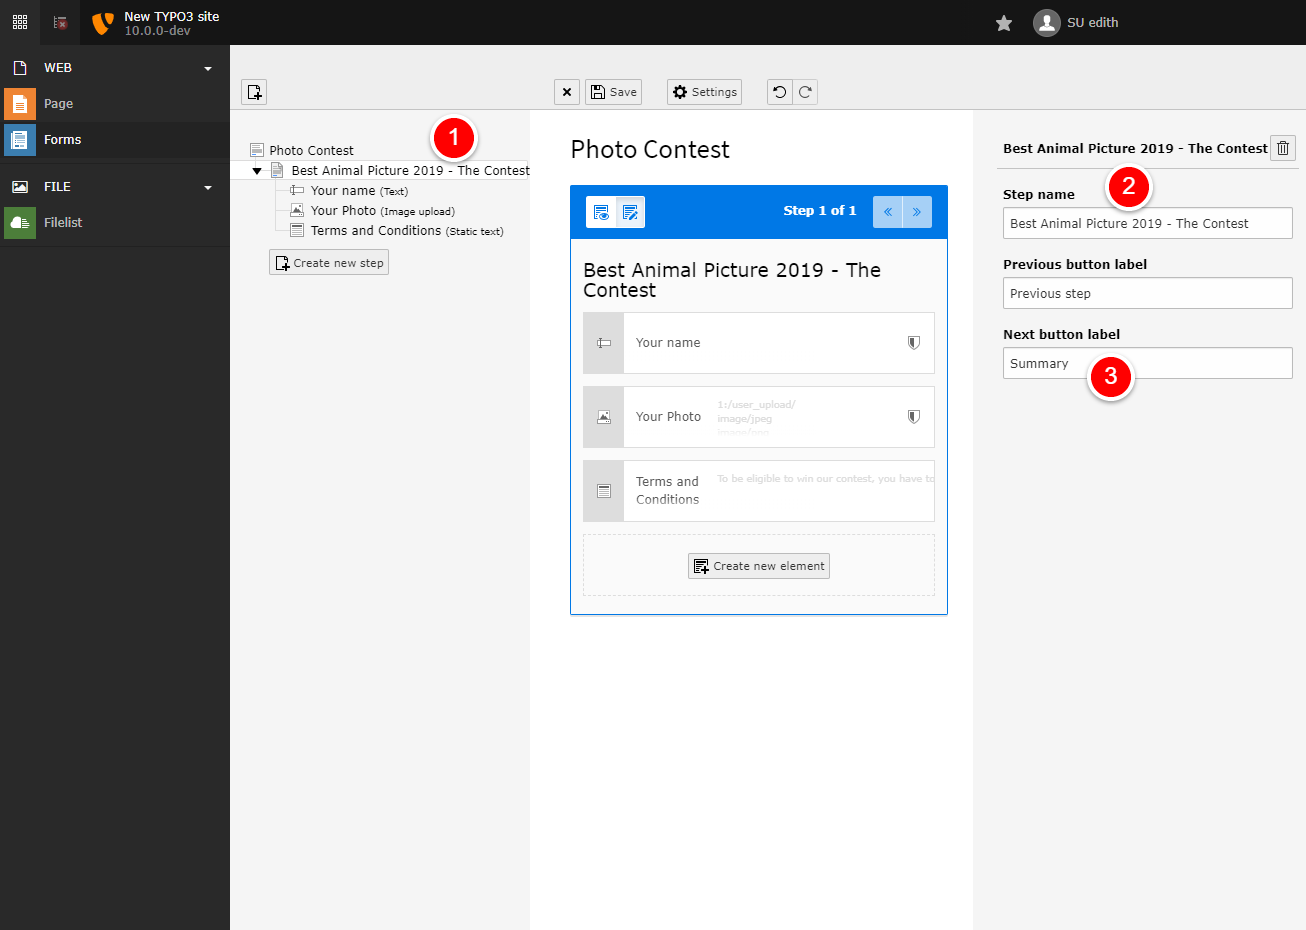
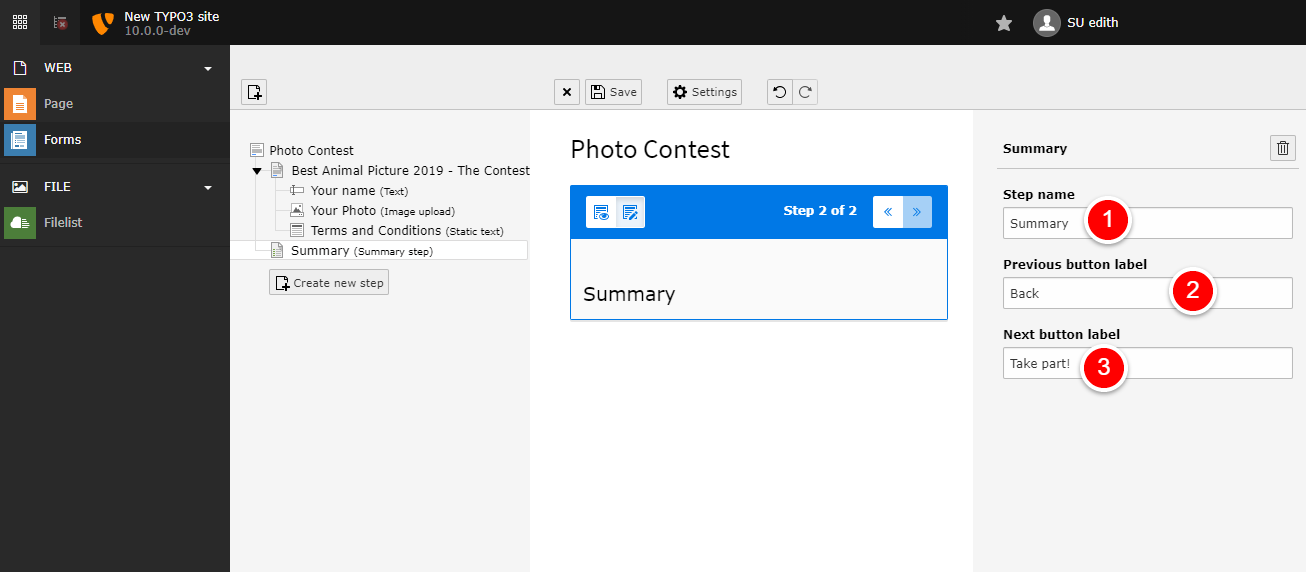
Change the headline and buttons
We want to have a nice headline for the form and the next button should read "Summary". To do that, click on "Step" (1) in the form tree and set the fields (2,3) on the right. You don't need to change the previous label, as we are on the first page and there is no previous in this case.
-
Create a summary page
We want to create a summary page where the user can confirm his or her data again. Click on "Create new step" on the left to create a new page/step in the form.
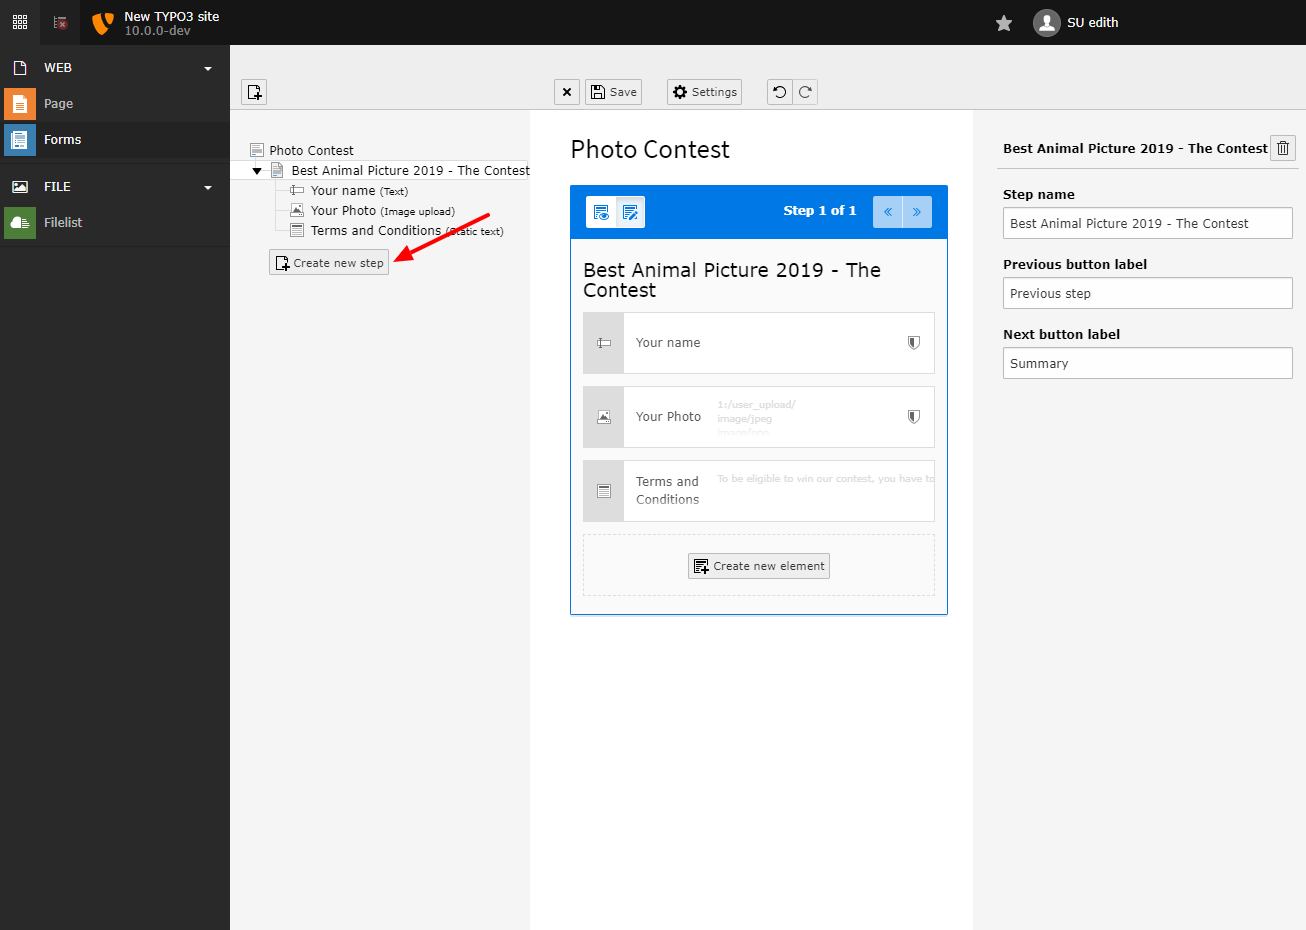
Create a new step in a form.
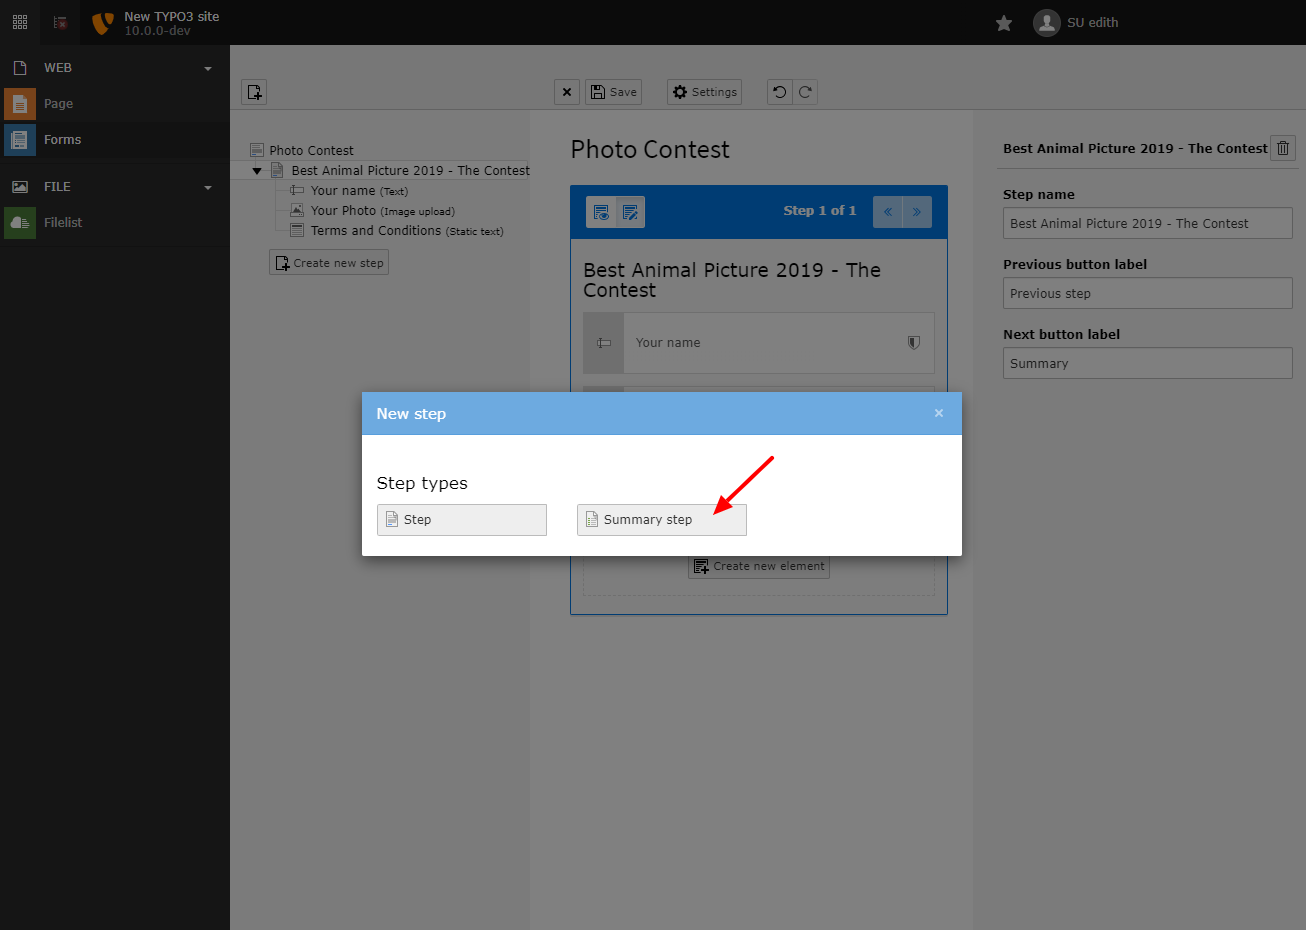
Choose summary as type for your new step
Configure the summary headline and button labels.
-
Preview the form
Click on the preview button to preview the form.
Preview the form.
Oh no! We forgot to create the email field. Let's do that next.
-
Add an email field
Go back to editing the form (1) and click on "Create new element" (2).
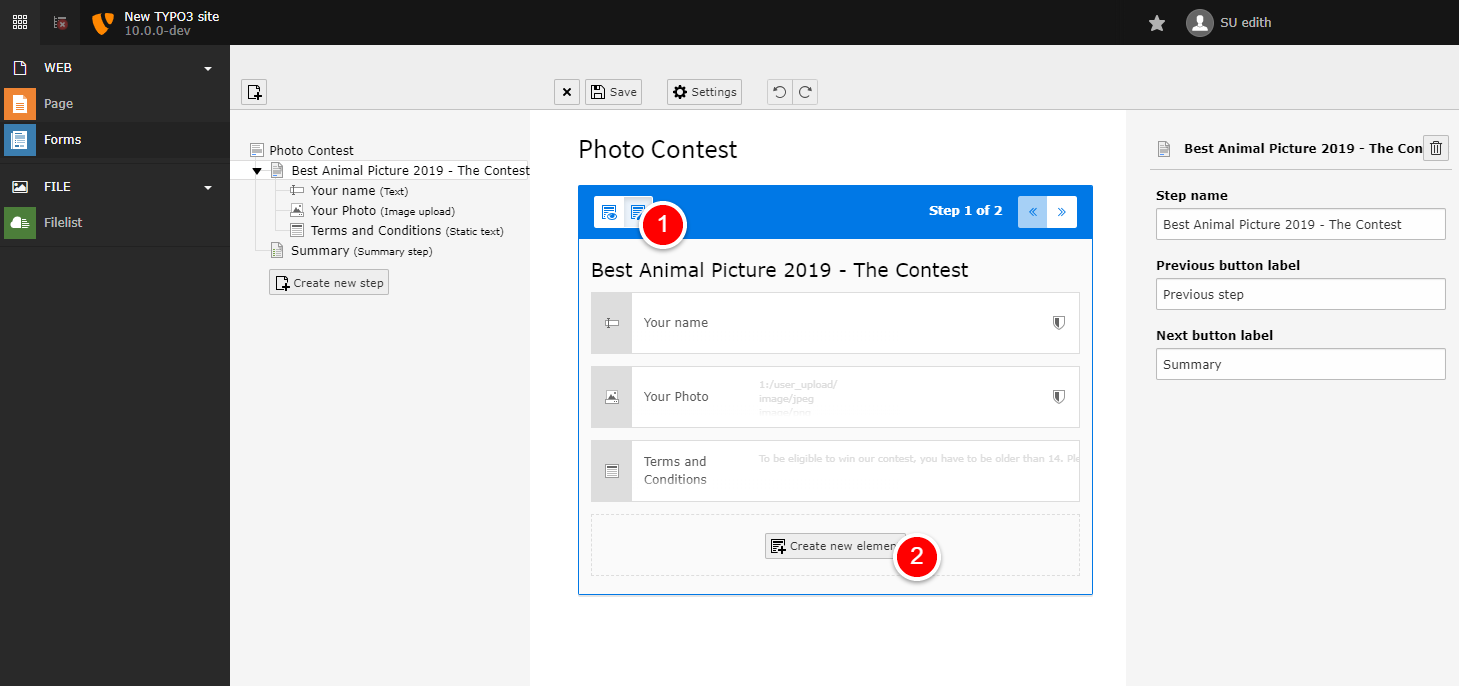
Switch to editing and create new element
The "email address" type
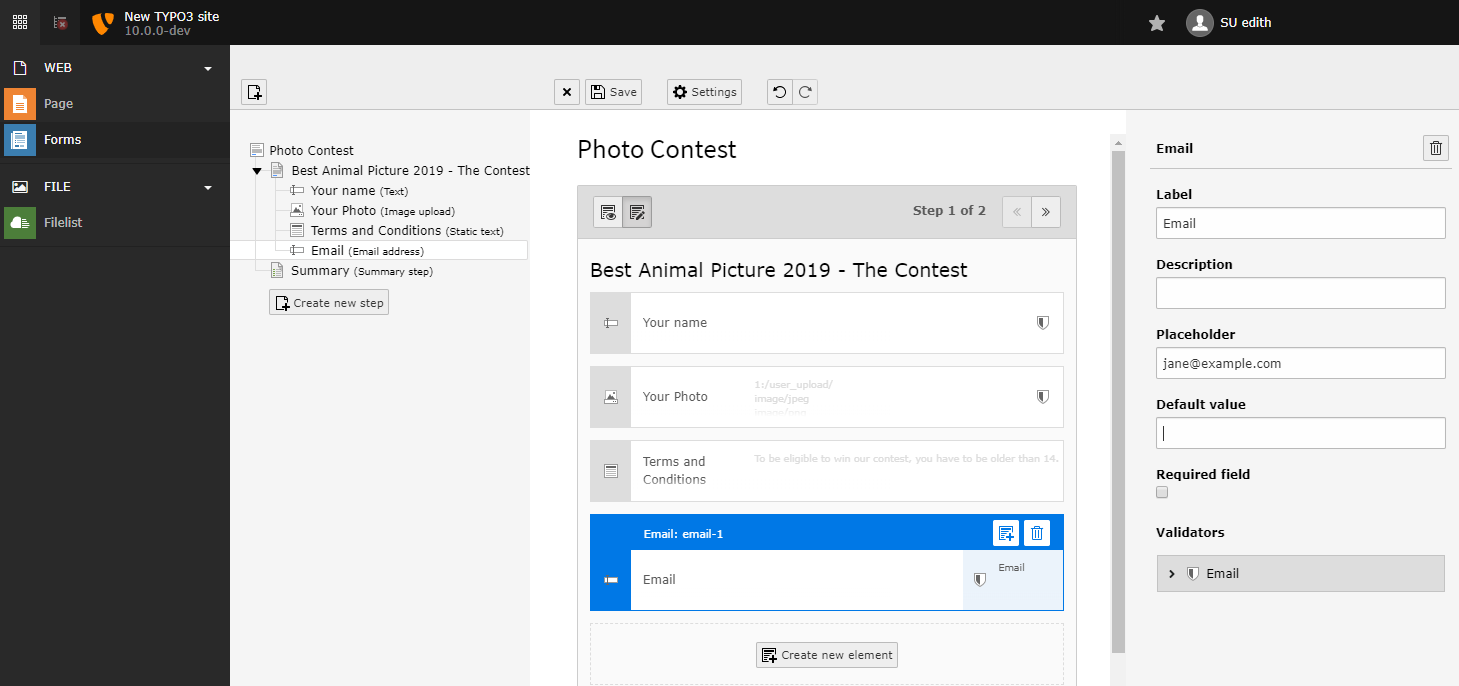
Configure the email address field.
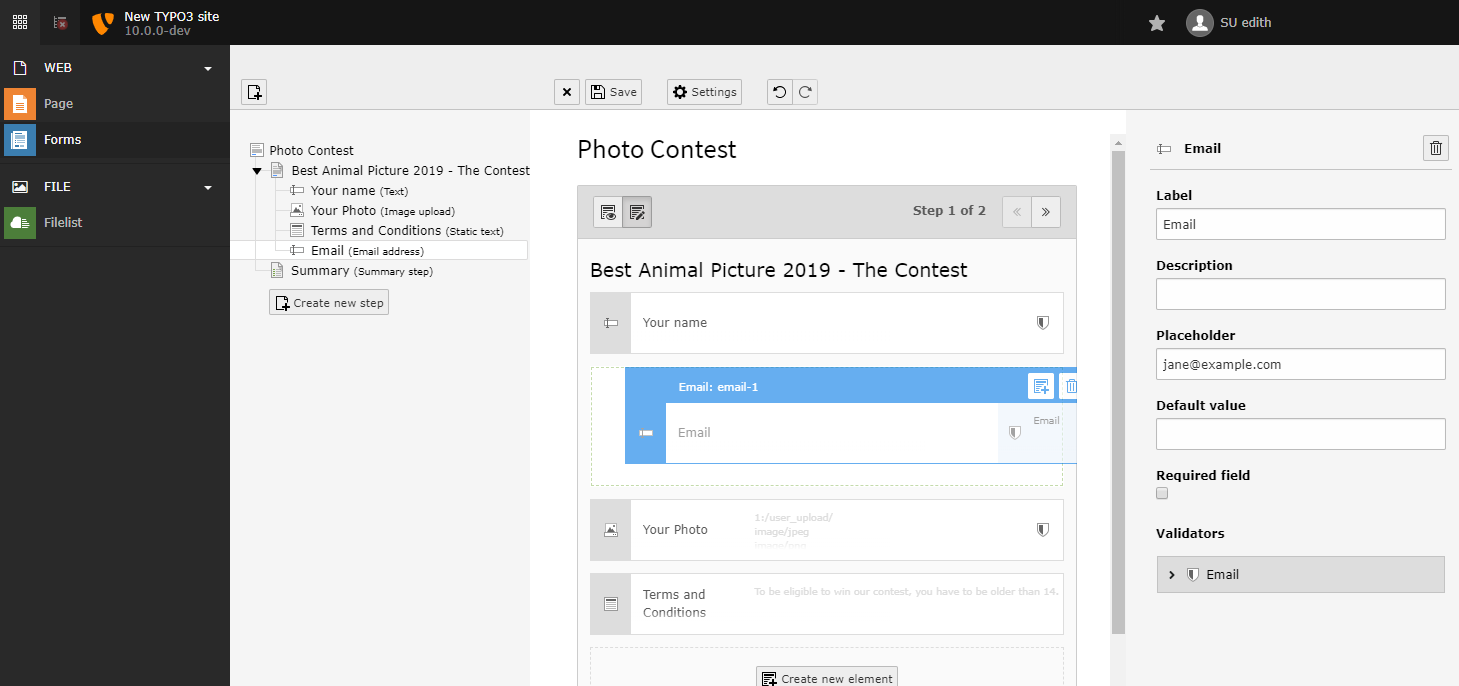
Move the email address field to a better position via drag and drop.
-
Save the form
Your form is now fully configured and ready to be inserted on pages.

Save the form.
You can save the form and do another review - now it looks fine. Let's go and insert it on a page.
-
Choose a page for your form
The form you configured can now be inserted on any page you want. Go to the page module and choose one.
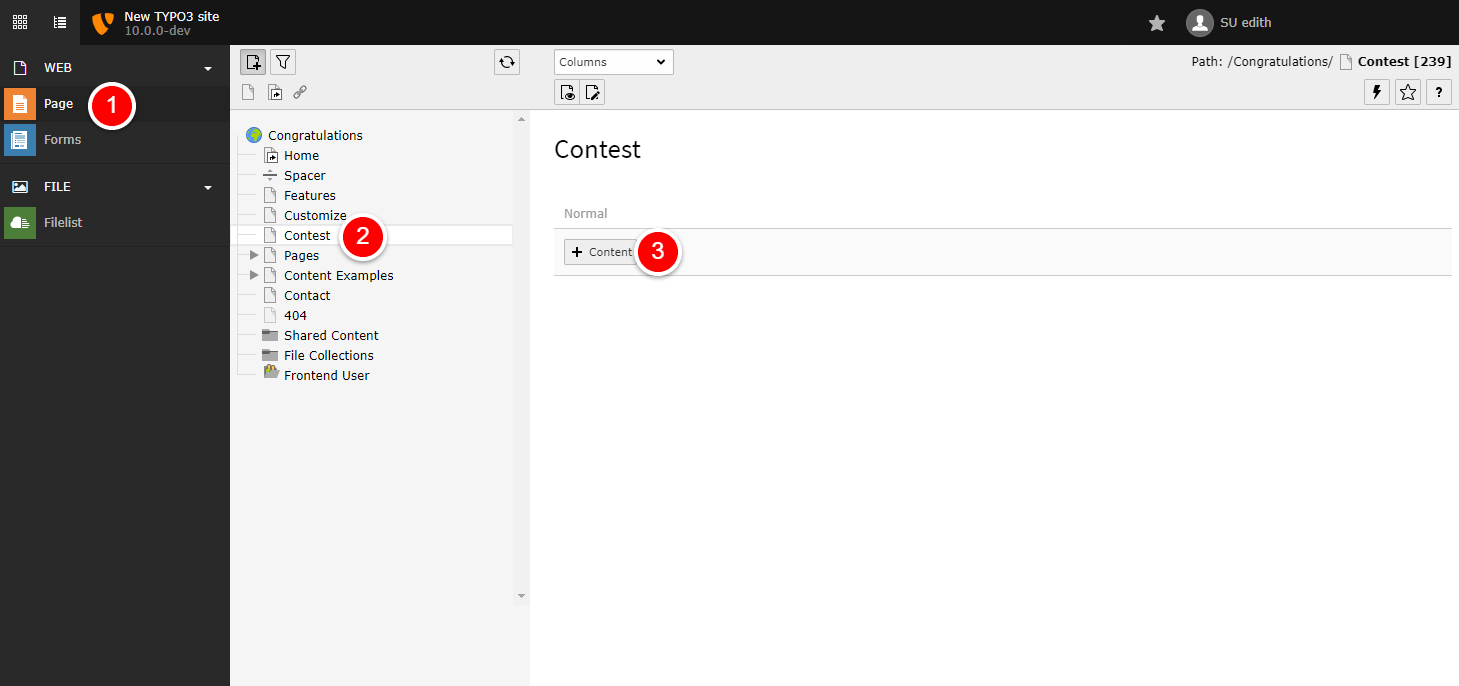
- Go to the page module.
- Choose a page in the page tree (for example: "Contest").
- Click on
+ Contentto create a new content element.
-
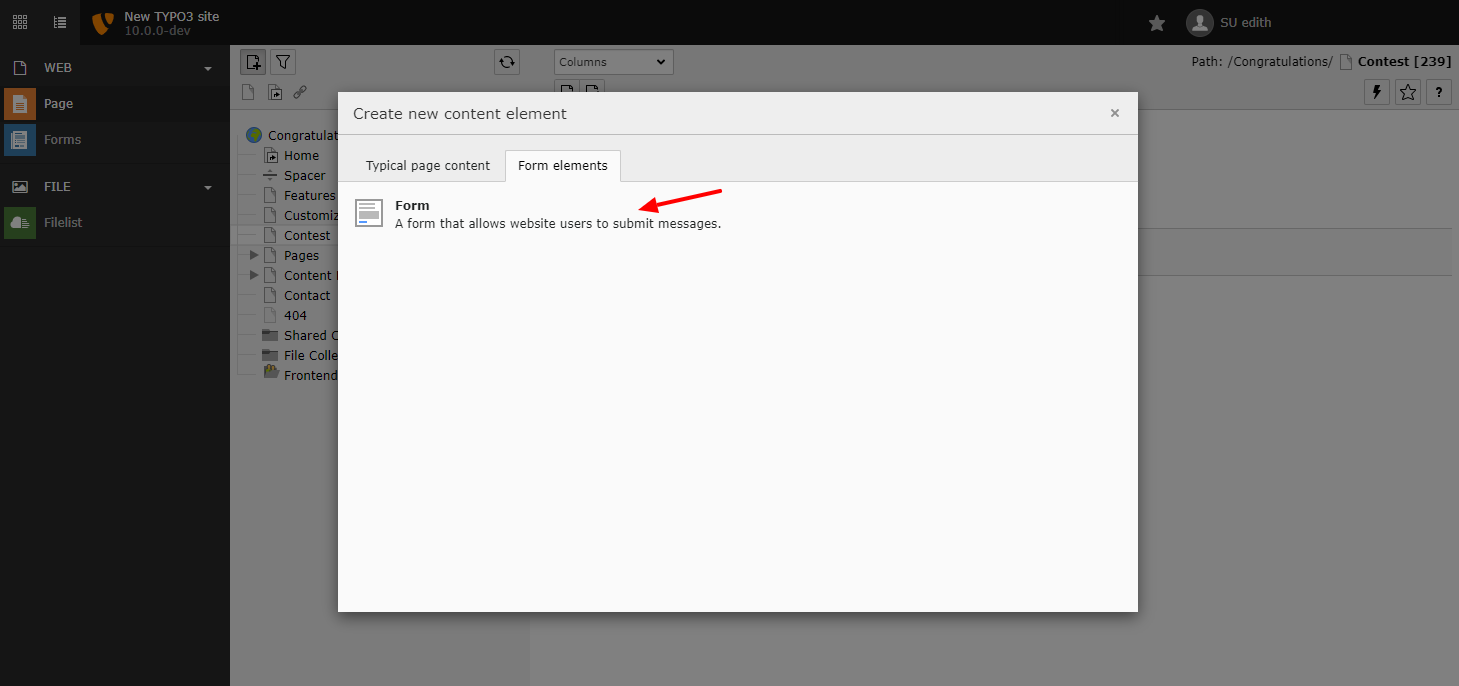
Insert Plugin
From the content element wizard, choose "Form" (in "Form elements" tab).
-
Choose your form definition
In the plugin tab, choose the form definition you just created. You can also use the "normal" TYPO3 fields like header to render a headline for your form.
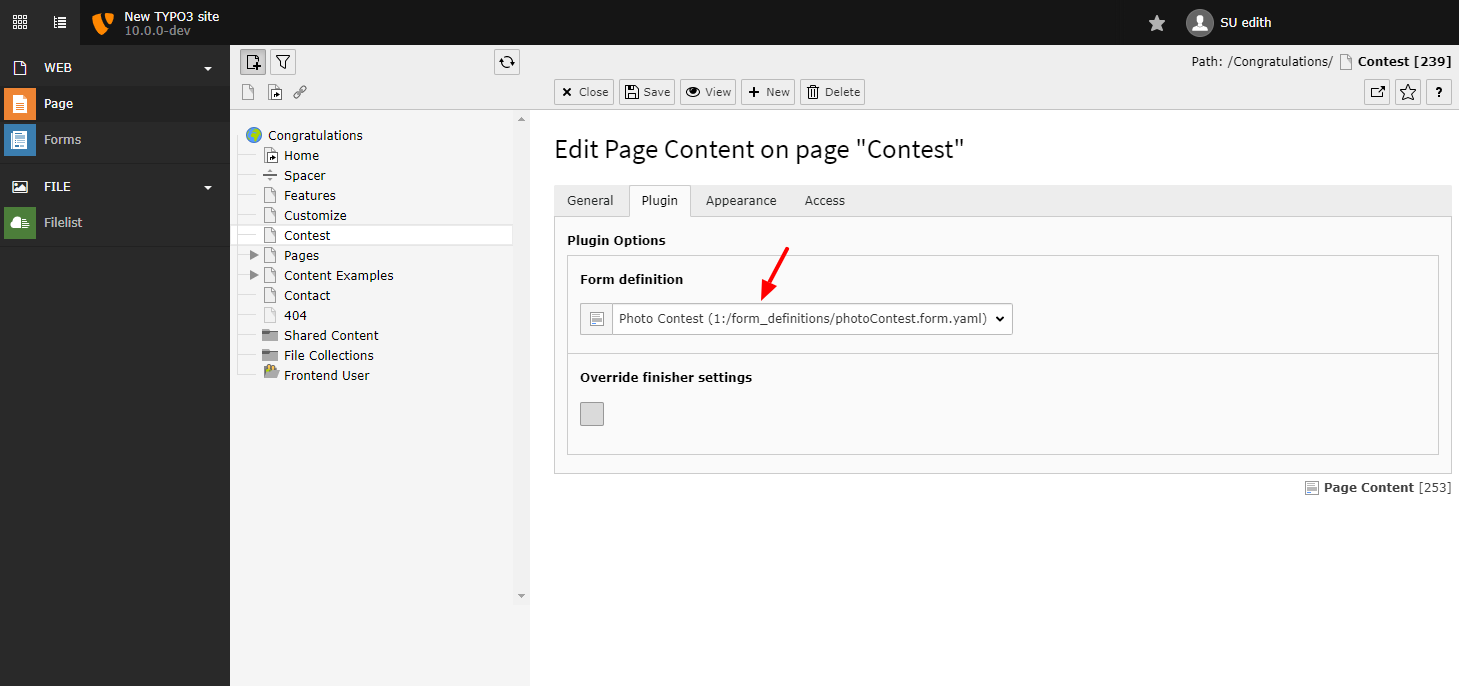
Having a separate form definition allows you to insert the form on many pages, customizing for example the headline in each case.
-
Save the content element
Save the content element and go and view your web page. You can now see your finished form.
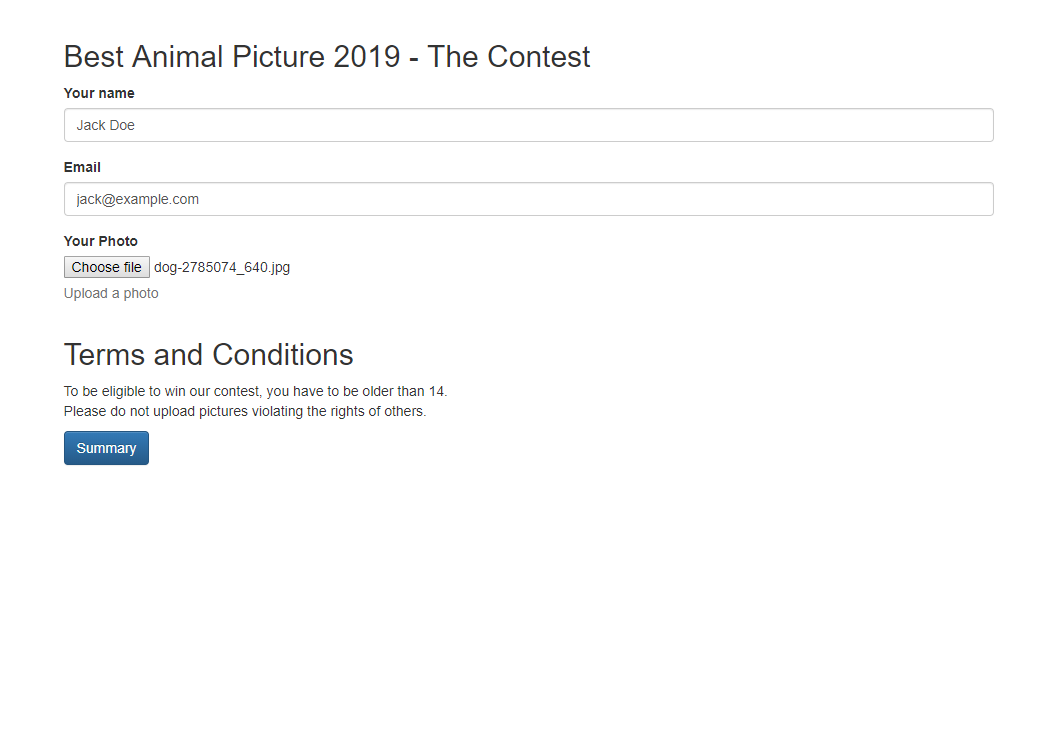
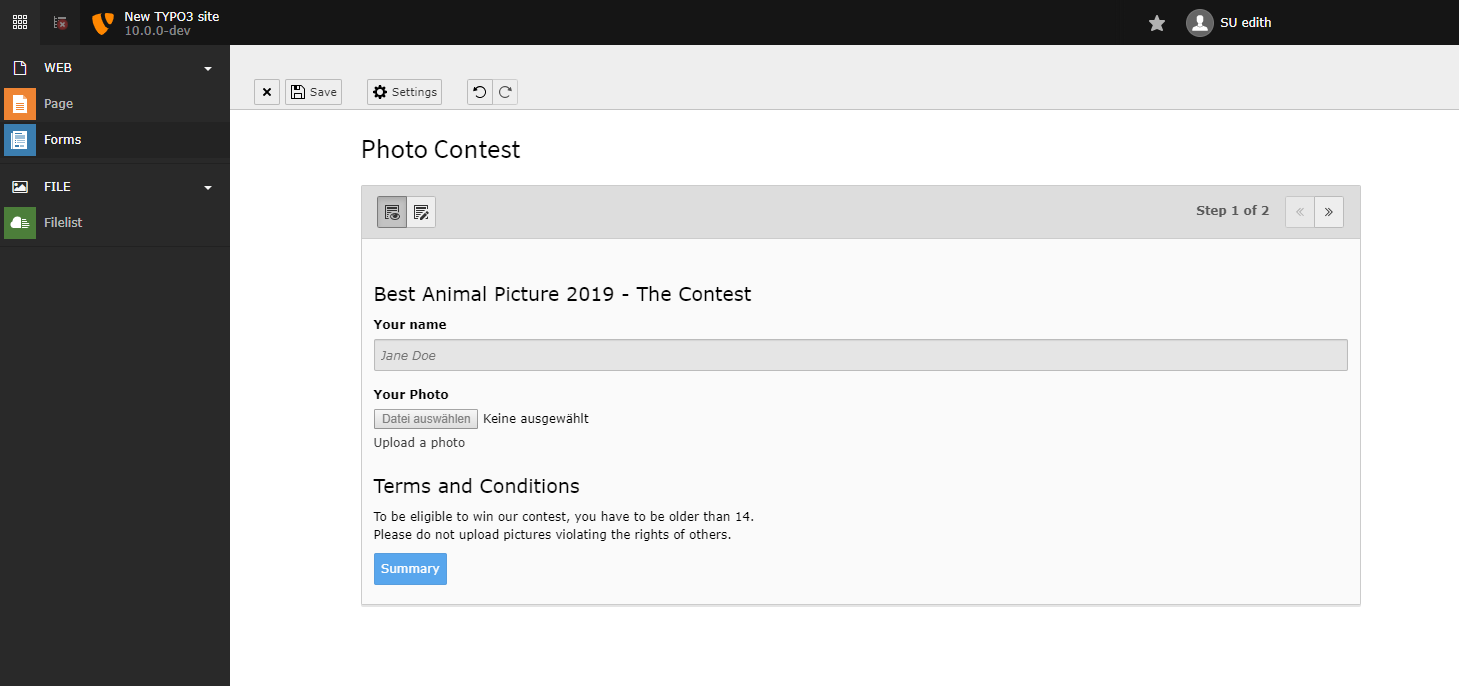
Depending on your frontend, your form might look different.
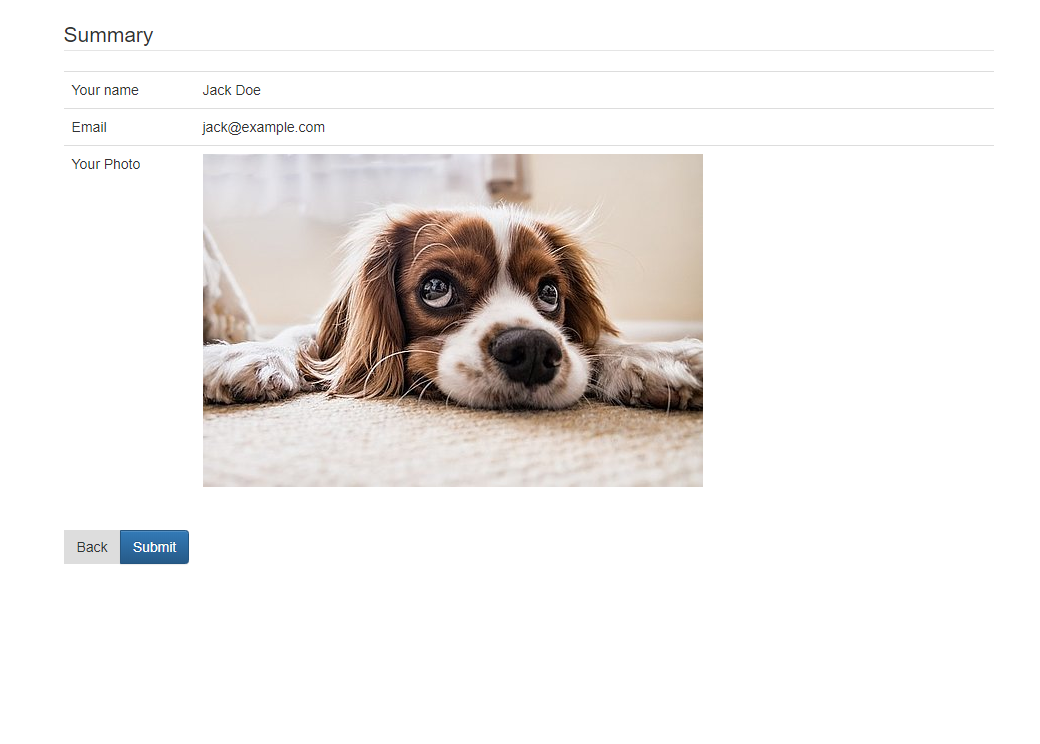
Depending on your frontend, your summary page might look different.
When testing your form, you might notice that it doesn't do anything yet when we fill it. That's bad. Let's change that.
-
Add email finisher
Everytime someone fills the form we want to receive an email with the contest picture. Let's add an email finisher for that:
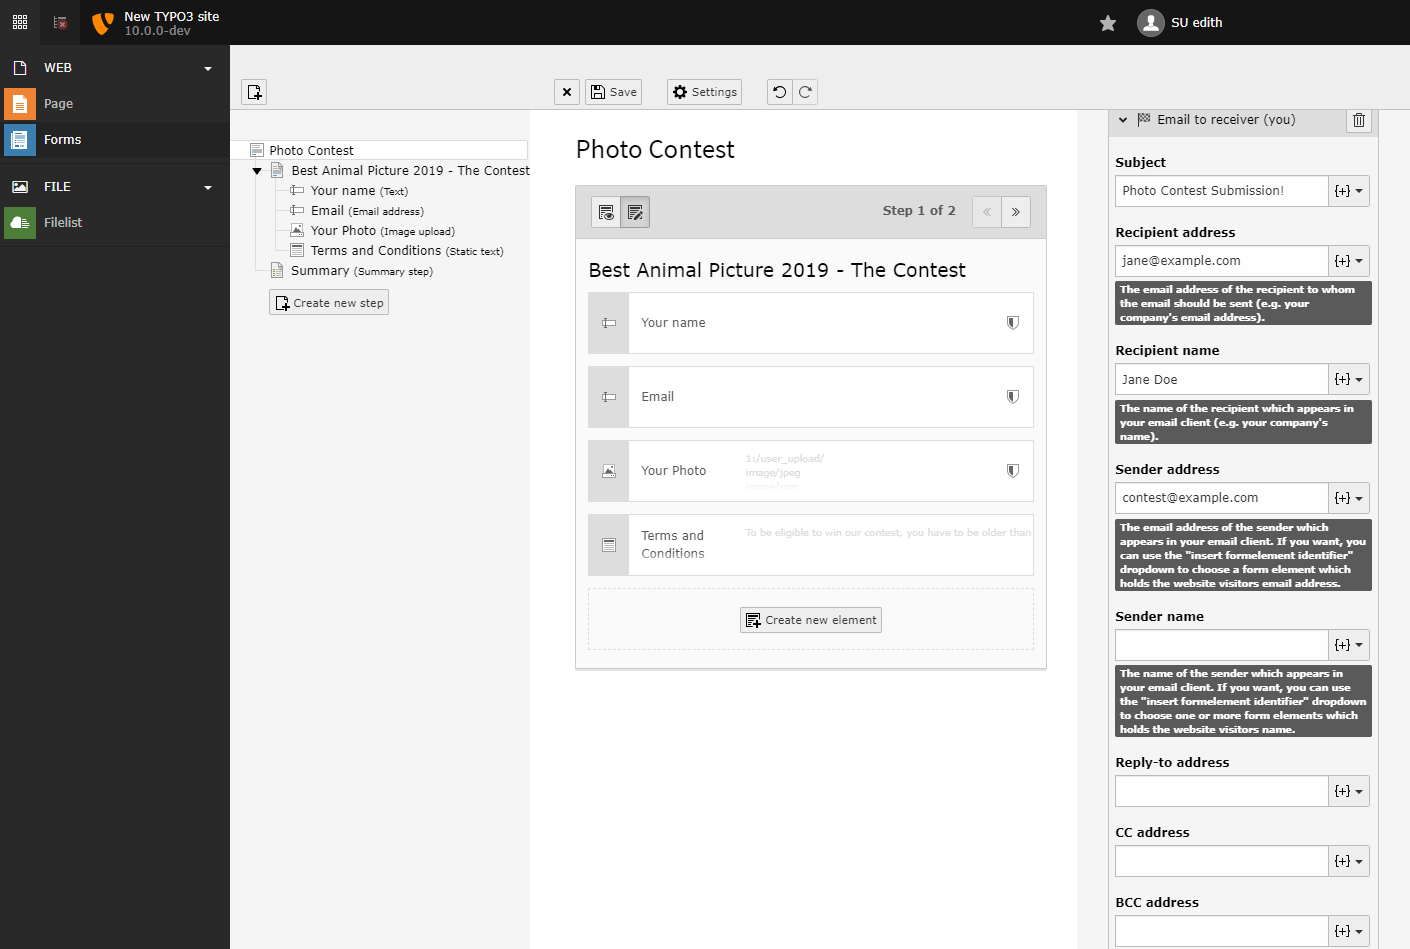
Configure the email finisher
-
Add redirect to "Thank You" page
After submitting the form we want to redirect the user to a thank you page. There's a ready-made finisher for that, too - the "Redirect to a page" finisher:
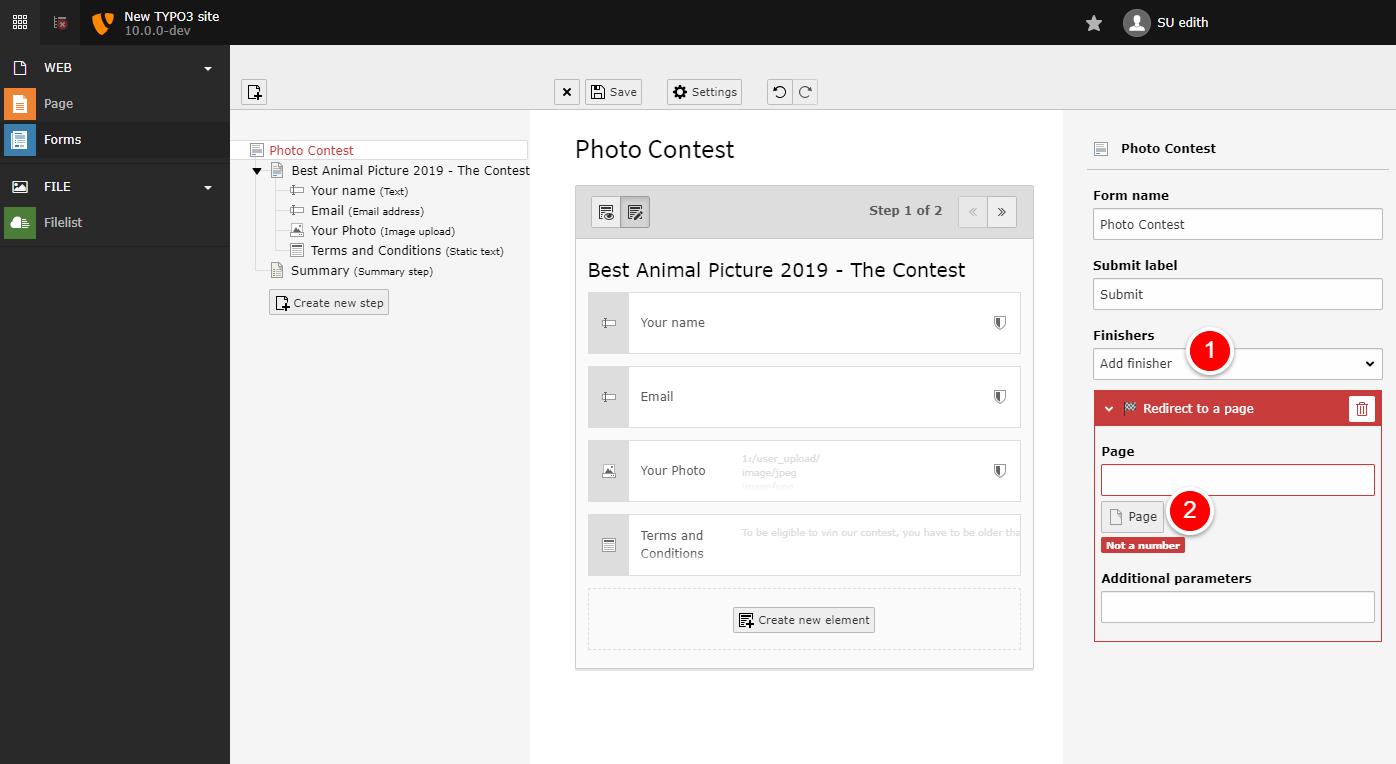
Redirect finisher with options.
Choose "Redirect to a page" from the finisher menu. Click on the "Page" button to open the page browser.
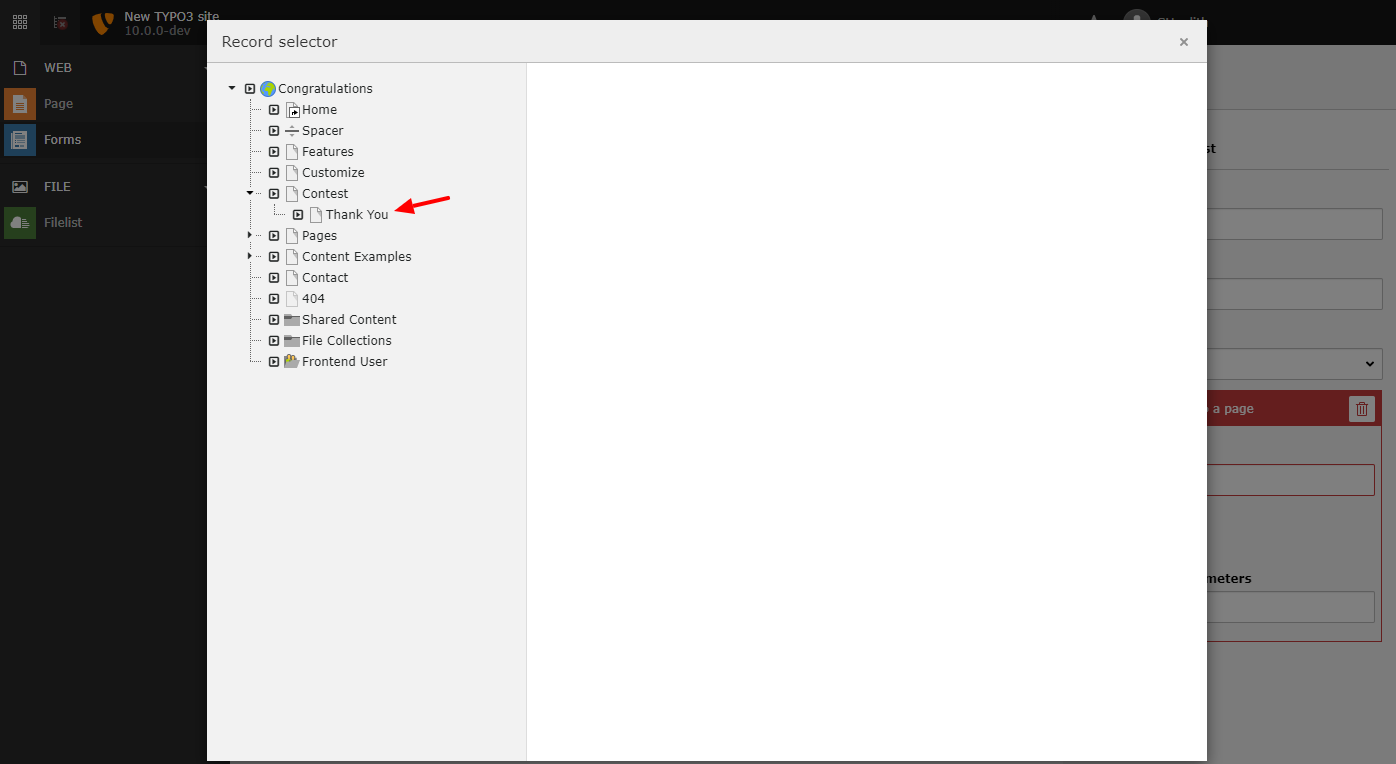
Page browser.
Choose your thank you page.
Attention
Make sure that the redirect finisher is the last finisher - after the redirect no other finishers will be executed.
-
Test again - Enjoy!
Save the form and reload the frontend. Now you can test the form again. After submitting you will now be redirected to the thank you page.

Depending on your frontend, your page might look different.