Grid Wizard
For those, who are not familiar with TypoScript or just prefer the usability of a point and click interface, there is a comfortable Grid Wizard that will help to create the TypoScript code.
Creating the basic grid structure
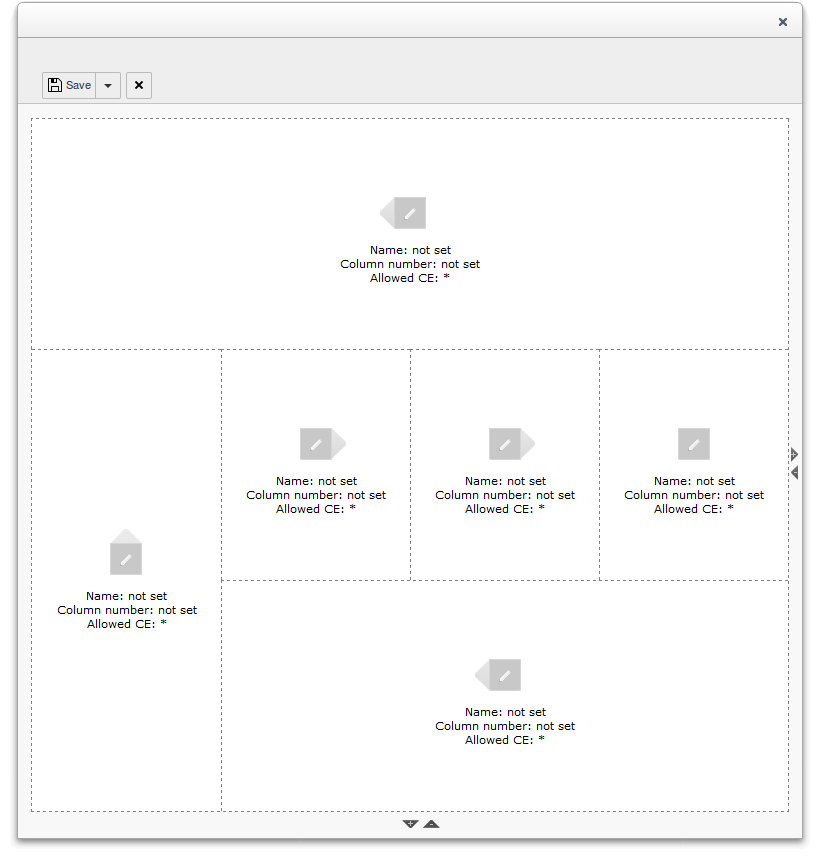
When you want to use this wizard just go to the Configuration tab of the layout record, click on the icon with the pencil to the right of the of the Grid Configuration area and wait for the popup window to open. When this is a newly created record, the wizard will look like this:

Otherwise it will show a visible representation of the structure provided in the textarea.
Now you can click on the small triangles at the right and at the bottom to create the basic grid structure. + will increase the number of columns and/or rows, - will decrease it. To get the example we have been using for the Grid TS Syntax, the basic grid would be looking like this:

Spanning, naming and assigning cells
Now you can deal with the cells that should be spanning multiple columns and/or rows . Therefor you just have to click on the triangle symbols beside the cells you want to enlarge. You can span right and down only , since this resembles the way cells are spanned in the HTML table used within the page module. Only when you spanned a cell over at least one column and/or row, there will be additional triangles pointing to the left and up , so that you can remove the spanning by clicking on them.
To create the structure of the Grid TS example, you should click on the right triangle of the upper left cell first until it spans the whole row. Then you should click on the bottom triangle of the first cell of the second row to have it span two rows. Finally you should click on the right triangle of the second cell of the last row until it spans the remaining three columns of the last row. Now the result should be looking like this:
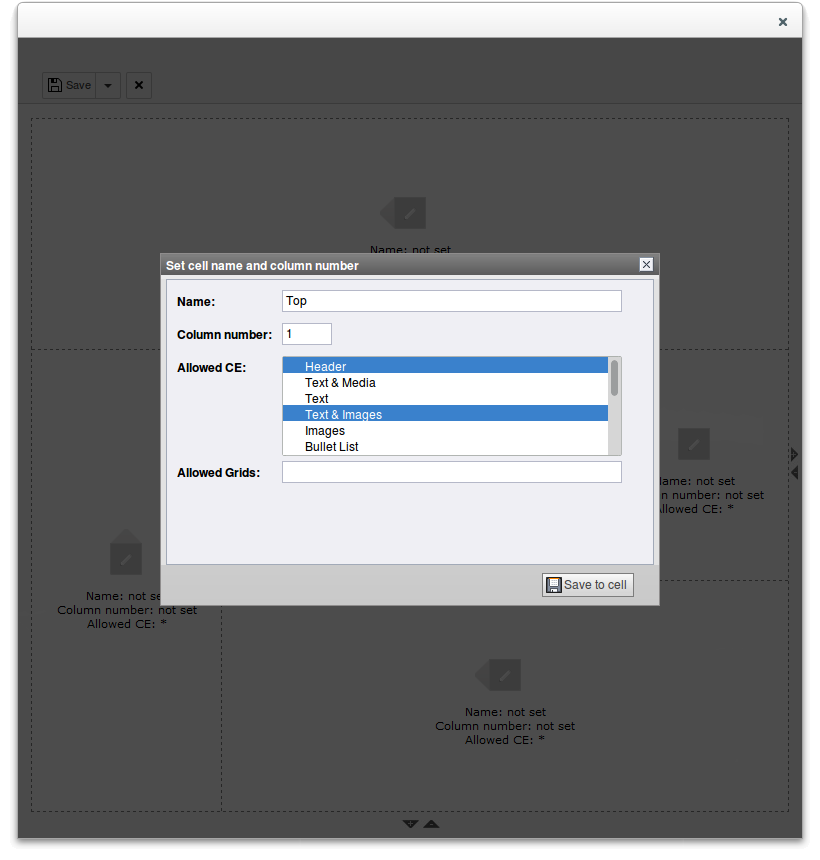
Finally you should give the cells a name and a number to be used as the value for the internal colPos within a grid element using this layout. And you should decide about the available content and grid element types for each cell. If you don’t set the column number, the cell will be a placeholder that can not contain any element later on. To edit the values for each cell, just click on the pencil within the square in the middle of each cell, fill in the values and save them by clicking on the disk symbol .
Saving the layout to the CE backend layout record
Now that you have named and assigned each cell, the layout should be looking like this:

You can save it by clicking on the disk symbol at the upper left corner of the popup window. Depending on the names and column values you have been using, the result should be close to the example we have used in the Grid TS Syntax section. When you open the wizard the next time, it will come up in the same state.