Users Manual
Basic plugin setup guide
Start by creating a folder (or more than one) to attach the Jobapplications Extension records to. For this example we will use a single folder, though you can split the system records into different folders as well. Having the folder set up we now create the pages needed for the extension to work.
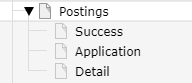
Basically there are four pages that each have a Jobapplications Plugin on them: The Job posting list page, the Detail View Page, the Application form page and the Success Page. Simply create all of these pages and name them as you want. You can leave them be for the moment. We will go over each page in detail in the following section.
A proposal for the order of the pages. You can do this as you please though.
List page
Let’s start with the Job posting list page. Here you will be able to see all your postings in a list view.
Make sure you are in page mode and click +Content. In the popup window select the Plugins tab and select Jobapplications. Having done that you can give the plugin a name and then change to the Plugin Tab.
Here are all the settings located. First of all make sure to select the correct plugin in the Selected Plugin Dropdown. On this page this is the Jobapplications: Posting Plugin.
Below that you have the setting for where you have to set the Detail Page. Simply click on the Page Button and select the page you created as the detail page in the beginning. Equally as important is to set the Record Storage Page (which you can find at the bottom) to the folder where the job postings will be located. Between that there are other settings as well:
Detail view and Application form on same page
You can put them on the same page. The application form plugin will automatically fetch the correct posting.
Number of postings per page
This defines how many postings are displayed on a paginated page.
Show only postings of
This setting allows you to filter the postings shown based on which categories they are assigned to. For example this can be useful if you want to have an extra page for the apprenticeship postings, so that there are no postings of another category. You have to create category system records for this to work, which then can be referenced by the job posting record.
Detail Page
Create a new plugin and go into its settings as described above already.
Make sure the correct plugin is selected. In this case it is the Jobapplications: Detail View plugin. Also make sure you selected the correct record storage page.
Application Module
Here you can change the status of the application system being available, meaning for the end users that there will be a button, where they can get to the application form.
This enables the setting where you have to set the application page. That means if you dont want the application system enabled you can stop here.
Define page title
In this option you can specify the page title. You have the posting title with the placeholder %postingTitle% available. If left empty the default title defined by the extenion takes place.
Show contact
This setting simply lets you decide whether you want to display the contact in the template.
Show contact photo
Here you can specify if the photo of the contact should be displayed.
Show title of location
This setting provides a possibility to not show the title of the location. This is useful if you only want to show the address of the location.
Enter a Google Maps API Key
This has no effect yet. It will come in use in a future update.
Application Page
This time the selected plugin should be Jobapplications: Application Form.
Set the success page and repository the same as on the previous pages.
Define page title
In this option you can specify the page title. You have the posting title with the placeholder %postingTitle% available. If left empty the default title defined by the extenion is used.
Should the referenced contact receive an email?
When this option is enabled the contact which was referenced by the posting will get an email with all the information the applicant provided including attachments. Make sure to specify the Email to applicant sender email and the Email to applicant sender name.
Should new applications be sent to a specific email address?
This does the same thing as the previous settings only that this time an email can be specified. Make sure to specify the Email to applicant sender email and the Email to applicant sender name.
Should an email be sent to the applicant?
With this setting enabled, new fields will show up, so you can enter the texts for the email.
Email to applicant subject
Placeholder:
- posting title: %postingTitle%
Email to applicant text
Placeholder:
- posting title: %postingTitle%
- applicant salutation: %applicantSalutation%
- applicant first name: %applicantFirstName%
- applicant last name: %applicantLastName%
Should applications be saved in the backend?
When this is disabled applications are not getting persisted in the record folder you selected for this plugin. This can be useful if you want to handle your whole application system via email.
Show “Salary Expectation” field
Enables or disables Salary Expectation field.
Show “Earliest Date Of Joining” field
Enables or disables Earliest Date Of Joining field.
Show “Message” field
Enables or disables Message field
Maximum message number of characters:
Maximum characters for the message field.
Link privacy agreement page
Assign the privacy agreement page which the applicants will have to accept when they apply. Make sure to open this in a new tab, otherwise all the applicants data will possibly be lost.
Unsolicited application
If you want to have a form for an unsolicited application, just place the plugin on the desired page. If the page does not receive a posting parameter, it automatically acts as an unsolicited application form. In the template you can change the title for this field. The emails contain the information unsolicited application and applications in the backend won’t be linked to postings. If you configured the plugin to send mails to the contact, make sure to overwrite the defaultContactMailAddress, defaultContactFirstName, defaultContactLastName settings with your custom values.
Success page
This page will be called when the applicants application was successfully sent. The plugin here: Jobapplications: Application Success Page
The job of this plugin is to provide a success message which is personalized to the applicant. It either easily integrates with other content elements on the page or the template is easily customizable to your own needs.
Enter message
Placeholders:
- Lastname: %lastName%
- Firstname: %firstName%
- Salutation: %salutation%
- Posting Title: %postingTitle%
When the applicant entered divers or nothing as salutation the salutation will be automatically replaced with the applicants first name.
Extra: Contact plugin
There is a plugin named Jobapplications: Contact Display which simply shows the selected contacts that are defined in the plugin settings. This can be useful to include as a contact section in another page.
There is also an option to enter a header text. This can be useful if you want to use this plugin as section.
Extension Configuration
This can be found in Settings->Extension Configuration->Configure Extensions->jobapplications
Override the automatically fetched server upload file size limit
Here you can choose to provide a custom upload file size limit, that gets shown in the frontend and checked in backend. This must be a smaller than or equal the value the server sets. Specifiy the value in kilobytes.
Allowed application upload file types
Here you can specify multiple file types by naming their extension by using the following notation: .pdf,.docx,.xlsx . Fallback is .pdf.
Slug behaviour
Slug behavior:”uniqueInSite”: The same slug can be used for postings in different sites. Use this setting only if no posting records are shared between sites. “unique” means that the same posting title will lead to different slug names.
Google Indexing API interface
This extension implements the Google Indexing API. It provides a possibility for telling Google when a job posting was created, updated or deleted. In this extension this happens (when everything is configured correcty) when a posting record is created, updated or deleted. The extension connects to the Google API and tells it that something changed to the postings url. Following that Google crawls this exact url and looks for the script tag containing the generated json formatted structured data. The goal for this is to happen automatically, so the editor doesn’t even notices it.
The link for the posting is dynamically generated. The extension will look through the content elements the list view page plugins are placed and tries to figure out which the most specifc (measured by category selection) is, and the build the url to the exact detail page.
Make sure that you do not activate this feature before your website is ready for it: Your website should be in a productive state, should use its final url and should be ready for getting indexed by google. A posting plugin should be placed somewhere on the website and point to the correct pid. If you activate the feature later on after all postings are already edited, you can start the full indexing mechanism from the backend module.
This function does not trigger when in development environment, if you want it to activate the option in “Trigger Google Indexing API while in develoment environment” in the Extension Configuration.
There is quite a bit of configuration to do though:
Enable Google Jobs in the Extension see (“Enable Google Jobs”) below.
- Create a Servive Account and download the .json configuration file including the private key and other data.
It should look somewhat like that:
{
        "type": "service_account",
        "project_id": "your-project-id",
        "private_key_id": "some-id",
        "private_key": "-----BEGIN PRIVATE KEY-----\n-some-private-key\n-----END PRIVATE KEY-----\n",
        "client_email": "some-email@appspot.gserviceaccount.com",
        "client_id": "some-id",
        "auth_uri": "https://accounts.google.com/o/oauth2/auth",
        "token_uri": "https://oauth2.googleapis.com/token",
        "auth_provider_x509_cert_url": "https://www.googleapis.com/oauth2/v1/certs",
        "client_x509_cert_url": "https://www.googleapis.com/robot/v1/metadata/x509/some-email%40appspot.gserviceaccount.com"
}
Save the file somewhere in your project and give a path to the .json file in the Extension Configuration.
Enable the Google Indexing API Extension Setting in the Extension Configuration.
Enable Debug Messages in the Extension Configuration.
Test if you’ve done everything correcty by saving a posting and waiting for a green flash message. If you were not successful the flash message will contain some information about why it didn’t work.
Template constants
In the Template Constant Editor the plugin registered a few settings.
Simply select PLUGIN.TX_JOBS.
Filestorage for applications
This is where you can configure a seperate non publicly accessible file storage where all application files are saved. The value is the uid of a file storage. The default value is the auto created fileadmin, which is not recommended to use.
The file storage must be browsable and writable, but not publicly accessible. Depending on your setup you might have to do more than just deactivate the flag. See the documentation here
Change template path
Here you can override the default templates.
Change CSS path
If you want a different Bootsrap.css or even a very different .css file you can change its path here.
Use single file upload
This is enabled by default to ensure extension backwards compatiblity. By disabling this field the multi file upload field is activated.
Send Email as HTML or Text or Both
This setting only has an effect in TYPO3 v10. You can choose to send out emails as their html, text or both combined versions. There are email templates, for both the html and text versions.
Enable Google Jobs
Here you can enable Google Jobs. The data for it will be automatically generated based on the posting data. Just make sure you have selected a company name in the extension configuration.
You can find the extension configuration in Settings->Extension Configuration->Configure Extensions->jobapplications.
Tasks
There are two tasks implemented to manage applications that are not needed anymore or have to be removed for privacy law reasons.
Both of them feature two additional settings:
Age in days
This determines the age the application must have. It is measured from the creation date of the application until now.
Status consideration
This setting decides whether the task should only delete applications that are in an end status (see Status record if you don’t know what that means).
This is only useful if the application administration and its statuses are used.
Clean up old applications
This task simply deletes all applications and its files, that qualified for removal. How this is determined is described above.
Anonymize old applications
This task anonymizes every application that qualified for removal information with three asterisks ***, except for the city name, country, privacy agreement confirmation, referenced job posting and the creation time.
This could be needed for following applicable law.