Installation
Installing zvoove for TYPO3
Install the zvoove extension
Press the Retrieve/Update button and search for the extension key
zvoove. Then import the extension from the repository.OR
Search for the current version in the TYPO3 Extension Repository (TER). Download the t3x or zip version. Upload the file afterwards in the Extension Manager and activate it.
OR
Install the extension using composer on the command-line:
composer require nng/zvoove
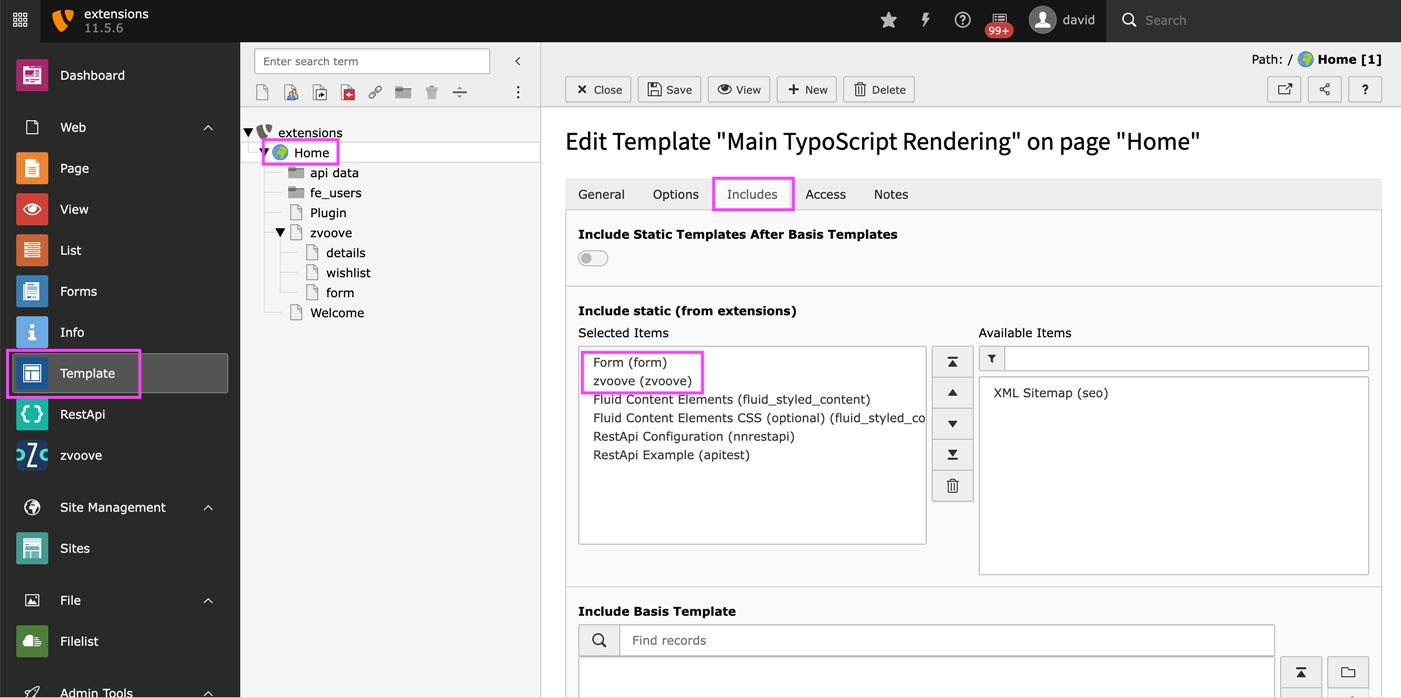
Include the static TypoScript templates
Make sure, the static TypoScript configuration for “zvoove (zvoove)” and “Form (form)” was included on your root-page. The configuration for Form should be included before zvoove!
To do so, follow the standard instructions on how to include TypoScript from extensions.
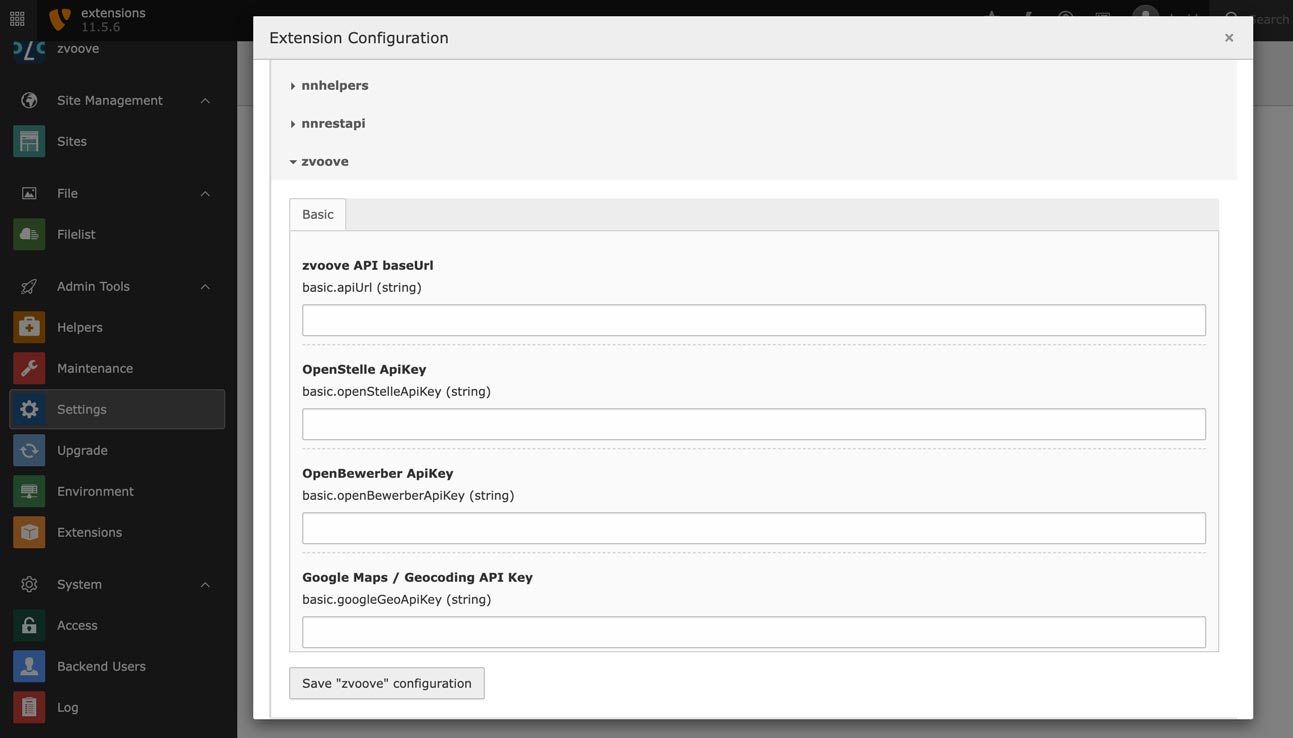
Enter your zvoove API keys
Switch to the “Settings” backend module and click on “Extension configuration”. Select “zvoove” and fill out the fields:
- zvoove API baseUrl is the website that you can view your vacancies on zvoove. This will be something like
https://yourname.europersonal.com/ - OpenStelle ApiKey is the API key from zvoove for displaying the list of vacancies. To generate an API-key, login to your account at zvoove and then navigate to API-Keys. Under “Bereich” select “OpenStelle” and copy the API-Key displayed below.
- OpenBewerber ApiKey is the API key from zvoove for sending applications to zvoove. Do the same as described above, but under “Bereich” select “OpenBewerber”.
- Enter a Google Maps / Geocoding API Key if you would like to enable address and postal-code search and filtering. Follow these instructions to create a key.
- zvoove API baseUrl is the website that you can view your vacancies on zvoove. This will be something like
Clear the cache!
Click on the “clear cache” icon in the backend to clear all caches!
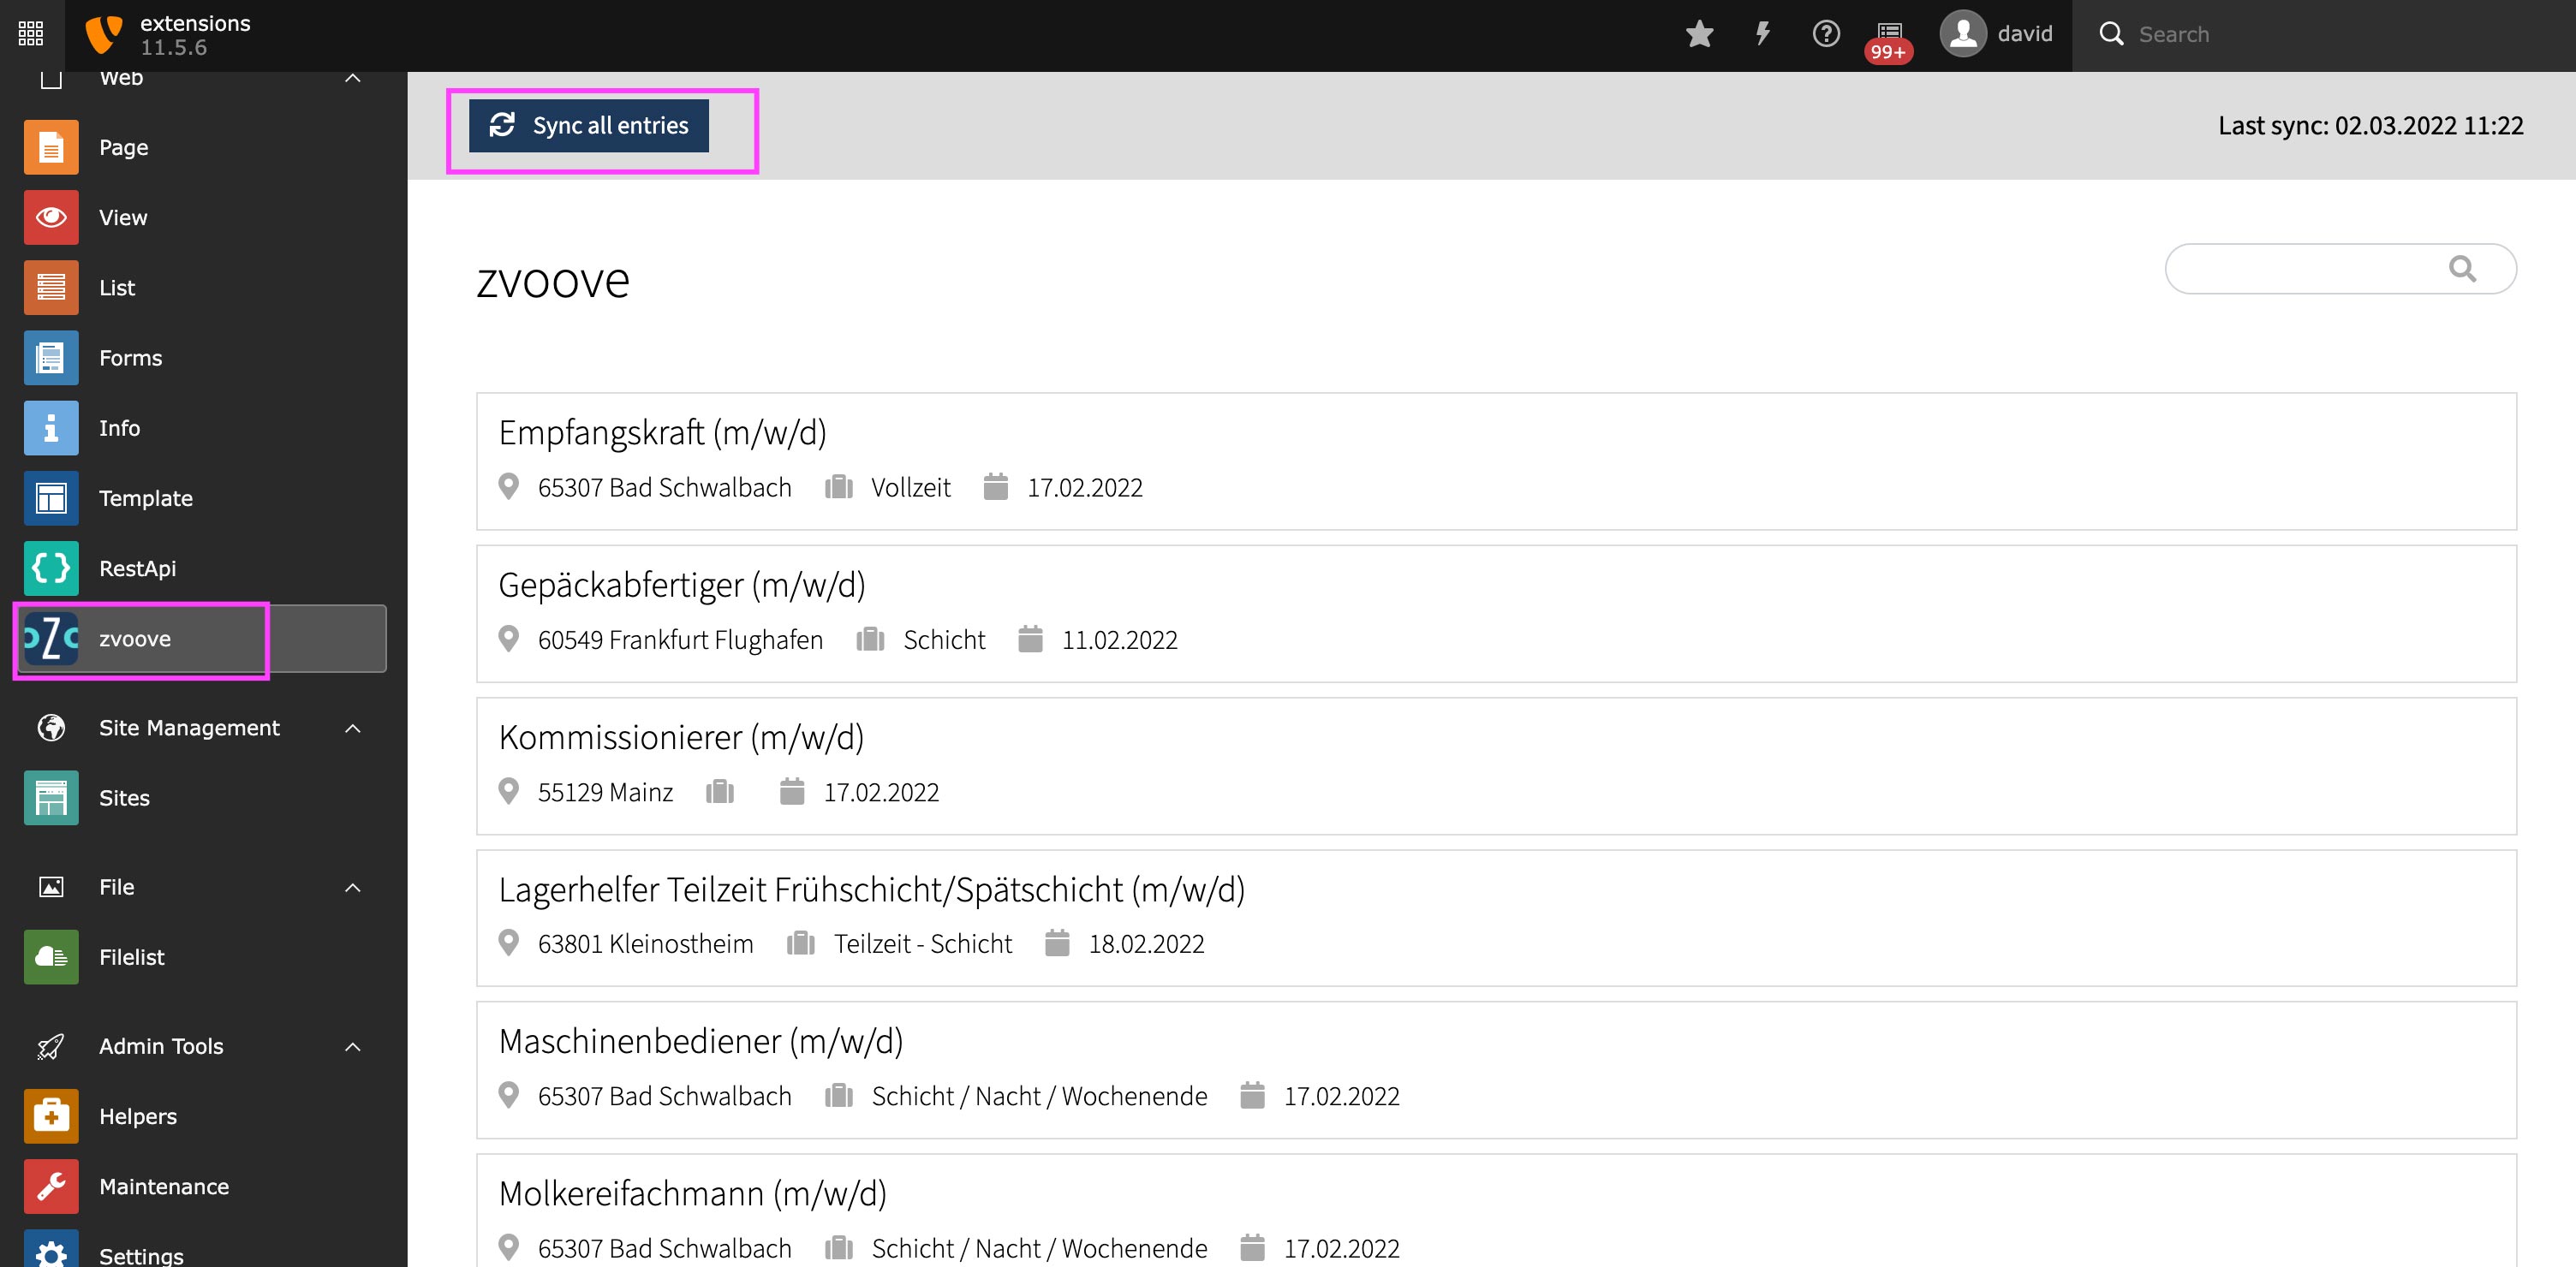
Test the backend module
To check, if the API-keys work and you can connect to zvoove:
- switch to the “zvoove” backend module
- click on “Sync all entries”
- the list of the vacancies from zvoove will be imported
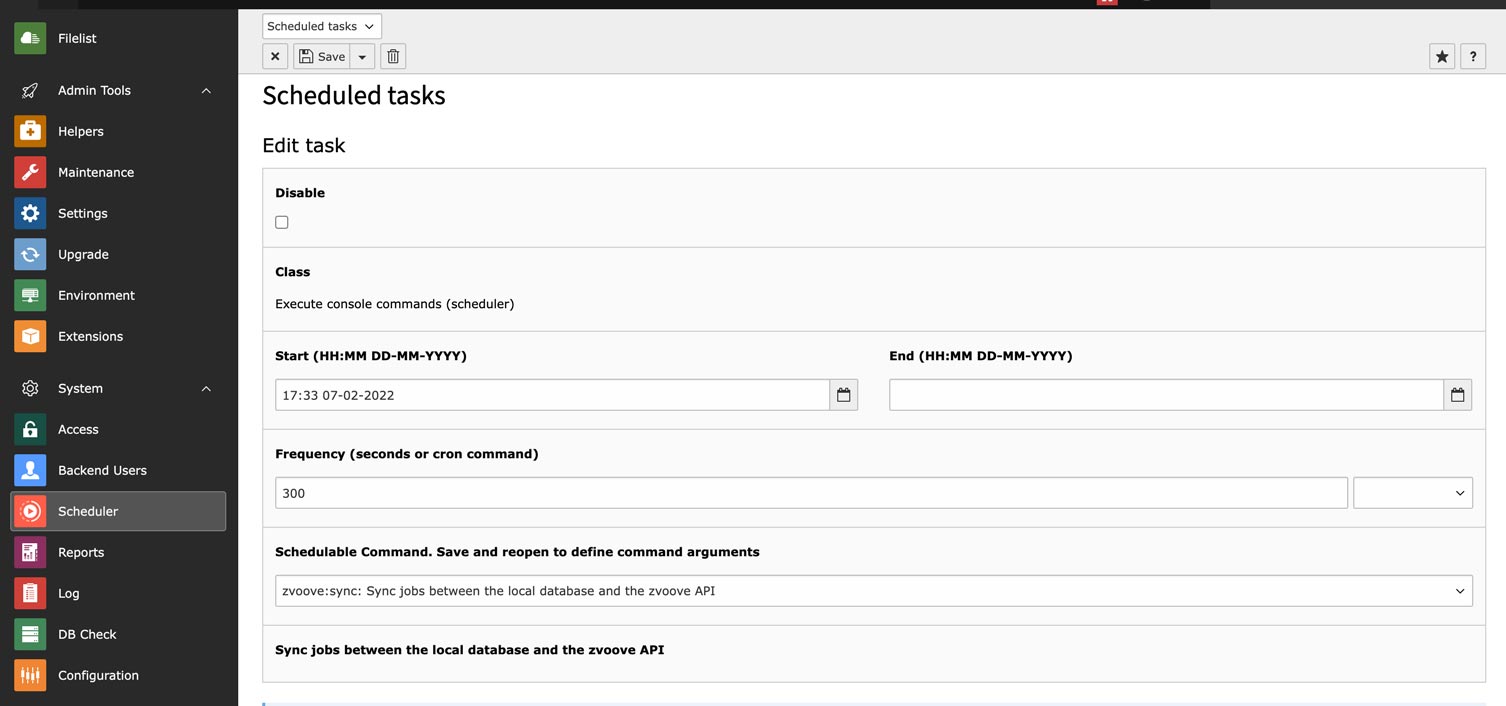
Create a scheduler task
The scheduler task will keep your local vacancies in sync with zvoove. You will need to have a cronjob configured for the server. Please refer to the official documentation if you are new to this topic.
To add the zvoove scheduler task to TYPO3:
- Switch to the “Scheduler” backend-module
- Create a new task
- In the dropdown “Class” select “Execute console command”
- In the field “Frequency” enter an interval, e.g. “300”
- From the dropdown “Schedulable Command” select “zvoove:sync”
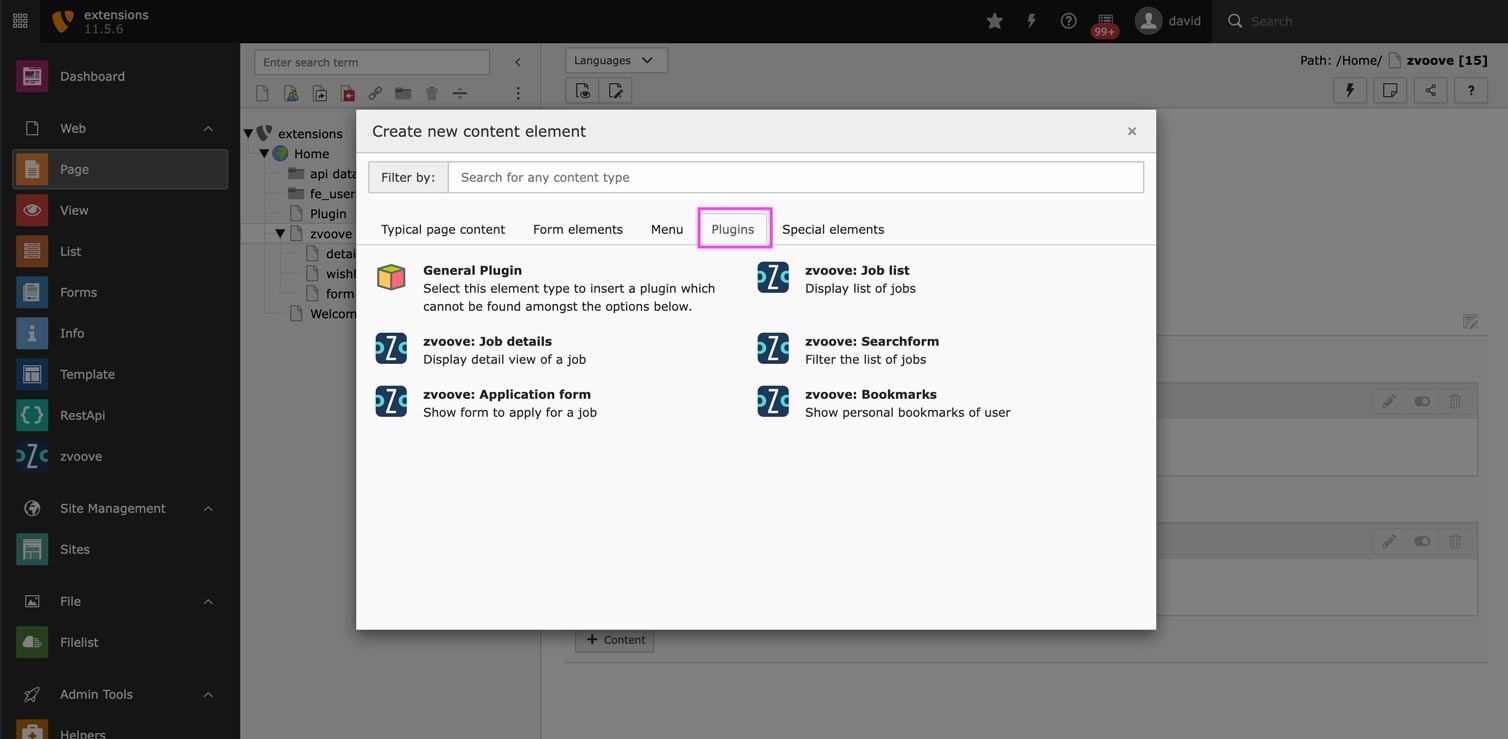
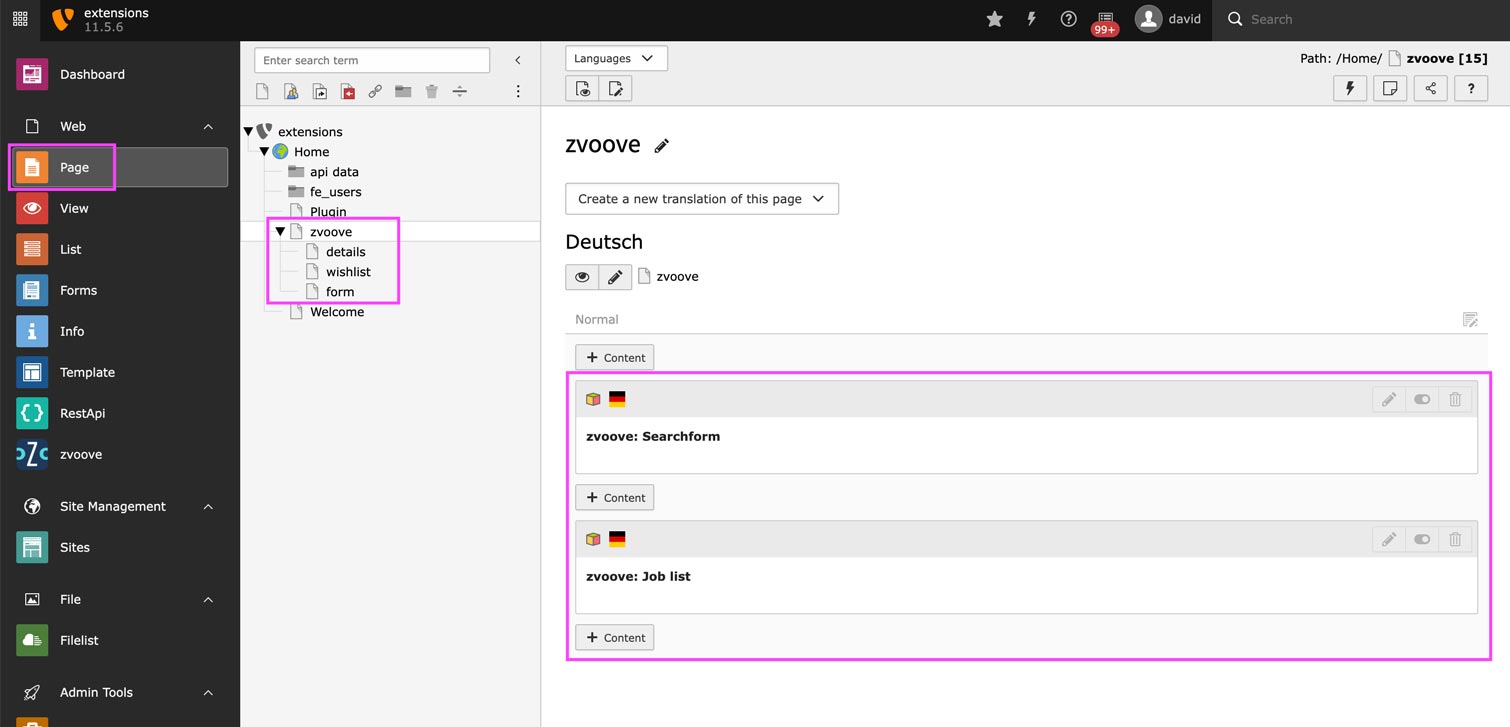
Place the zvoove plugin(s)
Create pages in the page-tree for the list-view, details-view, bookmark and application-form.
Place the plugins on the pages and fill out the flexform. This step is very self-explanatory if you are familiar with other plugins like the news-plugin.