DEPRECATION WARNING
This documentation is not using the current rendering mechanism and is probably outdated. The extension maintainer should switch to the new system. Details on how to use the rendering mechanism can be found here.
Installation
The Display Controller must be installed as part of the Tesseract suite of extensions. It is useless outside of this scope.
The extension will add a number of fields to the tt_content table and creates a new table used to store the relations between the various Tesseract components.
After installation the static TypoScript template provided by the extension should be added to the site's template.
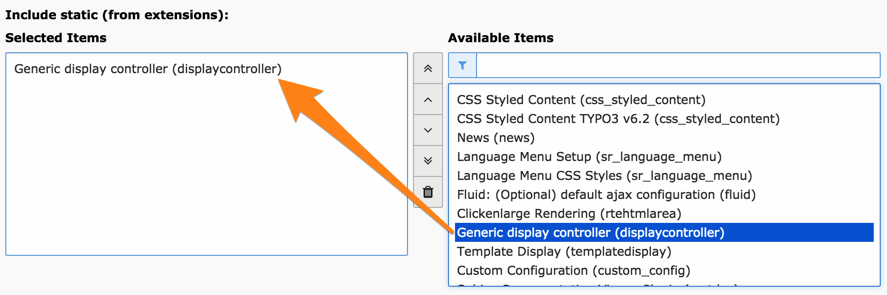
Including the static template provided by Display Controller
Compatibility
As of version 2.0.0, TYPO3 CMS 7 or more is required. Use version 1.6.x for TYPO3 CMS 6.2
Configuration
Here are the configuration options available after installing the extension:
- Debug
Choose the type of debugging that you want. Debugging to the output will display status messages right before the Display Controller's normal output in the frontend (see screenshot below). Debugging to the Developer's Log will log messages provided you have an extension enabling that log (such as "devlog"). It's also possible to debug to both. Choosing "None" will turn all debugging off.Debugging can also be activated on a content element basis (see User Manual below).The icons show the status. Rolling over displays the debug title and message (including the key of the extension which registered the message). Clicking on an icon will dump any extra debug data to the JavaScript console.
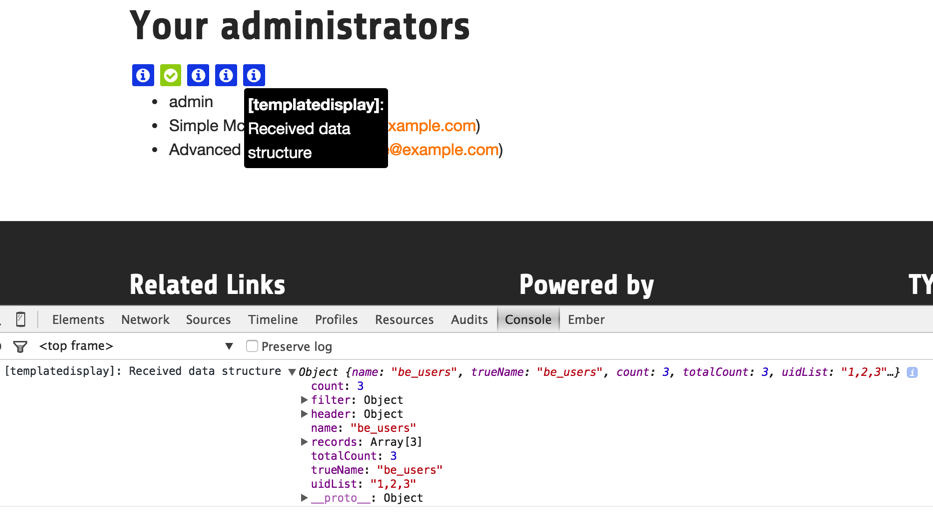
Debug markers in the frontend and output in the console
- Minimum level for debugging
- Only message with the chosen level of severity or above will be logged for debugging. All others are ignored. This makes for a less verbose output.
- Debug output class
- This makes it possible to create a custom
class for rendering the debug output. This class will be used instead
of
\Tesseract\Displaycontroller\Utility\Debugger. It must extend\Tesseract\Displaycontroller\Utility\Debuggerand override therender()method.