Users Manual
This chapter describes how to use the extension from a user point of view.
Workflow
Simply upload your unmodified pictures either from the File > Filelist module (fileadmin) or from the edit form of a content element (text with image, image, ...) and enjoy the automatic resizing and orientation in portrait of your pictures (here with an original picture in 3840 × 2560, 6.5 MB with EXIF orientation set to "portrait"):
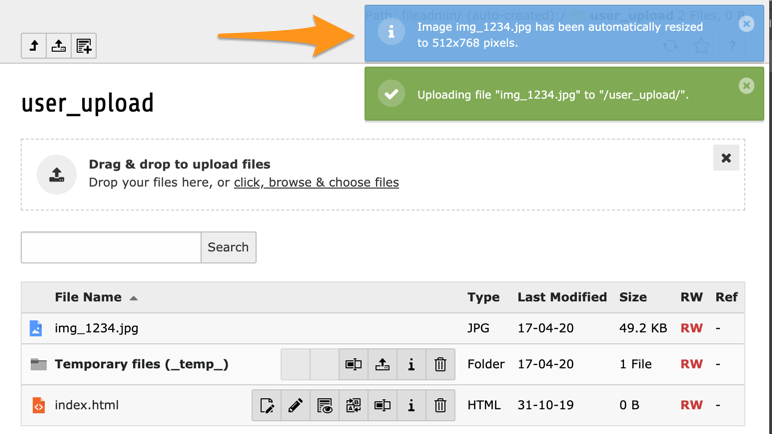
As you see, the constraints of 1024 × 768 pixels have been taken into account even with the correct orientation of the picture. If the reorientation did not have been taken into account, the picture would have been resized to 682 × 1024 instead (maximum ratio using the other dimension).
Here is another example, where a BMP (screenshot., 15.7 MB,
2732 × 1920) has been uploaded:
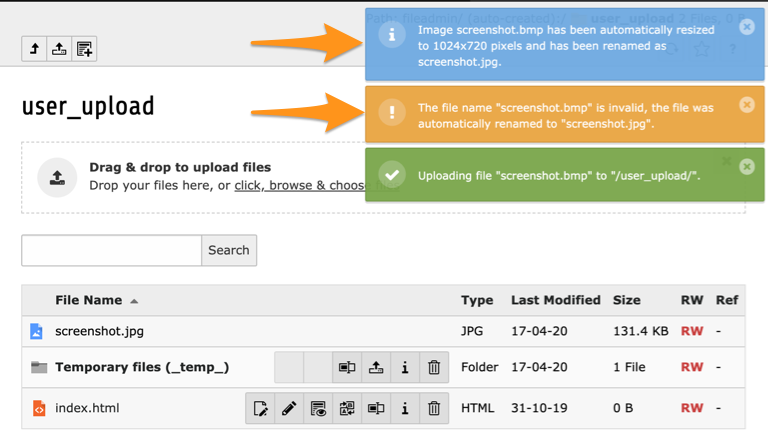
The uploaded file screenshot. has automatically been both resized and
converted to a new file screenshot. (according to the image type
conversion mapping option described in chapter Administrator Manual).
Details of this image show that its footprint is now quite small (131.4 KB).
Note
This extension is fully compatible with FAL (File Abstraction Layer)
introduced with TYPO3 6.0 even if some path references in this documentation
may not use the "new" format of the form 1:/.
Supported image types
This extension performs the resize with the standard image library API from TYPO3 meaning that on a well-configured system, following formats are supported:
- ai
- Adobe Illustrator
- bmp
- Windows OS/2 Bitmap Graphics
- gif
- Graphic Interchange Format
- jpg/jpeg
- JPEG/JIFF Image
- pcx
- Paintbrush Bitmap Graphic
- png
- Portable Network Graphic
- tga
- Truevision Targa Graphic
- tif/tiff
- Tagged Image Format