
Grid Wizard
The Grid Wizard is a visual tool for defining a grid's rows, columns and their relationships, spanning, restrictions and column numbers, without typing Grid TS Syntax by hand. TYPO3 Core provides the same tool for page-level Backend Layouts; Grid Elements carries it forward to content-element level, see History and Design Background for how that continuity came about.
The Grid Wizard belongs to the structure-definition layer described in Core Concepts. It defines a structural area; it does not create content. It is not the New Content Element Wizard, which selects and creates a content element, and it is not the Drag-In Wizard, Grid Elements' own direct-authoring tool for creating and placing content in one interaction. Using the Grid Wizard on a layout changes the structure that layout offers, not the content already placed inside a Grid Element using it, directly. If a cell or column that already holds child elements disappears from the layout definition, though, Grid Elements' consistency handling can move the affected children into the unused state; should a matching cell become available again later, those children can become available again accordingly, see Restrictions, Validation & Permissions and the Editor Guide's material on unused elements for how that handling works.
Creating the basic grid structure
Open the Configuration tab of a CE backend layout record to find the wizard within the editing form. On a new, unconfigured record, it starts empty:
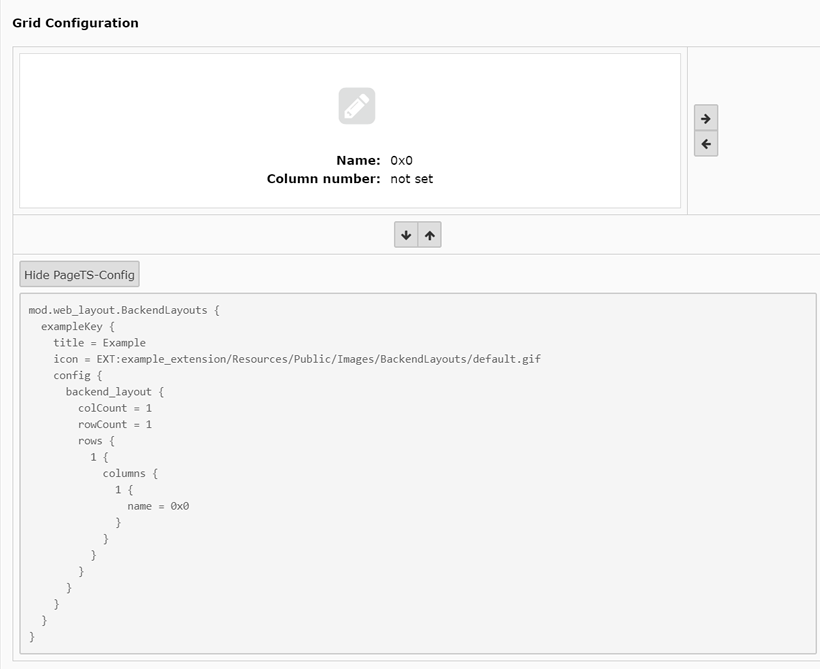
For an existing record, it instead renders the structure already present in the layout's TSconfig.
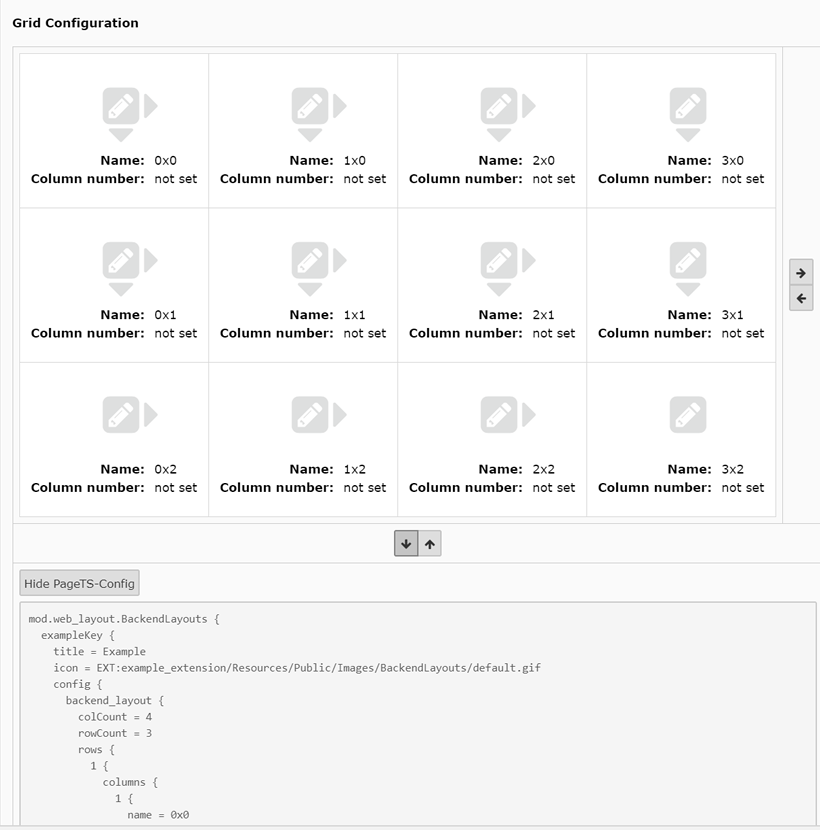
Use the small arrows on the right and bottom edges to size the grid: right and down add columns or rows, left and up remove them. Building the same structure used in the Grid TS Syntax example produces this basic grid:
Spanning, naming and assigning cells
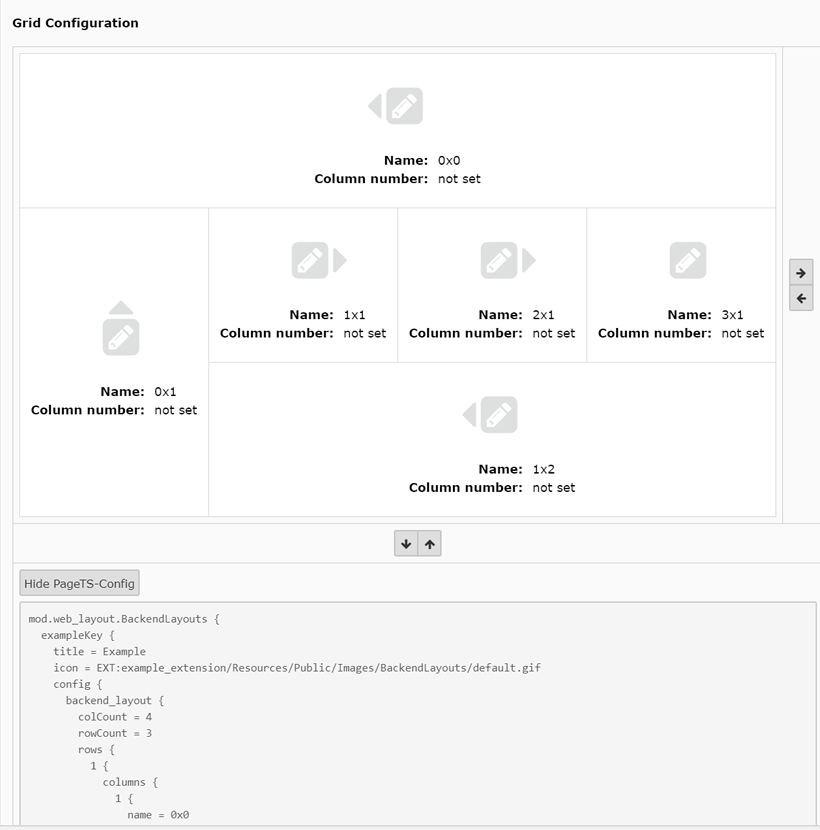
Click the triangle symbols beside a cell to have it span additional columns or rows. Spanning is only possible to the right and down, matching how cells are spanned in the HTML table the page module renders. Once a cell spans at least one extra column or row, additional triangles pointing left and up appear, letting you undo the spanning the same way.
To reproduce the Grid TS Syntax example: span the upper left cell's first row triangle until it covers the whole row, span the first cell of the second row downward so it covers two rows, then span the second cell of the last row rightward until it covers the remaining three columns:
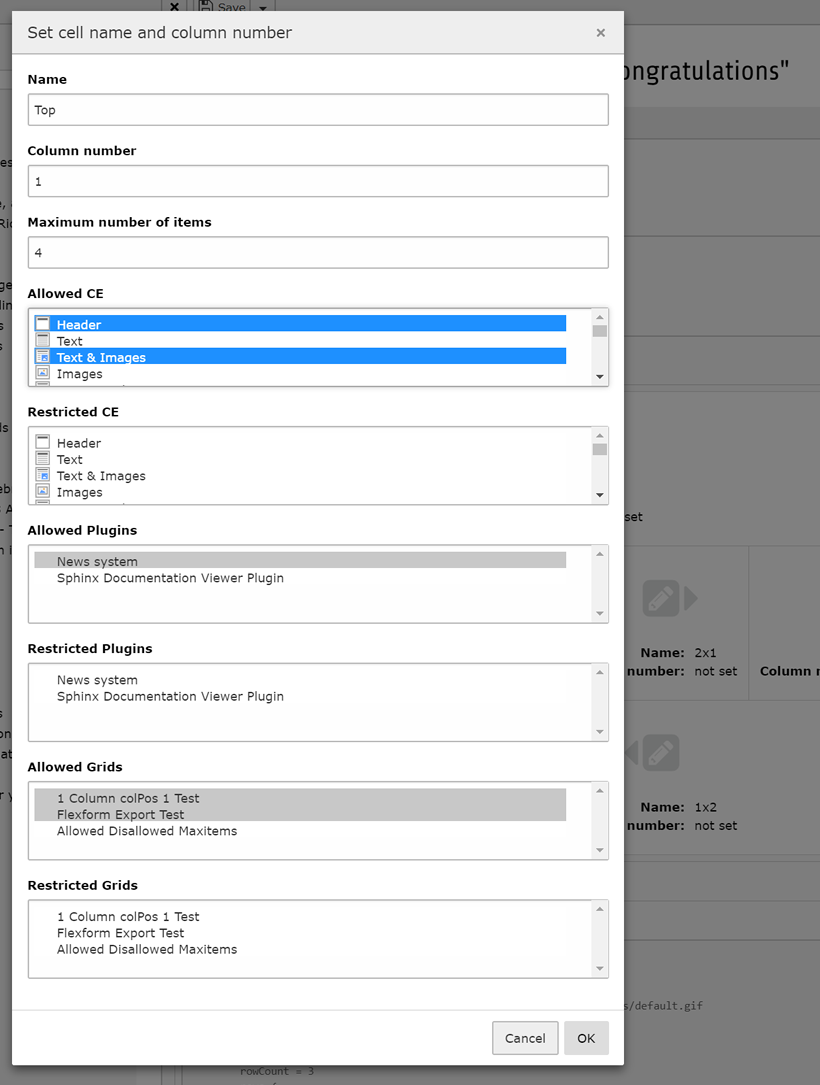
Each cell still needs a name and, if it should hold content, a
column number, which becomes that cell's colPos in the
resulting Grid TS Syntax, see Grid TS Syntax for what that value
does and does not establish. This is also where you set the allowed
and disallowed content, list and grid element types and the maximum
number of items for the cell, see Restrictions, Validation & Permissions for how those
values are enforced. A cell left without a column number stays a
placeholder and cannot hold content later on. Click the pencil icon in
the middle of a cell to edit its values, and the disk icon to save
them:
Saving the layout to the CE backend layout record
With every cell named and assigned, the layout is complete:
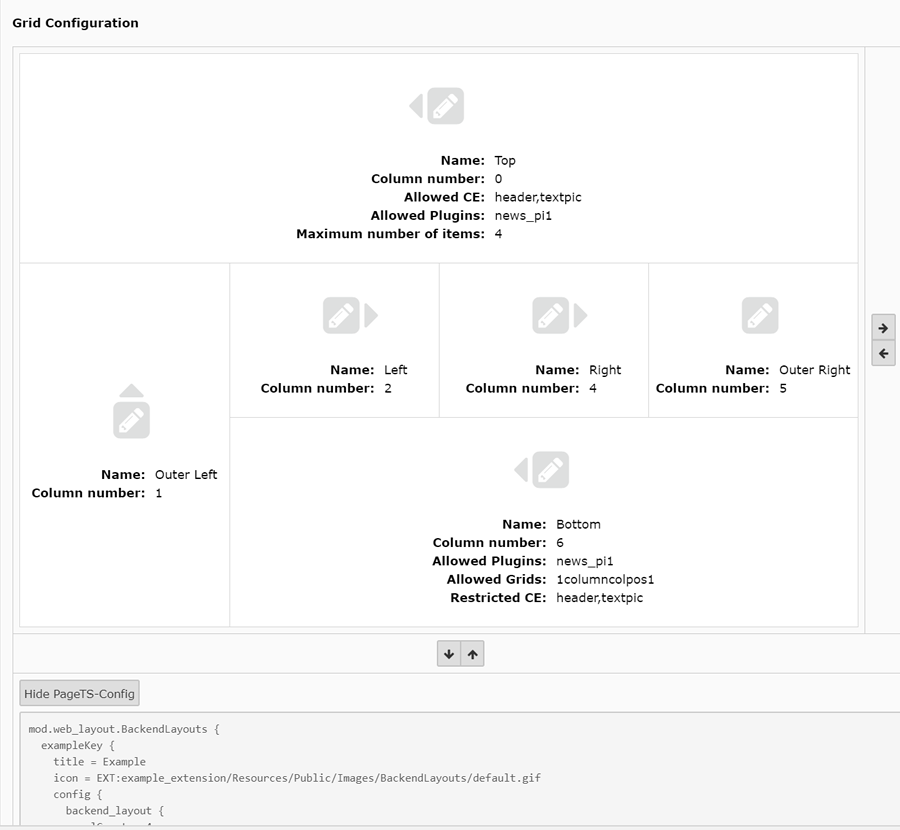
Saving the record converts the visual structure into the same Grid TS Syntax shown in that page's example. Reopening the wizard later restores it in the same visual state, so the two representations, visual and textual, always describe the same structure and can be moved between freely.
The result does not have to stay a database record. Copy the
generated syntax out of the wizard's TSconfig display and paste it
into a TSconfig file under tx_gridelements.setup, which also makes
it reusable and versionable across projects. A layout defined this way
reaches a page tree through TYPO3's normal Page TSconfig loading and
inheritance, the same as any other Page TSconfig; no separate option
is needed to point a page tree at it. See TSconfig for that
option and the further keys it accepts, and its
PAGE_TSCONFIG_ID option, which serves a different purpose:
pointing at the page that acts as the storage folder for CE backend
layout database records.