Quick configuration
With Site Sets (recommended)
-
Add a new ROOT site in your page tree
This site will be used to store the MAIL pages later. Remember the uid of this new page, you may need it in a later step.
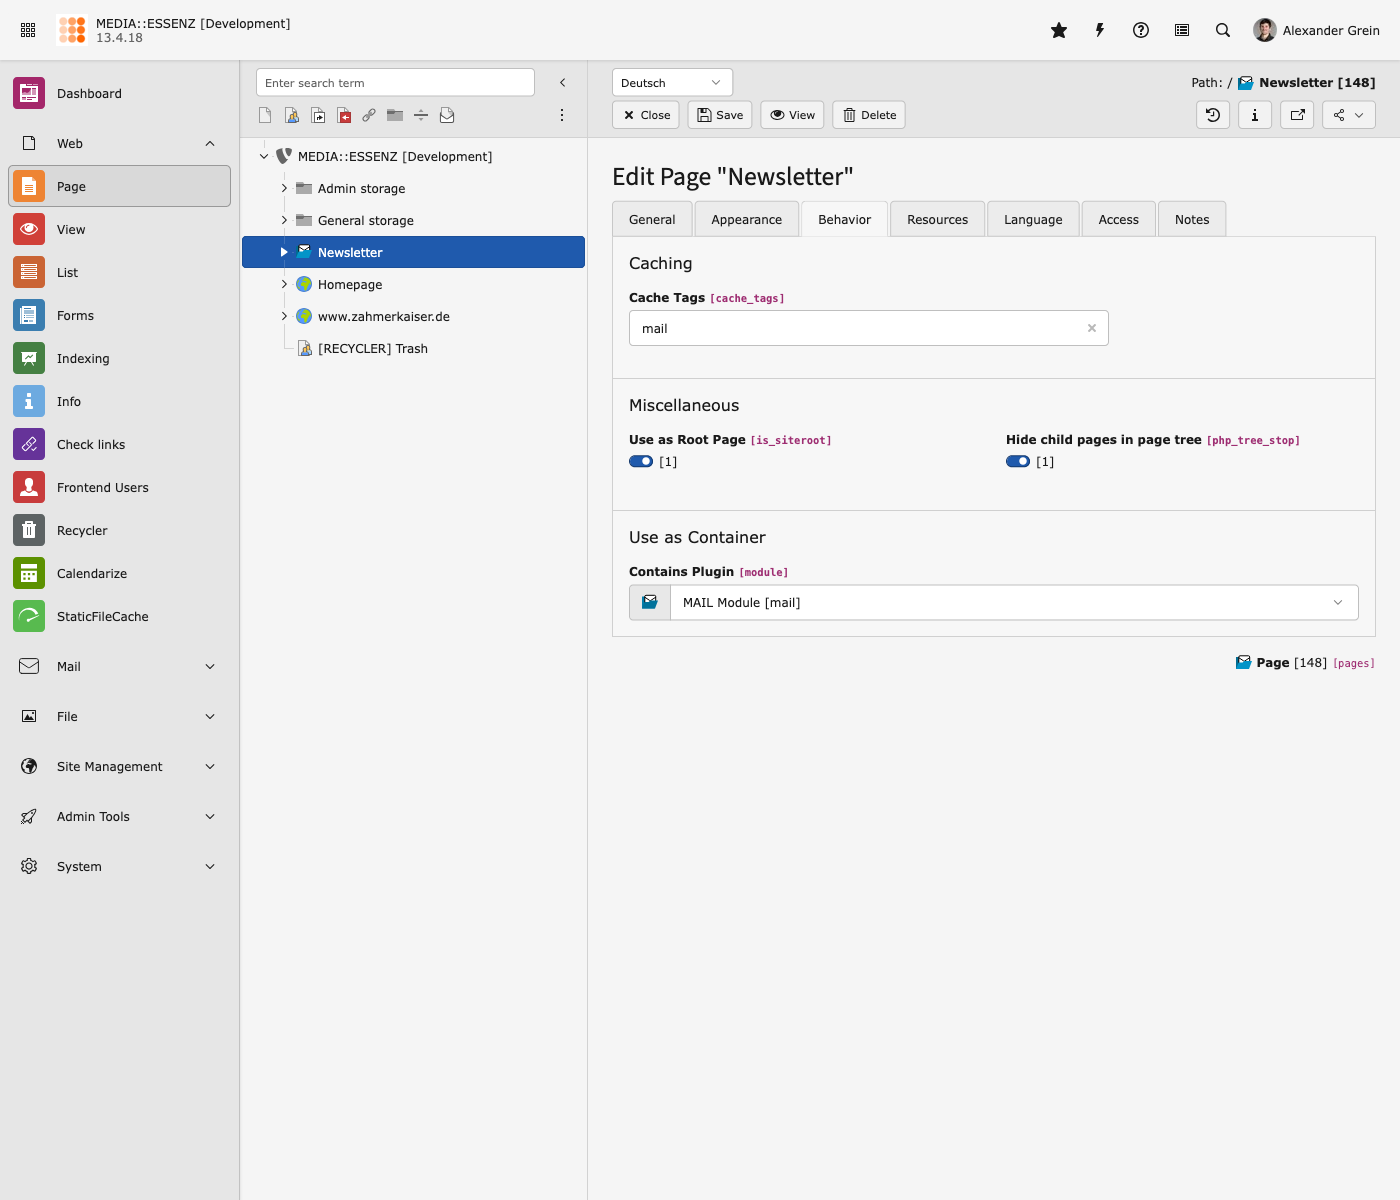
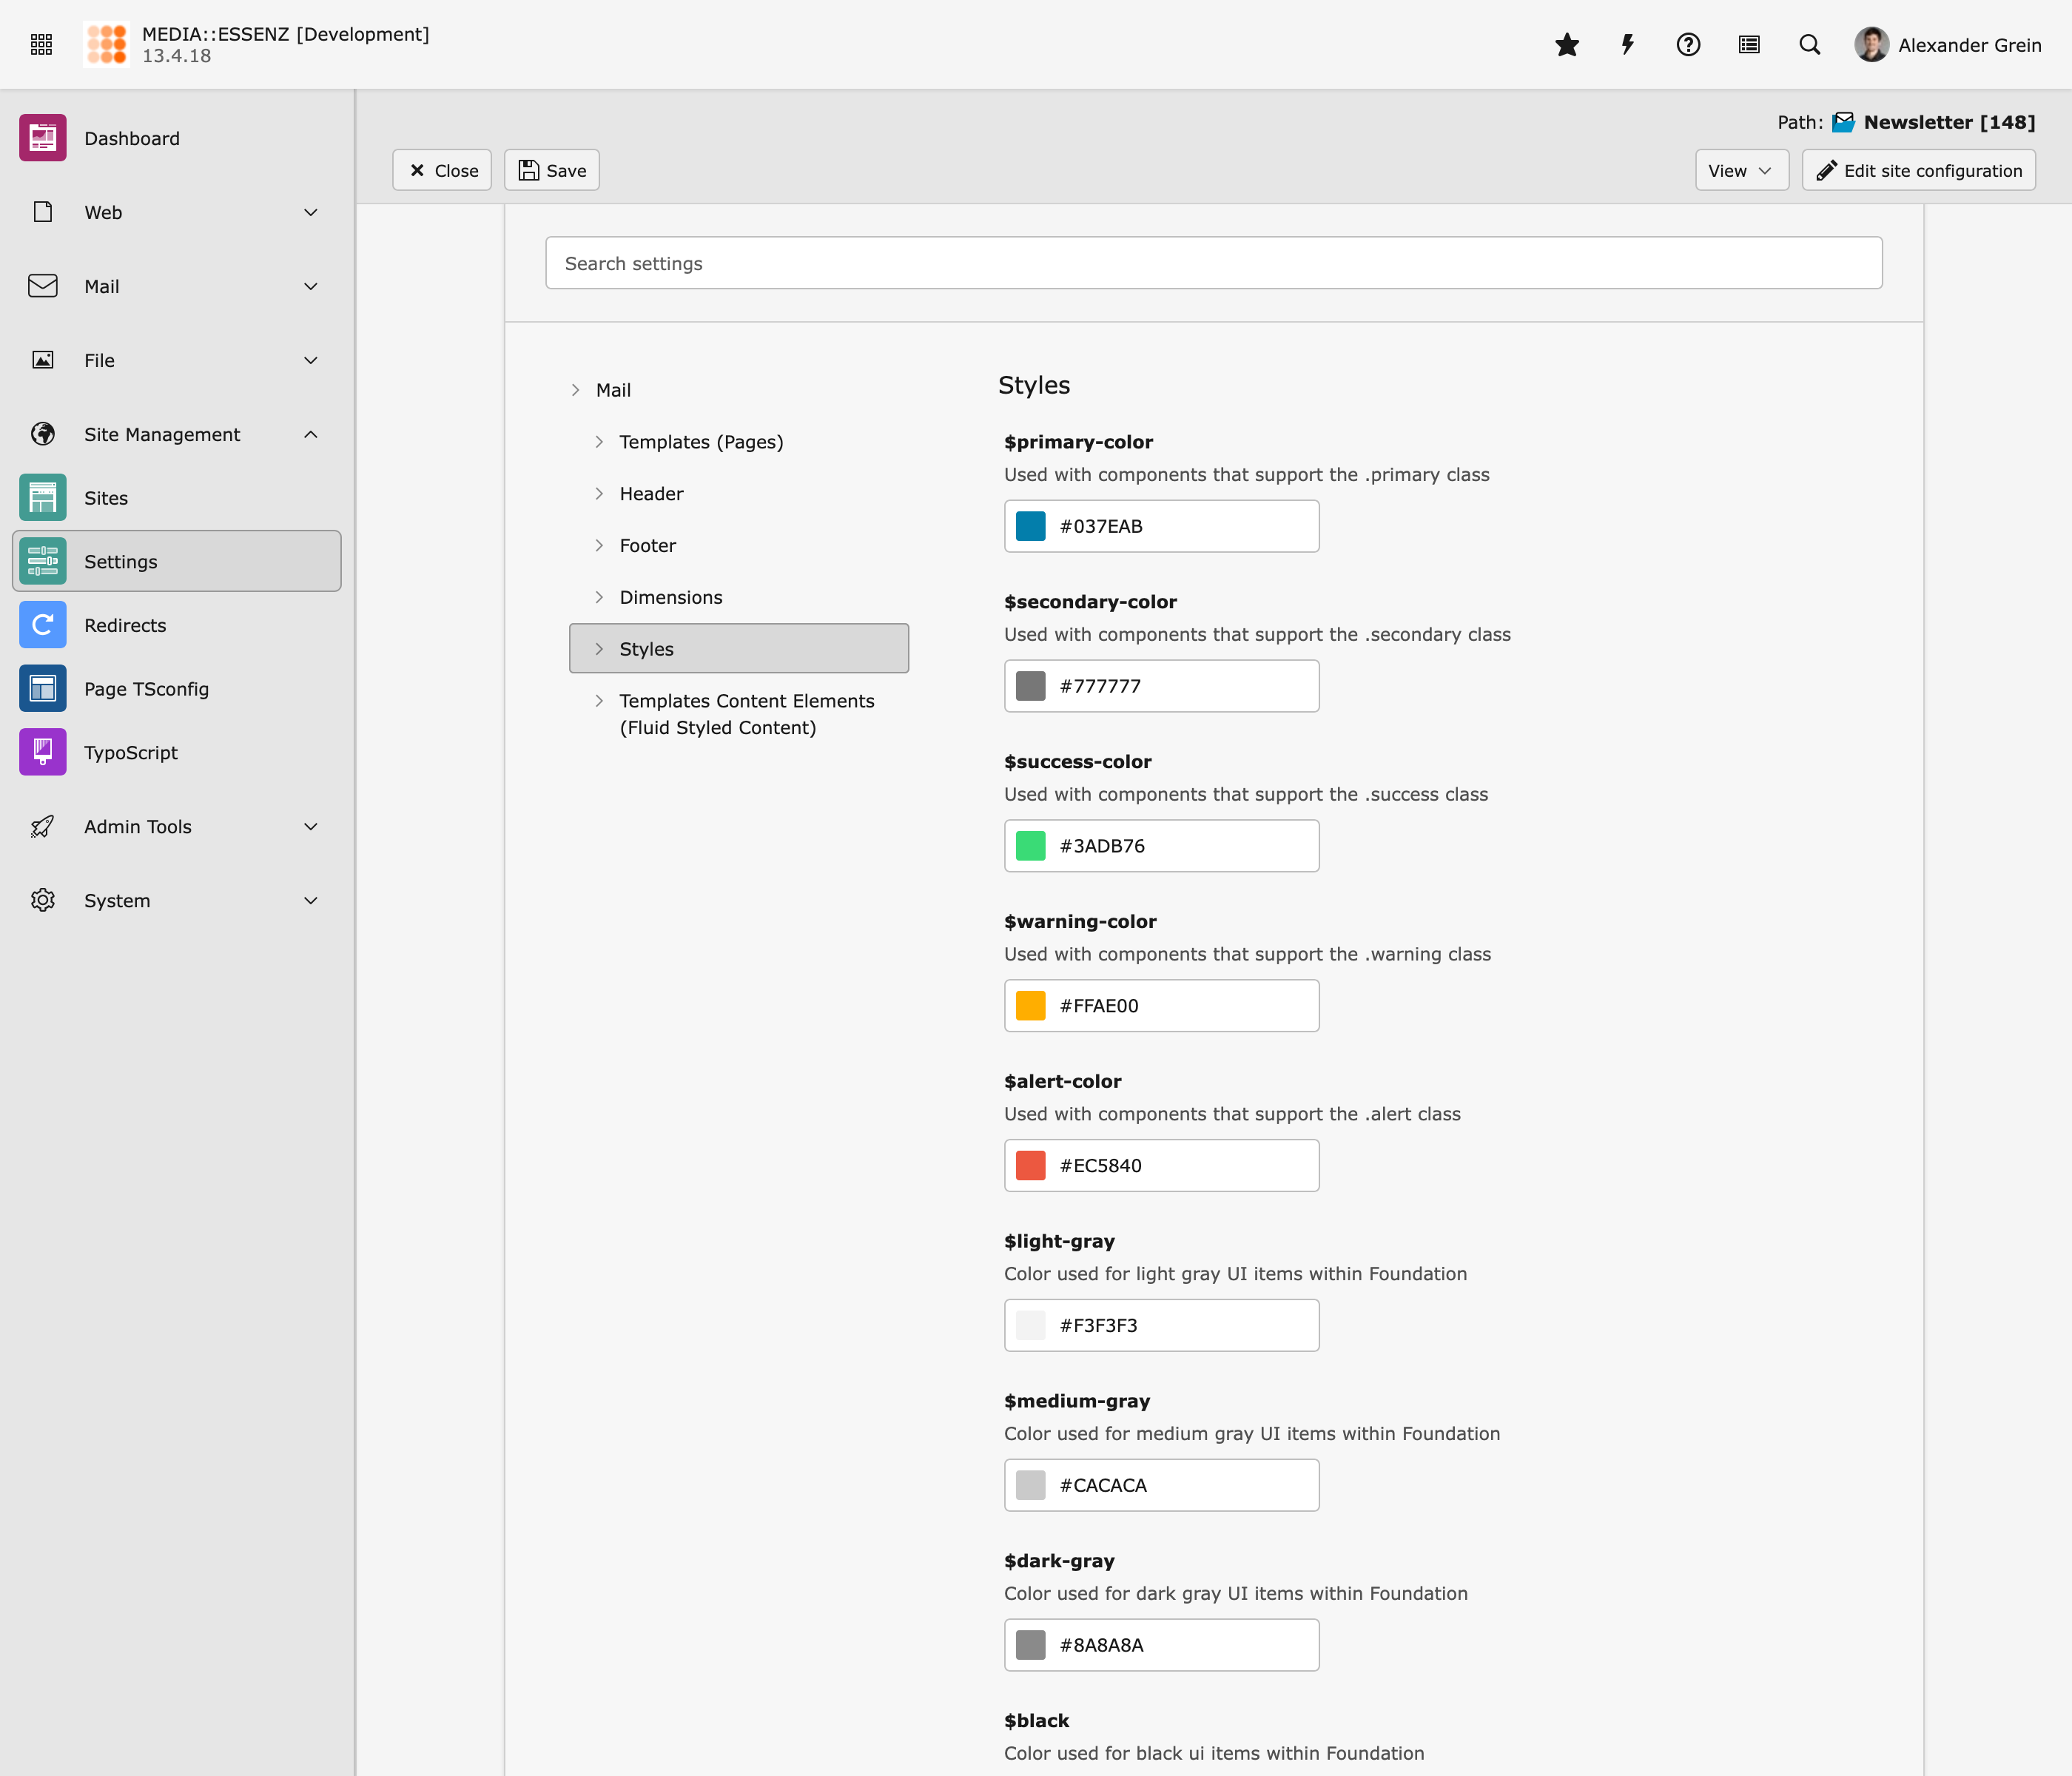
Open the settings of the new created page, go to tab Behaviour and switch on Use as Root Page. Additional select MAIL Module under Contains plugin. Also check Hide child pages in page tree, if you like to activate a usefull feature that helps you to keep track of an extensive page tree.
-
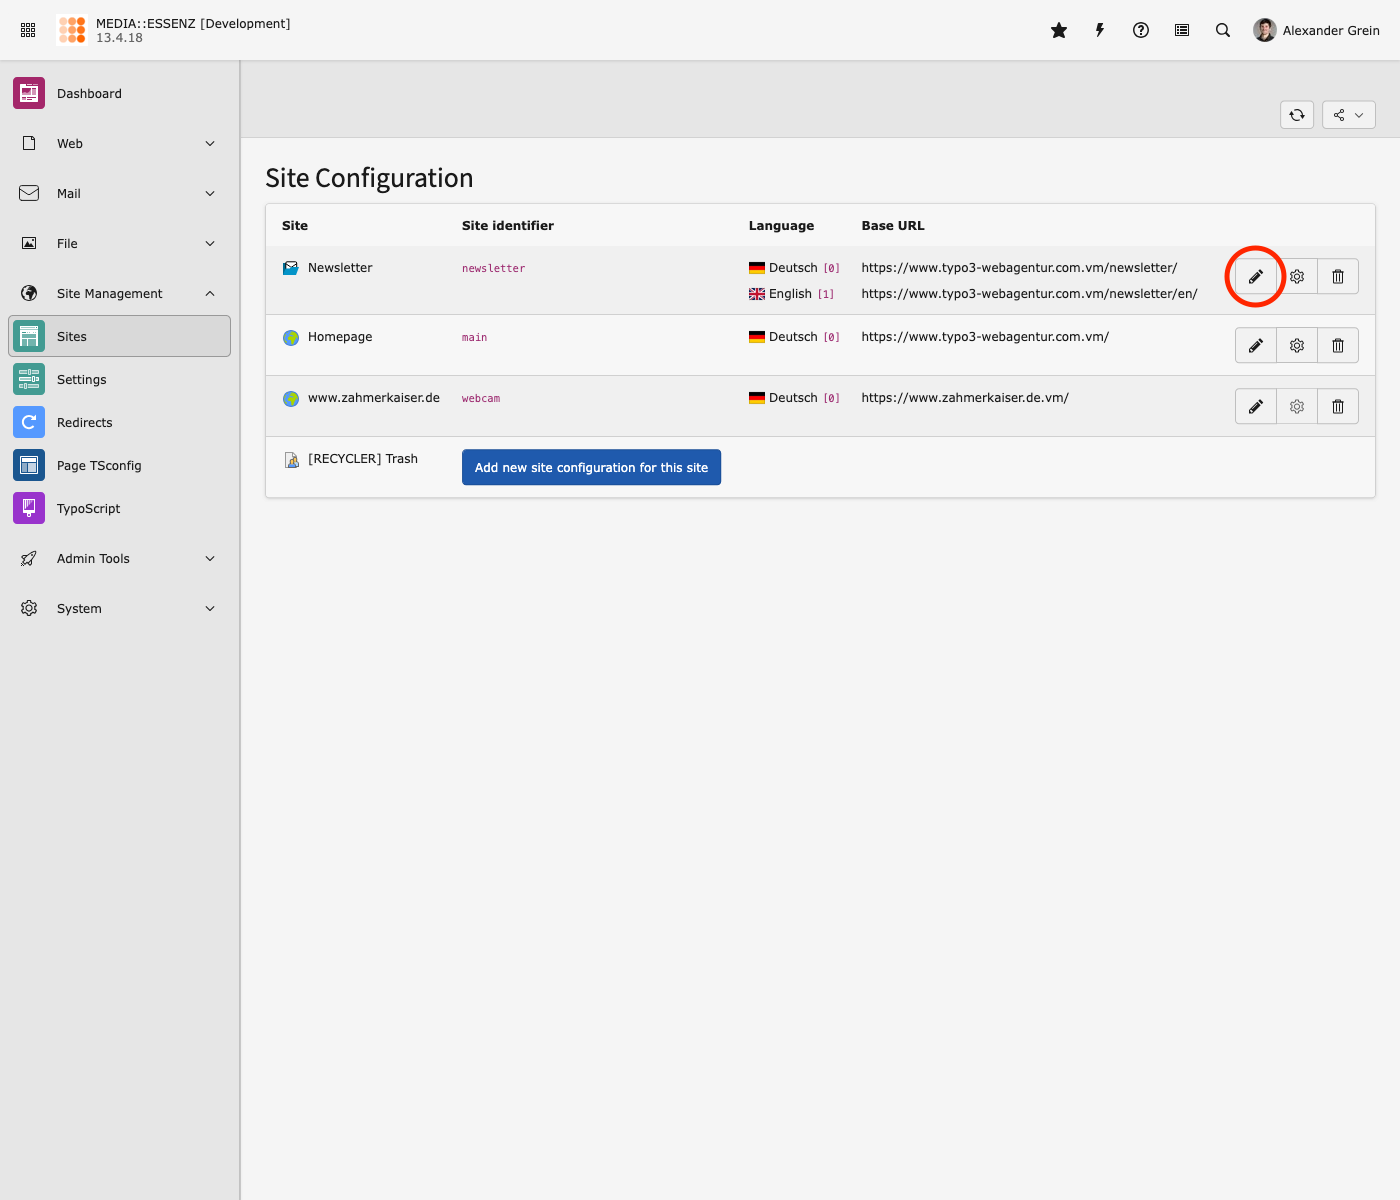
Open the site configuration of the just created page
-
Add Site Set
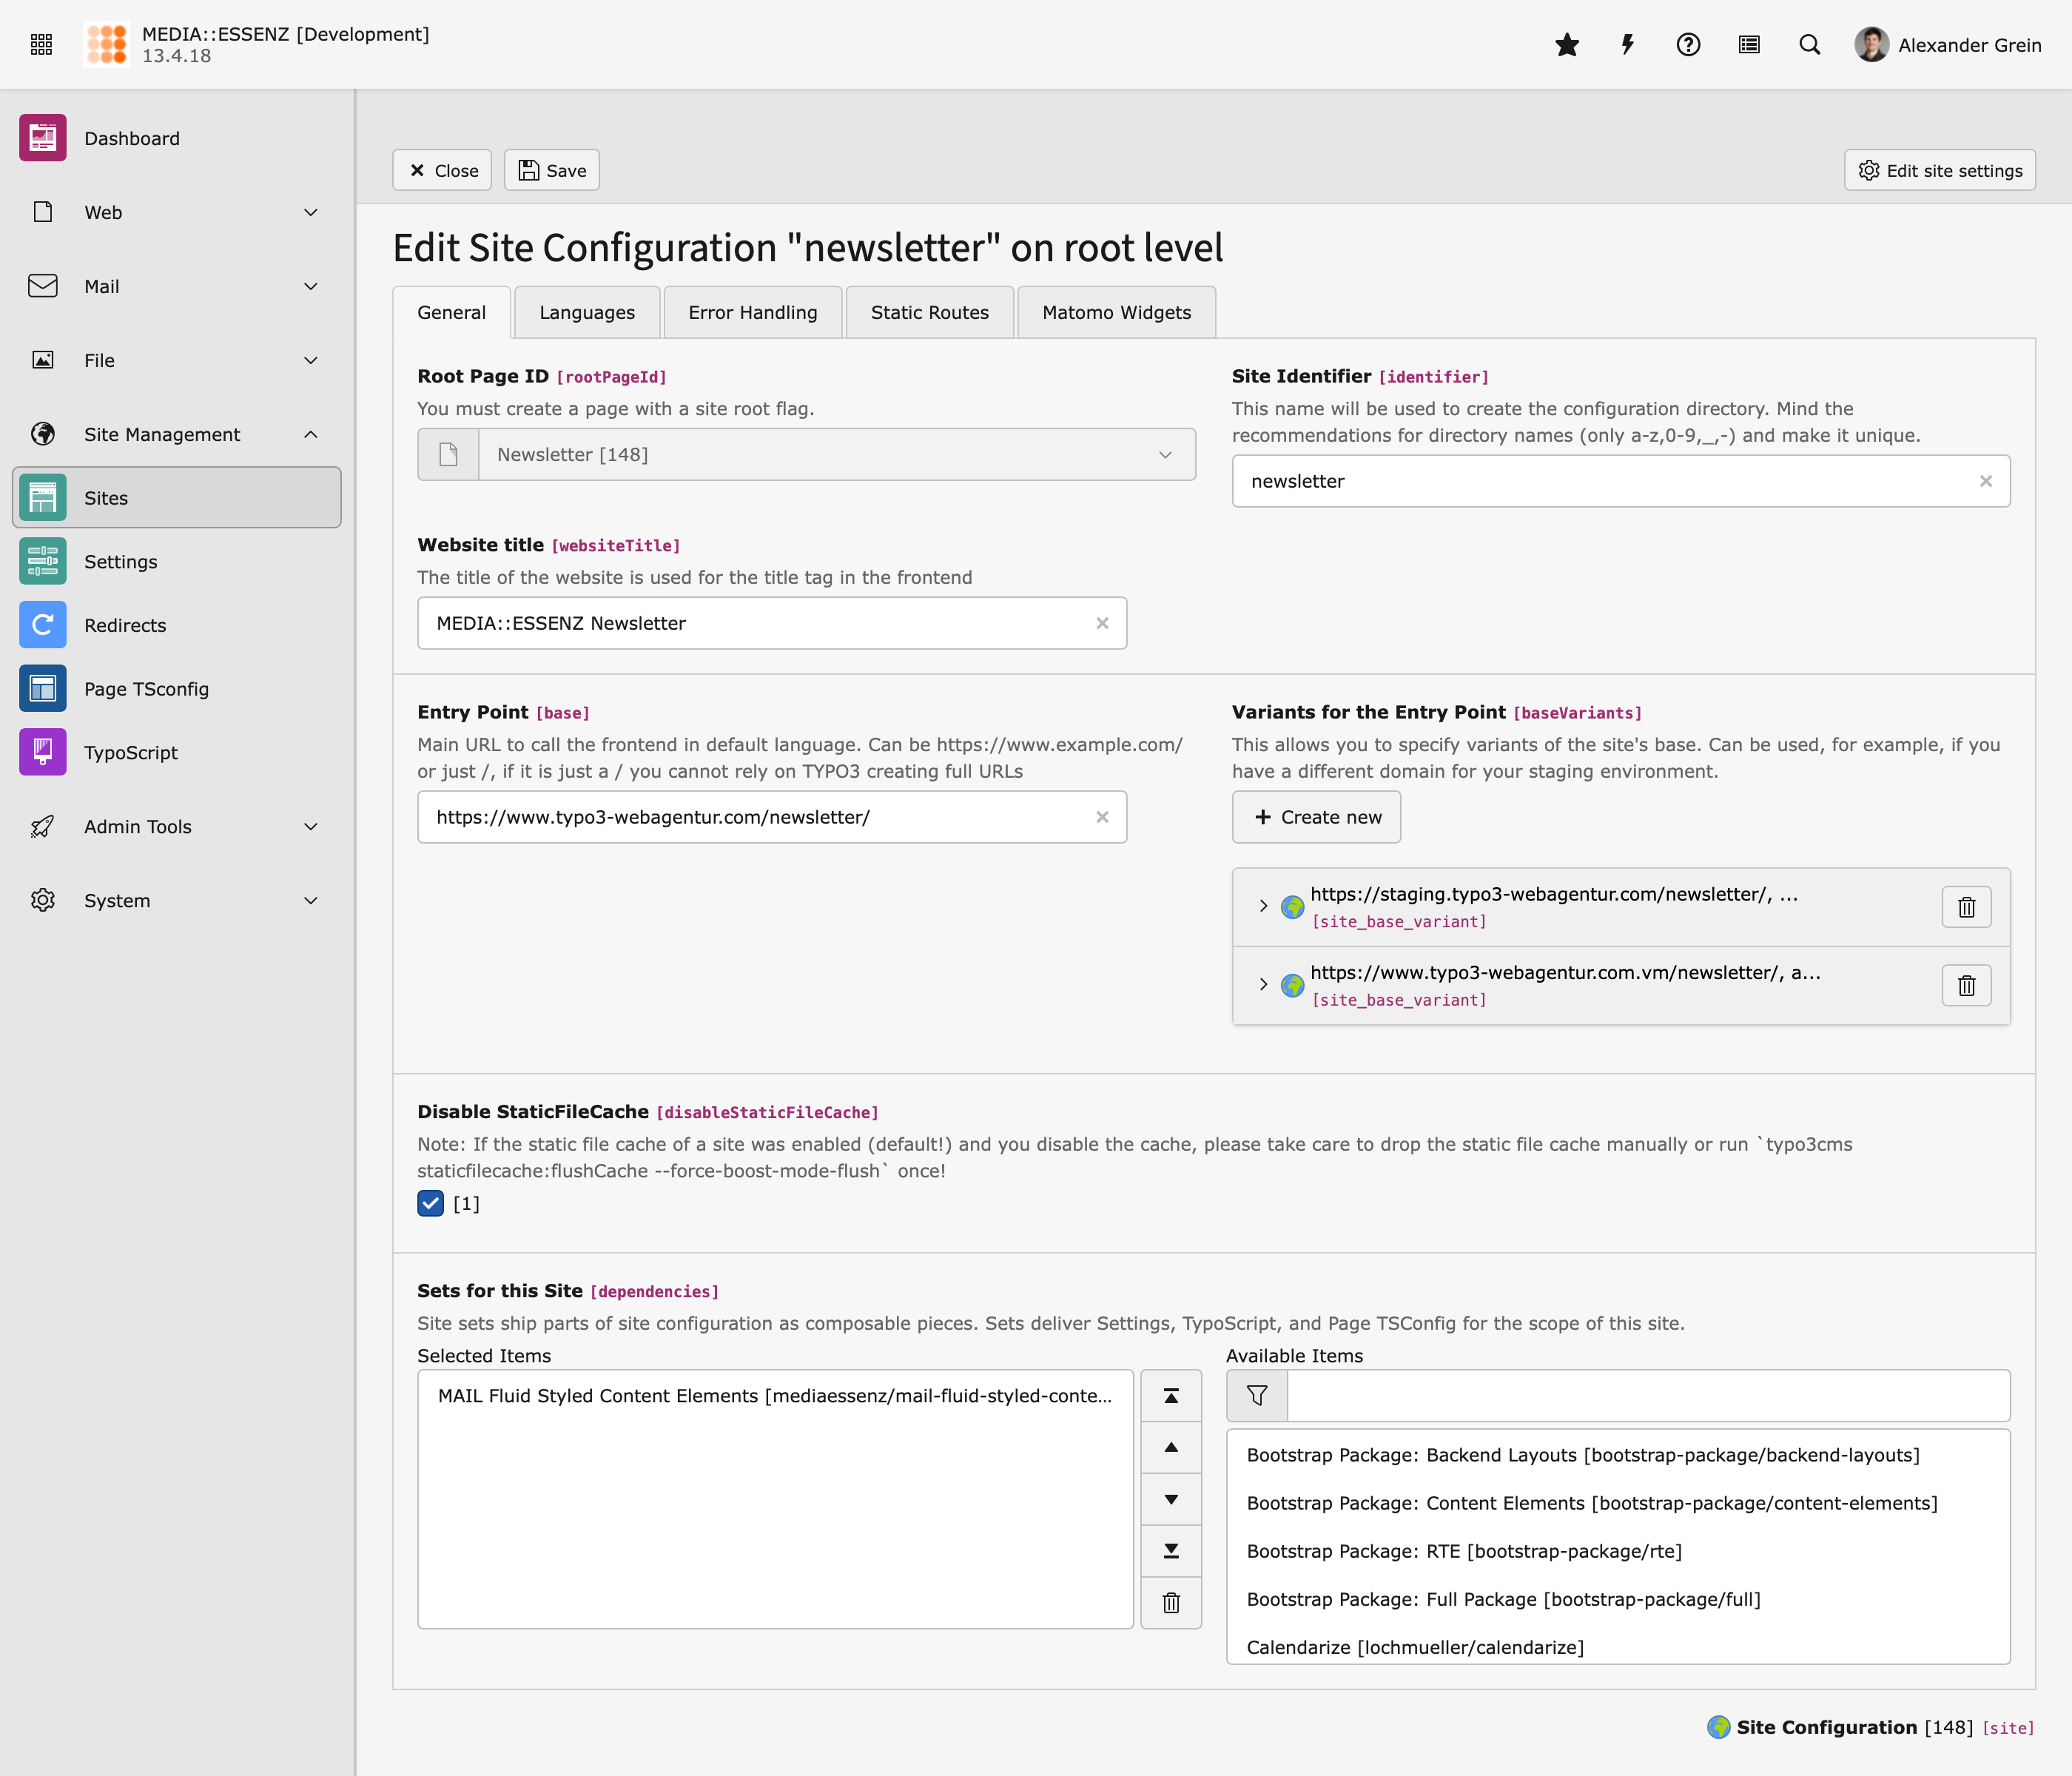
Under the General Tab you can find all relevant settings. First of all you have to enter a Site Identifier (eg. newsletter). Second, add an Entry Point. This must be a full domain! Relative domains like "/" will not work! Same for optionaly added Variants.
At Sets for this Site add the included MAIL Fluid Styled Content Elements Set (if you like to use the included fluid styled content elements) or, if you like to use the included Content Block Elements the MAIL Content Blocks Set. There is also a MAIL News Content Elements Set available, if you like to use the News Plugin. All of them depend on the MAIL Backend Layout and Settings Set, so that these do not need to be added separately.
-
Set Backend Layout
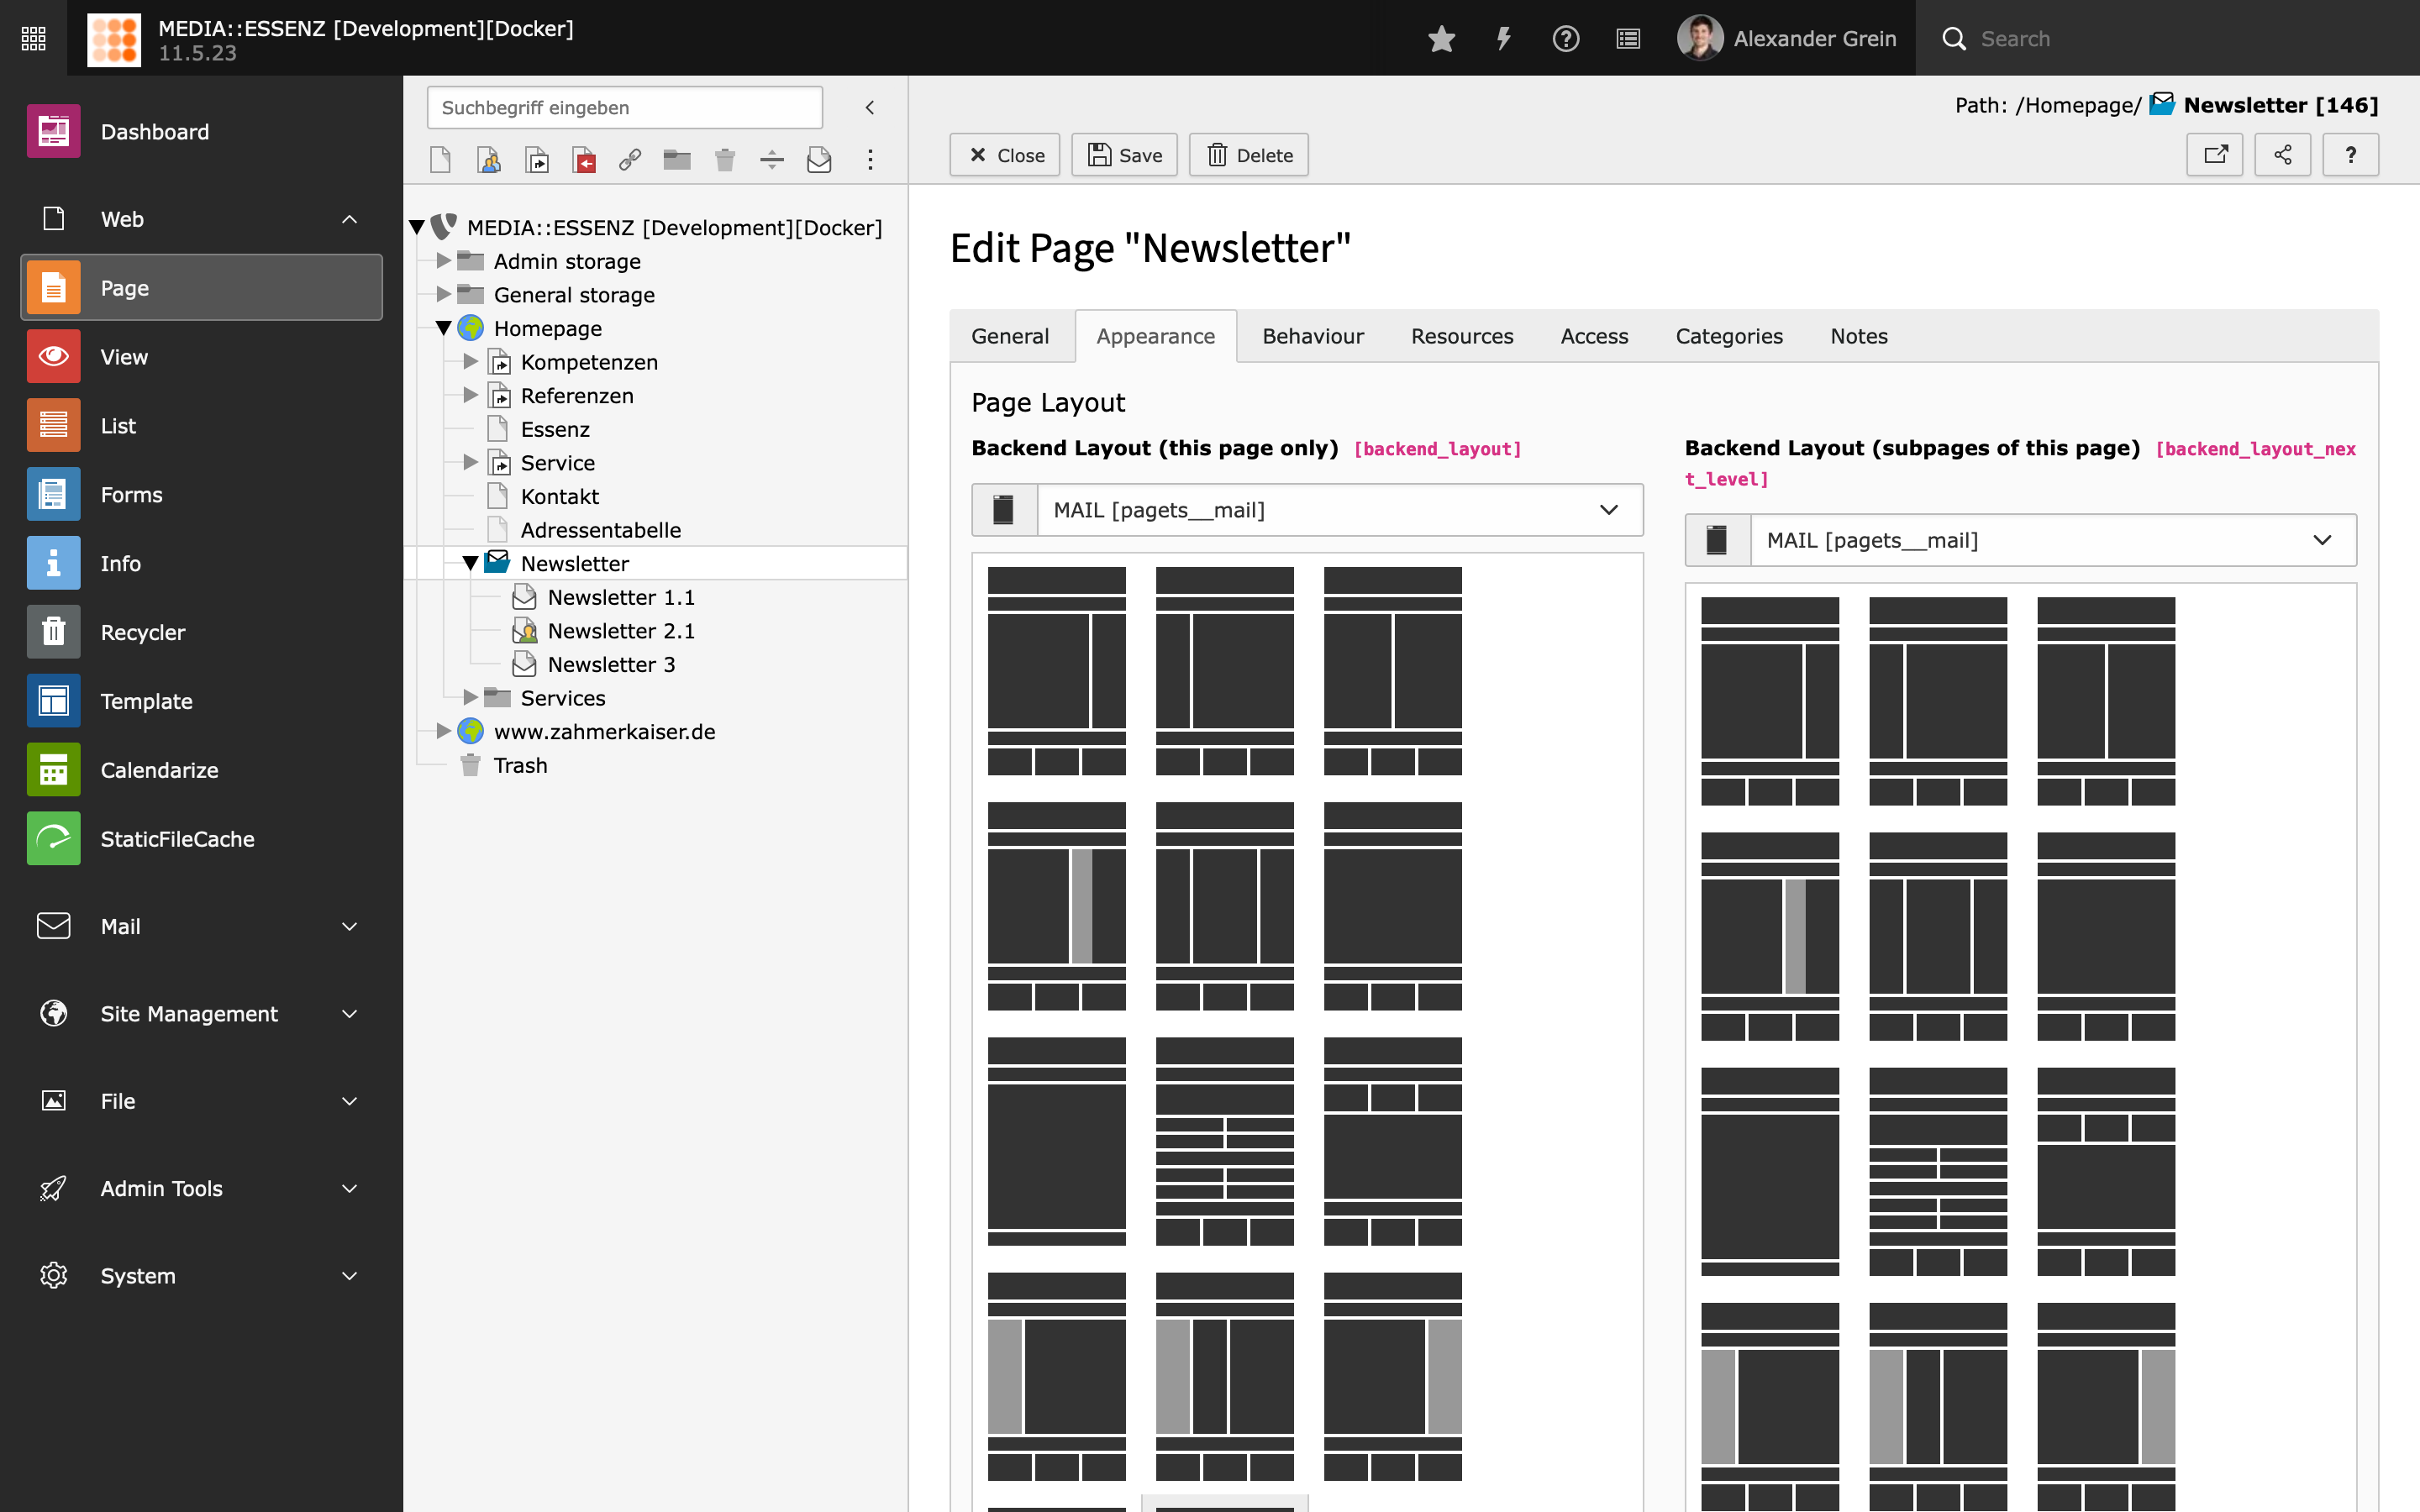
Back in the TYPO3 Page Module, open the Settings of your MAIL Root Page. In here, click on the Appearance tab, select MAIL in both Backend Layout boxes and press Save.
Now you are ready to add mail pages
-
Styling
To change the styles of the generated mails, go to the Settings Module and click on Edit Settings of your MAIL Site.
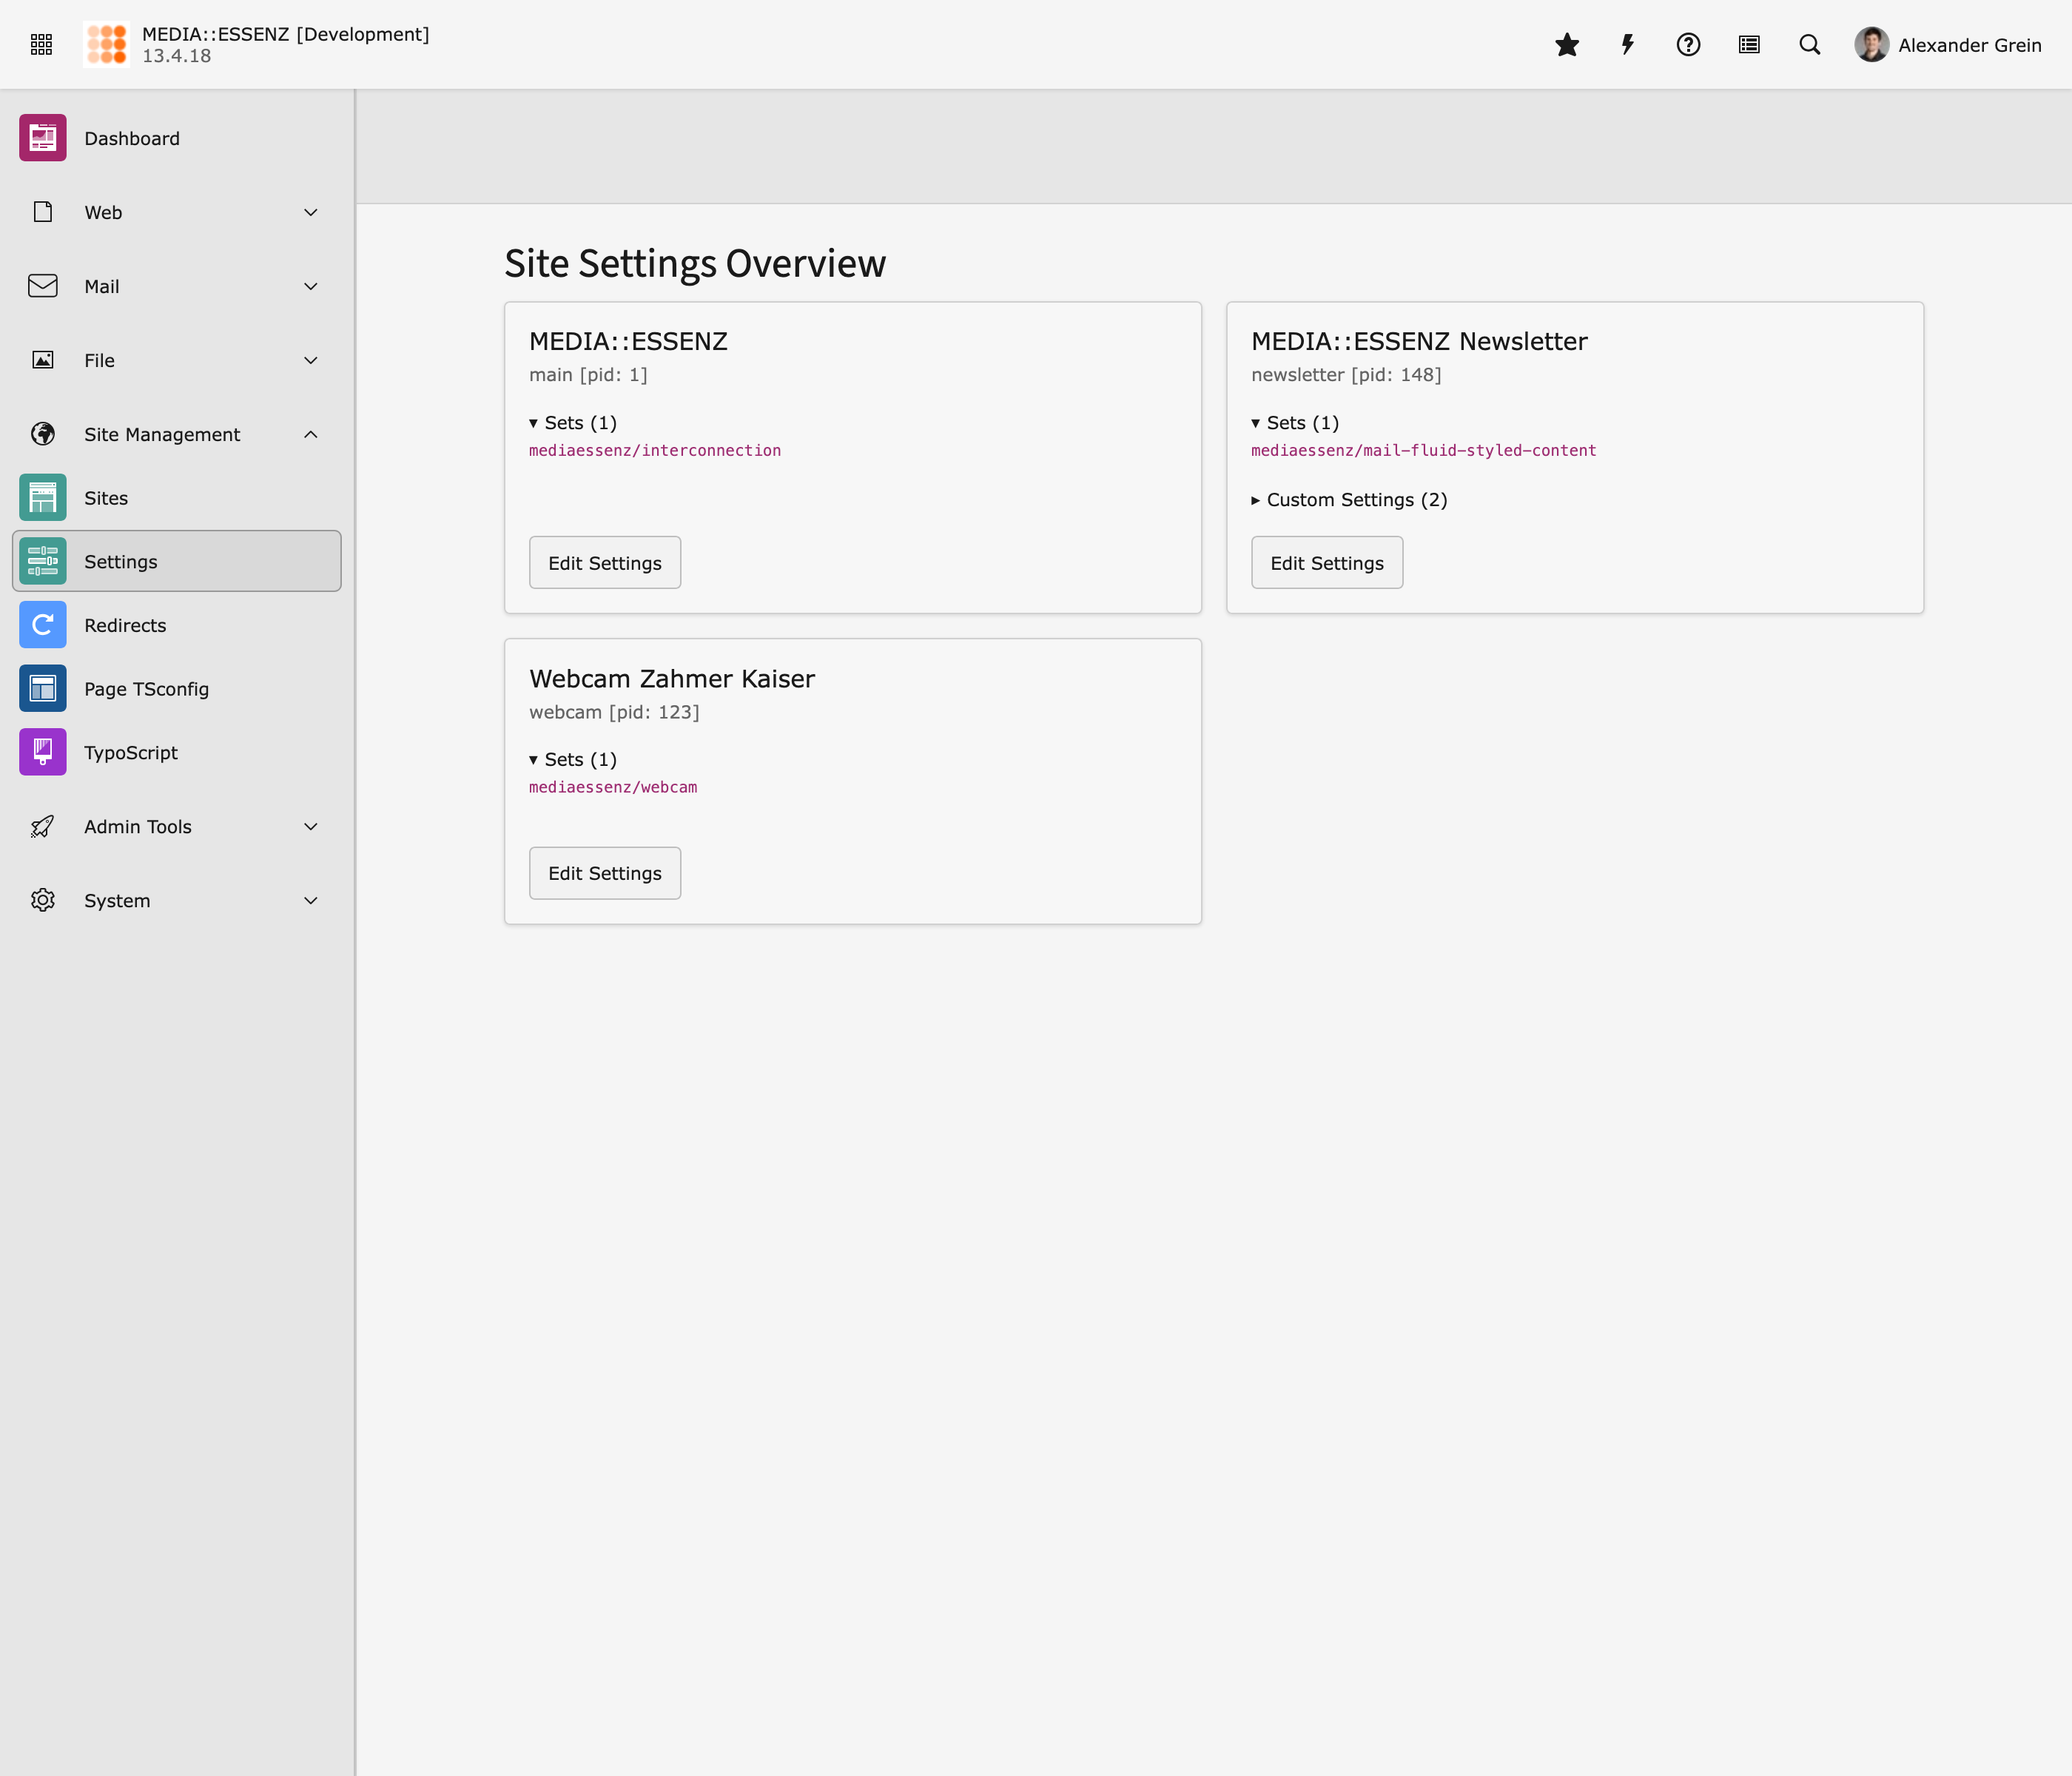
E.g. change colors under Styles
Attention
If you want to switch from the classic way to site sets way, aware that the root page of MAIL has be changed to a "real" site root. Additional do not forget to remove old TypoScript or TsConfig settings! And a classic: Clear ALL Caches after a change.
Further reading
- https:docs-typo3-org-permalink-t3coreapi-site-sets_
- MAIL Site Sets Settings
Classic Way
-
Add a new sys-folder inside (!) of your page tree (not on page 0!)
This folder will be used to store the MAIL pages later. Remember the uid of this new sys-folder page, you may need it in a later step.
Open the settings of the new created sys-folder page, go to tab Behaviour and select MAIL Module under Contains plugin.
-
Add Static Page TSconfig Files
Switch to the Resources tab and include this static Page TSconfig entries:
- MAIL: Add simple mail backend layout
- MAIL: TCEFORM settings for the mail root page
- MAIL: Default settings for mail pages
If you want to use the fluid styled content elements additional:
- MAIL: Allow only supported fluid styled content elements
- MAIL: Disable not supported fields of fluid styled content elements
If you want to use the content block elements additional:
- MAIL: Allow only supported content blocks
- MAIL: Disable not supported fields of content blocks
If you want to use the news plugin additional:
- MAIL: Allow only supported news content elements
If you want to disable all category stuff:
- MAIL: Deactivate categories
Press the good old floppy disc icon to save.
After that, a new backend layout MAIL should be available under the Appearance tab.
-
Select MAIL backend layout
Choose it for this page and also for the subpages.
-
Include TypoScript templates
To use the included table based content elements, a corresponding TypoScript is provided by this extension.
Go module Web > Template and chose your MAIL sys-folder. If not already done, create an extension template. Switch to view Info/Modify and click on Edit the whole template record.
Switch to the Advanced Options tab and check Constants and Setup to Clear every TypoScript settings from TypoScript records up in root-line.
Additional Include the following TypoScript sets if you want to use the fluid styles content elements:
- MAIL (Page)
- MAIL (Styles)
If you want to use the fluid styled content elements additional:
- Fluid Content Elements (fluid_styled_content)
- MAIL (Fluid Styled Content)
If you want to use the content block elements additional:
- MAIL (Content Blocks)
If you want to use the news plugin additional:
- MAIL (News)
Read more about possible configurations via TypoScript in the Reference section.
Add recipient sources
MAIL needs a yaml configuration for recipient sources. It comes with a ready configuration for frontend user groups (fe_groups), frontend user (fe_users) and addresses (tt_address).
To add them all, just import the included yaml into your site configuration:
imports:
- { resource: "EXT:mail/Configuration/Site/RecipientSources.yaml" }Note
If no entries with the key prefix mail.recipientSources found in your site configuration, the default configuration from the upper path will be used.
Read more about how to add your own recipient sources in the Site configuration reference.
Configure default settings
MAIL brings – similar to EXT:direct_mail – an easy way to adjust some default settings, used by the mail creation wizard.
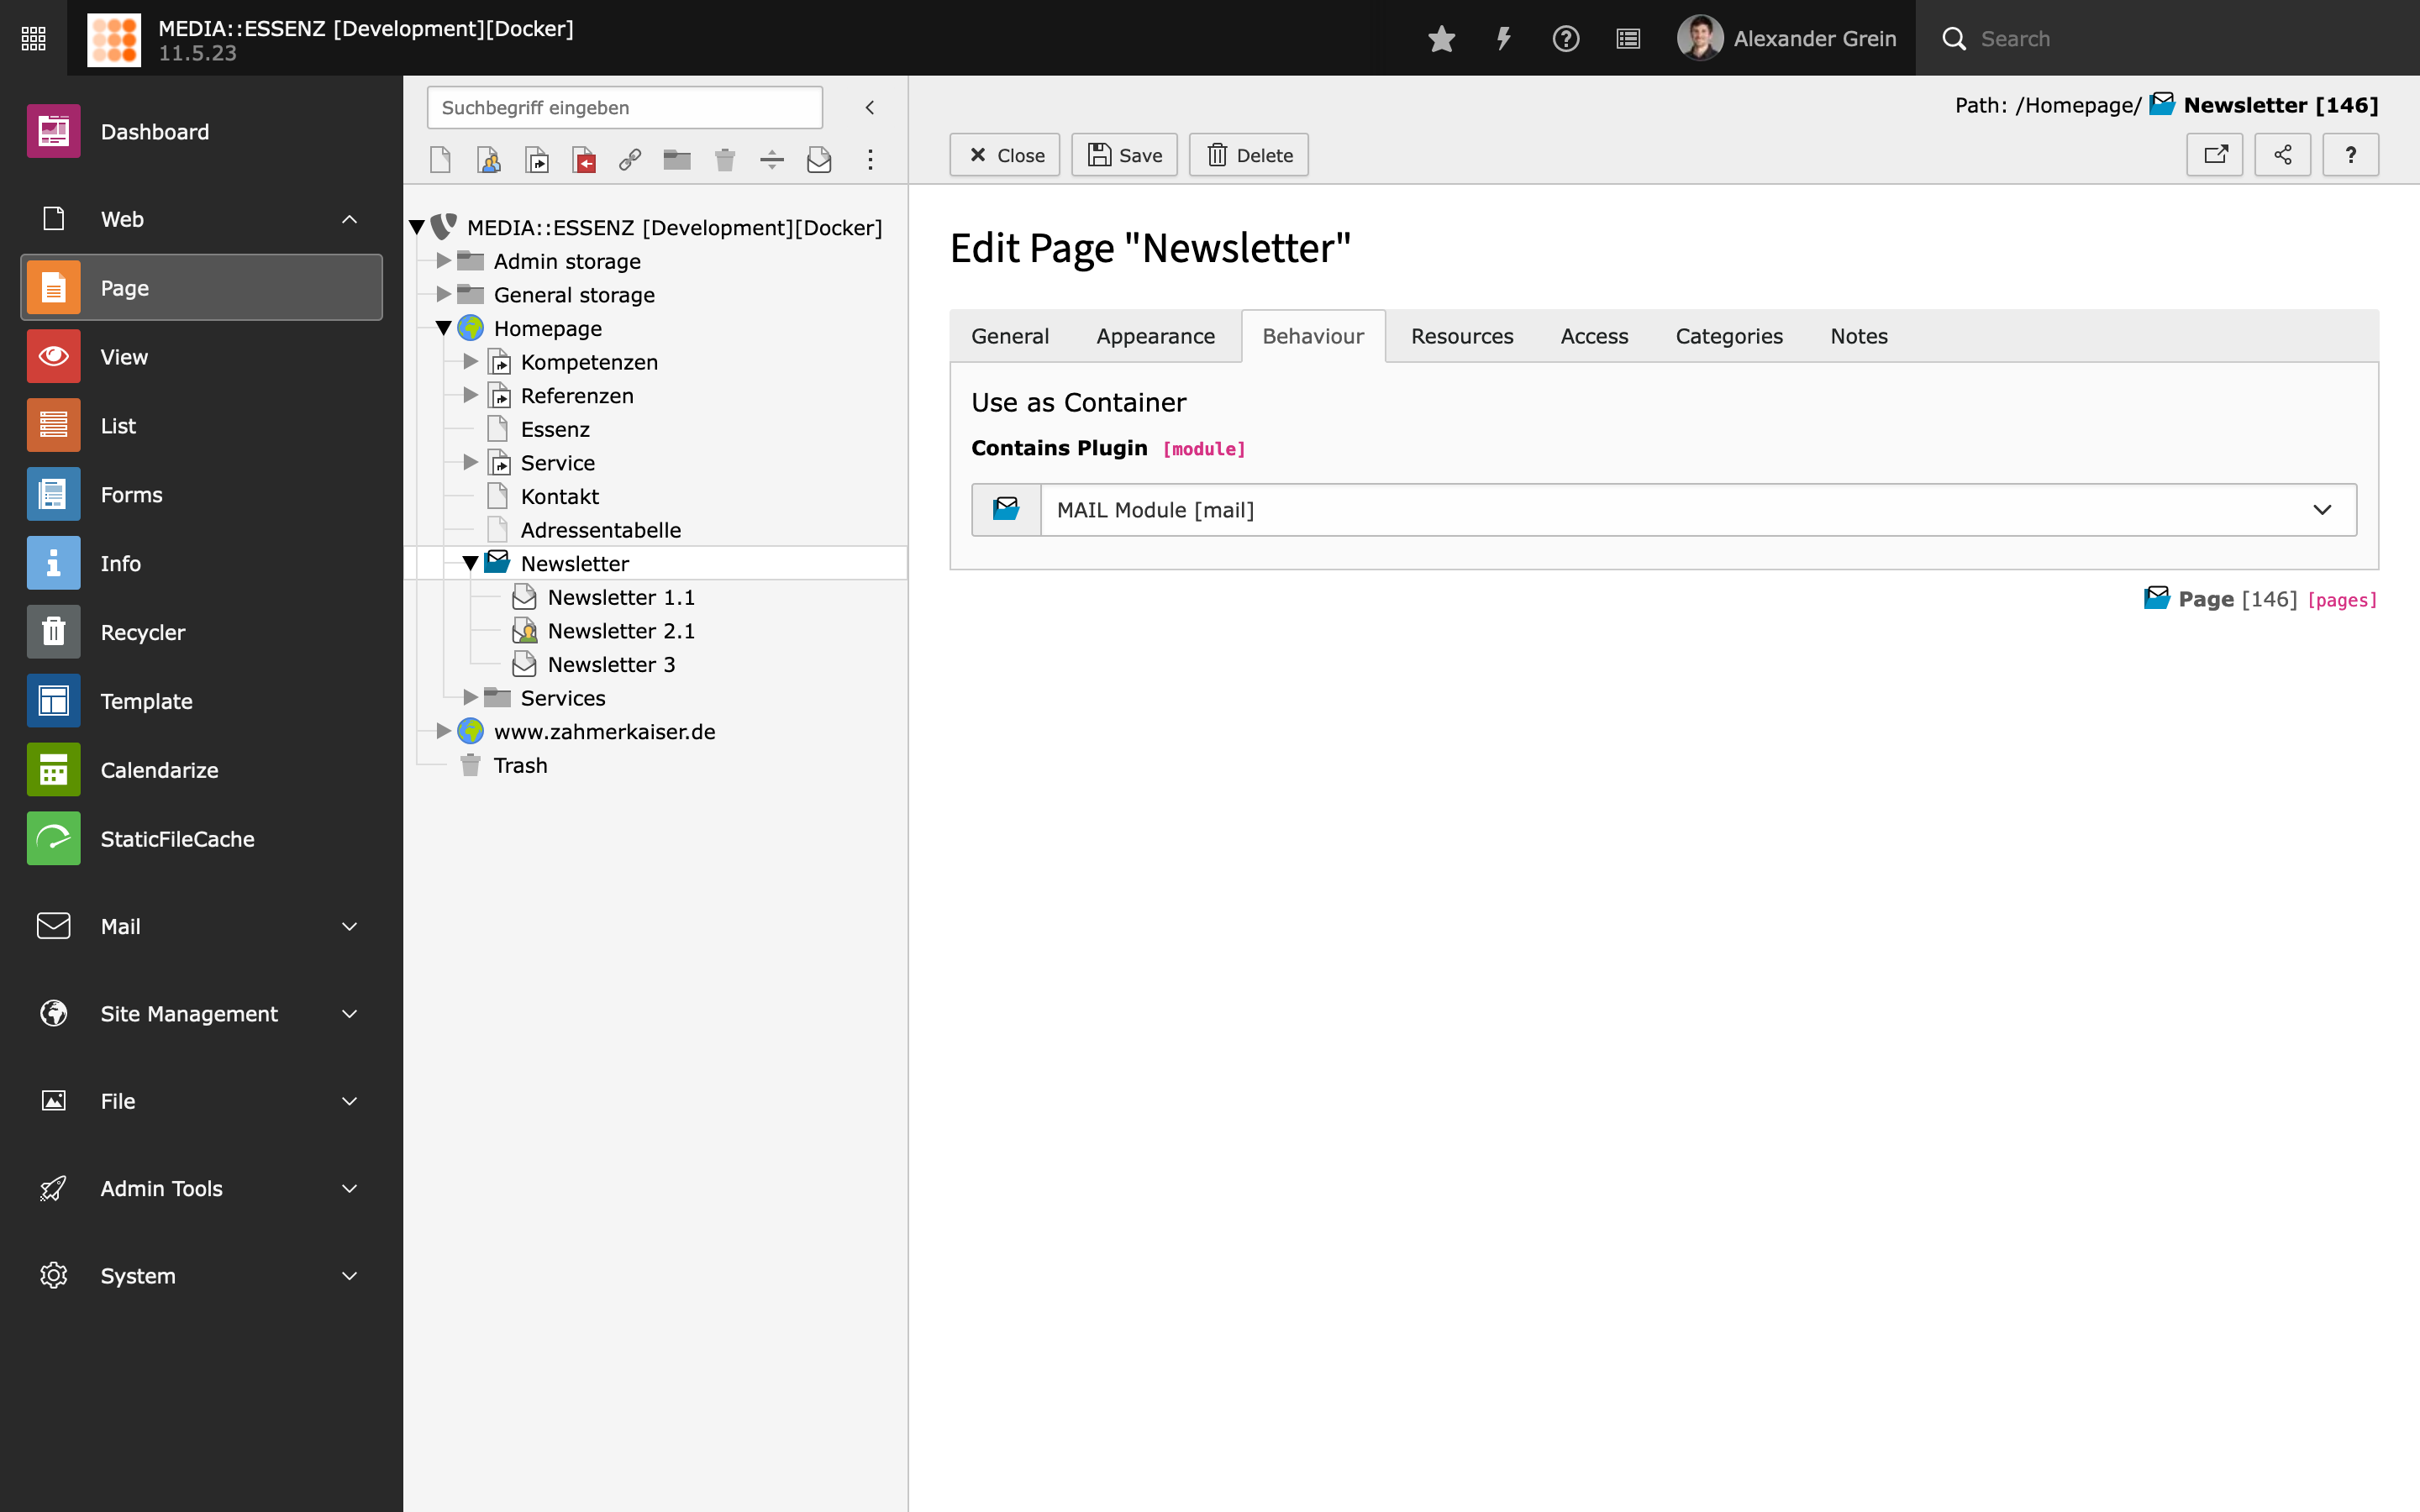
You find it by clicking on the cog button (Configuration) on the upper right corner of the MAIL wizard module.
The input fields are divided into several groups, which can be reached by clicking on their titles.
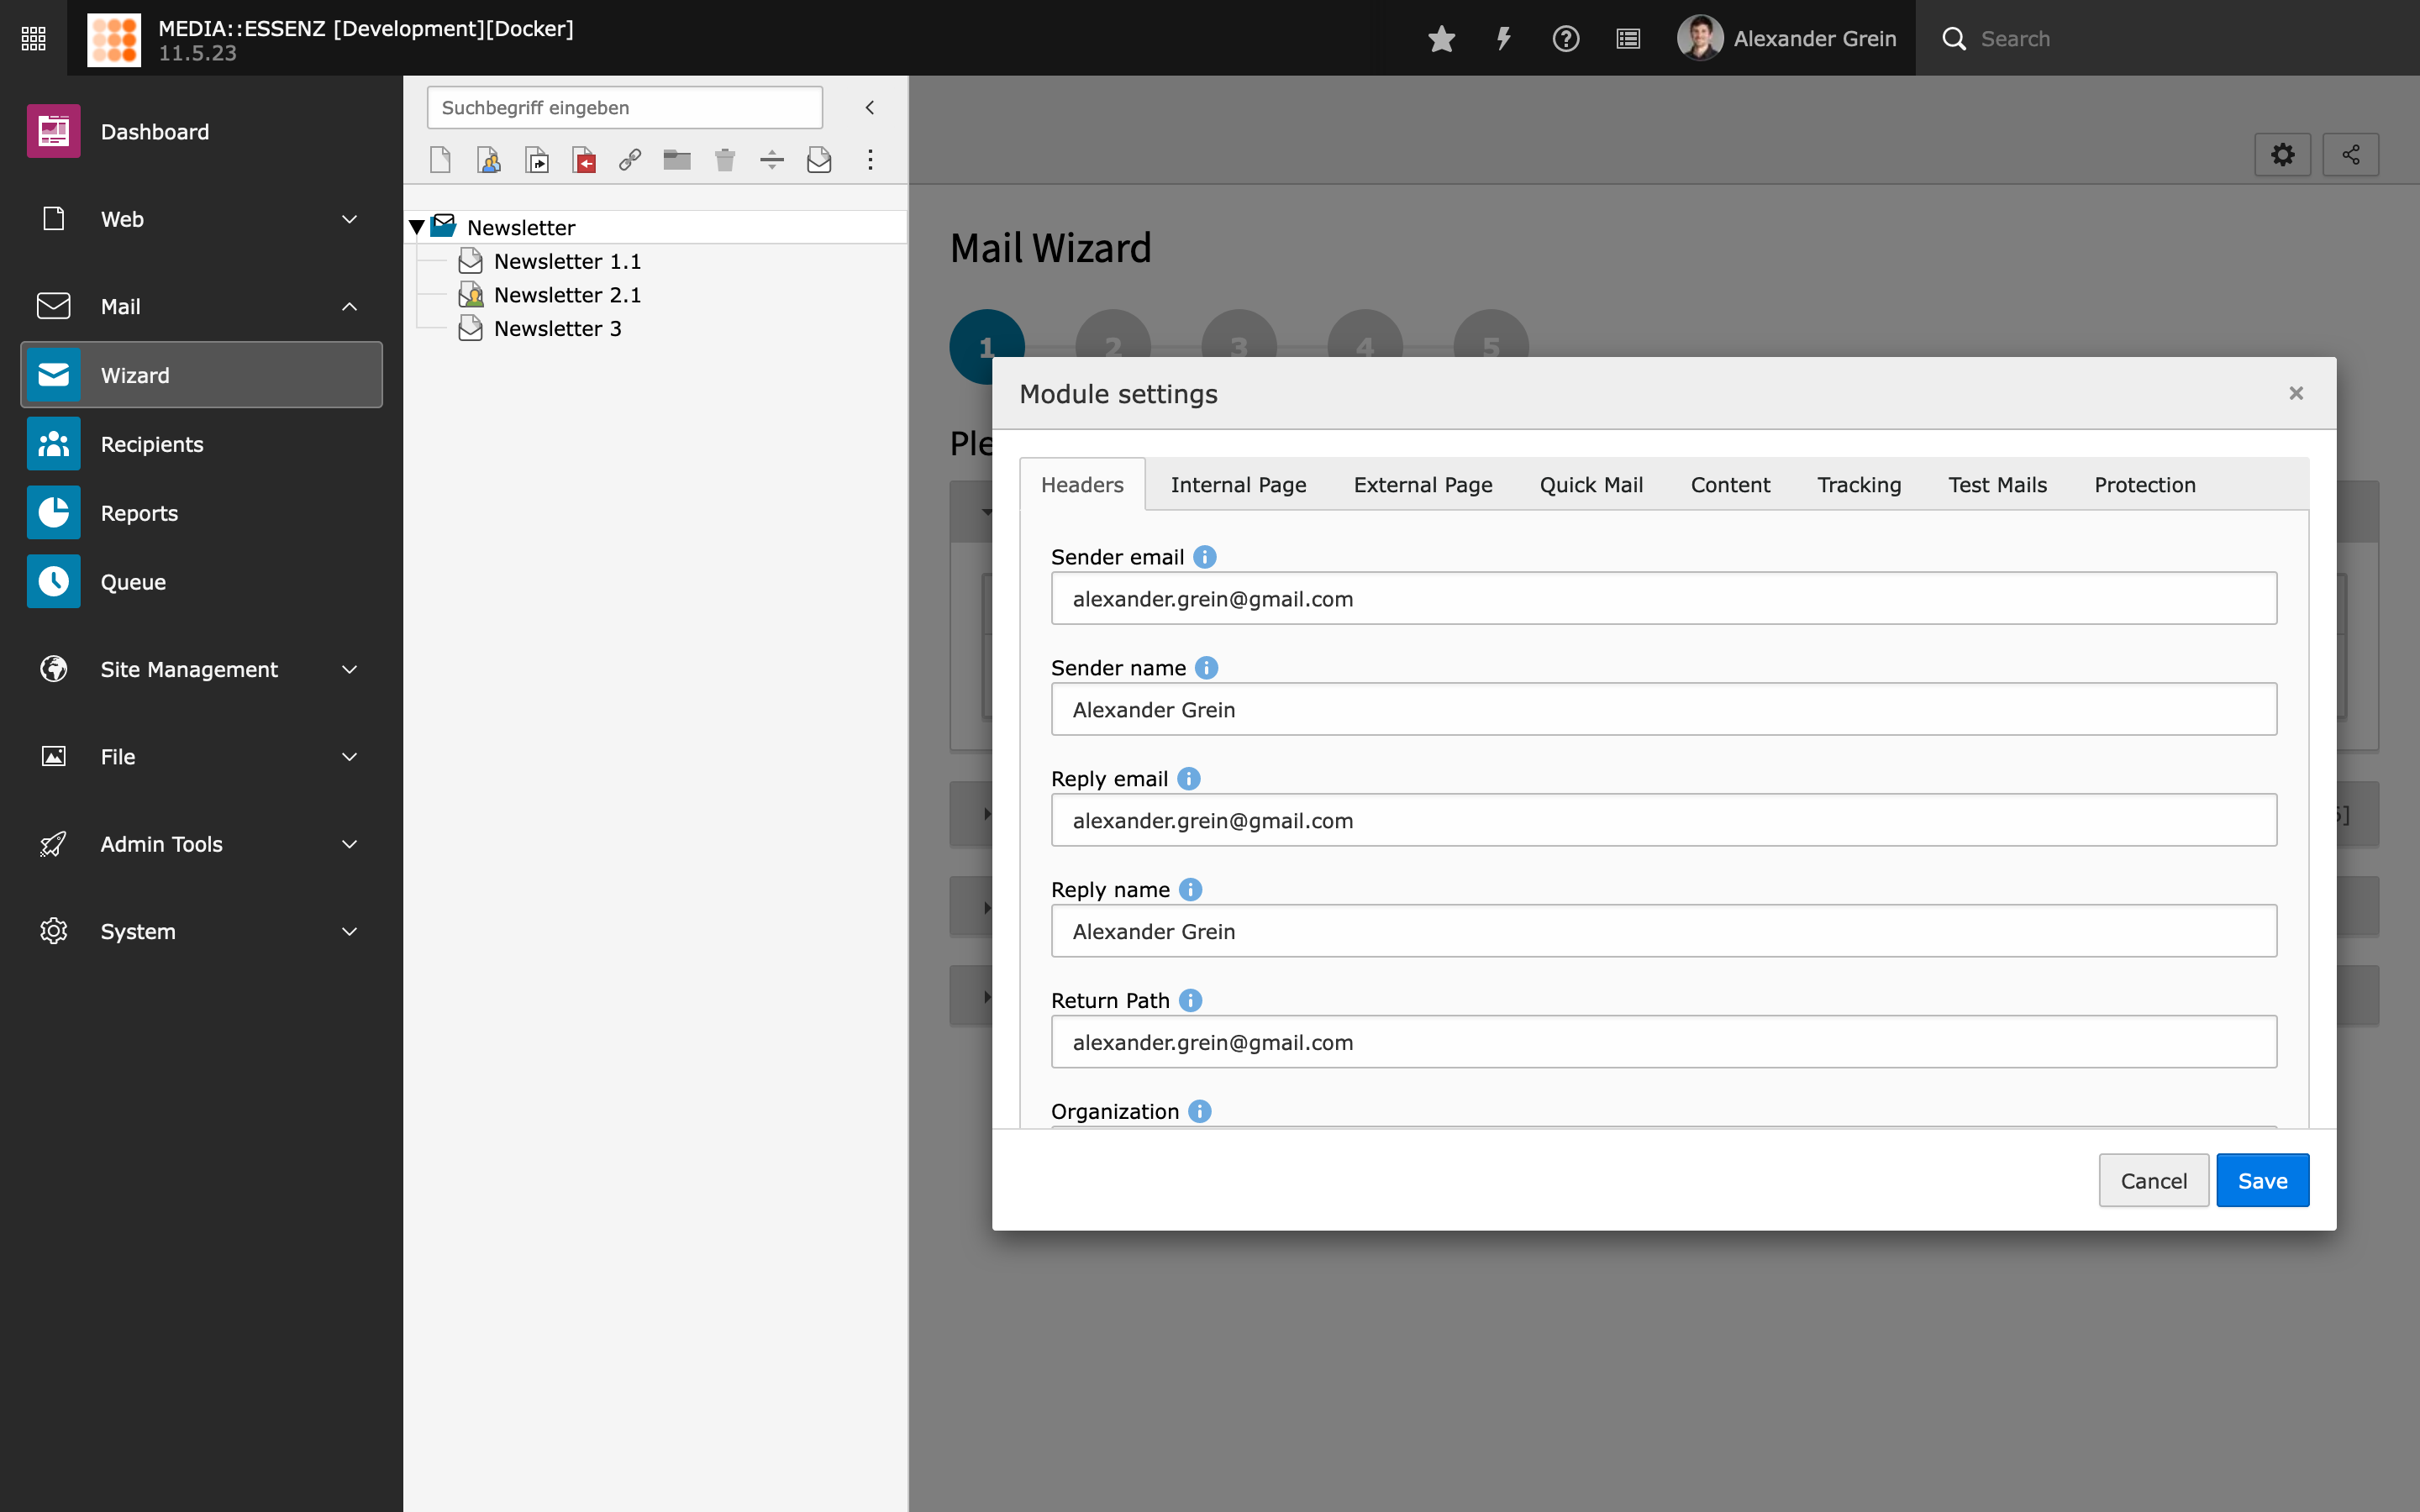
After filling all fields with your data, press SAVE to store.
Tip
All configurations done here will be stored in the Page TSconfig field of the currently selected page. This way, it is possible to override settings in a deeper page tree level.
Further reading
- Global extension configuration
- Site configuration (Recipient sources and mail transport settings)
- TypoScript configuration
- Page TSconfig configuration