Configuration with Keycloak
Adding the OAuth2 App in Keycloak
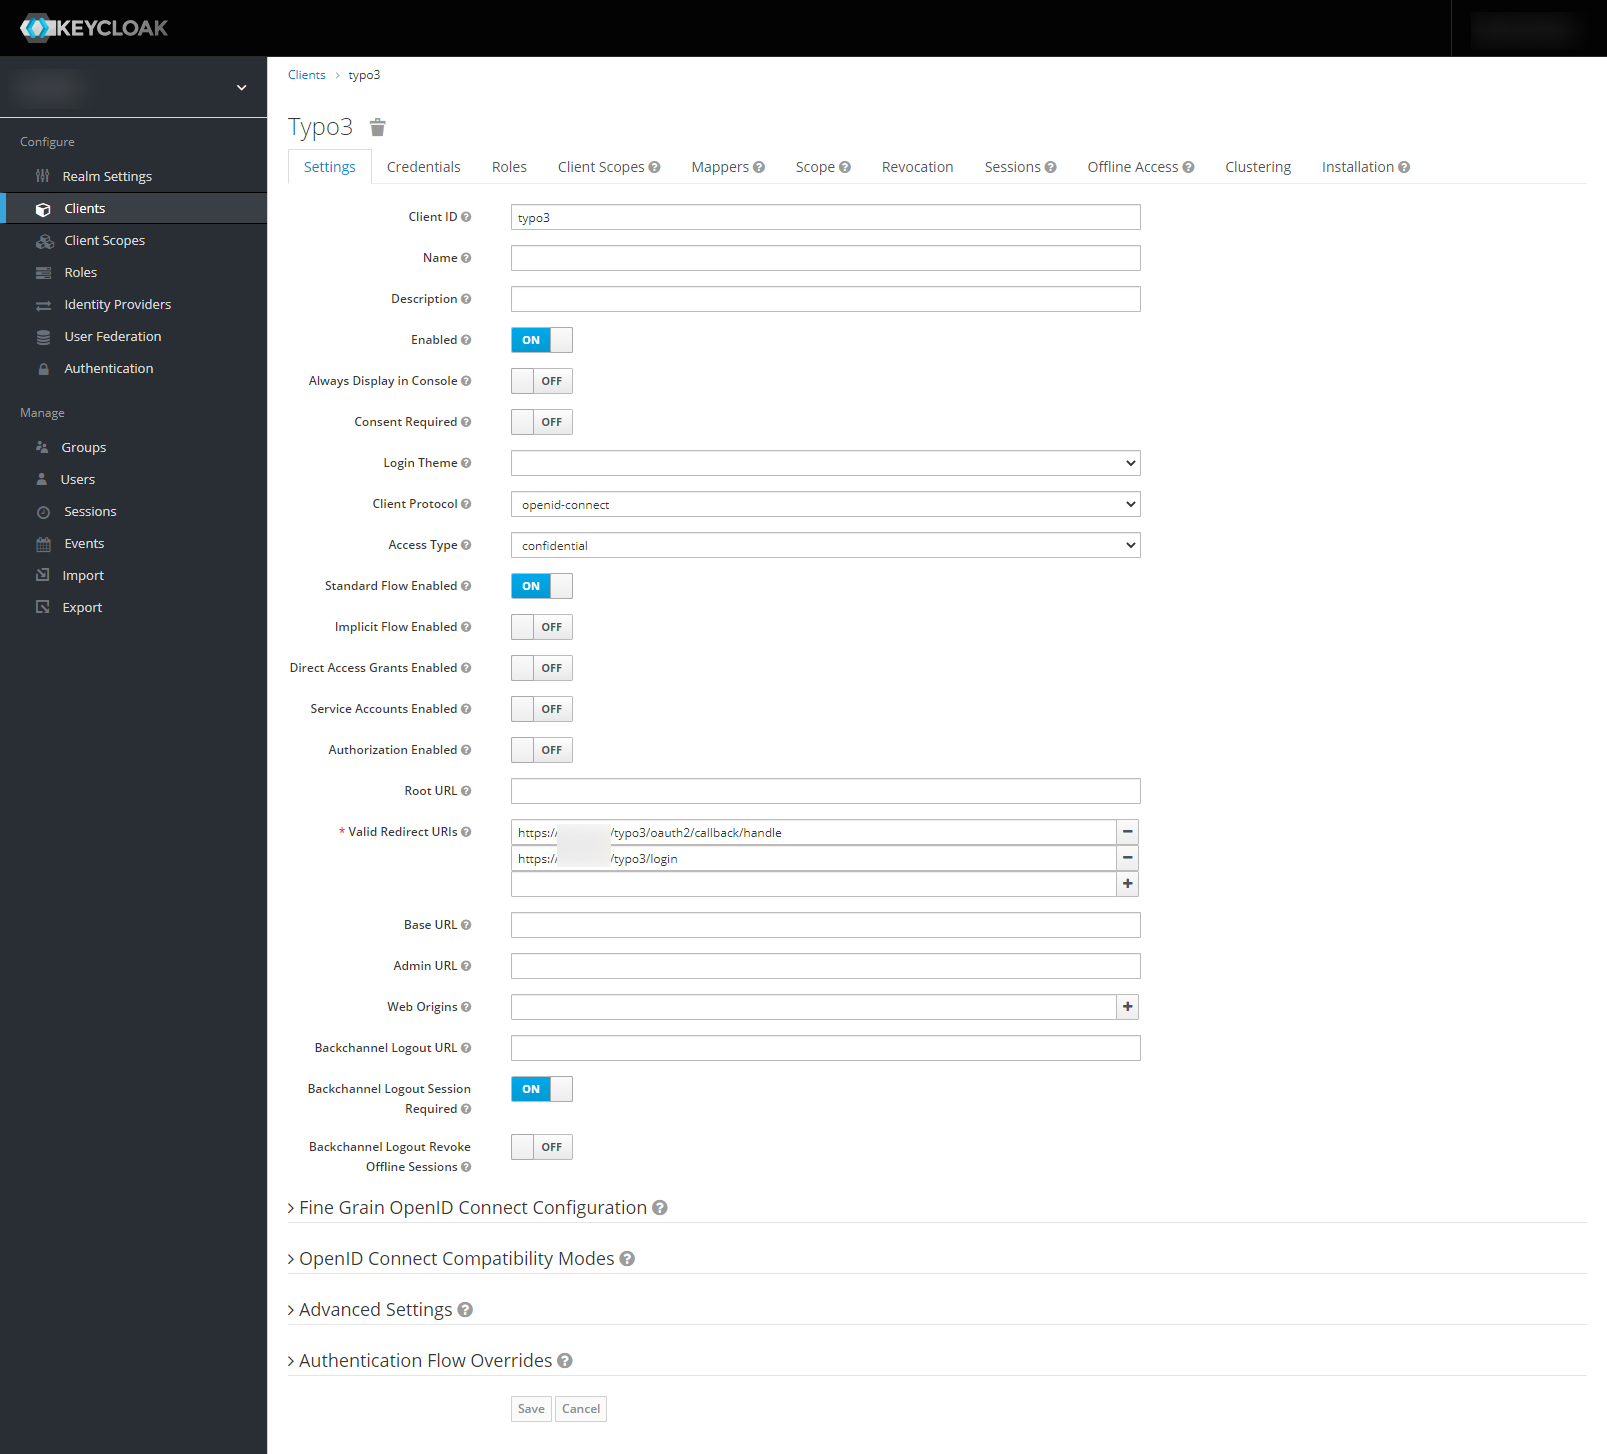
- Login to your Keycloak Administration Console
- Go to your realm and create a new Client with protocol “openid-connect” and access type “confidential”
- Enable the “Standard Flow”
- Add the redirect URIs:
https://<your-TYPO3-installation>/typo3/loginandhttps://<your-TYPO3-installation>/typo3/oauth2/callback/handle - Save the client
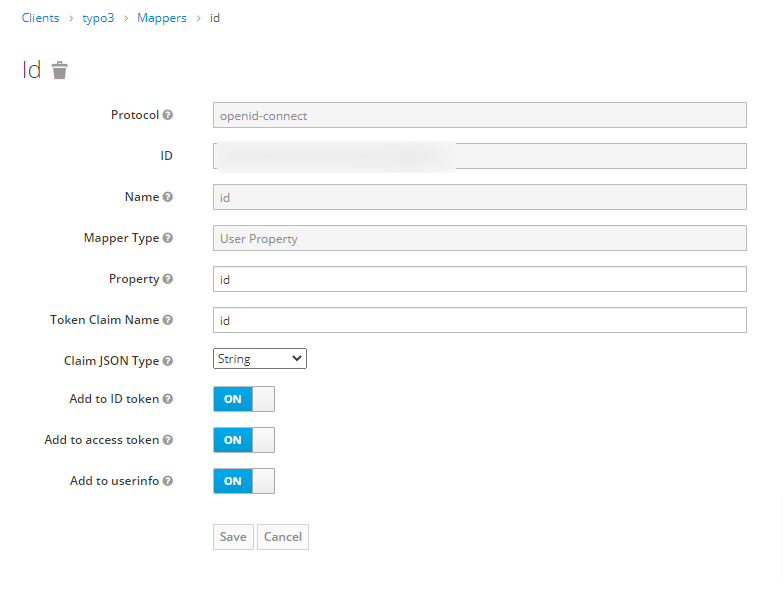
- Switch to the “Mappers” tab and configure a mapper for the ID field (which is necessary to successfully connect to TYPO3), after clicking create:
- Enter “id” as Name
- Choose “User Property” as Mapper Type
- Enter “id” as Property
- Enter “id” as Token Claim Name
- Choose “String” as Claim JSON Type
- Check all three check boxes
- Save
- Copy the client secret (Tab: Credentials) and client id
Adding the OAuth2 Keycloak Client in TYPO3
Add the following configuration to your AdditionalConfiguration.php:
$GLOBALS['TYPO3_CONF_VARS']['EXTENSIONS']['oauth2_client'] = [
   'providers' => [
      'keycloak' => [
         'label' => 'Keycloak',
         'iconIdentifier' => 'oauth2-keycloak',
         'description' => 'Login with Keycloak',
         'options' => [
             'clientId' => '<your-client-id>',
             'clientSecret' => '<your-client-secret>',
             'urlAuthorize' => 'https://<keycloak-domain>/auth/realms/<your-realm>/protocol/openid-connect/auth',
             'urlAccessToken' => 'https://<keycloak-domain>/auth/realms/<your-realm>/protocol/openid-connect/token',
             'urlResourceOwnerDetails' => 'https://<keycloak-domain>/auth/realms/<your-realm>/protocol/openid-connect/userinfo'
         ],
     ],
   ],
];
Registering the icon (optional)
If you want to use a custom icon, in your site package ext_localconf.php register the icon like this:
$iconRegistry = \TYPO3\CMS\Core\Utility\GeneralUtility::makeInstance(
    \TYPO3\CMS\Core\Imaging\IconRegistry::class
);

$iconRegistry->registerIcon(
    'oauth2-keycloak',
    \TYPO3\CMS\Core\Imaging\IconProvider\FontawesomeIconProvider::class,
    ['name' => 'key']
);
If you want to use the default icon instead, remove the iconIdentifier from the configuration.