Attention
TYPO3 v10 has reached end-of-life as of April 30th 2023 and is no longer being maintained. Use the version switcher on the top left of this page to select documentation for a supported version of TYPO3.
Need more time before upgrading? You can purchase Extended Long Term Support (ELTS) for TYPO3 v10 here: TYPO3 ELTS.
Working with languages
TYPO3 CMS comes with the built-in ability to handle web sites in multiple languages.
Detailed information about setting up a multilingual web site is found in the Frontend Localization Guide.
Defining a new language
Languages are defined per site.
Adding a new language is done in the Site Management > Sites module, which is restricted to admin users. Detailed information on how to configure your site to add more languages can be found in the Site Handling documentation.
The Introduction Package's default languages are English, Danish and German languages.
Translation modes
When you choose to translate content, TYPO3 offers two methods:
-
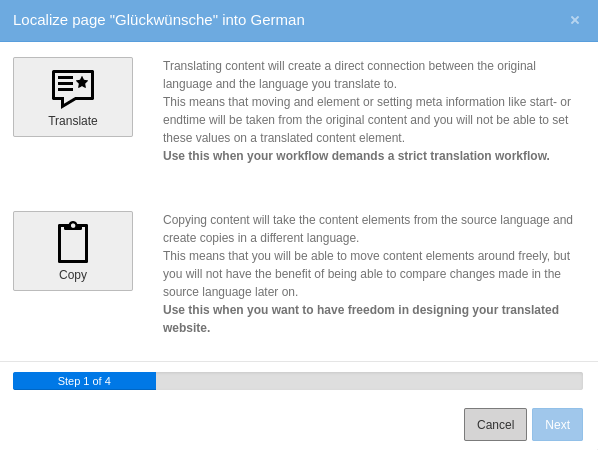
Translate - Use this option when you have a strict translation workflow or content structure.
TYPO3 will create a direct connection between the original language and the translation. When the original language content is changed, the translations are marked as out-of-date and you can see the changes in the original language when editing a translation.
This mode means that TYPO3 can help you maintain consistency when you have separate teams localizing content. This mode also allows TYPO3 to automatically mark translated content for review, and notify translators when the original text changes.
-
Copy - Use this option when you would like the content structure to be free and independent between languages.
TYPO3 creates a copy of the content in the target language. No connection is maintained between the original and the translation, which means subsequent versions of the translations can easily diverge from the original.
Working with translations
- Working with the Introduction Package, in the Web > Pages module, go to the "Congratulations" home page.
-
Using the menu in the docheader, switch to the "Languages" view.
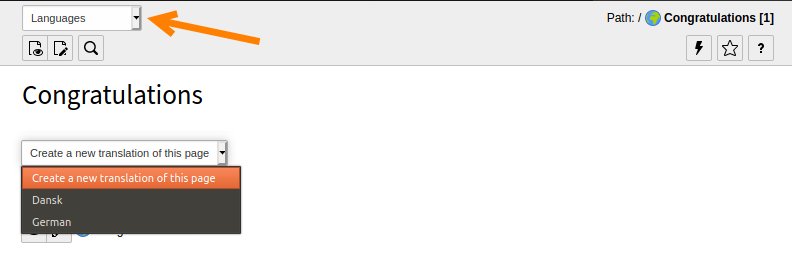
- In the drop-down menu "Create a new translation of this page", choose a language, let's say German in this case. The page properties displays for the German version of the page.
-
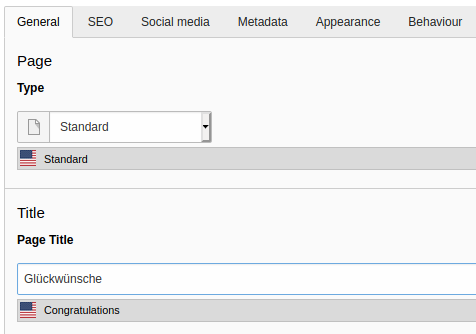
Type the German translation in the Page Title field.
-
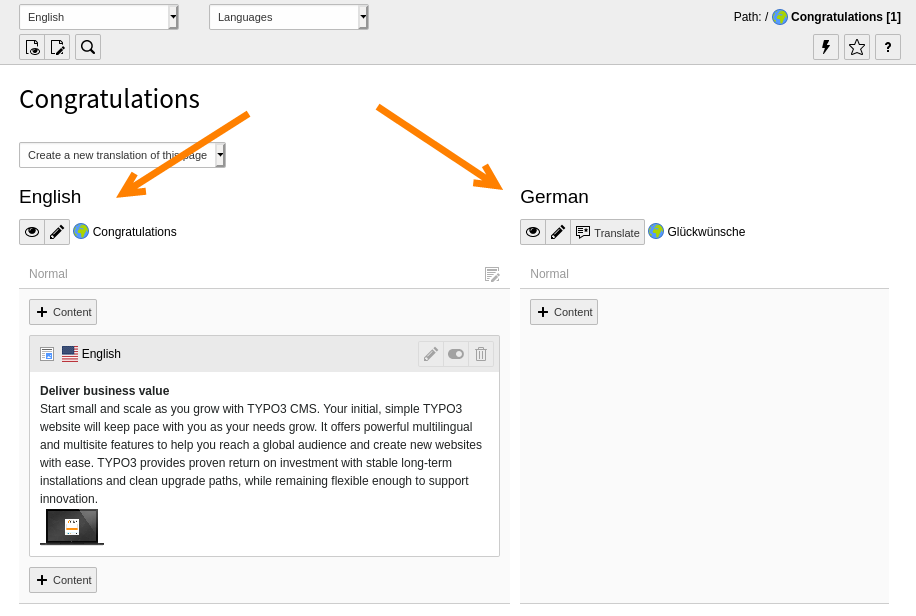
Save and close the page. The screen now displays two versions of the content elements showing the default language and the German version side by side.
-
In the German column, click the Translate button for a content element. The Localize wizard displays.
- For this example, click the Translate button then click Next. Step 2 of the wizard will pass by automatically since we are translating in a single language. Step 3 provides a summary of the elements that will be translated.
-
Click Next to complete the wizard.
The German version of the content element is now prepended with [Translate to German:]. The element is hidden by default, so that incomplete translations aren't displayed on the frontend until you are ready.
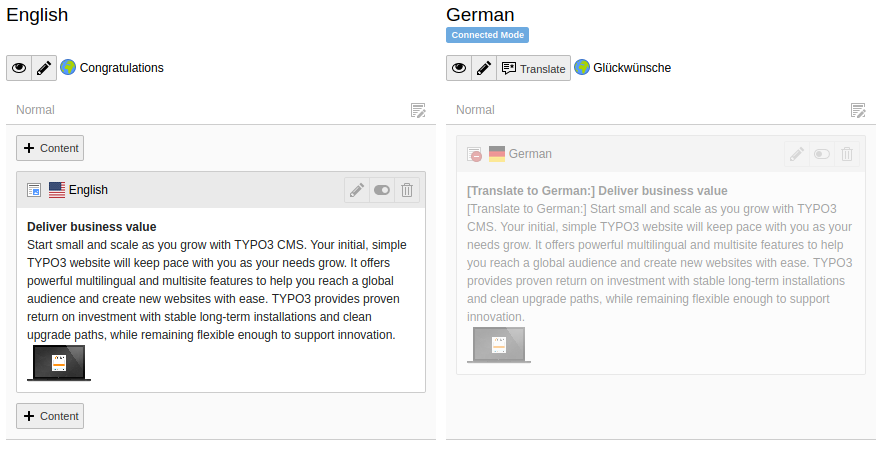
A newly created content element translation
Adjusting the view
The Page module may now seem cluttered, with one column for each translation. You can view a single language at a time by switching back to the "Columns" mode and choosing a specific language in the docheader.
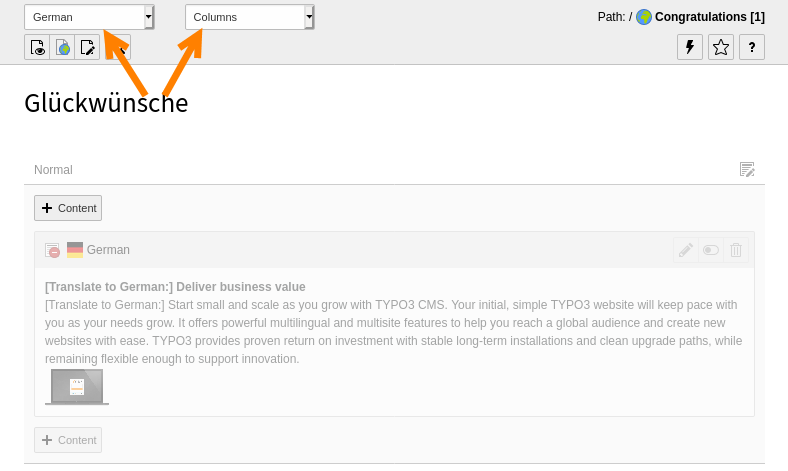
The "Columns" mode displaying a translation
Next steps
The Frontend Localization Guide contains detailed information about setting up a multilingual web site and how to actually do the translation and localization.
The Site Handling documentation contains information about how to configure your site to add more languages.