Create mailing
Choose source
Click the blue/white envelope icon of the MAIL wizard module.
Choose the MAIL sys-folder and move over to the main content area of this module, where the accordion for "Internal Page" should now show the previous created MAIL page.
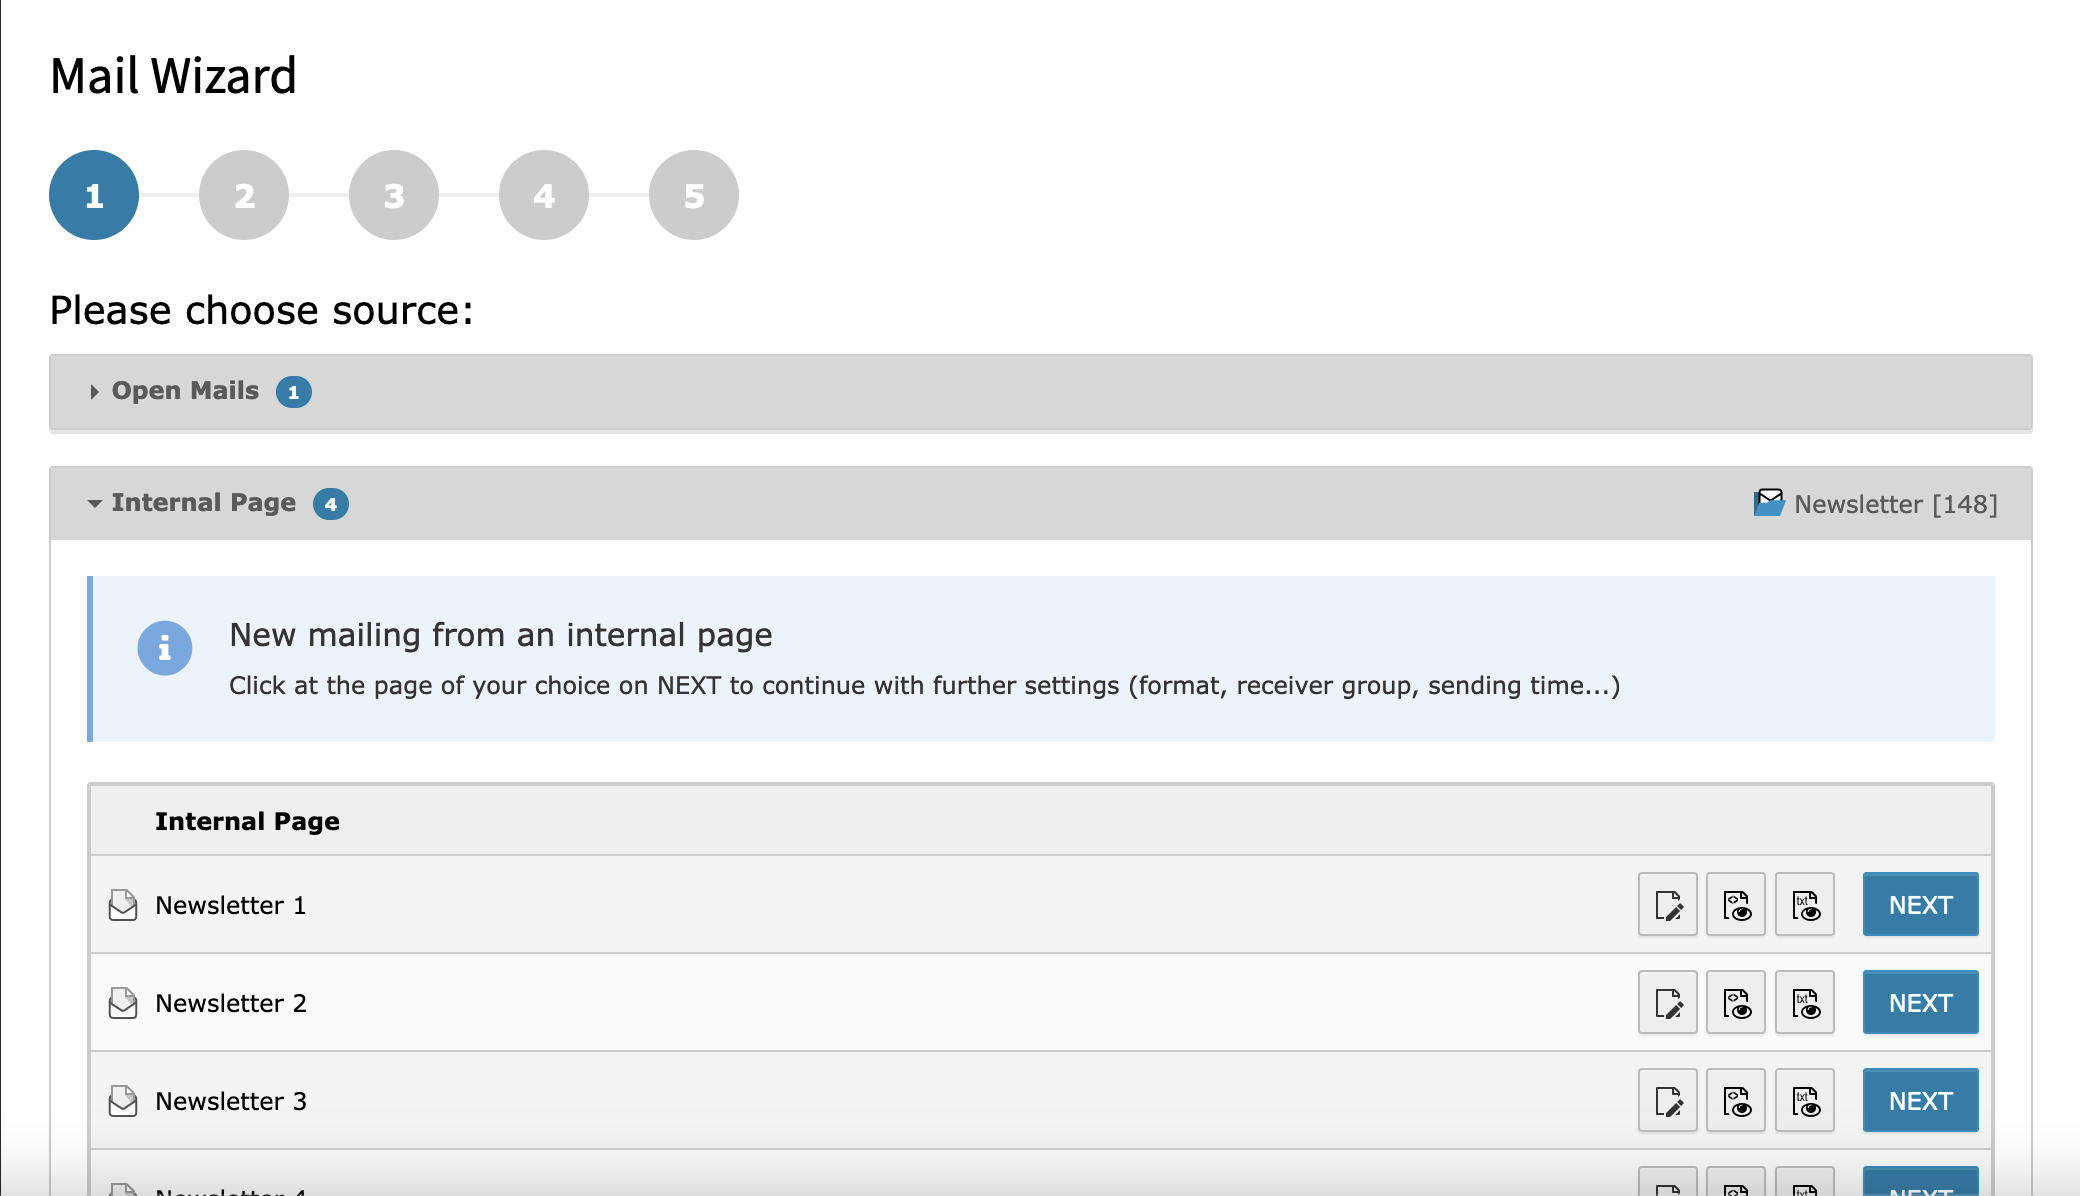
With the two page preview buttons (page-eye-icon) you can get an idea how the mail will look like at the mail client of the recipient later.
To continue click the NEXT button to get to the settings page.
Settings
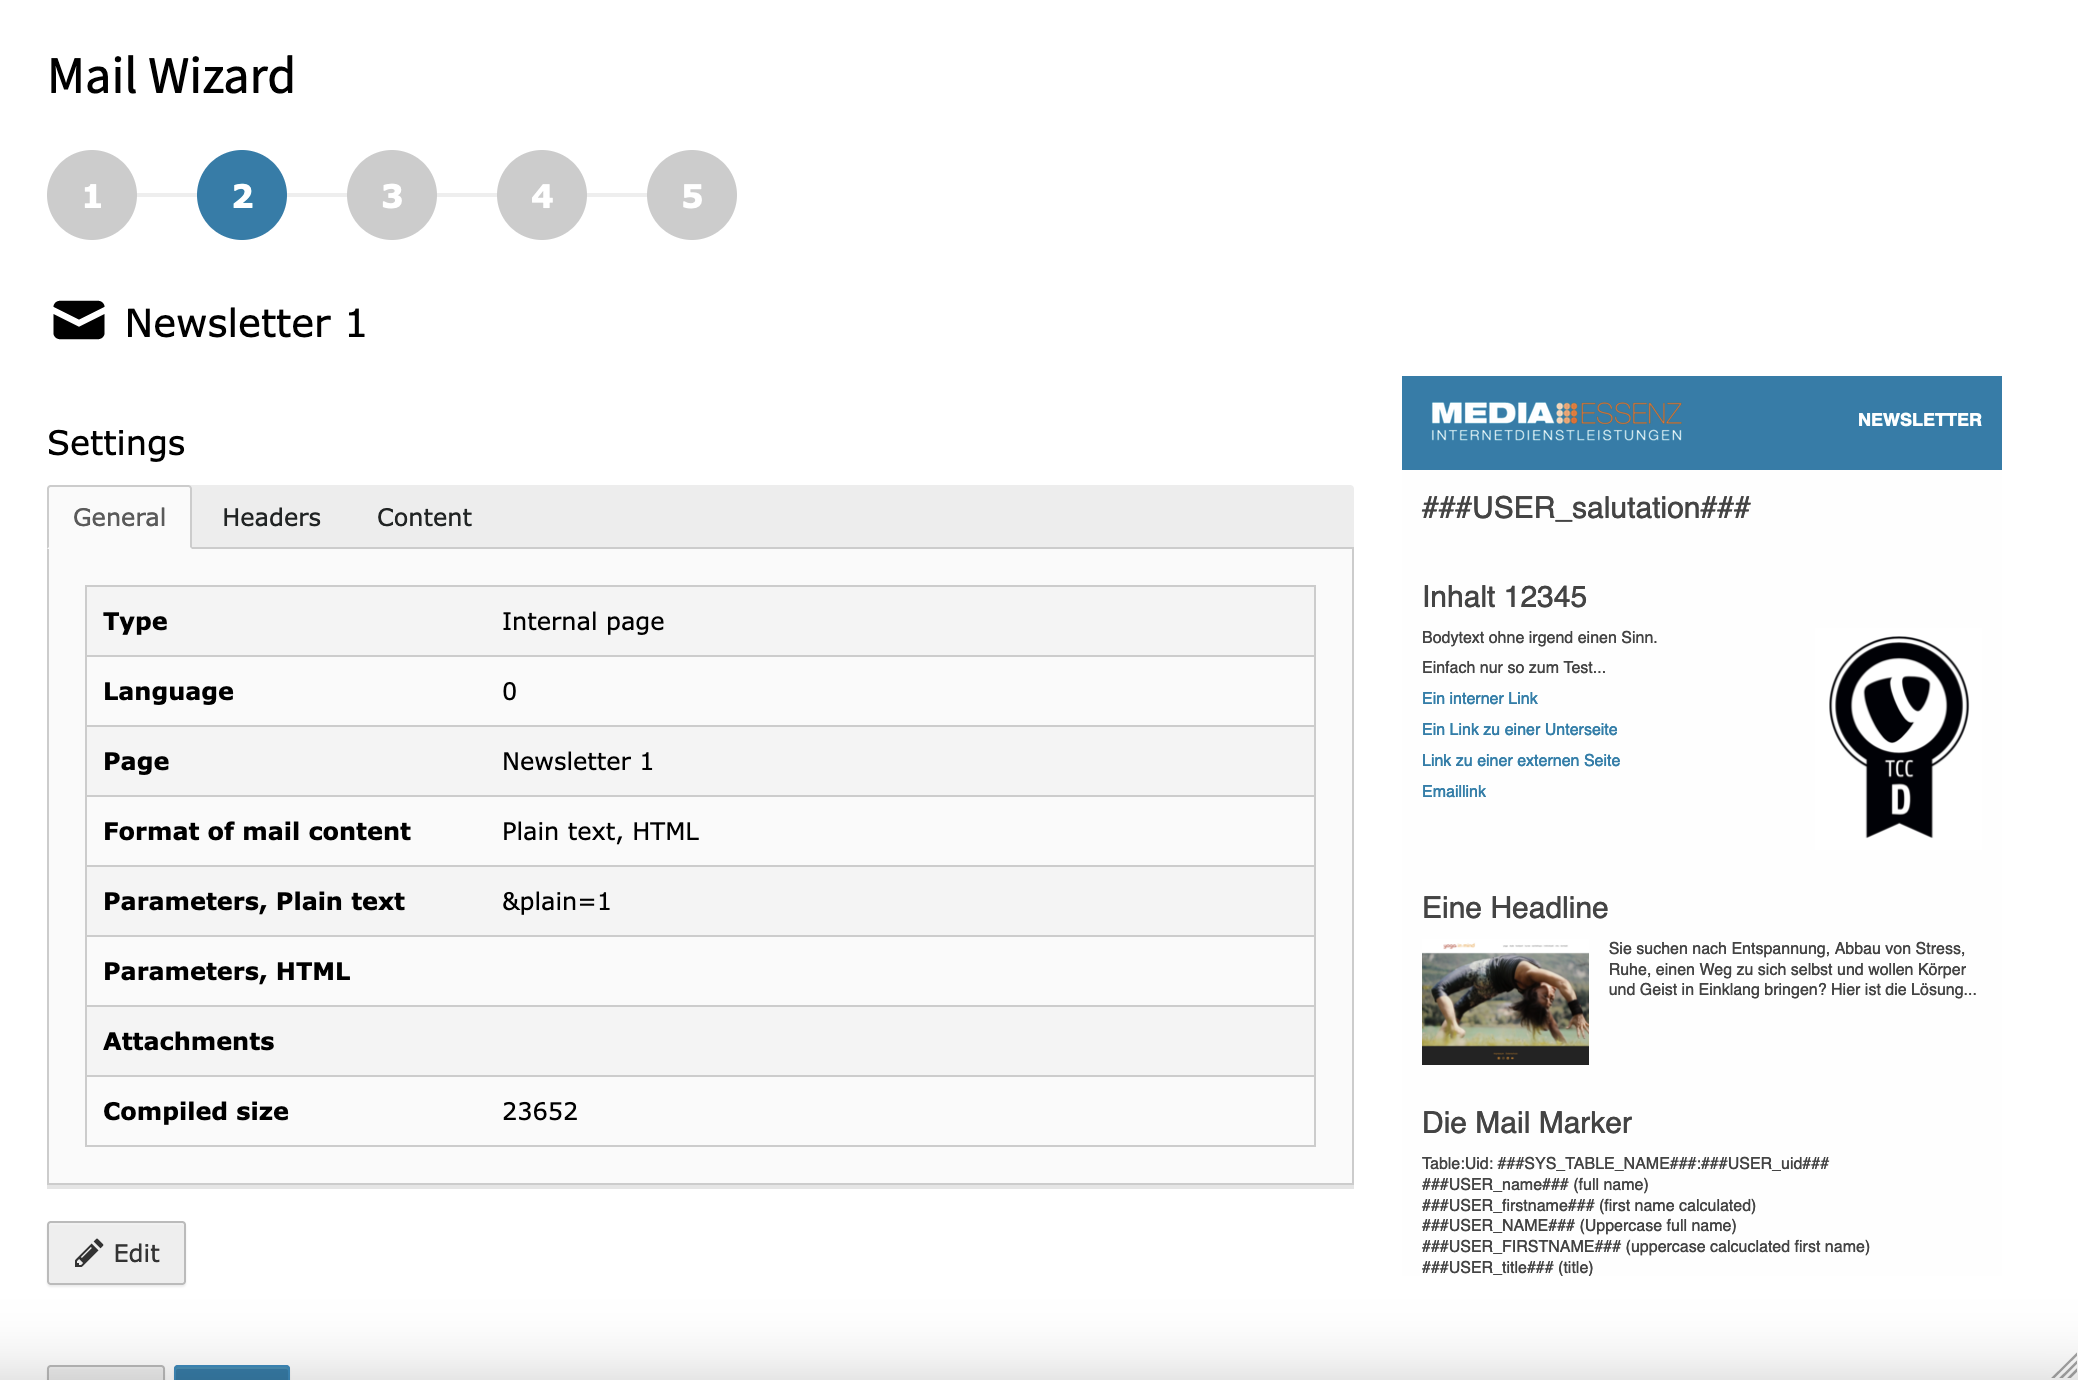
On this page you can check and change the default settings of the mail, which are defined in the configuration module. Adding attachments is also possible.
If done, click NEXT again to get to the category settings.
Categories
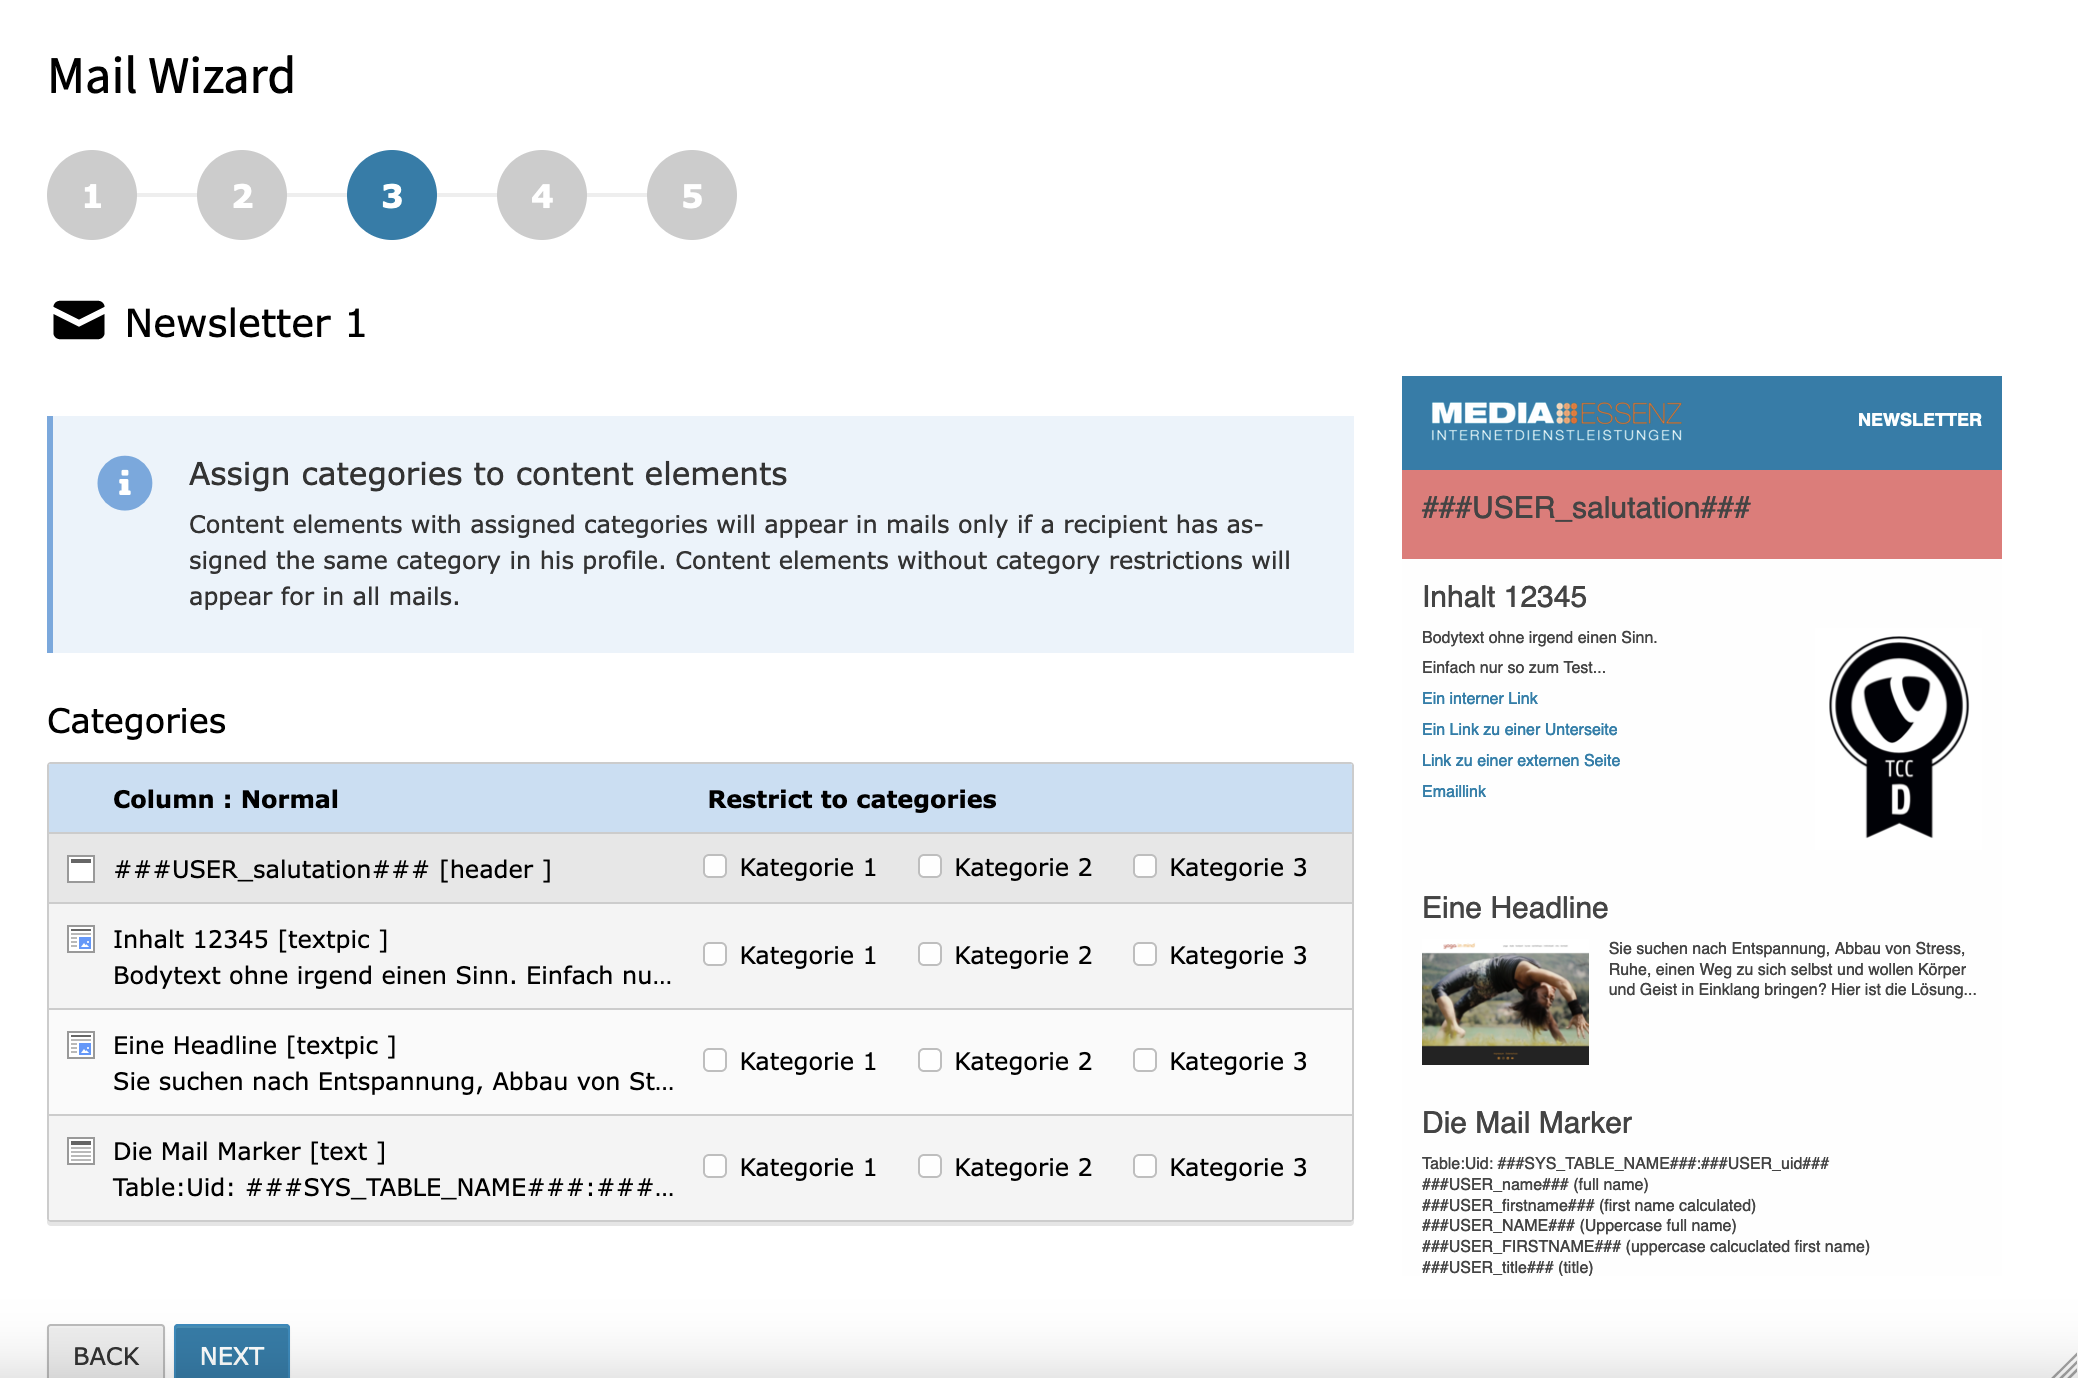
Since it is possible to choose categories inside the different recipient sources (eg. fe_users, tt_address) it must also be possible to set categories inside the different content elements.
This is what can be done here.
During moving your mouse over a row of categories the corresponding content elements on the right side gets highlighted.
To see categories at this place, they must be defined before, of course. How this can be done is described in the TYPO3 core api reference.
But for now you can skip this step by click on NEXT, which brings you to the fourth step: test mail
Test mail
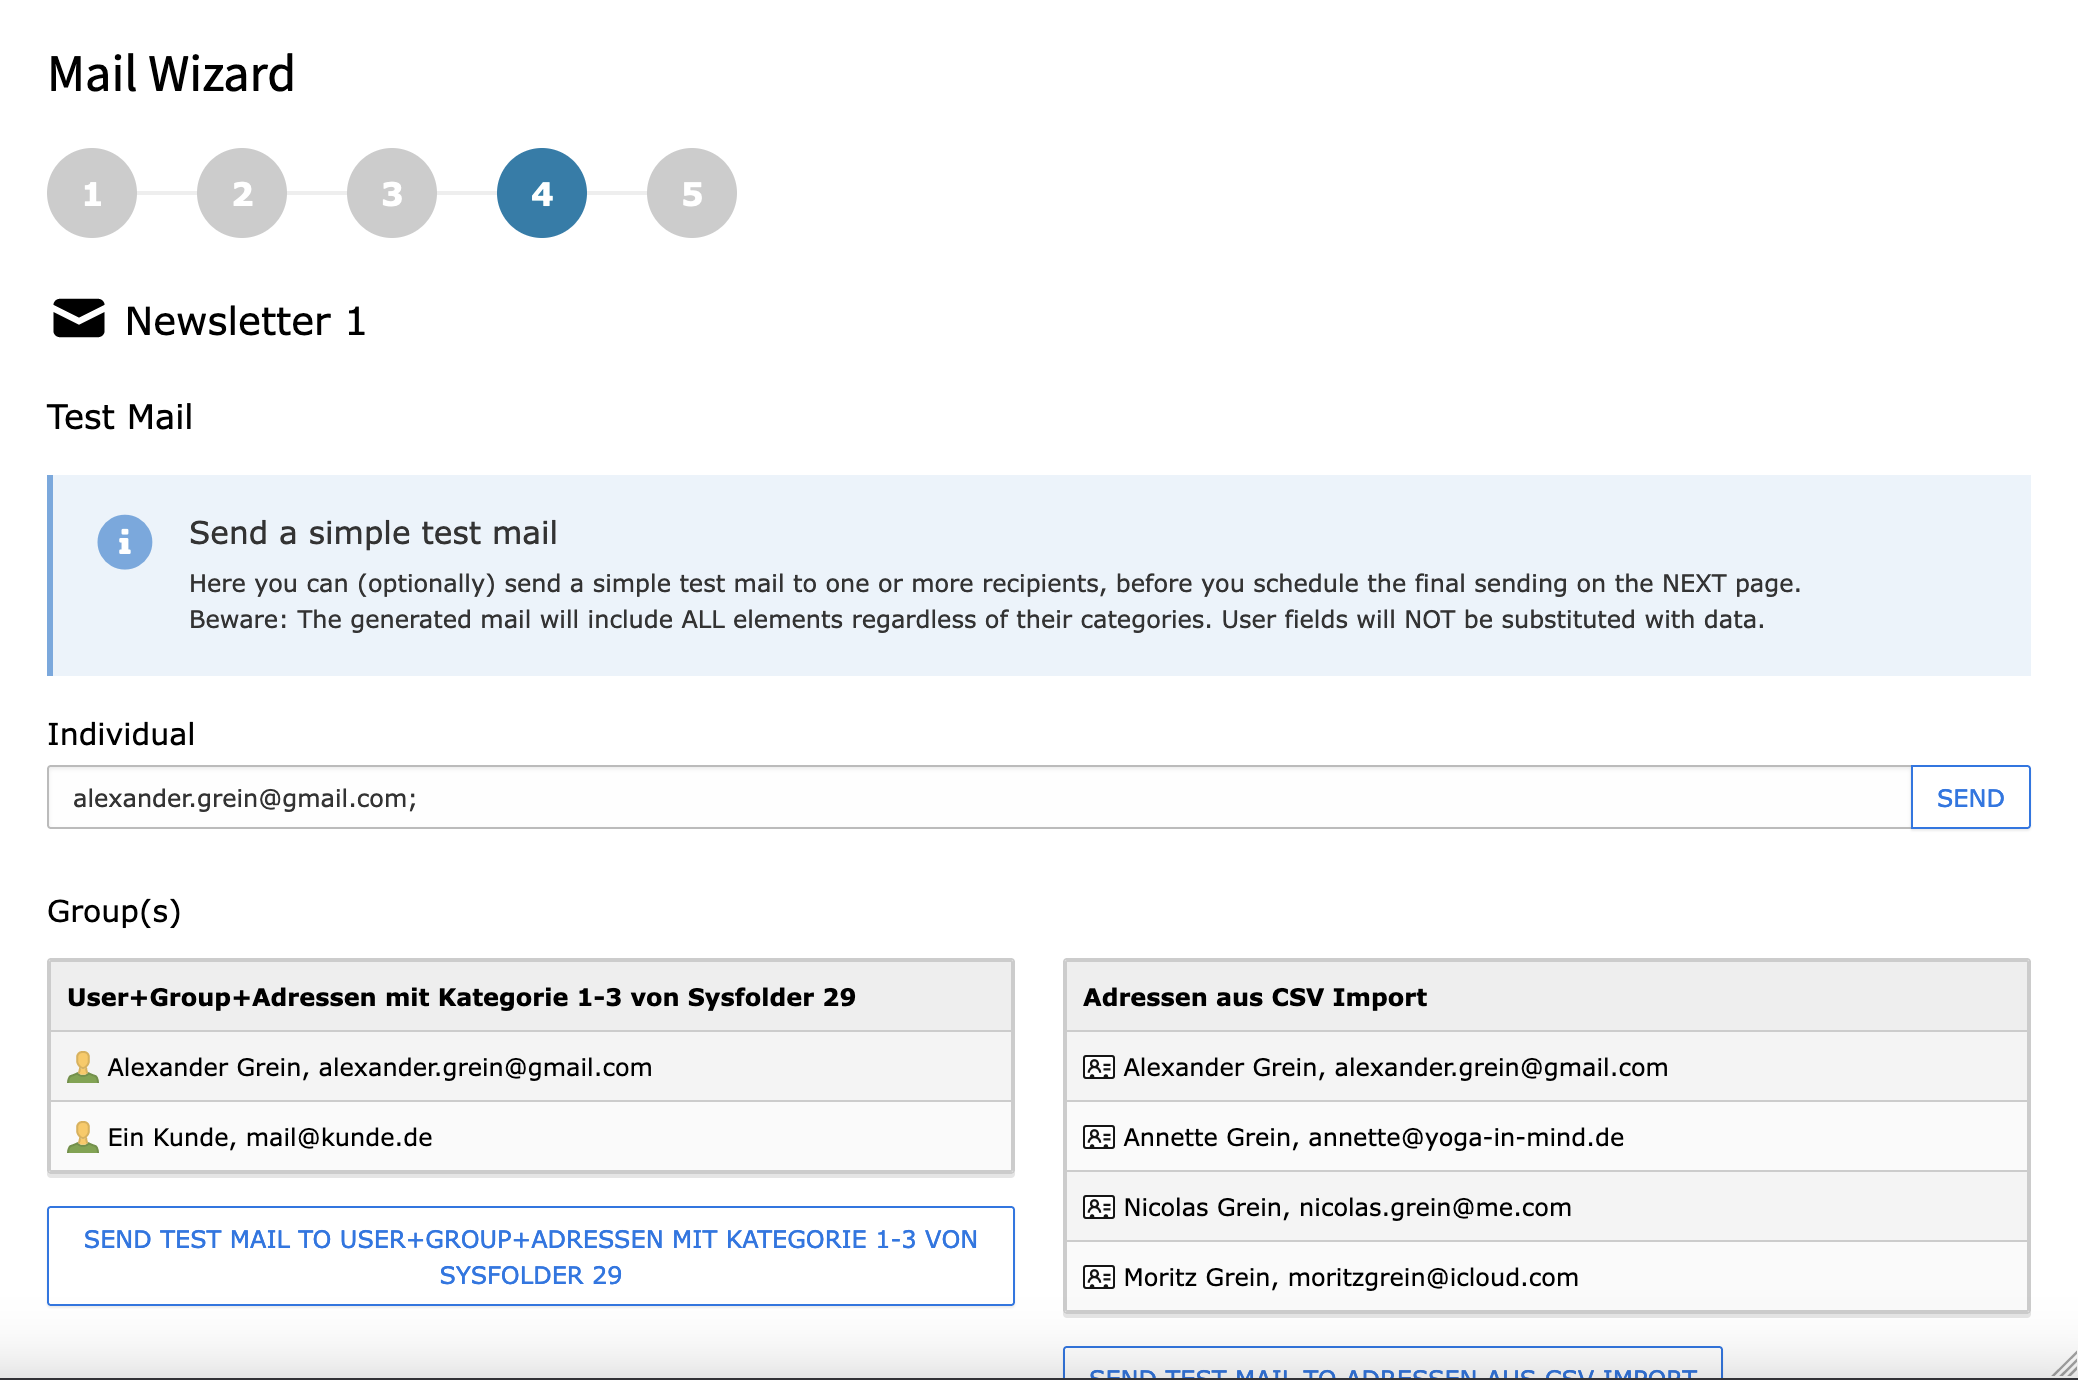
Here you can send a simple test mail to one or a list of mail addresses. But beware: The generated mail will include ALL content elements regardless of their categories. User fields will NOT be substituted with data.
After pressing NEXT another time, you reached the last point of this wizard: Schedule sending
Schedule sending
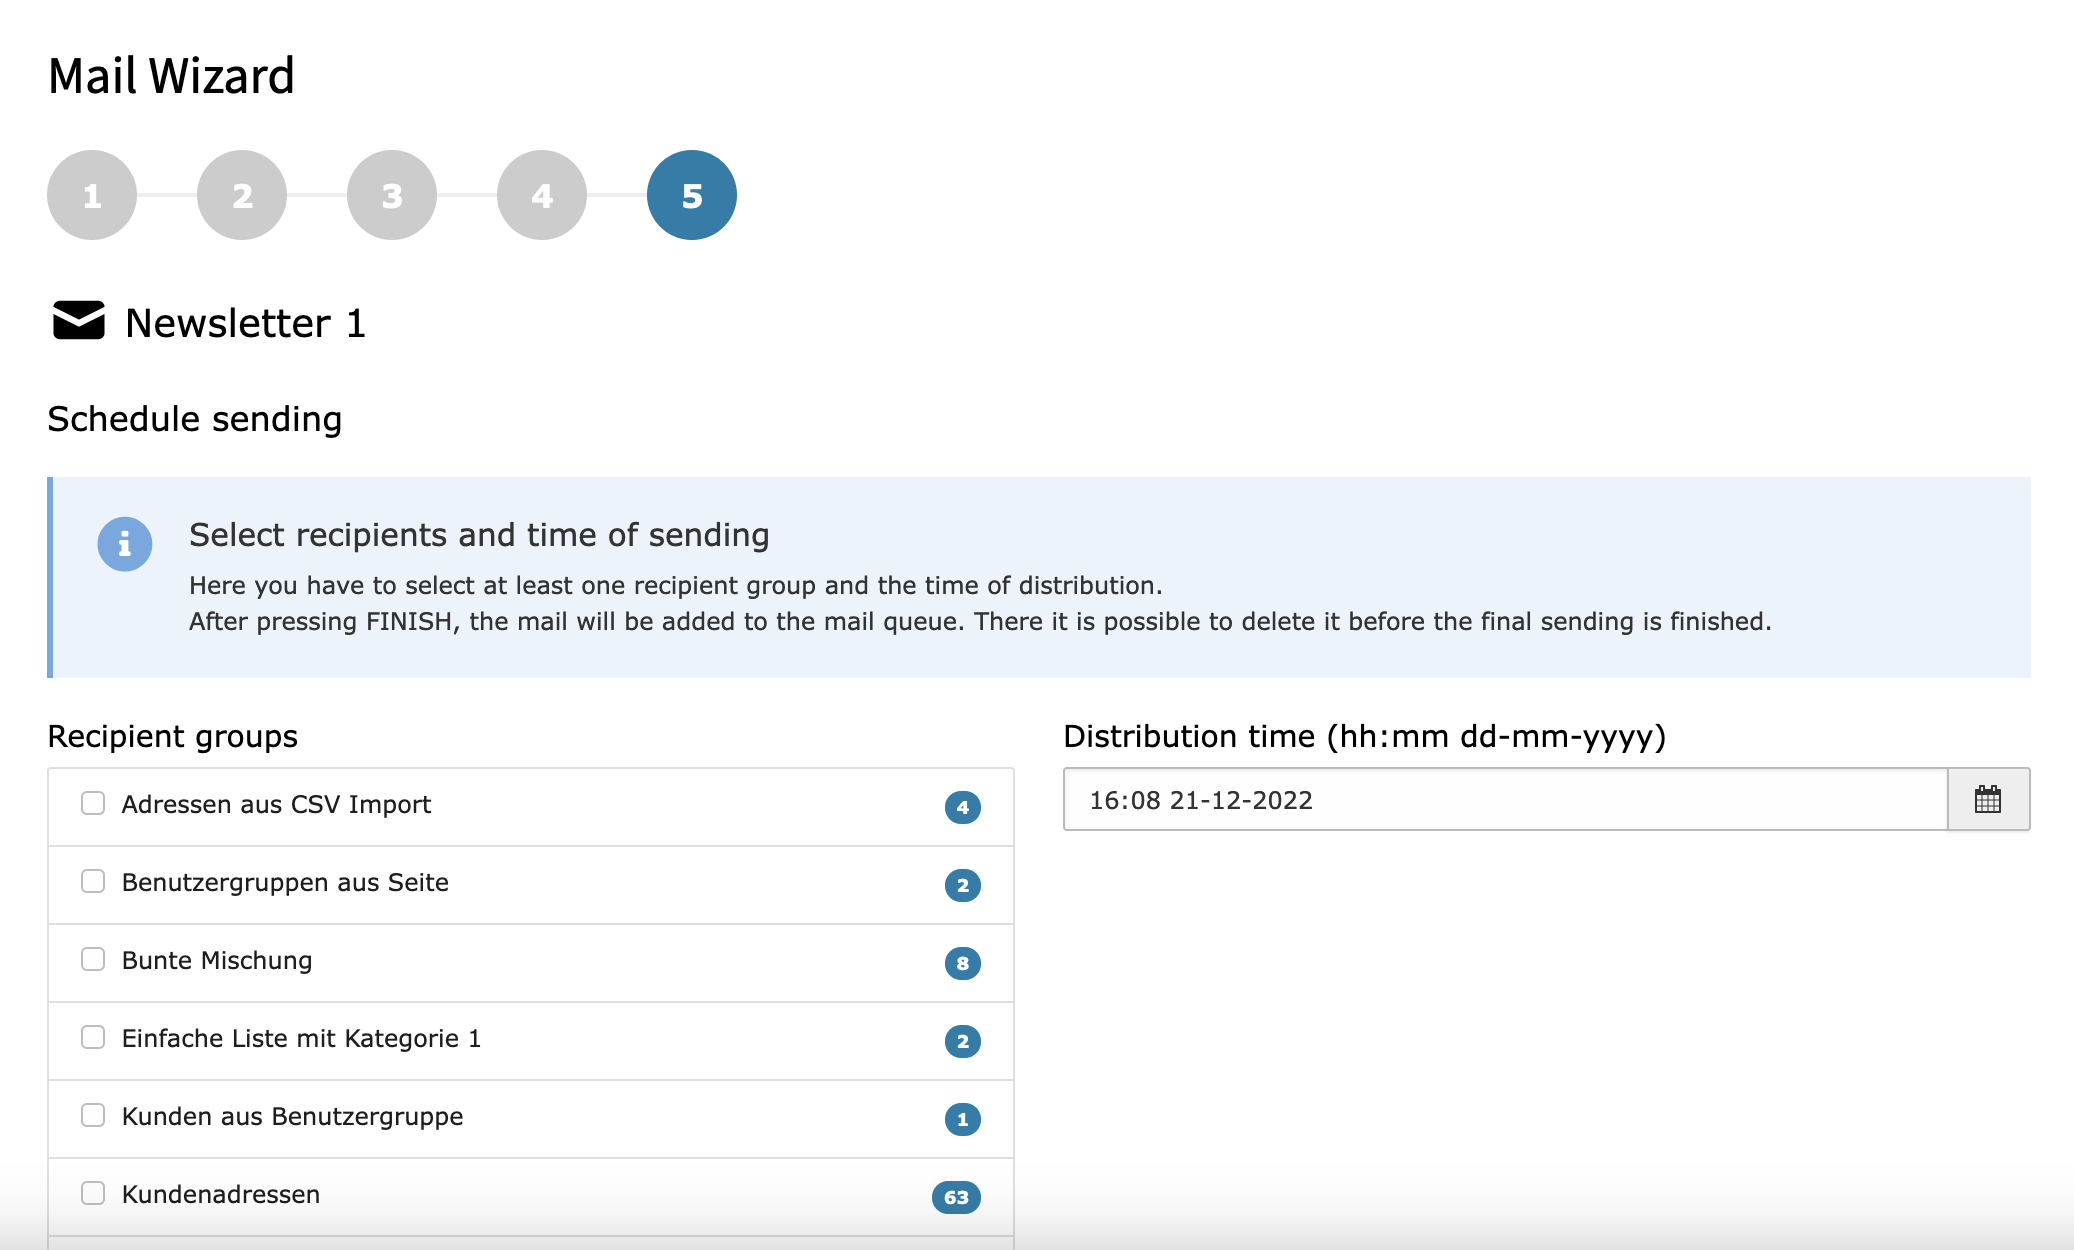
On this site you can choose one (or more) recipient groups and the date/time when distribution should start.
For our test, just choose the recipient group you created in the Create recipient group step and press FINISH.