Create recipient groups
Since this extension is made to send personalized mails to groups of recipients, this groups has to be defined first.
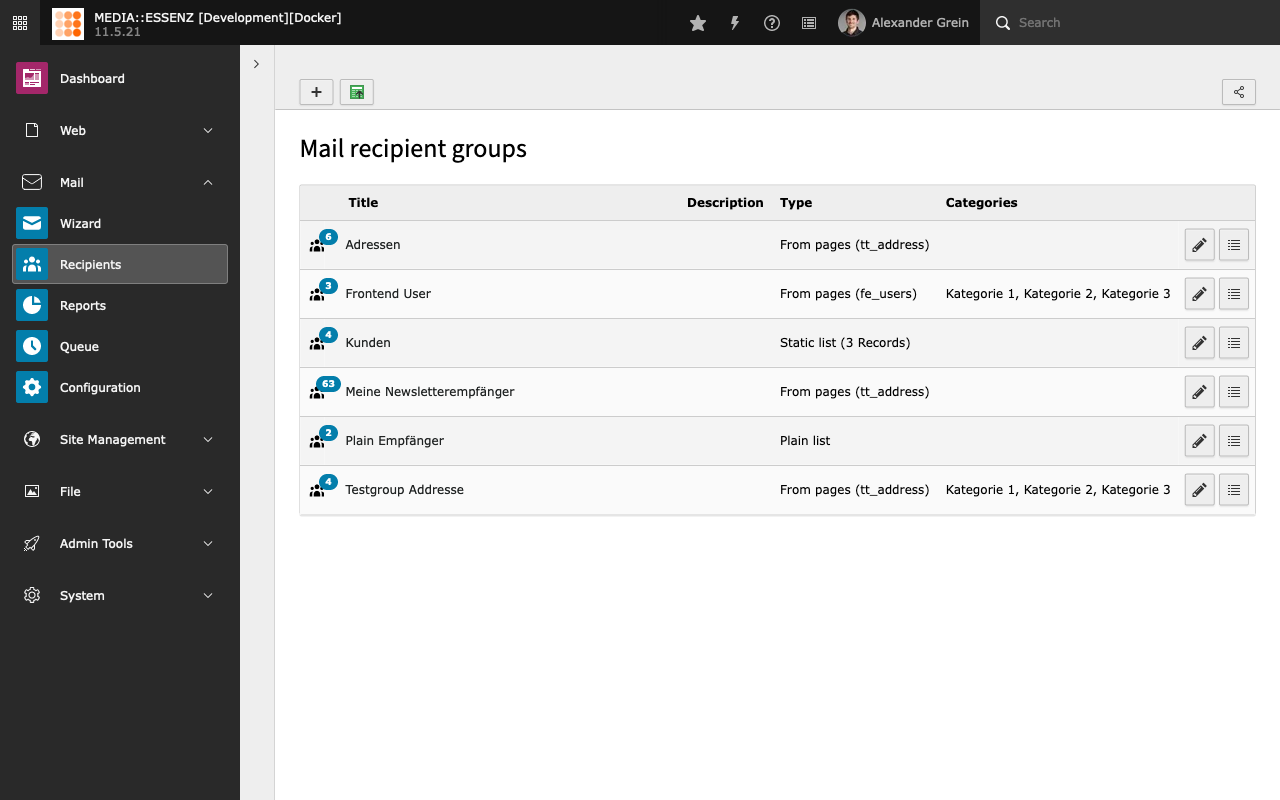
MAIL comes with a lot of possibilities:
From pages
compare to EXT:direct_mail, MAIL is not limited to fe_groups, fe_users, tt_address and one custom table
It is possible to add as many tables you like, as long they have the needed fields or an extbase model which implements at least the RecipientInterface, defined in Classes/Domain/Model/RecipientInterface.php
Beside the recipient source (table) it is also possible to set a starting point where the records should be taken from
Categories can also be set to filter the list of recipients to only those how have the at least one of them assigned as well
Static list
Single records of all defined sources can be added – also fe_groups which will add all fe_users who have this groups assigned.
Plain list
A comma separated list of recipients (just mails or names and mails separated by a comma or semicolon)
compare to EXT:direct_mail, within MAIL you also can choose whether the group of users should receive html or just plain mails.
categories are also definable
From other recipient lists
To make things even more flexible, it is also possible to create a compilation of different other recipient groups.
Some EXT:direct_mail power users may miss the possibility to define queries as sending groups. This feature is currently not available, and will maybe come with a future release. Sponsoring is highly welcome.
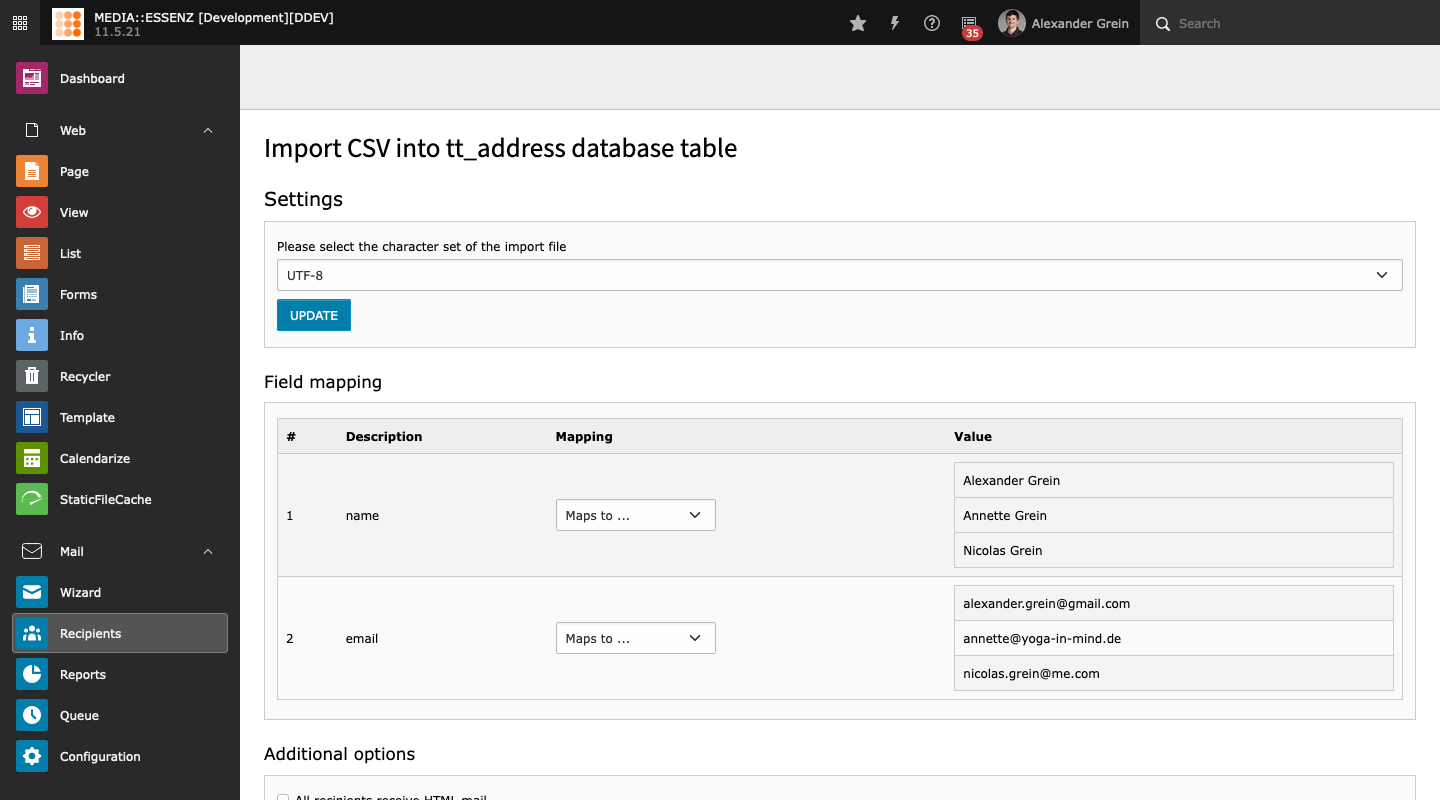
Importing a csv list of addresses
This module also gives you the option to import a csv (comma-separates list) of addresses and create a recipient group containing the imported records afterwards.
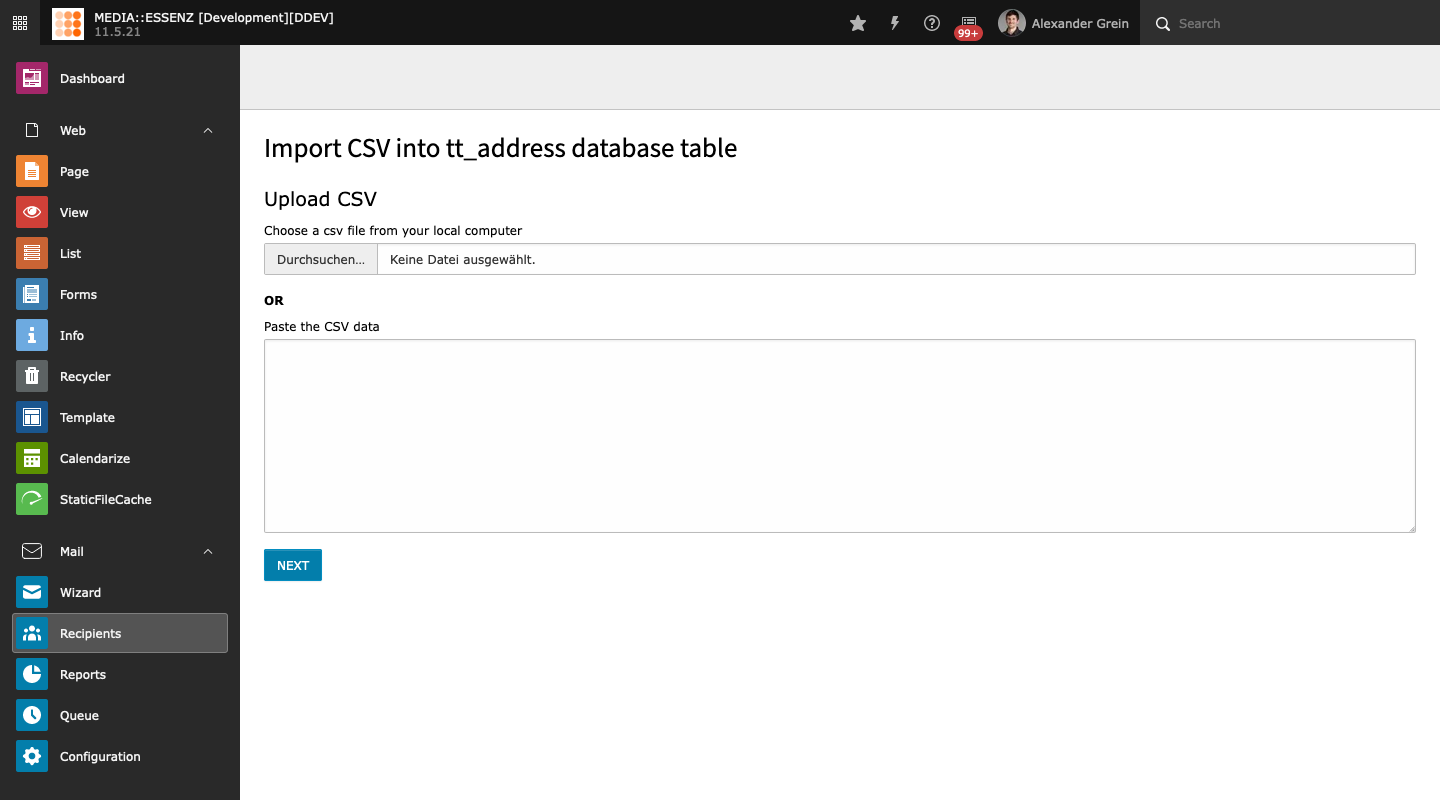
To make it easier to import csv records, there is a wizard, which guide you through the process.
In the first step you can choose to upload a csv file or paste the records into a text field. You can use comma (;), semicolon (;), or colon (:) as field delimiter. This can be configured in the second step.
By clicking the NEXT button, the csv file or csv records are uploaded and the second step is shown. In this step you can specify the detail information of the csv data, such as field delimiter, field encapsulation, and field name in the first line. You can also specify the sys-folder, where the records should be imported to, the uniqueness of the records, rename or update the records if a similar record is found, or to empty the sys-folder before importing.
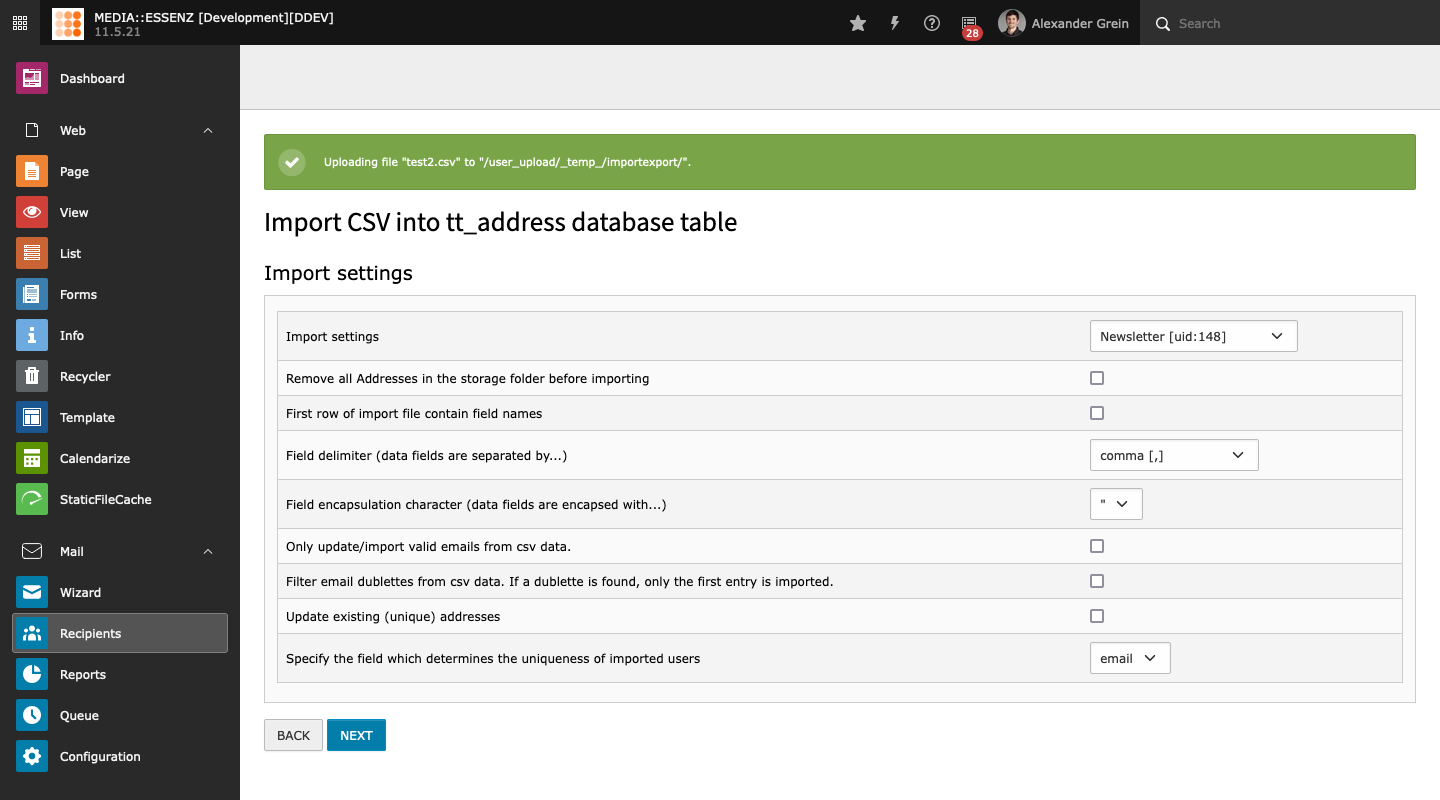
Warning
If you set the field “remove all Addresses in the storage folder before importing”, all records in this sys-folder WILL be physically deleted .
After specifying the configuration you can start mapping the fields. There are 3 columns in the mapping step. The description column shows the first row of the csv records (if you set in the configuration that the first row is the field names) or shows only field_xx (where xx is continuous number).
The mapping column shows only the list of field, which are part of tt_address table. You must at least map the field “Name” and “Email”.
The value column shows the first up to three rows from the csv records. They should help you to map the field.
You can also set the HTML flag or categories to all records you are importing.
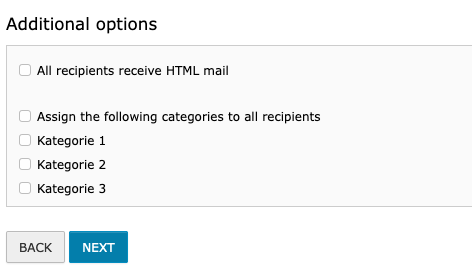
In the select box, which contains the field names of tt_address, there is also an entry “categories”. This entry can be mapped to a comma-separated list of sys_category IDs. This value will overwrite whatever categories you selected in the “Additional options” section.
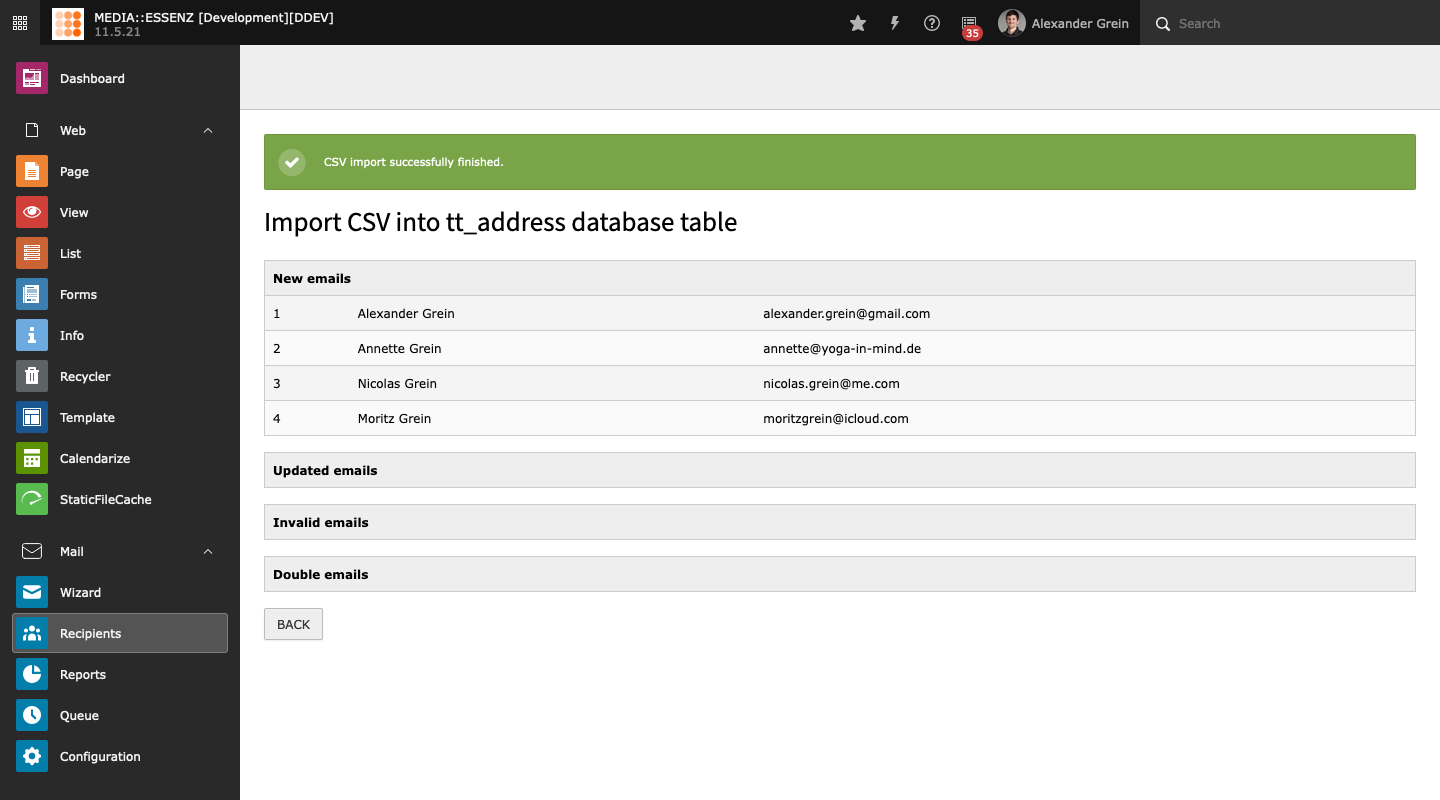
After mapping the fields you are ready to start the import process by pressing the IMPORT button. If finished a list of new imported, invalid email, updated and doublet records will be shown.