TYPO3 v12 has reached end-of-life as of April 30th 2026 and
is no longer being maintained. Use the version switcher on the top
left of this page to select documentation for a supported version of TYPO3.
Need more time before upgrading?
You can purchase Extended Long Term Support (ELTS) for TYPO3 v12 here:
TYPO3 ELTS.
TYPO3 site package tutorial
This tutorial describes step by step how to come from your first TYPO3
installation to the first basic site.
Here we define the benefits of the site package: like the concepts of
encapsulation, the concepts of dependency management, the clean
separation from the userspace (fileadmin/FAL), some important security
benefits, deployment and distributability advantages.
We define the starting point to build a site package extension.
Normally we start with static html files and a bunch of css and
JavaScript files. This is also called "integrate".
We introduce the templating engine Fluid, that is used to render the
html pieces in a logically manner. Then we describe the directory
structure that is needed in a site package extension. We also
explain the first steps to include the previously static files and
html pieces using Fluid.
Here we show enter the first content into the TYPO3 backend. We
create pages, add the site configuration from the site package,
show the connection of the site configuration and the file
config.yaml and show case the view module in the TYPO3
backend.
We introduce the main menu, explain how we build up a menu
processor with TypoScript and how we can output the menu with Fluid.
We introduce the so called "Debug ViewHelper".
Here we explain the purpose of backend layouts. Additionally we
introduce the DatabaseQueryProcessor which is used to render content
from a special "colPos" previously defined in the backend layout.
We use Fluid to output content from a specific colPos. By this we
get to know the cObject ViewHelper.
This tutorial guides you step-by-step through the process of creating a site package
from scratch, introducing you to various TYPO3 concepts along the way.
If you are already familiar with TYPO3 and want to create a site package quickly,
you may consider using the
Site Package Builder.
What files are included in a site package?
A site package typically includes the following files:
Configuration files, such as site settings, TypoScript, and RTE
(rich-text editor) configurations
Public assets: CSS, JavaScript, fonts, theme related images
Templates: Fluid templates that generate the HTML output
If you are developing functionality that may need to be shared across multiple sites
or TYPO3 installations in the future, it is advisable to create a custom extension
for that functionality instead.
TYPO3 v12 has reached end-of-life as of April 30th 2026 and
is no longer being maintained. Use the version switcher on the top
left of this page to select documentation for a supported version of TYPO3.
Need more time before upgrading?
You can purchase Extended Long Term Support (ELTS) for TYPO3 v12 here:
TYPO3 ELTS.
Minimal example
We want to create a site package that outputs a single web page with
minimal effort. This site package can be used to simply test system output or as
an example of the fewest possible steps to create a working site package.
To start, in the TYPO3 backend, create a standard page named
Minimal example just under (inside) the page tree TYPO3 logo
container. Create a new TypoScript template record on this page.
Give the TypoScript template a title, and make it a root level template,
but do not include any static templates.
The TypoScript-only version
In the TypoScript template Setup field, add the following three lines:
TypoScript Setup
page = PAGE
page.1 = TEXT
page.1.value = Hello, world.
Copied!
View the web page.
This TypoScript-only design has the least instructions required to output a
web page from TYPO3. This TypoScript template is self contained and
no other files or database records needed. Changing this content
only requires the appropriate access needed to make changes to TypoScript
templates.
The TYPO3 Fluid version
Empty the Minimal design page TypoScript template Setup field,
then add the following lines:
Here we are putting the page content into a separate HTML file, allowing for
separate access control and for an editing workflow that does not need much
TypoScript. The TYPO3 renderer still requires a TypoScript template on the
Minimal design page to know which file to process.
Resulting web page
Here is the resulting web page HTML source for both the TypoScript-only and
the Fluid based implementations. Notice how TYPO3 has added default markup
around the single line of content:
Example frontend output
<!DOCTYPE html><htmllang="en"><head><metacharset="utf-8"><!--
This website is powered by TYPO3 - inspiring people to share!
TYPO3 is a free open source Content Management Framework initially
created by Kasper Skaarhoj and licensed under GNU/GPL.
TYPO3 is copyright 1998-2018 of Kasper Skaarhoj. Extensions are
copyright of their respective owners.
Information and contribution at https://typo3.org/
--><title>Minimal design</title><metaname="generator"content="TYPO3 CMS"></head><body>
Hello, world.
</body></html>
Copied!
Attention
TYPO3 v12 has reached end-of-life as of April 30th 2026 and
is no longer being maintained. Use the version switcher on the top
left of this page to select documentation for a supported version of TYPO3.
Need more time before upgrading?
You can purchase Extended Long Term Support (ELTS) for TYPO3 v12 here:
TYPO3 ELTS.
Design Template
External Resources
A typical use case of developing a standard website includes the implementation
of the visual appearance of the site. In most cases this is a set of HTML and
CSS files, as well as some images, e.g. a company logo, etc. As of today,
modern frameworks build a perfect foundation and provide features such as
clean, structured layouts, mobile responsiveness and compatibility across a
wide range of web browsers.
The project discussed in this tutorial uses the well-known and popular
Bootstrap framework version 4 and jQuery version 3. Both are not mandatory for a sitepackage in
TYPO3 as such and can be replaced with similar frameworks or JavaScript
libraries as required by the individual project.
Directory Structure
Let's assume, we have the following directories and files, which represent a
typical website theme as we know it from a static website.
The two CSS and JavaScript files bootstrap.min.css and
bootstrap.min.js belong to the Bootstrap framework. As a matter of
fact, these files can be ignored (we will include the Bootstrap framework using
TypoScript as shown in section TypoScript setup). The CSS file
website.css implements the custom styles used for the website. Same as
the JavaScript file website.js, which contains custom JavaScript code.
The only file inside the images/ directory is a simple logo. Let's
assume this is a square image of 100px width by 100px height.
Another file we can ignore is the jQuery library jquery-3.2.1.min.js in
the js/ directory. Due to the fact that there is a better way to
include external libraries in TYPO3, we do not need to worry about this library
either.
This leaves us with the remaining file index.html, which is explained
in more detail in the next section.
File 'index.html'
A typical HTML document consists of a header and a body section. These
parts are wrapped by the
<html> ... </html> tags as shown below.
theme/index.html
<html><head>
...
</head><body>
...
</body></html>
Copied!
At this point, we only need to focus on the
<body> ... </body> part.
The next section of this tutorial describes how the design templates are
converted into "Fluid" templates, which can be used by TYPO3 to render the
theme.
Attention
TYPO3 v12 has reached end-of-life as of April 30th 2026 and
is no longer being maintained. Use the version switcher on the top
left of this page to select documentation for a supported version of TYPO3.
Need more time before upgrading?
You can purchase Extended Long Term Support (ELTS) for TYPO3 v12 here:
TYPO3 ELTS.
After this tutorial you have created Fluid templates and split them into
manageable pieces.
Implement template files
Based on the facts explained above, it should be easy to copy the static
files from the Design Template into the appropriate folders of the site
package directory structure.
The custom CSS file, as well as the custom JavaScript file, are files which
will be maintained by a developer and never modified by TYPO3 at all. The same
applies to the logo. However, TYPO3 may create a modified copy of the image,
but should never manipulate the original image file (the "source"). Therefore,
all three files can be classified as static and copied to the Public/
folder as follows.
As discussed before, the Bootstrap and jQuery files should be ignored for the
time being. This leaves us with the index.html file, more precisely with
the
<body>-part of that file.
Due to the fact that this file needs to be rendered and enriched with dynamic
content from the CMS, it can not be static and the content of this file will
not be sent to the user directly. Therefore, this file should be stored
somewhere inside the Resources/Private/ directory. The question about
the exact sub-directory pops up though: is Resources/Private/Layouts/Page/
or Resources/Private/Templates/Page/ the perfect fit?
In our case, directory Resources/Private/Templates/Page/ is the correct
folder, because this is the entry point for all page templates, despite the
fact that our index.html file in fact implements the layout of the entire
site. Therefore, the index.html file gets copied into
Resources/Private/Templates/Page/ and renamed to Default.html (in order
to visualize that this file represents the layout of a default page).
As a result, we end up with the following structure.
It is important to note that at this point in time the sitepackage extension
contains four files only: Default.html, website.css, logo.png and
website.js. The rest are empty directories for now.
The point is that TYPO3 follows the convention over configuration principle.
This is a software design paradigm to decrease the number of decisions that a
web developer is required to make. Simply learn and follow the conventions
(e.g. that the path should be Resources/Private/Templates/Page/) and the
development will be smooth, easy and straight forward. In addition, if another
web developer (e.g. one of your colleagues) looks at your sitepackage
extension, they know the locations and naming of files. This reduces
development time significantly, e.g. if an issue needs to be investigated or a
change should be implemented.
Furthermore, you might want to consider technologies such as Sass, SCSS and
TypeScript for improved productivity and maintainability of your style sheets
and JavaScript code. For the sake of simplicity, this tutorial uses the basic
implementation of Cascading Style Sheets (CSS) and JavaScript files.
The page layout file
As described before, a typical static index.html file contains a
<head>
and a
<body> section, but we only need to focus on the
<body>. Open
file site_package/Resources/Private/Templates/Page/Default.html in your
favorite text editor and remove all lines before the starting
<body> tag
and after the closing
</body> tag. Then, remove these two lines, too. As a
result, your Default.html may now be empty. In that case, you can use the
following example based on the Bootstrap Jumbotron. If using your own layout template,
your Default.html now contains only the HTML code inside the body.
So, let's assume it contains something like the following HTML code:
In case you have worked with the Bootstrap library before, you will quickly
realize that this is a simplified version of the well-known template called
Bootstrap Jumbotron.
The first section creates a mobile responsive navigation menu (
        <nav> ...
</nav>
) and the second section a container for the content (
        <main> ...
</main>
). Inside the content area we see a full-width section (
        <div
class="jumbotron"> ... </div>
) and a simple container with two columns.
The code above misses a few lines at the end, which include some JavaScript
files such as jQuery and Bootstrap. You are advised to remove these line from
the Resources/Private/Templates/Page/Default.html file, too.
Due to the fact that the "jumbotron" elements could be used on several pages
(page layouts) across the entire website, we should move this part to a
partial. Create a new file named Jumbotron.html inside directory
site_package/Resources/Private/Partials/Page/ and copy the approriate six
lines (starting from
<div class="jumbotron">) into it. Make sure the file
name reads exactly as stated above with upper case "J" as the first
character.
Now, remove the lines from file
Resources/Private/Templates/Page/Default.html and replace them with the
following single line:
Congratulations -- you just applied your first ViewHelper! HTML tags starting
with
<f:...> are typically core ViewHelpers in Fluid. The tag
<f:render> is the Render-ViewHelper, which (as the name suggests)
renders the content of a section or partial. In our case it is the latter,
because of the
partial="..." argument. Note: do not append .html here.
HTML is the default format and as a convention, the ViewHelper automatically
knows the file name and its location: Partials/Page/Jumbotron.html.
Let us also move the navigation part into the file
Partials/Page/Navigation/MainNavigation.html. As the navigation will
contain dynamic parts we forward all variables as arguments:
At this point, we have implemented an (optional) partial and a page layout
template. Keep the file Resources/Private/Templates/Page/Default.html open
in your text editor, because we need to make one more small adjustment.
As described above, files inside the Templates/ directory are page-specific
layouts. An additional component allows web developers to build the overall
layout (the skeleton) of the website: this is an HTML file in the
Resources/Private/Layouts/Page/ folder that we name Default.html, too.
Before we create this file, we need to tell our page layout template
(Resources/Private/Templates/Page/Default.html) which website template
it should use:
The updated template file shows two additional lines at the top (
<f:layout>
and
<f:section>) and an additional line at the bottom (the closing
</f:section> tag). The Layout-ViewHelper refers to the "Default" website layout
file, which we will create in the next step. The Section-ViewHelper simply
wraps the page template code we created before and therefore defines a section
named "Main".
The website layout file
Now, let's implement the website layout file. First, we create a new file
Default.html inside the directory
site_package/Resources/Private/Layouts/Page/ and add the following line:
Surprisingly, that is all. This line instructs Fluid to render the section
"Main", which we have implemented in the page layout template file
Resources/Private/Templates/Page/Default.html.
However, we will do an additional step. The navigation menu will be shown on
all pages across the entire website. Therefore, it can be part of the global
website layout. Therefore, file
Resources/Private/Layouts/Page/Default.html is a suitable destination.
Move the
<f:render partial="Navigation/MainNavigation.html" arguments="{_all}"/>
part from file
Resources/Private/Templates/Page/Default.html to
Resources/Private/Layouts/Page/Default.html as shown here:
Do not forget to remove the line from the
Resources/Private/Templates/Page/Default.html file. If you do not
remove them, the menu would appear twice in the frontend.
Next steps: Fetch the content and configure the menus
TYPO3 v12 has reached end-of-life as of April 30th 2026 and
is no longer being maintained. Use the version switcher on the top
left of this page to select documentation for a supported version of TYPO3.
Need more time before upgrading?
You can purchase Extended Long Term Support (ELTS) for TYPO3 v12 here:
TYPO3 ELTS.
TypoScript configuration
TYPO3 uses TypoScript as a specific language to configure a website.
TypoScript is a very powerful tool in the TYPO3 universe, because it allows
integrators to configure and manipulate almost every aspect of the system and
customize a TYPO3 instance to very specific needs of their customers. It is
important to highlight, that TypoScript is not a programming language, so you
do not need to be a software developer to fine tune TYPO3. However, due to the
complexity of TYPO3 and its configuration options, quite comprehensive
documentation about TypoScript exists, which can be overwhelming sometimes.
As part of this tutorial, we focus on the basics only and how to apply them. A
documentation about TypoScript and all its objects, properties
and functions can be found in the TypoScript Reference.
Files and directories
First of all, we create two new files in the site package directory structure,
which will contain all TypoScript configurations. By following the official
conventions of their file and directory naming, TYPO3 knows how to include them
automatically.
As shown above, these two files are constants.typoscript and
setup.typoscript inside the Configuration/TypoScript/ folder.
The Fluid template files we have created in the previous step are located in
the Resources/ directory, but not listed above for clarity reasons.
TypoScript constants
TypoScript constants are used to set values that can be used in the TypoScript
setup through out the project.
Note
TypoScript constants are only interpreted as such, when they are added to
the correct location. They need to be added to the file
constants.typoscript or a file or path included from this file.
It is best practise to use them for values that might
want to be changed later on like paths, ids of important pages (contact,
imprint, a system folder that contains certain records, ...).
You could for example define the title of your page in a TypoScript constant:
The setup.typoscript will only contain imports in our example. It is
considered best practice to split up large TypoScript files into logical parts.
This improves maintainability and collaboration. In the example below we split
up the TypoScript setup file into sections by didactic reasons.
Line 1 imports the default setup
from the system extension fluid_styled_content (which is part of the
TYPO3 Core).
Line 2 imports all files ending on .typoscript from the specified
folder. It does however not import files from sub folders. Those would have to
be imported separately.
Hello World: The PAGE object
In order to create any output at all we first need to define a
PAGE. The example below would output an empty page:
The parameter
typeNum is mandatory. Setting it to
0
enables the page to be called. If you would set it to any value above there
the page would need to be called with an additional parameter like &type=12345
to the url.
Part 1: Fluid template section
First, create a file called Part1FluidTemplateSection.typoscript in the
folder Configuration/TypoScript/Setup/ with the following content:
Line 1 is a comment. All lines starting with
// or
#
will be ignored by the parser. In TypoScript it is however not possible to have
a comment after code in a line as you might be used from PHP of Java.
Line 2 configures that the template rendering engine Fluid should be used to
generate the page output.
The name of the template to be used is determined in line 4 ff. The current
backend layout is stored in the
gettext function pagelayout.
By default these start with pagets__
followed by a lowercase keyword. By stdwrap we replace the first part and change the case such that the
backend type pagets__twoColumns will call the template of name
TwoColumns.
Line 21 ff define the storage paths for the templates.
Template files are stored here in the
aforementioned folders Templates/Page/, Partials/Page/ and
Layouts/Page/.
Part 2 and 3: CSS and JavaScript file inclusion
We have combined part 2 and 3, because the inclusion of CSS and JavaScript
files in TypoScript is pretty straight forward. Create a file called
Part2CssFileInclusion.typoscript in the
folder Configuration/TypoScript/Setup/ with the following content:
Section
includeCSS { ... } instructs TYPO3 to include the CSS from the
Bootstrap library from an external source. It also includes file
website.css from the site package extension. We have copied this file
into the appropriate folder before.
Section
includeJSFooter { ... } includes four JavaScript files in total.
The first three are externally hosted files (jQuery, Popper and Bootstrap).
Therefore,
.external = 1 forces TYPO3, not to check for their local
existence. The fourth JavaScript file is the file we added before to the site
package extension itself.
It is possible to configure multiple options globally in the section Typoscript
object
config. None of them is necessary to make the example here
run. So we just included two configuration values as an example.
Read more about them here: TypoScript Reference.
// Part 4: global site configurationconfig {# Adjust the title tag to be displayed as “website - page title” pageTitleSeparator = - pageTitleSeparator.noTrimWrap = | | |# Display the Admin Panel at the bottom of pages to logged in backend users admPanel = 1}
Copied!
This is all required for the "TypoScript Configuration" part at this point. The
next step deals with the extension configuration and adds a couple of PHP
files, so let's move on.
Attention
TYPO3 v12 has reached end-of-life as of April 30th 2026 and
is no longer being maintained. Use the version switcher on the top
left of this page to select documentation for a supported version of TYPO3.
Need more time before upgrading?
You can purchase Extended Long Term Support (ELTS) for TYPO3 v12 here:
TYPO3 ELTS.
Extension Configuration
Composer configuration composer.json
In this tutorial we assumed, you
installed TYPO3 with Composer.
Therefore the extension needs to contain its own composer.json.
For historic reasons TYPO3 extension names are written in
lower case words and separated by underscores if there are more than one. This
is known as the extension key. The directory containing the extension should have
the same name as the extension key. Composer package names are written in
lower-case words but are by convention separated with dashes if there
is more than one word.
At the top of the composer.json file we see the Composer package name
t3docs/site-package (with a dash) and at the bottom we see the TYPO3
extension key in the extras section - site_package (with an underscore).
The Composer "name" consists of a vendor name followed by a forward slash and the
lowercase extension name with dashes.
Hint
Make sure you don't mix up your underscores and dashes otherwise Composer
will not find your site-package extension.
Extension icon
Every extension can feature an icon using an SVG, PNG or GIF file.
The image should be stored in Resources/Public/Icons/.
It is recommended that you use an SVG file called Extension.svg.
Make TypoScript available
In order to automatically load the TypoScript files we have created in the
previous step, a new PHP file sys_template.php needs to be created and
stored in directory Configuration/TCA/Overrides/. The content of this file
should look like the following code:
Let's review the directory and file structure of the sitepackage extension as
it stands now.
site_package/
Configuration/
TCA/
Overrides/
sys_template.php
TypoScript/
constants.typoscript
setup.typoscript
Resources/
Private/
Layouts/
Page/
Default.html
Partials/
Page/
Jumbotron.html
Templates/
Page/
Default.html
Public/
Css/
website.css
Icons
Extension.svg
Images/
logo.png
JavaScript/
website.js
composer.json
At this point we can install the sitepackage extension in an TYPO3 instance,
which we will do in the next step.
Attention
TYPO3 v12 has reached end-of-life as of April 30th 2026 and
is no longer being maintained. Use the version switcher on the top
left of this page to select documentation for a supported version of TYPO3.
Need more time before upgrading?
You can purchase Extended Long Term Support (ELTS) for TYPO3 v12 here:
TYPO3 ELTS.
Extension installation
This tutorial assumes that your TYPO3 instance is a brand new installation,
without any themes, templates, pages or content.
We assume that you are working on your local machine using DDEV and that you
followed these steps:
Move your extension folder site_package/ into the packages/
folder. Then require the extension via Composer using the
package name defined in the site package extension's composer.json now located
at packages/site_package/
packages/site_package/composer.json
{
   "name": "myvendor/site-package"
}
Copied!
require it by:
Execute in directory page_root
composer require myvendor/site-package:@dev
Copied!
Project file structure
Your project should now have the following structure:
TYPO3 v12 has reached end-of-life as of April 30th 2026 and
is no longer being maintained. Use the version switcher on the top
left of this page to select documentation for a supported version of TYPO3.
Need more time before upgrading?
You can purchase Extended Long Term Support (ELTS) for TYPO3 v12 here:
TYPO3 ELTS.
Create initial pages
In the next step, we create some initial pages. You and your editors will be
able to create further pages, remove pages, enable and disable pages and
shuffle pages around in the future. The following page tree is just an example
as a starting point.
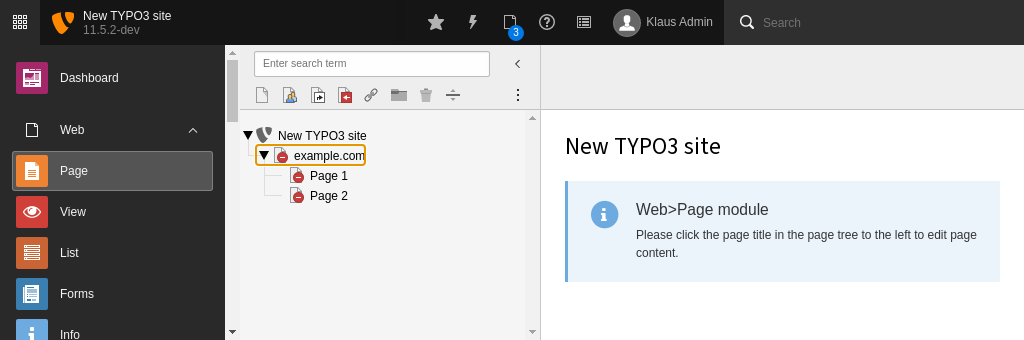
Go to module Web > Page. Assuming, we are using a
fresh installation of TYPO3 as
outlined in section Prerequisites to create a TYPO3 site package extension, an almost empty area is shown in the
page tree area. The only entry is the name of the website as defined during the
installation process (e.g. "New TYPO3 site") with a grey TYPO3 logo.
By clicking the page icon with the "plus" at the top, and then dragging the
"standard page" icon to its appropriate position in the page tree, you can
build the following page tree. Enter the page names as shown (a double-click on
the page name allows you to rename it).
Create initial pages
By default, all new pages are disabled (marked as a red icon at the bottom
right). Enable all pages by clicking the "Enable" link in the context menu.
Enable pages in context menu
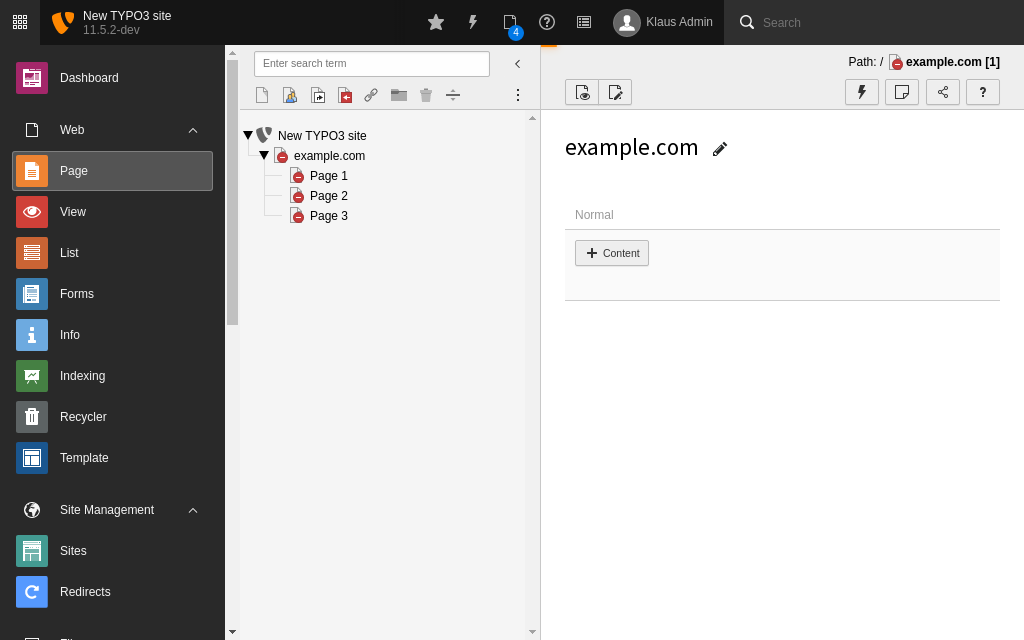
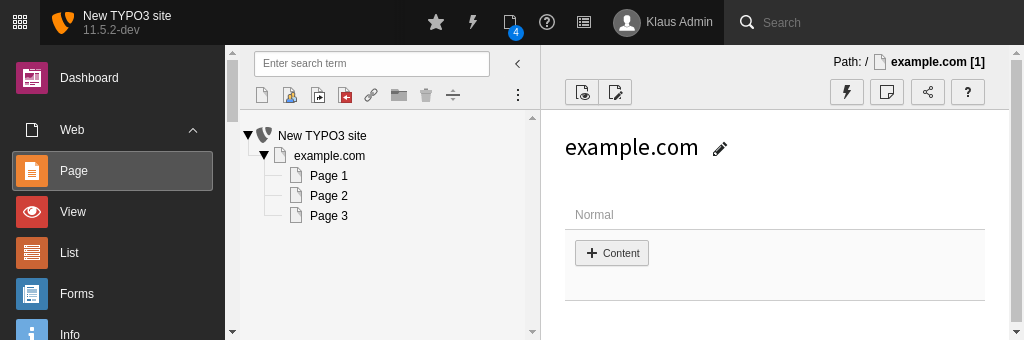
Once all pages have been created, you should end up with the following page
tree.
Site configuration
The site configuration is stored in a file called
config/sites/[site_identifier]/config.yaml. For your convenience you
can create and edit this file with the backend module
Site Management > Sites.
The root page you just created should be listed in this module. Click on the
button Add new site configuration beside that page to create a
site configuration for it.
In the next step you can enter some basic information about the site.
The site identifier will can be arbitrary so we use "example_site" here.
The entry point should be an URL pointing to the web root. In our example this
is a URL generated by ddev.
In the next two tabs you can define error handling like a custom 404 and static
routes, for example to a robots.txt. We do not cover these topics here.
After saving a new file should have been created in your project:
config/sites/example_site/config.yaml
base:'https://example-typo312.ddev.site'languages:-title:Englishenabled:truelocale:en_UShreflang:''base:/en/websiteTitle:''navigationTitle:Englishflag:en-us-gblanguageId:0rootPageId:7websiteTitle:'My example page'
Copied!
TypoScript template
Now we will add a TypoScript template to the site and include the TypoScript
configuration we have created during the development of our sitepackage. Do
not be confused about the terminology "template". In this context, we are
referring to TypoScript templates, not HTML/CSS/JS templates.
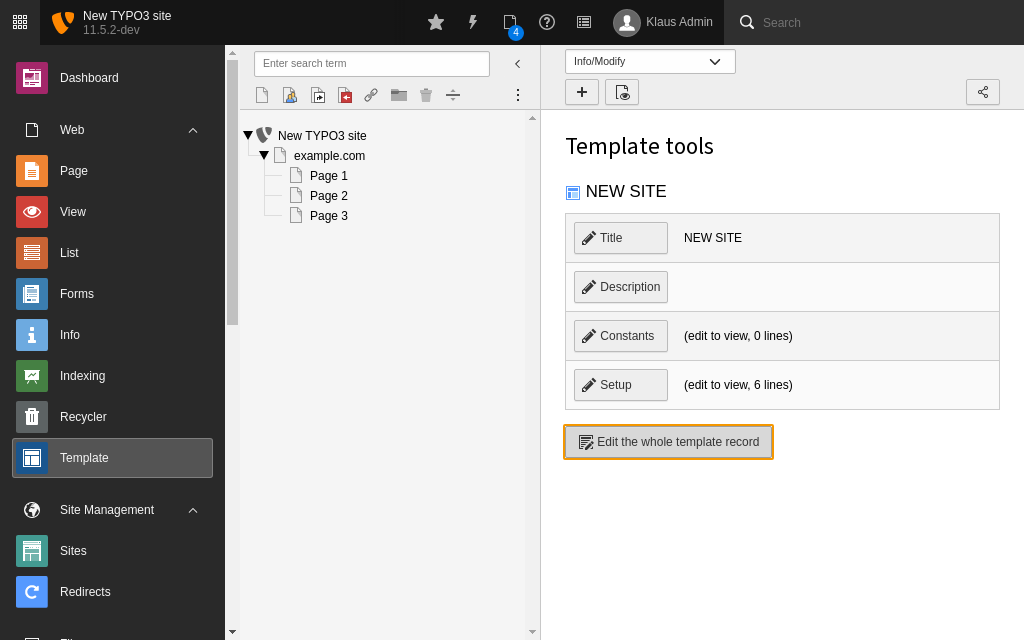
Go to Web > Template and select the page named "example.com". Then, click
button "Create template for a new site" and change the dropdown box at the top
to "Info/Modify". Click button "Edit the whole template record".
Edit the whole template record
This opens an
editor for Constants and Setup. The latter contains a few example lines ("HELLO
WORLD!"). Remove these lines, so that the box is completely empty.
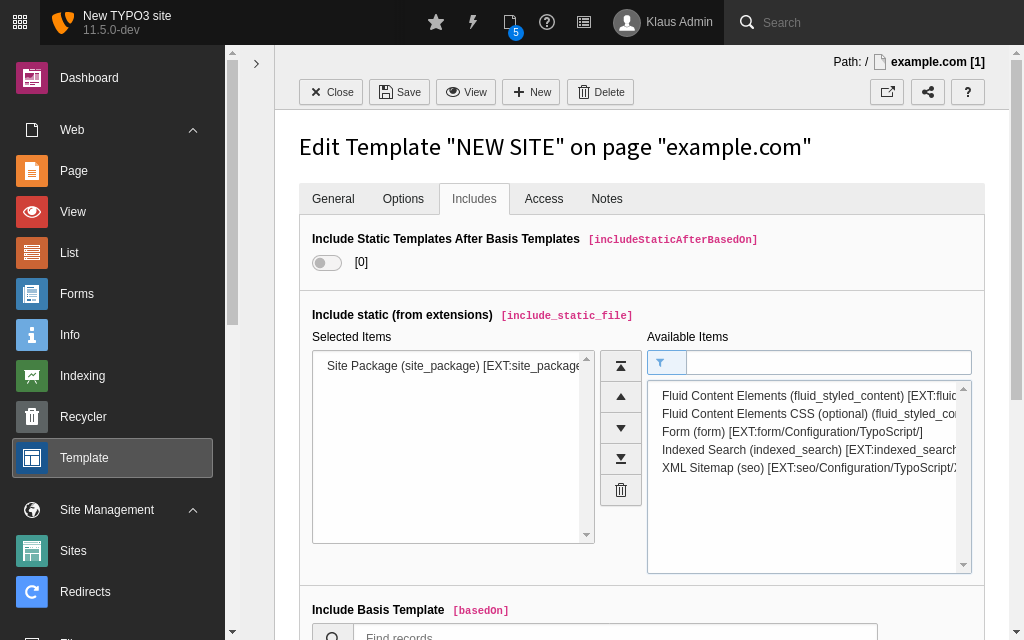
Include the TypoScript of the EXT:sitepackage
Go to section Includes > Include static (from extensions).
You should find the item "Site Package (site_package)" in the list
Available Items. Click on this item to make it appear in the list
Selected Items.
Include the site package TypoScript template
Now save your changes by clicking the Save button at the top.
Hint
The item "Site Package" was created by the file
Configuration/TCA/Overrides/sys_template.php in the step
Make TypoScript available.
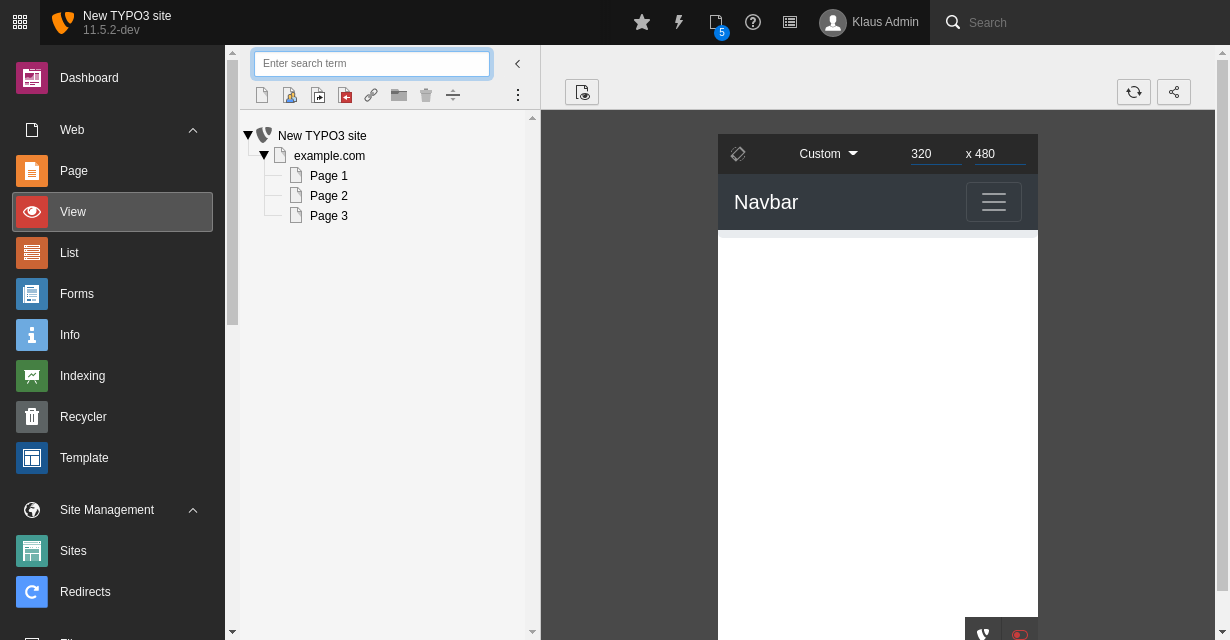
Preview the page
At this point, it is a good time to preview what we have achieved so far. Go to
Web > View and try a few different screen widths. The two buttons at the
top left of the screen (marker 1) allow you to show/hide the page tree and to
minimize the function menu at the left.
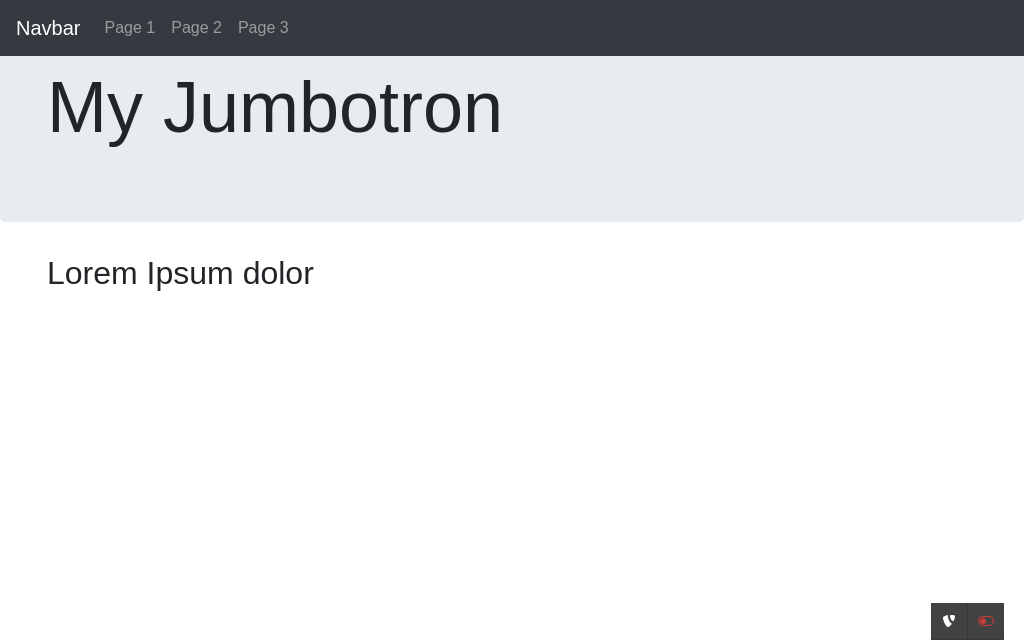
The preview shows the frontend with a menu (NavBar) at the top. In a mobile
view (narrow screen width), a button provides access to a toggle menu. However,
only one link is shown in the menu: "Home". The other pages we have created in
the backend are still missing. Besides the menu, a large "Hello, world!" greets
the visitors of the website. This is the "Jumbotron"-partial. Below that, three
columns are shown, each of them with a "Heading". In a mobile view, these
columns stack on top of each other nicely.
Let's update the Fluid template files and implement a simple menu and enable
dynamic content that can be edited in the TYPO3 backend in the next steps.
Attention
TYPO3 v12 has reached end-of-life as of April 30th 2026 and
is no longer being maintained. Use the version switcher on the top
left of this page to select documentation for a supported version of TYPO3.
Need more time before upgrading?
You can purchase Extended Long Term Support (ELTS) for TYPO3 v12 here:
TYPO3 ELTS.
Main Menu Creation
At this point, we have a working frontend for our website, but an important part
is missing: there is no easy way to navigate through the pages, which is a
crucial part of any website. The following section explains how to implement
a simple one-level menu by using TYPO3's Frontend Data Processor
MenuProcessor. Other options are available (e.g. the
HMENU cObject as
described in the TypoScript Reference).
Add 'MenuProcessor'
Open file Configuration/TypoScript/setup.typoscript and locate the part
which defines the
FLUIDTEMPLATE. Add the
dataProcessing { ... } section
below the paths declarations as follows.
Note the directive
as = mainnavigation: this defines the name of the menu
which will be used in the next step. It is 'mainnavigation' in this case.
Update Fluid and Implement Main Menu
To make the output of the
MenuProcessor visible at the frontend, we have to
adjust the Fluid template slightly. You may remember that we moved the
main menu to the Fluid layout file, which is located under
Resources/Private/Layouts/Page/Default.html (see section
The website layout file). Open this file and adjust it as shown here:
The changes are inside the
<ul> ... </ul> tags. The new code extends the
list by using a "For-ViewHelper", which builds a loop and iterates variable
mainnavigation as single items named
mainnavigationItem. Each item
represents one link to a page in the menu. The attributes we are using are:
mainnavigationItem.link: the actual link to the page or external
resource
mainnavigationItem.target: if the link should be opened in a new window
for example
mainnavigationItem.title: the page or link title
The construct
{f:if(condition: mainnavigationItem.active, then: 'active')}
is a special case. This is called an inline notation, that outputs the word
active, if variable
mainnavigationItem.active is set. In this example,
the inline notation is used to output
active as the CSS class name.
Preview Page
When previewing the site as it stands now, we can verify if everything is
working as expected and if the menu is generated. Go to WEB → View and
check, if the menu reflects the pages you created in the backend. Add one or
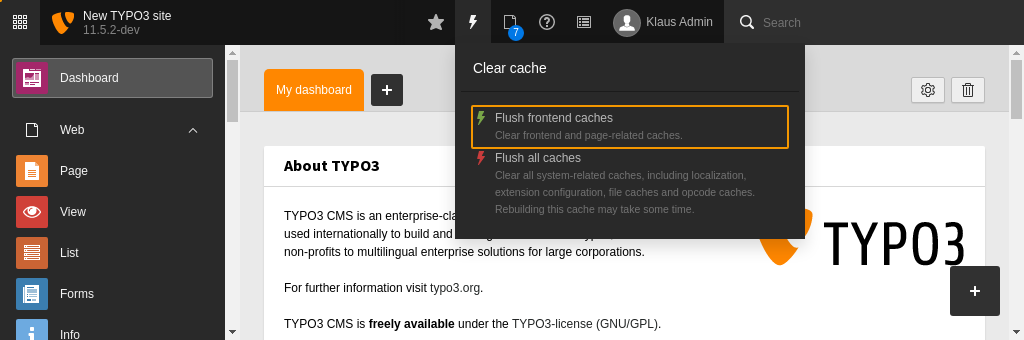
two additional pages to the page tree and check to see if they appear in the preview. If
the menu does not change, you possibly need to flush the frontend caches,
then reload the preview.
Flush the frontend cache after changing template files
The preview in the screenshot above shows the menu with three page links: "Page
1", "Page 2" and "Page 3". If everything is working as expected, let's
configure the dynamic content rendering in the next step.
Attention
TYPO3 v12 has reached end-of-life as of April 30th 2026 and
is no longer being maintained. Use the version switcher on the top
left of this page to select documentation for a supported version of TYPO3.
Need more time before upgrading?
You can purchase Extended Long Term Support (ELTS) for TYPO3 v12 here:
TYPO3 ELTS.
Content mapping
Having a perfect visual appearance of a website is pointless, if the content
entered into the backend is not visible in the frontend. In the last step, we
create a backend layout with several rows and columns, which hold content
elements such as text, images, etc. to be displayed in areas in the frontend.
The backend layouts can be defined as database records or a TsConfig
configuration. We use page TsConfig as it can be kept in the site-package and
under version control.
The output of content into the front end is defined via TypoScript.
See Backend layouts for more information about setting up various columns and rows.
Define the backend layouts
Many websites nowadays require different layouts for different types of pages.
We define two distinct backend layouts here to demonstrate using multiple
backend (and frontend) page layouts.
We assume by default pages consists of the menu, a jumbotron and the main
content area. Meanwhile some subpages will additionally need a sidebar
to be displayed to the right of the main content.
Dynamic Content Rendering in TypoScript
Create a file at Configuration/page.tsconfig with the following
content:
This syntax imports all files ending on .tsconfig from the specified folder.
Note
Starting with TYPO3 12 the file Configuration/page.tsconfig is
automatically loaded during build time. See
Setting page TSconfig on how to load the file in older
TYPO3 versions.
When there is only one site in your installation or all sites share the same
configurations we suggest to include this file globally as decribed here.
See Setting page TSconfig on how to load the page TSconfig
for a certain page tree.
Then create a file
Configuration/TsConfig/Page/PageLayout/Default.tsconfig with the
following content:
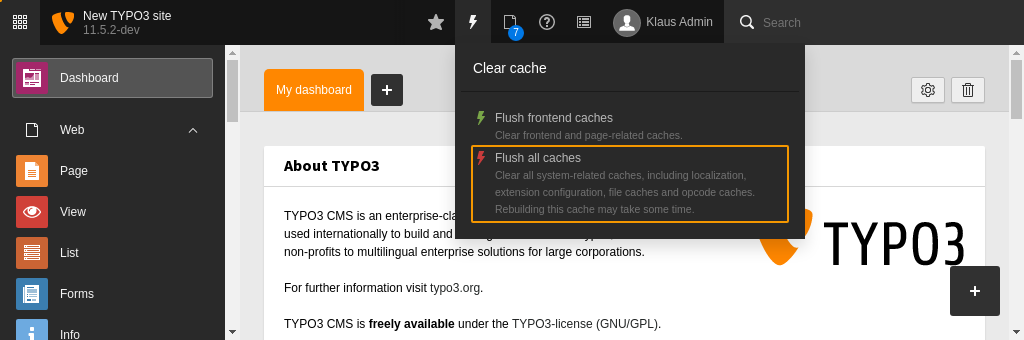
When you make changes to the files of an extension it is usually necessary
to flush all caches by hitting the button.
Flush all caches
After flushing the all caches the new backend layout is available in the page
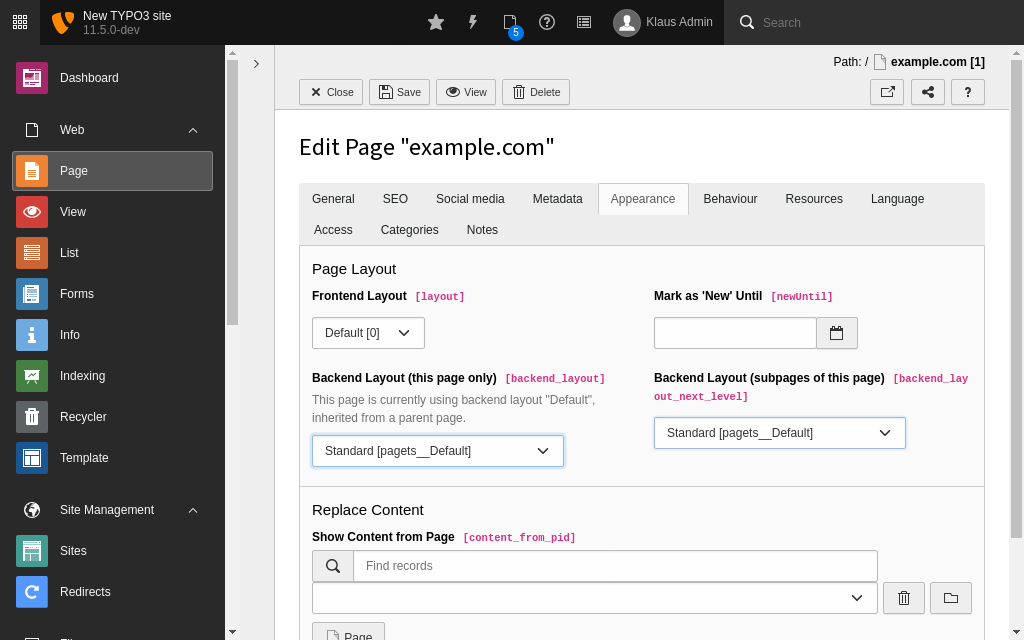
properties at Appearance > Page Layout > Backend Layout.
Choose the backend layout
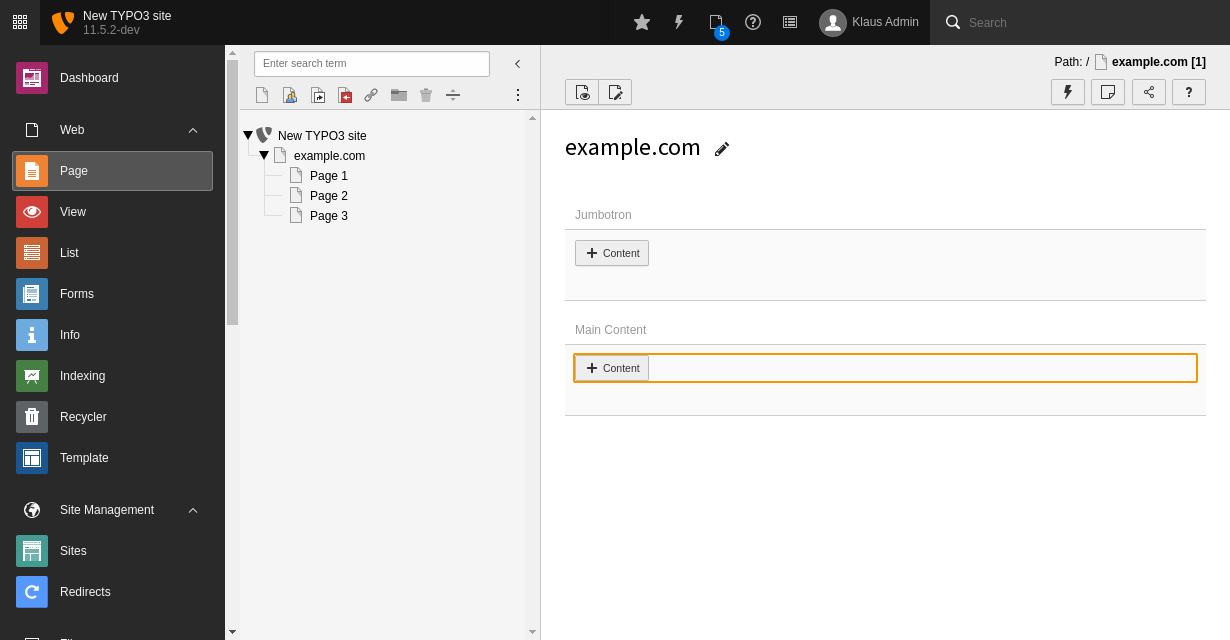
Switch to the new backend layout and save the page properties. In the
Page module you will see two columns called "Jumbotron" and
"Main Content" now.
Create new content element
Insert some example content into the two rows. In the database each content
element (stored in the table
tt_content) has the value defined in
colPos stored in a field of corresponding name. The numbers of the columns
are arbitary. It is best practise, however to store the main content in colPos
0 and to use the same column numbers for the same positions throughout all
backend layouts of a site. This facilitates switching between different
layouts or looking up content up the page tree.
For the second layout we create a second file at
Configuration/TsConfig/Page/PageLayout/TwoColumns.tsconfig with the
following content:
Internally the backend layouts are grids. A row can span multiple columns by
setting a colspan. It is also possible for a column to span multiple rows.
See Backend layouts for more information about
setting up various columns and rows.
Content rendering via data processing
Just like with the menu, the content can also be displayed by using
a data processor, the
DatabaseQueryProcessor.
Define the data processor in
page.10.dataProcessing beside the
data processors of the menu:
Open the file Resources/Private/Templates/Page/Default.html and locate the
main content area. It contains a headline (look for the <h2>-tags) and
some dummy content (look for the <p>-tags).
Simply replace these lines with the cObject-ViewHelper (<f:cObject ... >),
so that file Default.html shows the following HTML code.
The TypoScript object
tt_content.[CType] comes from the TypoScript
of the system extension fluid_styled_content. It internally uses
Fluid templates and TypoScript with data processors just like the ones we were
defining above. If you desire to change the output of these content elements
you could override the Fluid templates of the extension
fluid_styled_content.
Edit the file TwoColumns.html in the same directory. Exchange the
main content area just as we have done before with the default template. Now
replace the content area of the sidebar with the content elements in the Fluid
variable
{sidebarContent}.
You can compare your result to the example in our site extension:
TwoColumns.html.
The jumbotron: Customize output of content elements
As you can see in the static html template, the jumbotron consist of a headline
and a text:
We could use a content element of type Text to store the needed
information. However the output of the Standard content element "Text" look
like this:
Example HTML Output
<divid="c215"class="frame frame-default frame-type-text frame-layout-0"><header><h2class="">
Hello World!
</h2></header><p>Lorem ipsum dolor sit amet, ...</p></div>
Copied!
Also we do not want to output other types of content like images or forms.
Open the partial displaying the jumbotron:
Resources/Private/Partials/Page/Jumbotron.html. We already have the
data of content elements in the column "jumbotron" in a Fluid variable called
"jumbotronContent".
Now instead of letting extension fluid_styled_content render the
content we will render it ourselves in this partial. Add the debug view helper
to the partial to see what the data of the jumbotronContent looks like:
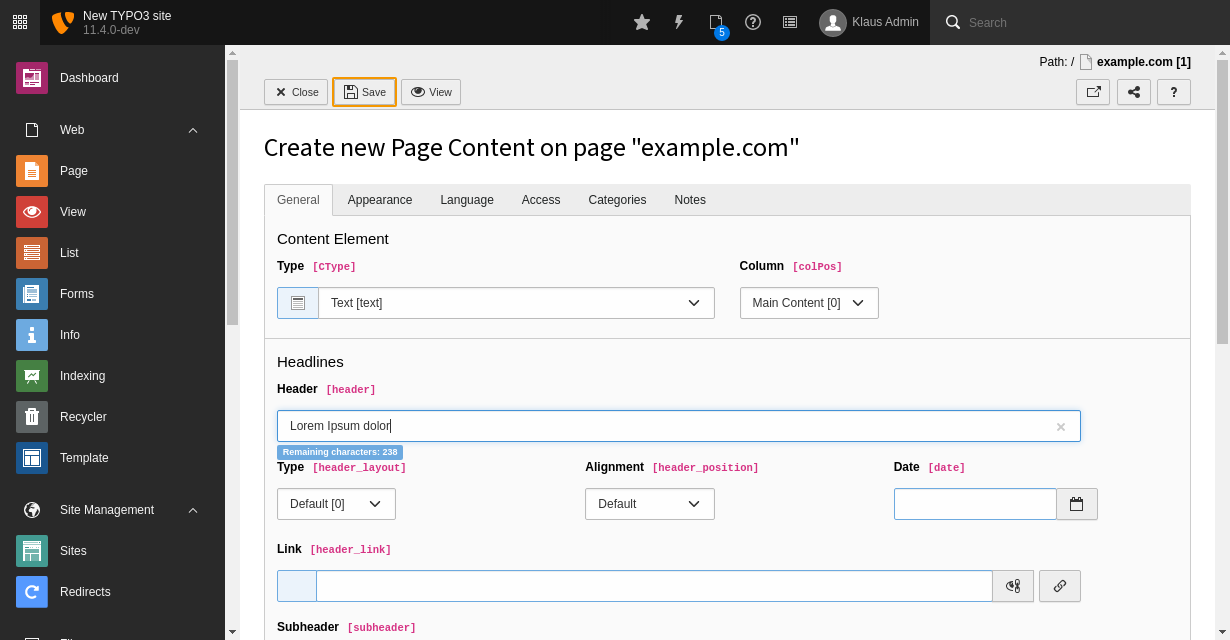
Now it's a great time to add some content in the backend. Go to
Web > Page and select any of the pages you created before,
(for example "Page 1"). Click the + Content button
in the column labelled "Main" and choose the "Regular Text
Element" content element.
Create new content element
Enter a headline and some arbitrary text in the Rich Text Editor (RTE)
and save your changes by clicking button Save at the top.
You can return to the previous view by clicking Close.
Fill some content in the new content element
The new content element appears in the appropriate column. Repeat this process
and enter some further content in the column "Jumbotron". The page module should
now look like this:
Preview the page
Preview page
We have made changes to the Fluid templates of the extension above. It is
therefore necessary to Flush the content caches in the Menu in the
top bar before you can preview the page properly:
Flush the frontend cache after changing template files
You can now preview your page:
Preview the page
Switch to the two column layout with a sidebar
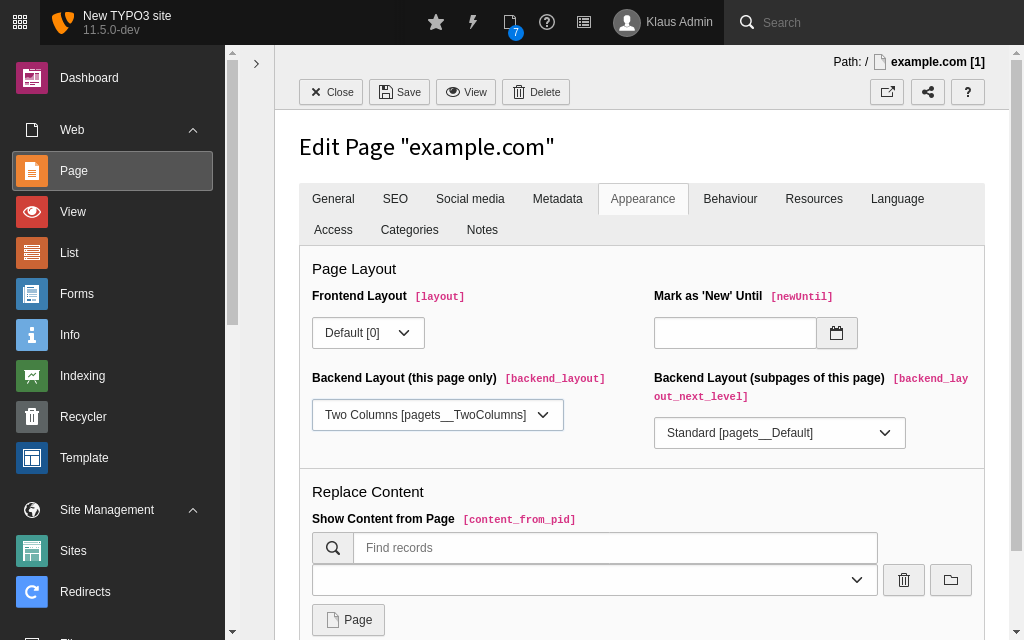
You can switch the used page backend layout in the page properties at
Appearance > Page Layout > Backend Layout. Edit the page
properties of your page to use the backend layout "Two Columns".
Switch to the Backend Layout "Two Columns"
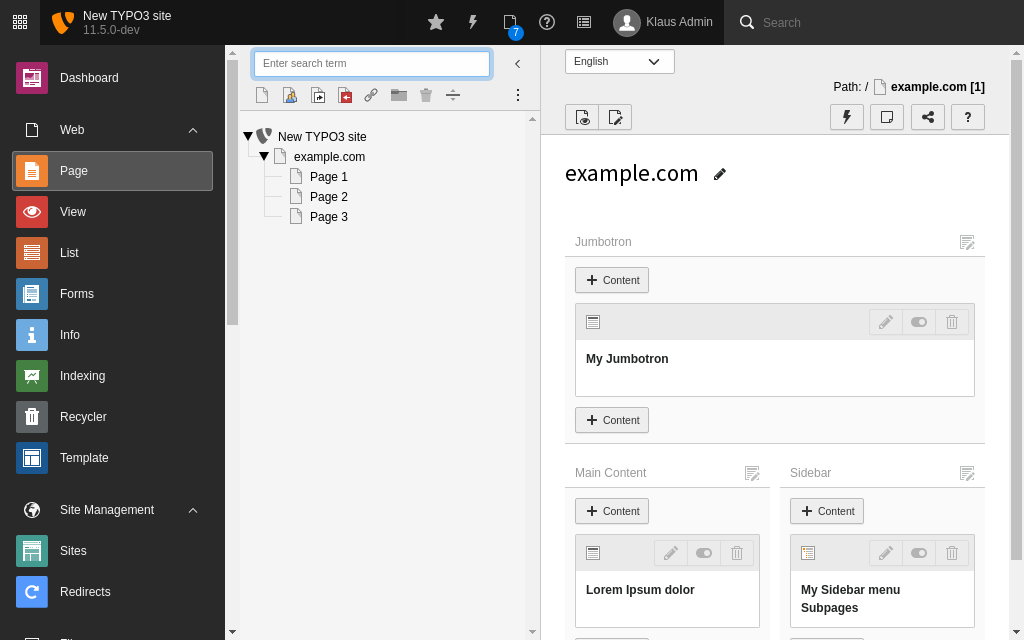
After saving you will see that the content of the columns "main" and
"jumbotron" remains unchanged while there is a third column "sidebar".
This is due to the fact that the backend layout "Default" and "TwoColumns"
use the same colPos number for these columns.
A new column "Sidebar" appears
Enter some content to the sidebar. You could for example use the content element
"Menu of subpages" to display a menu in the sidebar.
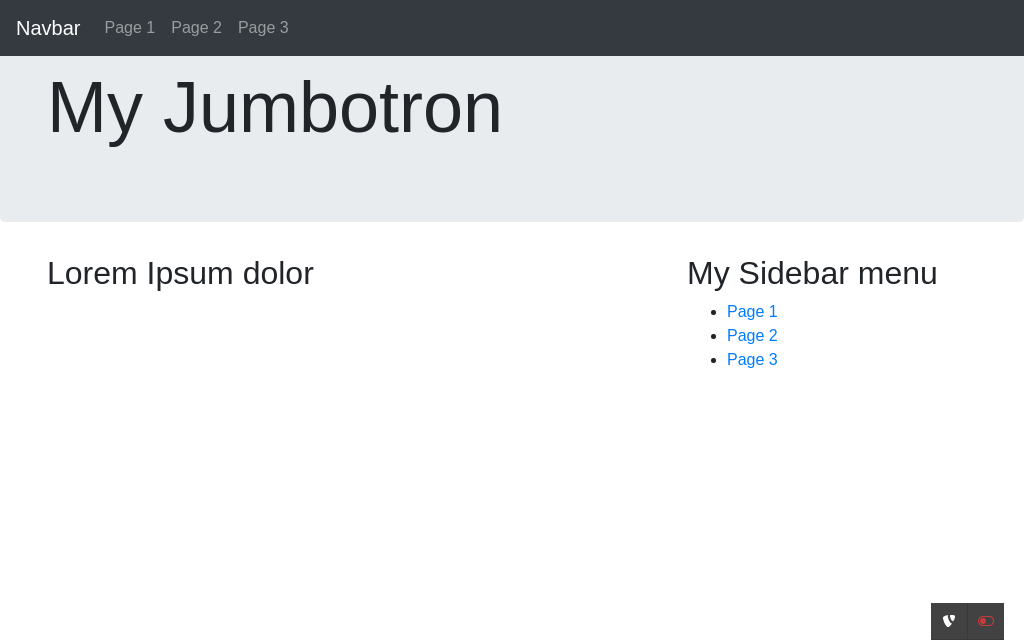
Preview the page once more. A sidebar will appear in the frontend:
The sidebar appears in the frontend
Next steps
The last section of this tutorial summarises the achievements, discusses some
shortfalls of the extension as it stands now and provides some suggestions what
to do next.
Attention
TYPO3 v12 has reached end-of-life as of April 30th 2026 and
is no longer being maintained. Use the version switcher on the top
left of this page to select documentation for a supported version of TYPO3.
Need more time before upgrading?
You can purchase Extended Long Term Support (ELTS) for TYPO3 v12 here:
TYPO3 ELTS.
The site package extension, as it stands now, still has some shortfalls. Let us
have a closer look what you could or should do as the next steps to address
these.
Navigation menu features one level only
The bigger the website becomes, the more likely is a multi-level page
structure required. This means, editors will likely create sub-pages of the
root page "Page 1" for example. At the moment, the menu does not support
sub-pages.
If this becomes a requirement, the TypoScript code used to generate the menu
(see chapter Main Menu Creation) and the Fluid template file that
outputs the menu (Resources/Private/Layouts/Page/Default.html) need
to be updated.
Jumbotron has no background image
The Jumbotron stands as a place holder for various options in our example.
Some readers may like to implement a banner with rotating images, some prefer a
text content element or a video player instead. All this and much more is
possible with TYPO3, but beyond the scope of this tutorial.
There are no icons for pages in the menu
It would be possible to define an additional field in the
pages
table to store an icon for each page and then output them in the menu for
example.
There is not footer
The page could receive a footer with content taken from a special page or
column of the root page.
In general, the nature of a tutorial, such as this document, is to provide
detailed instructions to walk a beginner through a particular task. By building
your own site package extension from scratch, you have learned each step that
is required to turn a basic web design template into a fully working website in
TYPO3.
When you create site packages in the future, you probably do not want to create
every file over and over again, but use a pre-built version of the site package
extension. Therefore, it make sense to store and maintain the current state in
a central place, such as a Git repository. Despite the fact that for a learning
experience it is always beneficial to develop the extension yourself, you can
also download the extension built in this tutorial below.
TYPO3 v12 has reached end-of-life as of April 30th 2026 and
is no longer being maintained. Use the version switcher on the top
left of this page to select documentation for a supported version of TYPO3.
Need more time before upgrading?
You can purchase Extended Long Term Support (ELTS) for TYPO3 v12 here:
TYPO3 ELTS.
Sitemap
Reference to the headline
Copy and freely share the link
This link target has no permanent anchor assigned.The link below can be used, but is prone to change if the page gets moved.