Quick start
Watch the video and/or read the instructions to get a (minimal) working shop setup.
Note
The video shows the setup for an older version. Some parts are outdated, nonetheless the video still gives a good overview. Please also read the instructions below which work with the current version.
Instructions
-
Install this extension:
-
Include the TypoScript of this extension:
-
Install a product database extension
You need to install at least one more extension to get a working shop setup. This other extension will offer the products itself. This can be one of the existing extensions or a custom extension.
The next steps of this quick start use
EXT:. Include the TypoScript of this second extension as described above or as described in the corresponding documentation.cart_ products -
Create the needed pages and directories in the TYPO3 backend.
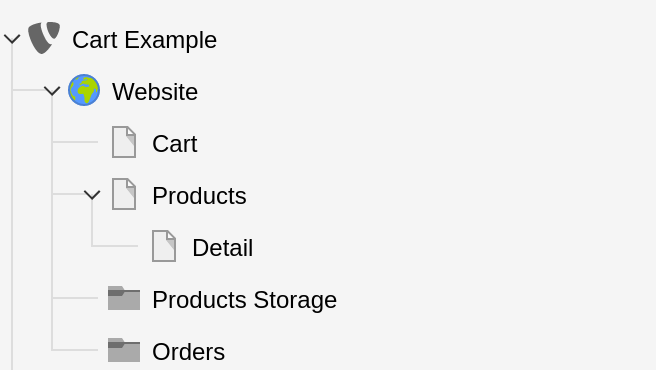
- Create a page for cart. Here it's named Cart.
- Create a page for a list of products. Here it's named Products.
- Create a page for the detail view of a product. Here it's named Detail.
- Create a page of type "directory" where the products will be stored. Here it's named Products Storage.
- Create a page of type "directory" where the orders will be stored. Here it's named Orders.
Tip
You can create multiple, even nested, directories to organize your products in the backend.
In this case you can even have multiple pages for lists and detail views.
-
Create Plugin for the cart
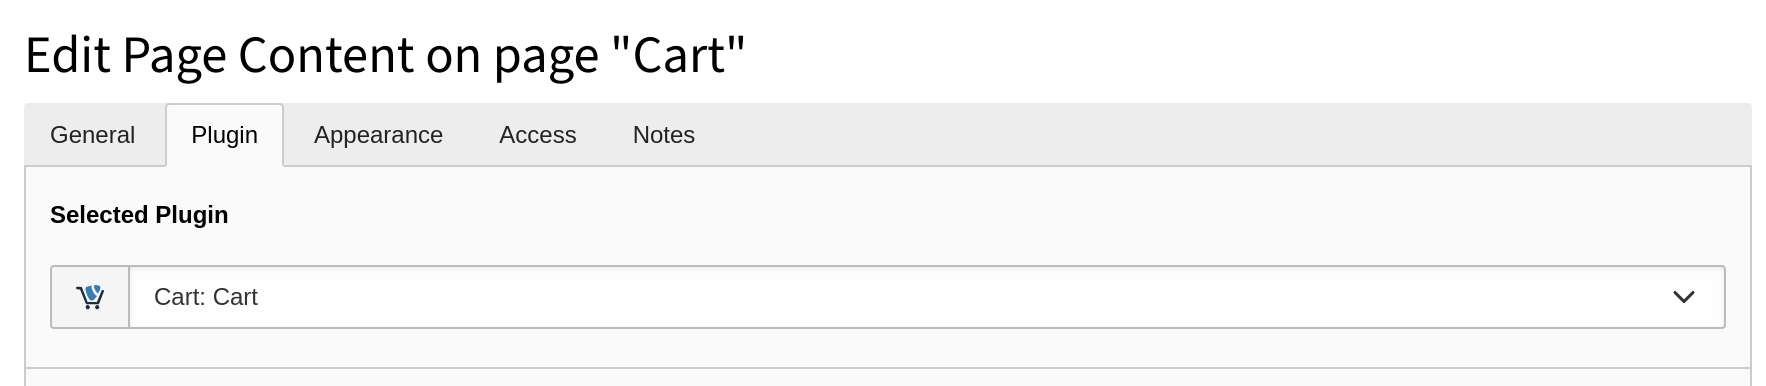
On the page Cart:
- Create a record of type plugin Cart: Cart.
-
Create Plugin for the list view
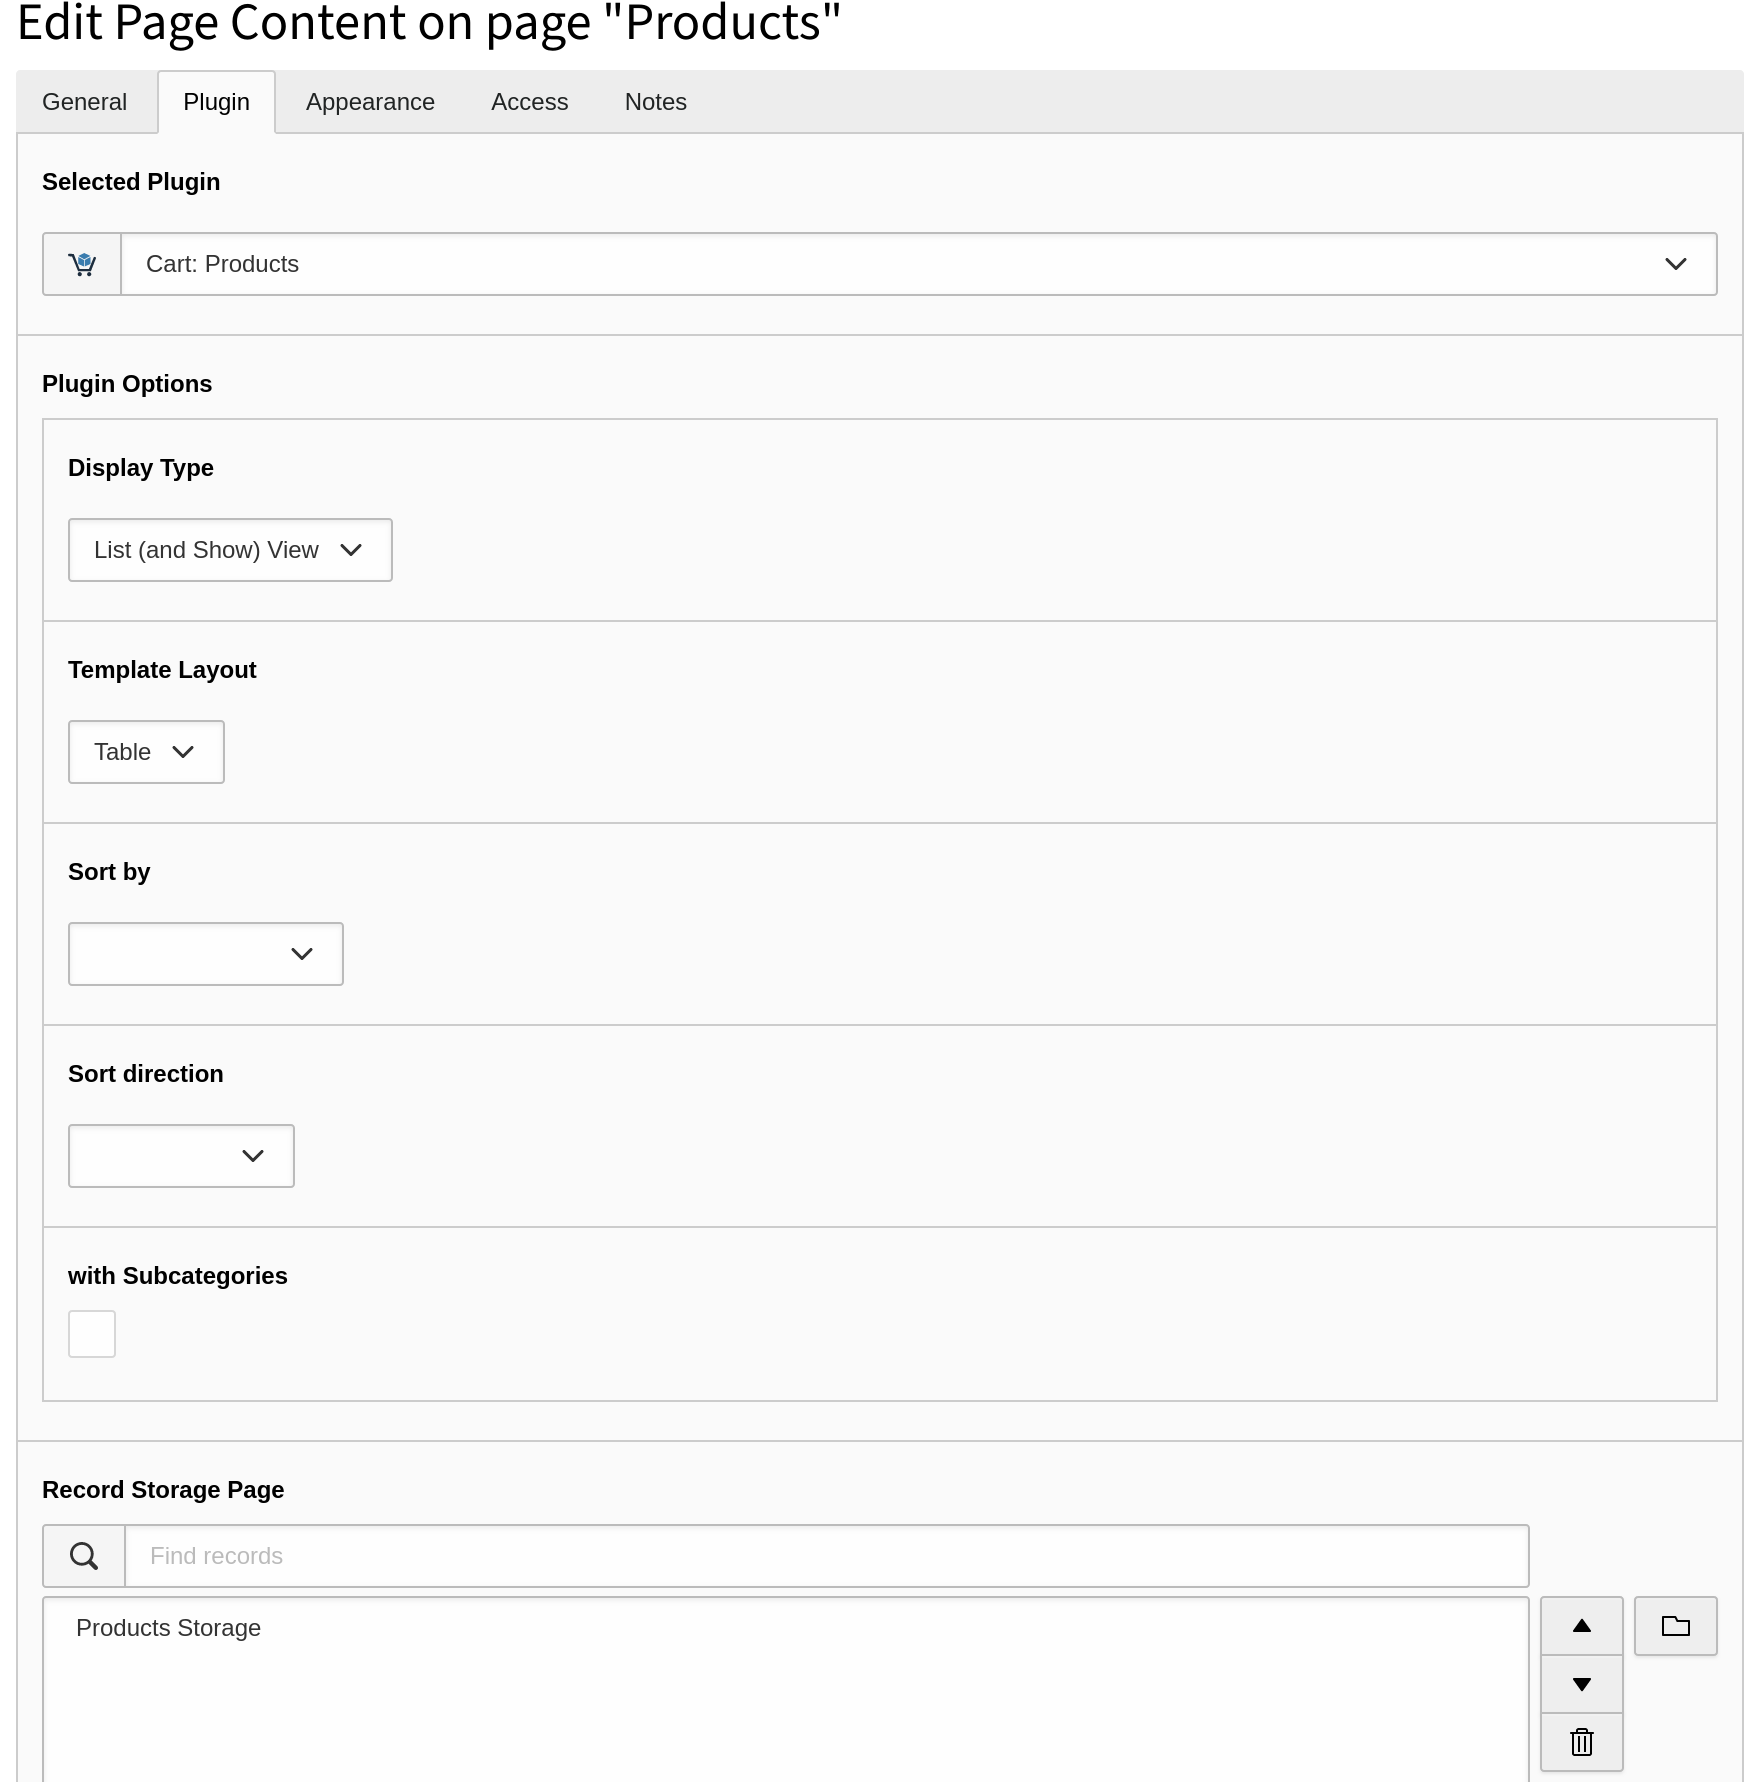
On the page Products:
-
Create a record of type plugin Cart: Products and make the following settings:
- Choose "Display Type" = "List (and Show) View".
- In Product Detail Page choose the page Detail.
- In Record Storage Page choose the page Products Storage.
-
-
Create Plugin for the detail view
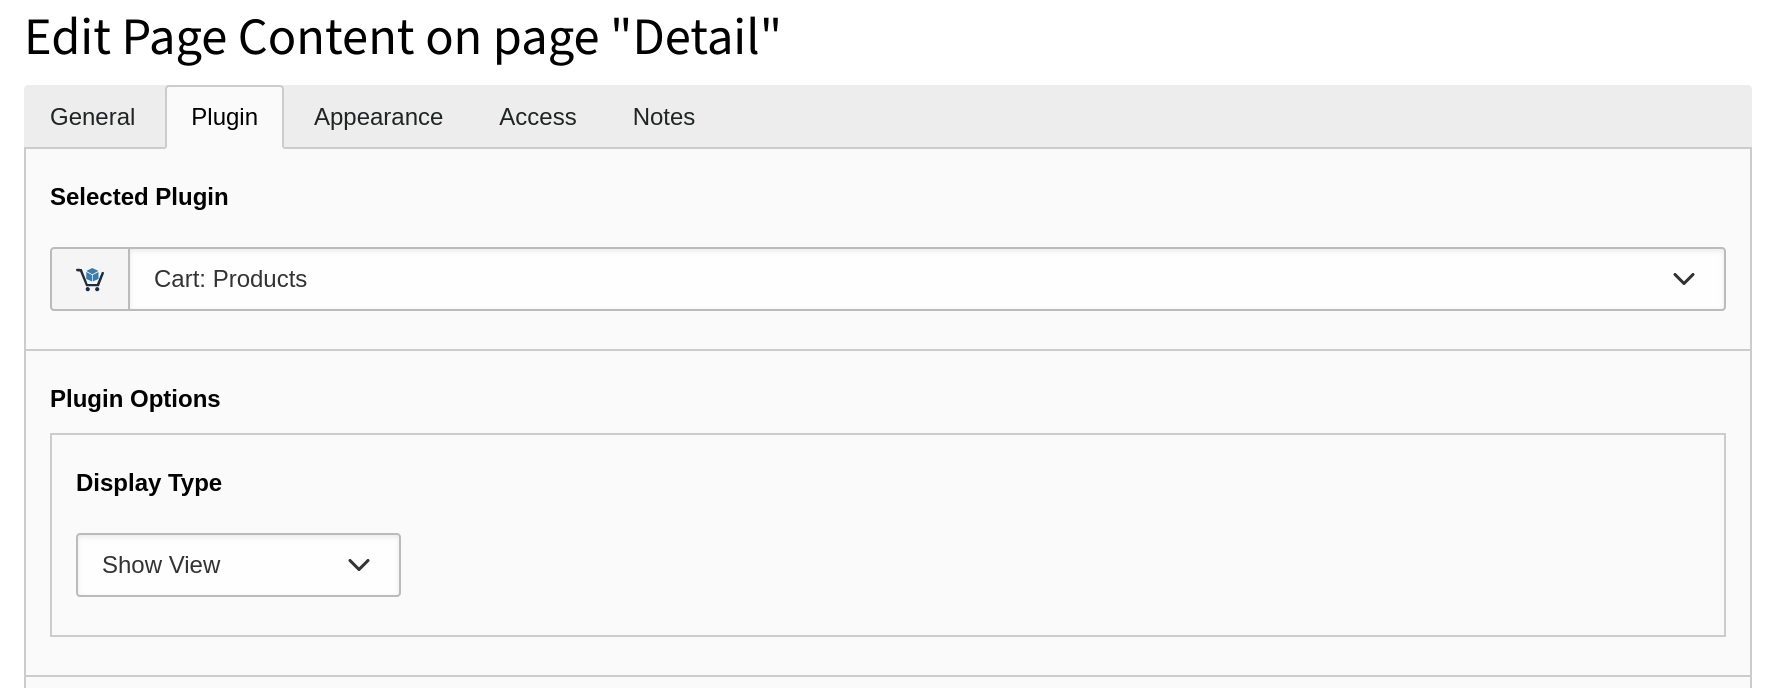
On the page Detail:
-
Create a record of type plugin Cart: Products.
- Choose "Display Type" = "Show View".
-
-
Set TypoScript constants
The following can be done in the TYPO3 backend in the TypoScript Module (as shown in the video) or better in your own sitepackage (which is preferred because it is under source control).
See also Base Configuration.
EXT:sitepackage/Configuration/TypoScript/constants.typoscriptplugin.tx_cart.settings { cart { pid = # The PID of the page "Cart". isNetCart = # 0 or 1, depending on your needs. } order.pid = # The PID of the page "Orders". }Copied! -
Set needed TypoScript setup
You should set in your
sitepackage/fitting values for:Configuration/ Typo Script/ setup. typoscript - payments
- shippings
- currencies (only needed when not only using €),
-
Link for consent checkboxes in the cart
EXT:sitepackage/Configuration/TypoScript/constants.typoscriptplugin.tx_cart.settings.cart { acceptTermsAndConditions.pid = # The PID of your terms and conditions page. acceptRevocationInstruction.pid = # The PID of your revocation instructions page. acceptPrivacyPolicy.pid = # The PID of your privacy policy page }Copied! -
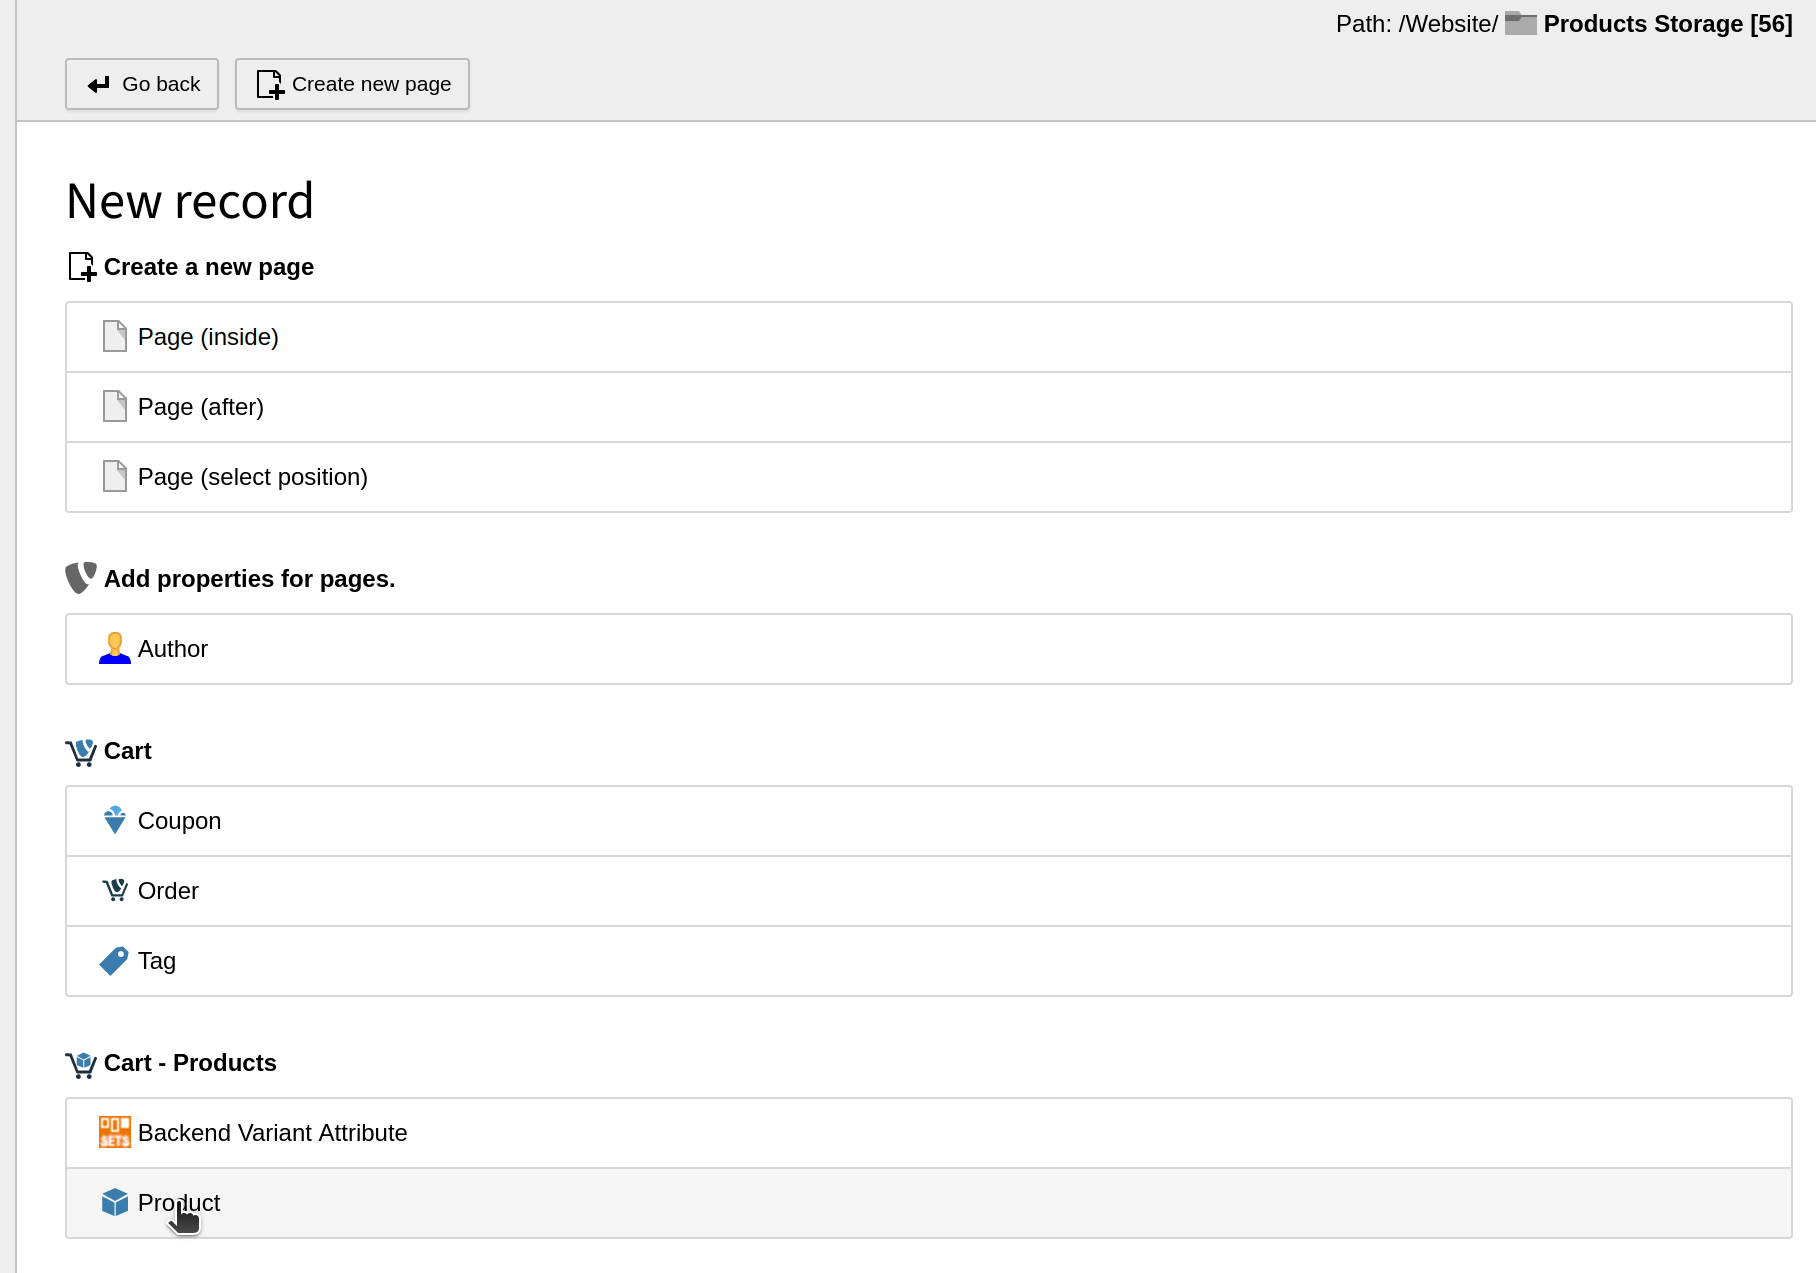
Create a product
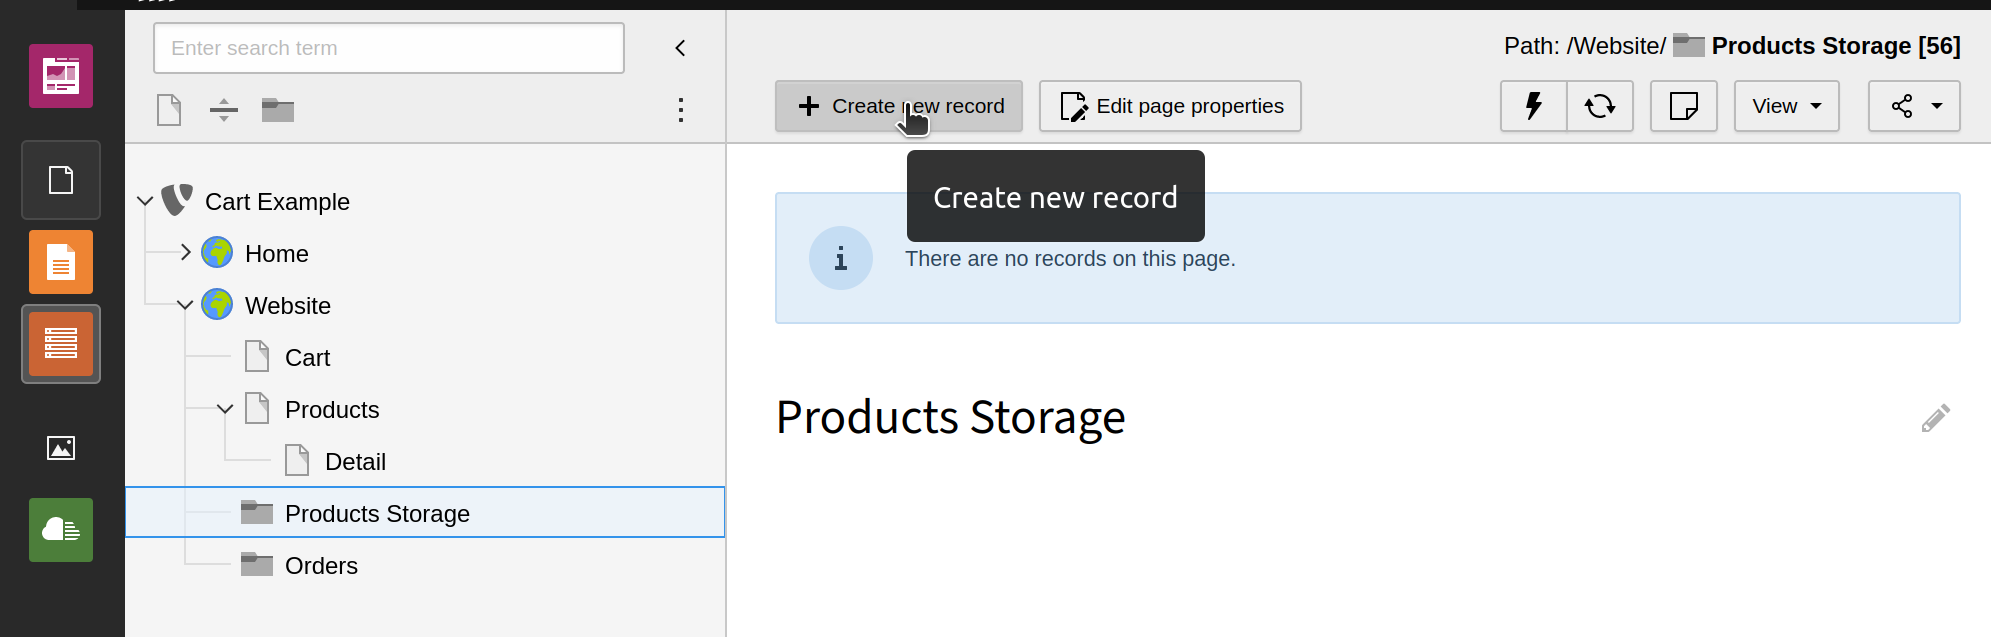
- Go to the page Product Storage, switch to the backend module "List".
- Click on + Create a new record → Product for a
product which is given from the database extension (which is
EXT:in this quick start).cart_ products - Fill in necessary product data and save.
-
Done
You should now be able to see the product in the frontend and make an order.